Table of Contents
Advertisement
Quick Links
Description
E1M40, 240 V, 50 Hz, single-phase
E1M40, 220-240/380-415 V, 50 Hz, three-phase
E1M40, 208 V, 50 Hz/208-230 V, 60 Hz/460 V,
60 Hz, three-phase
E2M40, 240 V, 50 Hz, single-phase
E2M40, 220-240/380-415 V, 50 Hz, three-phase
E2M40, 208 V, 50 Hz/208-230 V, 60 Hz/460 V,
60 Hz, three-phase
E1M80, 220-240/380-415 V, 50 Hz, three-phase
Instruction Manual
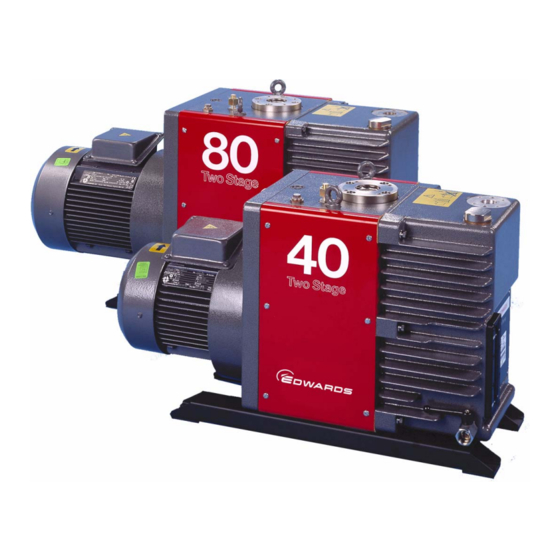
E1M40, E1M80, E2M40 and E2M80
E2M40S and E2M80S Rotary Vacuum Pumps
Number
A344-01-960 E1M80, 208 V, 50 Hz/208-230 V, 60 Hz/460 V,
A344-01-935 E2M80, 220-240/380-415 V, 50 Hz, three-phase
A344-02-982 E2M80, 208 V, 60 Hz/208-230 V, 60 Hz/460 V,
A364-01-960 E2M40S, 220-240/380-415 V, 50 Hz, three-phase
A364-01-935 E2M40S, 208 V, 50 Hz/208-230 V, 60 Hz/460 V,
A364-02-982 E2M80S, 208 V, 50 Hz/208-230 V, 60 Hz/460 V,
A345-01-935
Item
Description
60 Hz, three-phase
60 Hz, three-phase
60 Hz, three-phase
60 Hz, three-phase
A344-02-880
Issue J Original
Item
Number
A345-02-982
A365-01-935
A365-02-982
A364-13-935
A364-13-982
A365-13-982
Advertisement
Table of Contents

Related Manuals for Edwards E1M40


Summary of Contents for Edwards E1M40
- Page 1 60 Hz, three-phase E1M40, 220-240/380-415 V, 50 Hz, three-phase A344-01-935 E2M80, 220-240/380-415 V, 50 Hz, three-phase A365-01-935 E1M40, 208 V, 50 Hz/208-230 V, 60 Hz/460 V, A344-02-982 E2M80, 208 V, 60 Hz/208-230 V, 60 Hz/460 V, A365-02-982 60 Hz, three-phase...
-
Page 3: Table Of Contents
Start-up procedure .....................21 To achieve ultimate vacuum ..................22 To pump condensable vapours ..................22 To decontaminate the oil ....................22 Unattended operation ....................23 Shut-down ........................23 © Edwards Limited 2007. All rights reserved. Page i Edwards and the Edwards logo are trademarks of Edwards Limited. - Page 4 Outlet mist-filter (toxic applications) ................42 7.4.8 External oil filter .......................42 7.4.9 Oil-level monitor ......................43 7.4.10 Solenoid-operated gas-ballast control valve ...............43 7.4.11 Vibration isolators ......................44 Page ii © Edwards Limited 2007. All rights reserved. Edwards and the Edwards logo are trademarks of Edwards Limited.
- Page 5 Oil-level sight-glass assembly ..................31 Accessories .......................44 External oil-filtration unit tapping points ................49 External fittings, connections and controls .................50 Typical dry nitrogen gas circuit ..................54 © Edwards Limited 2007. All rights reserved. Page iii Edwards and the Edwards logo are trademarks of Edwards Limited.
- Page 6 E1M40/80, E2M40/80 external oil filtration system adaptor kit A540-00-880 EOF external oil filtration system A540-01-880 Trademark credits ® Fomblin is a registered trademark of Ausimont SpA. Page iv © Edwards Limited 2007. All rights reserved. Edwards and the Edwards logo are trademarks of Edwards Limited.
-
Page 7: Introduction
Introduction Scope and definitions This manual provides installation, operation and maintenance instructions for the Edwards E1M40, E1M80, E2M40, E2M80 Rotary Vacuum Pumps. You must use your pump as specified in this manual. Read this manual before you install and operate your pump. Important safety information is highlighted as WARNING and CAUTION instructions;... -
Page 8: The Rotary Vacuum Pump (E1M40 Shown)
A344-02-880 Issue J Figure 1 - The Rotary Vacuum Pump (E1M40 shown) 1. Disposable oil-filter 7. Oil-level sight-glass 2. Oil return, from external oil mist filter 8. Oil drain-tap 3. Lifting-eyes 9. Connection for oil pressure gauge accessory 4. Inlet-port 10. -
Page 9: Description
The distributor valve provides only oil suckback protection when you switch off an E1M40 or E1M80 pump. To obtain air suckback protection when you switch off an E1M40 or E1M80 pump, you must fit a solenoid operated gas-ballast control valve:... - Page 10 With the gas-ballast control closed, when you switch the pump off: E1M40 and E1M80: the pressure inside the pump will slowly rise to atmospheric pressure. (To maintain the vacuum inside the pump, fit a solenoid operated gas-ballast control valve.) E2M40 and E2M80: the vacuum will be maintained inside the pump.
-
Page 11: Technical Data
(4 x 10 (7 x 10 (3 x 10 (5 x 10 Maximum water vapour pumping rate Maximum gas-ballast flow © Edwards Limited 2007. All rights reserved. Page 5 Edwards and the Edwards logo are trademarks of Edwards Limited. -
Page 12: Dimensions E1M40 And E2M40 (Mm)
A344-02-880 Issue J Figure 2 - Dimensions E1M40 and E2M40 (mm) Page 6 © Edwards Limited 2007. All rights reserved. Edwards and the Edwards logo are trademarks of Edwards Limited. -
Page 13: Dimensions E1M80 And E2M80 (Mm)
A344-02-880 Issue J Figure 3 - Dimensions E1M80 and E2M80 (mm) © Edwards Limited 2007. All rights reserved. Page 7 Edwards and the Edwards logo are trademarks of Edwards Limited. -
Page 14: Mechanical Data
When you restart a hot pump, the motor draws the start-up current specified in Table 2 for up to 0.5 seconds. The current drawn then immediately falls to the full-load current value. Page 8 © Edwards Limited 2007. All rights reserved. Edwards and the Edwards logo are trademarks of Edwards Limited. -
Page 15: Lubrication Data
You may need to use a different fuse rating. Use the information supplied with your circuit breaker or starter to select the correct fuse rating. Lubrication data Note: An Edwards Health and Safety Data Sheet for the following oil is available on request. Recommended oil* Ultragrade 70 E1M40... - Page 16 A344-02-880 Issue J This page has been intentionally left blank. Page 10 © Edwards Limited 2007. All rights reserved. Edwards and the Edwards logo are trademarks of Edwards Limited.
-
Page 17: Installation
You must ensure that the pump is suitable for your application. If you have any doubt about the suitability of the pump for your application, refer to the Edwards guidelines on vacuum pump and vacuum system safety. (See Associated Publications at the end of the contents list). -
Page 18: Unpack And Inspect
If the pump is not to be used immediately, replace the protective covers. Store the pump in suitable conditions, as described in Section 6.1. Page 12 © Edwards Limited 2007. All rights reserved. Edwards and the Edwards logo are trademarks of Edwards Limited. -
Page 19: Locate The Pump
When the ambient temperature is 12°C or higher, we recommend that you use Edwards Ultragrade 70 oil. This tested and proven oil will give you the best performance, maintenance intervals and pump life. Otherwise, use another oil with the specification VG ISO 68. -
Page 20: Filling Procedure
4. Connect the cables to the terminals as shown in Figure Figure 4 - Electrical supply connection, single-phase motor, 240 V 50 Hz Page 14 © Edwards Limited 2007. All rights reserved. Edwards and the Edwards logo are trademarks of Edwards Limited. -
Page 21: Electrical Installation: Three-Phase Motors
Figure 5 - Electrical supply connection, three-phase motors, 220-240 V 50 Hz, 208-230 V 60 Hz, or 208 V 50 Hz © Edwards Limited 2007. All rights reserved. Page 15 Edwards and the Edwards logo are trademarks of Edwards Limited. -
Page 22: Electrical Supply Connection, Three-Phase Motors, 380-415 V 50 Hz, Or 460 V 60 Hz
5. Pass the motor electrical supply cable through the cable-gland. 6. Connect the cables o the terminals as shown in Figures and 6. Page 16 © Edwards Limited 2007. All rights reserved. Edwards and the Edwards logo are trademarks of Edwards Limited. -
Page 23: Check The Direction Of Rotation
Use a suitable inlet catchpot if you pump condensable vapours or if you use the pump for very dusty applications. Ensure that sealing surfaces are clean and scratch-free. © Edwards Limited 2007. All rights reserved. Page 17 Edwards and the Edwards logo are trademarks of Edwards Limited. -
Page 24: Connect To Iso40 Fittings
NW40 fittings as shown in Figure Figure 7 - Connect inlet to ISO40 fittings Figure 8 - Connect inlet to NW40 inlet fittings Page 18 © Edwards Limited 2007. All rights reserved. Edwards and the Edwards logo are trademarks of Edwards Limited. -
Page 25: Connect The Pump Outlet To Your System
Leak-test the system and seal any leaks found after you have installed the pump, to prevent leakage of substances out of the system and leakage of air into the system. © Edwards Limited 2007. All rights reserved. Page 19 Edwards and the Edwards logo are trademarks of Edwards Limited. - Page 26 A344-02-880 Issue J This page has been intentionally left blank. Page 20 © Edwards Limited 2007. All rights reserved. Edwards and the Edwards logo are trademarks of Edwards Limited.
-
Page 27: Operation
A344-02-880 Issue J Operation WARNING We do not recommend that you use the E1M40, E2M40, E1M80 and E2M80 pumps to pump hazardous substances. Gas-ballast control Use the gas-ballast control (Figure 1, item 11) to change the amount of air (or inert gas) introduced into the low-vacuum stage of the pump. -
Page 28: To Achieve Ultimate Vacuum
2, make sure that this is not due to your system design before you contact your supplier or Edwards for advice. In particular, the vapour pressure of all materials used in your vacuum system, including pump oil, must be much lower than the specified ultimate vacuum of the pump. -
Page 29: Unattended Operation
2. Close the vacuum system isolation-valve (if not already closed). 3. Turn gas-ballast control (Figure 9, item 4) clockwise to close. 4. Switch off the electrical supply to the pump. © Edwards Limited 2007. All rights reserved. Page 23 Edwards and the Edwards logo are trademarks of Edwards Limited. - Page 30 A344-02-880 Issue J This page has been intentionally left blank. Page 24 © Edwards Limited 2007. All rights reserved. Edwards and the Edwards logo are trademarks of Edwards Limited.
-
Page 31: Maintenance
The pump may have overheated if it was misused or if it was in a fire. Health and Safety Data sheets for fluorinated materials used in the pump are available on request; contact your supplier or Edwards Leak-test the system after maintenance work is complete if you have connected or disconnected any vacuum or exhaust joints;... -
Page 32: Maintenance Plan
If necessary, adjust the maintenance plan according to your experience. When you maintain the pump, use Edwards spares and maintenance kits; these contain all of the components necessary to complete maintenance operations successfully. The Item Numbers of the spares and kits are given in Section Examine the condition of any external accessories, filters or traps (if fitted). -
Page 33: Check The Oil-Level
10. Replace the gas-ballast filter (see Section 5.6). 11. Reconnect the pump to your vacuum system. 12. Reconnect the electrical supply to your pump. © Edwards Limited 2007. All rights reserved. Page 27 Edwards and the Edwards logo are trademarks of Edwards Limited. -
Page 34: Replace The Fine Oil-Filter
4. Make sure that the filter sealing ring (supplied with the new filter) is seated correctly on the new filter. Screw in the new filter and tighten turn using the strap-wrench. Page 28 © Edwards Limited 2007. All rights reserved. Edwards and the Edwards logo are trademarks of Edwards Limited. -
Page 35: Replace The Gas-Ballast Filter
8. Replace the assembly into the valve body in the correct orientation and secure with the two screws removed earlier. 9. Reconnect the electrical supply to your pump. © Edwards Limited 2007. All rights reserved. Page 29 Edwards and the Edwards logo are trademarks of Edwards Limited. -
Page 36: Inspect And Clean The Inlet-Filter
5. Refit the inlet-filter (2) and the filter retainer-circlip (1). 6. Reconnect the pump to your vacuum system. 7. Reconnect the electrical supply to your pump. Page 30 © Edwards Limited 2007. All rights reserved. Edwards and the Edwards logo are trademarks of Edwards Limited. -
Page 37: Clean The Oil-Level Sight-Glass
6. Refit the sight-glass seal, sight-glass and bezel and secure with the eight screws. 7. Refill the pump with oil as described in Section 5.4. 8. Check that the sight-glass does not leak. © Edwards Limited 2007. All rights reserved. Page 31 Edwards and the Edwards logo are trademarks of Edwards Limited. -
Page 38: Clean The Motor Fan-Cover
Fit new blades Fit new blades to the pump as described in the instructions supplied with the blade kit (see Section Page 32 © Edwards Limited 2007. All rights reserved. Edwards and the Edwards logo are trademarks of Edwards Limited. -
Page 39: Basic Fault-Finding
Basic fault-finding A list of fault conditions and their possible causes is provided here to assist you in fault-finding. If you are unable to rectify a fault when you use this guide, call your nearest Edwards Service Centre for help. 5.13.1... -
Page 40: The Pump Is Noisy
The pumping speed is poor The connecting pipelines are too small in diameter The connecting pipelines are too long The inlet-filter is blocked Page 34 © Edwards Limited 2007. All rights reserved. Edwards and the Edwards logo are trademarks of Edwards Limited. -
Page 41: There Is An External Oil Leak
There is an oil leak from the drain-tap There is an oil leak from the sight-glass There is an oil-leak from the fine oil-filter element-seal. © Edwards Limited 2007. All rights reserved. Page 35 Edwards and the Edwards logo are trademarks of Edwards Limited. - Page 42 A344-02-880 Issue J This page has been intentionally left blank. Page 36 © Edwards Limited 2007. All rights reserved. Edwards and the Edwards logo are trademarks of Edwards Limited.
-
Page 43: Storage And Disposal
Fluoroelastomers which may have decomposed as a result of being subject to high temperatures. Components and oil which have been contaminated with dangerous process substances. © Edwards Limited 2007. All rights reserved. Page 37 Edwards and the Edwards logo are trademarks of Edwards Limited. - Page 44 A344-02-880 Issue J This page has been intentionally left blank. Page 38 © Edwards Limited 2007. All rights reserved. Edwards and the Edwards logo are trademarks of Edwards Limited.
-
Page 45: Spares And Accessories
Item Number and description of part. Service Edwards products are supported by a worldwide network of Edwards Service Centres. Each Service Centre offers a wide range of options including: equipment decontamination; service exchange; repair; rebuild and testing to factory specifications. Equipment which has been serviced, repaired or rebuilt is returned with a full warranty. -
Page 46: Spares
All models Common Seals Kit A344-01-820 Accessories A range of accessories is available for the E1M40, E2M40, E1M80 and E2M80 pumps. 7.4.1 Inlet dust-filter The inlet dust-filter is a nylon-fibre filter-element which protects your pump against abrasive dust (see Figure item 1). -
Page 47: Inlet Catchpot
The catchpot is supplied with two NW25 'C clamps, NW25 elbow, two NW25 centring rings and 'O' rings, bolts, washers, mounting bracket and studs. Product Item Number CP100 Outlet Catchpot A461-03-000 © Edwards Limited 2007. All rights reserved. Page 41 Edwards and the Edwards logo are trademarks of Edwards Limited. -
Page 48: Outlet Mist-Filter (Clean Applications)
EOF300M External Oil Filter A500-23-000 Mechanical Filter Element for EOF300M A223-04-042 EOF100A and M Connection Kit A500-39-000 EOF300A and M Connection Kit A364-01-020 Page 42 © Edwards Limited 2007. All rights reserved. Edwards and the Edwards logo are trademarks of Edwards Limited. -
Page 49: Oil-Level Monitor
Item Number EBV100S Solenoid-Operated Gas-Ballast A500-18-930 Control Valve for E1M40 and E1M80 EBV300D Solenoid-Operated Gas-Ballast A500-17-930 Control Valve for E2M40 and E2M80 © Edwards Limited 2007. All rights reserved. Page 43 Edwards and the Edwards logo are trademarks of Edwards Limited. -
Page 50: Vibration Isolators
3. External oil-filter (15-litre capacity) 4. External oil-filter (6-litre capacity) 5. Outlet catchpot or outlet mist-filter 6. Vibration isolator 7. Oil level monitor Page 44 © Edwards Limited 2007. All rights reserved. Edwards and the Edwards logo are trademarks of Edwards Limited. -
Page 51: Appendix A E2M40S And E2M80S (Superpumps)
Dry nitrogen is also introduced through a pipe union and non-return valve into the oil-box. This oil-box purge is used when pumping flammable or toxic gases, where large scale dilution in the oil-box is necessary for safety reasons. © Edwards Limited 2007. All rights reserved. Page 45 Edwards and the Edwards logo are trademarks of Edwards Limited. - Page 52 A344-02-880 Issue J This page has been intentionally left blank. Page 46 © Edwards Limited 2007. All rights reserved. Edwards and the Edwards logo are trademarks of Edwards Limited.
-
Page 53: A2 Technical Data
5 to 7 Minimum dry nitrogen flow A2.2 Lubrication data Note: An Edwards Health and Safety Data Sheet for the following oil is available on request. See Associated publications on contents page Recommended oil grade Edwards Fomblin pfpe Y/LVAC 06/6 or... -
Page 54: A2.3 Electrical Data: Three-Phase Motors
You may need to use a different fuse rating. Use the information supplied with your circuit breaker or starter to select the correct fuse rating. Page 48 © Edwards Limited 2007. All rights reserved. Edwards and the Edwards logo are trademarks of Edwards Limited. -
Page 55: A3 Installation
You should familiarise yourself with the external fitting points, connections and controls on the pump. See Figures and A2. Figure A1 - External oil-filtration unit tapping points 1. External oil-filtration pipe outlet-connection 2. External oil-filtration pipe inlet-connection © Edwards Limited 2007. All rights reserved. Page 49 Edwards and the Edwards logo are trademarks of Edwards Limited. -
Page 56: A2 External Fittings, Connections And Controls
3. Shaft-seal leakage viewing-tube 4. Inlet-union for dry nitrogen gas-ballast to shaft-seals 5. Inlet-union and non-return valve for dry nitrogen oil-box purge Page 50 © Edwards Limited 2007. All rights reserved. Edwards and the Edwards logo are trademarks of Edwards Limited. -
Page 57: A3.2 Fill The Pump With Oil
3. After a few minutes, recheck the oil-level. If the oil-level is now below the MAX mark, pour more oil into the pump. 4. Screw the non-return valve (5) back into the oil-box and tighten down firmly; re-connect the pipe. © Edwards Limited 2007. All rights reserved. Page 51 Edwards and the Edwards logo are trademarks of Edwards Limited. - Page 58 A344-02-880 Issue J This page has been intentionally left blank. Page 52 © Edwards Limited 2007. All rights reserved. Edwards and the Edwards logo are trademarks of Edwards Limited.
-
Page 59: A4 Operation
A3. If you wish to continue to purge the oil-box after the pump has stopped you need only switch off the supply to the gas-ballast by closing the flow regulator (5) to the gas-ballast. © Edwards Limited 2007. All rights reserved. Page 53 Edwards and the Edwards logo are trademarks of Edwards Limited. -
Page 60: A4.1 Start-Up
4. Pressure gauge (0-30 psi) 10. Non-return valve 5. Flow regulator valve 11. Fixed restrictor 6. Flow meter 12. Dry nitrogen gas-ballast input Page 54 © Edwards Limited 2007. All rights reserved. Edwards and the Edwards logo are trademarks of Edwards Limited. -
Page 61: A4.2 Shut-Down
2. Close the gas-ballast solenoid-valve to maintain the system vacuum when the pump is shut down. 3. Switch off the electrical supply to the pump. © Edwards Limited 2007. All rights reserved. Page 55 Edwards and the Edwards logo are trademarks of Edwards Limited. - Page 62 A344-02-880 Issue J This page has been intentionally left blank. Page 56 © Edwards Limited 2007. All rights reserved. Edwards and the Edwards logo are trademarks of Edwards Limited.
-
Page 63: A5 Spares
The following maintenance kits are available for your pump. The maintenance kits also include instructions for the use of the kits. Pump Kit Description Item Number E2M40S Spares kit A364-13-801 E2M80S Spares kit A365-13-801 © Edwards Limited 2007. All rights reserved. Page 57 Edwards and the Edwards logo are trademarks of Edwards Limited. - Page 64 A344-02-880 Issue J This page has been intentionally left blank. Page 58 © Edwards Limited 2007. All rights reserved. Edwards and the Edwards logo are trademarks of Edwards Limited.
Need help?
Do you have a question about the E1M40 and is the answer not in the manual?
Questions and answers