Table of Contents
Advertisement
Quick Links
Advertisement
Table of Contents

Subscribe to Our Youtube Channel
Related Manuals for Compuprint PageMaster 402N


Summary of Contents for Compuprint PageMaster 402N
- Page 1 Compuprint PageMaster 402N User Guide Apr 02...
-
Page 2: Proprietary Statement
N.V. All Rights Reserved. This software may not be reproduced, modified, displayed, transferred, or copied in any form or in any manner or on any media, in whole or in part, without the express written permission of CPG International N.V . -
Page 3: Table Of Contents
Features 1-4 Available Configuration 1-5 Chapter 1 Getting Started 1-1 About this Chapter 1-2 Package Contents 1-2 CD-ROM Contents 1-2 Printer Location Requirements 1-3 Printer Weight and Dimensions 1-3 Space Requirements 1-3 Environment Requirements 1-4 Electrical Requirements 1-5 Apr 02 Contents... - Page 4 Compuprint PageMaster 402N User Guide Parts of the Printer 1-5 Optional Printer Accessories 1-8 Paper Path 1-9 Chapter 2 Using the Printer 2-1 Connecting the Printer to the AC Outlet 2-2 Turning Power On and Off 2-3 Connecting the Printer to the Host Computer 2-4...
- Page 5 Moving the Printer a Long Distance 4-26 Inoperative Printer 5-3 No Ready Message 5-3 Noise, Smoke, or Smell 5-3 Clearing an E1, E2-1 or E2-2 Paper Jam 5-6 Clearing an E3 or E4 Jam 5-14 Clearing an E0 Jam 5-23 Compuprint PageMaster 402N User Guide...
- Page 6 Compuprint PageMaster 402N User Guide Print Image Quality Problems 5-27 Miscellaneous Problems 5-35 Warning Messages and Error Messages 5-39 Chapter 6 Using the Duplexer 6-1 About the Duplexer 6-2 Installing the Duplexer 6-2 Testing the Duplexer 6-5 Solving Duplexer Problems 6-6...
- Page 7 Correcting Miscellaneous Paper Feeder Problems 7-23 Cleaning Feed Rolls 7-25 Moving the Printer and 500 Sheet Feeder a Short Distance 7-29 Moving the Printer and 500 Sheet Feeder a Long Distance 7-29 Major Components of the High Capacity Feeder 8-3...
- Page 8 Compuprint PageMaster 402N User Guide Maintaining the High Capacity Feeder 8-19 Moving the High Capacity Feeder 8-21 Chapter 9 Using the Stacker 9-1 About the Stacker 9-2 Installing the Stacker 9-3 Testing the Stacker 9-8 Solving Stacker Problems 9-8...
-
Page 9: Preface
In this Chapter . . . • “Welcome” on page 2 • “About this Manual” on page 2 • “About the Printer” on page 4 Apr 02 Preface... -
Page 10: About This Manual
About this Manual Welcome Thank you for selecting the Compuprint PageMaster 402N laser printer. This User Guide contains important information about the operation and care of your printer. Please read this manual in its entirety and keep it at hand for later reference. -
Page 11: Printer Orientation
Throughout this guide, the four sides of the printer are referred to as front, rear, right, and left. The front of the printer is the side near the control panel, and the rear of the printer is opposite the front. The left and right sides of the printer are defined as the sides to the left and right, respectively, of a person who is facing the front of the printer. -
Page 12: About The Printer
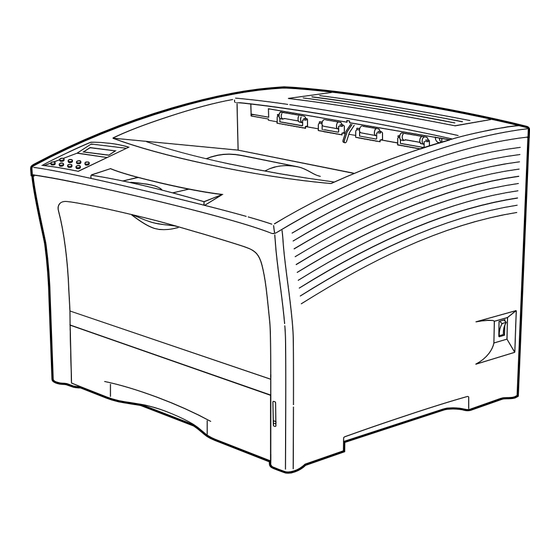
About the Printer About the Printer The Compuprint PageMaster 402N printer uses a data modulated laser beam and conventional dry-ink xerographic processes to produce images up to 1200 dpi resolution at a paper output speed of 40 pages per minute. The printer can accommodate both plain paper and other print media, and feeds paper from either a main 500-sheet paper tray or from the front tray, which is designed to feed special print media such as labels and transparencies. -
Page 13: Available Configuration
Available Configuration The Compuprint PageMaster 402N is available in the following configuration: • Memory: 64 MB • Resolutions: 600 x 600 dpi, and 1200 x 1200 dpi • Paper Input: One 500-sheet A4/letter paper tray and one 150-sheet front tray for paper, transparencies, envelopes, and other non-standard print media •... - Page 14 Compuprint PageMaster 402N User Guide About the Printer Apr 02...
-
Page 15: Chapter 1 Getting Started
“About this Chapter” on page 1-2 • “Package Contents” on page 1-2 • “Printer Location Requirements” on page 1-3 • “Parts of the Printer” on page 1-5 • “Optional Printer Accessories” on page 1-8 • “Paper Path” on page 1-9 Apr 02... -
Page 16: About This Chapter
This chapter reviews the contents of the printer packaging, explains the parts of the printer, and describes the space and environment requirements of the printer. Package Contents The items shown in the following figure are included in the printer packaging. If any items are missing or damaged, contact your dealer. NOTE: If you have not unpacked and installed your printer, please refer to the pictorial unpacking instructions and the Installation Guide included in the printer packaging. -
Page 17: Printer Location Requirements
Printer Location Requirements Printer Weight and Dimensions This printer weighs approximately 55 lbs (25 kg) and should always be lifted by two people. The dimensions of the printer are listed below. • Printer Height: 15.6 in (395 mm) • Printer Width (left to right): 19.3 in (490 mm) •... -
Page 18: Environment Requirements
Compuprint PageMaster 402N User Guide Printer Location Requirements Environment Requirements Use the following guidelines to determine the best location for the printer: 20 inches (500 mm) 20 inches (500 mm) Figure 1-2: Side view of the printer. 30 inches (760 mm) -
Page 19: Electrical Requirements
Electrical Requirements For correct printer operation, install the printer in a location where the AC wall outlet meets the following electrical requirements. • PageMaster 402N, 110V: 90~132 Volts AC grounded @ 50/60 Hz, 9 AMP current draw • PageMaster 402N, 220V:... - Page 20 Rear cover CAUTION: The fuser becomes very hot while the printer is operating. If you need to remove the drum cartridge to remove a paper jam, turn the power off and wait at least 10 minutes before removing the drum cartridge and touching the fuser.
- Page 21 Apr 02 Compuprint PageMaster 402N User Guide 1-7 LCD Display Shows error messages and other status messages; also displays menus, submenus, and settings. LED Indicators Show printer status. Pushbuttons Allow you to navigate through menus, place a printer offline, or cancel a print job.
-
Page 22: Optional Printer Accessories
Compuprint PageMaster 402N User Guide Optional Printer Accessories Optional Printer Accessories The following figure shows all of the available accessories as installed on the printer: Stacker Holds and separates large print jobs using an offset. High Capacity Feeder (HCF) Holds up to 2000 sheets A4 or Letter paper. -
Page 23: Paper Path
Paper Path The following figure shows the path that paper travels through the printer: The paper is initially fed from the front paper tray or one of the other paper trays. The image is transferred from the photosensitive drum onto the paper. - Page 24 1-10 Compuprint PageMaster 402N User Guide Paper Path Apr 02...
-
Page 25: Using The Printer
In this Chapter . . . • “About this Chapter” on page 2-2 • “Connecting the Printer to the AC Outlet” on page 2-2 • “Turning Power On and Off” on page 2-3 • “Connecting the Printer to the Host Computer” on page 2-4 •... -
Page 26: Connecting The Printer To The Ac Outlet
Insert the power cord into the AC connector on the rear of the printer. Verify that the power switch of the printer is in the [O] (off) position, then insert the plug of the power cord into the AC outlet. -
Page 27: Turning Power On And Off
Error Messages” on page Use the following procedure to turn the printer off: Turn the printer off by pressing the [ O ] on the power switch on the right side of the printer. Apr 02 Compuprint PageMaster 402N User Guide 2-3... -
Page 28: Connecting The Printer To The Host Computer
Your printer can print on a variety of media, including plain paper, labels, transparencies, and enve- lopes. Always use print media that meet the guidelines for use with this printer. Print media that is not recommended for use with this printer may cause frequent paper jams or poor print quality. - Page 29 Expect a slight reduction in image quality when you print on envelopes, labels, transparencies, or postcards. Apr 02 Tray 1 Tray 2 (standard) (option) Compuprint PageMaster 402N User Guide 2-5 Selecting Print Media Tray 3 High (option) Capacity Feeder (option)
-
Page 30: Print Media Weight, Type, And Size
Compuprint PageMaster 402N User Guide Selecting Print Media Print Media Weight, Type, and Size The following table defines print media that you can use in each of the paper sources, and also indi- cates the feed orientation—long edge feed (LEF) or short edge feed (SEF). If you have concerns about a specific brand or type of media, try samples of the media to determine if the resulting printer performance and print quality meet your expectations. -
Page 31: Loading Print Media
Loading the Main Tray The 500-sheet paper tray that sits inside the printer can accommodate paper sizes up to letter or A4. The tray has two length guides that are located on the sides of the tray, and one width guide that is located near the center of the tray. - Page 32 Compuprint PageMaster 402N User Guide Loading Print Media Use the following procedure to load paper into the 500-sheet A4/letter paper tray: Apr 02...
- Page 33 To avoid paper jams and other paper transportation problems, make sure the length and width guides are adjusted to match the paper size and are locked firmly into place. Apr 02 Compuprint PageMaster 402N User Guide 2-9 Loading Print Media...
-
Page 34: Loading The Front Tray
Loading the Front Tray The front tray located on the front of the printer can accommodate a maximum of 150 sheets of paper sizes up to A3 or 8.5 x 17 inches; the front tray can also accommodate a maximum of 30 sheets of standard labels, transparencies, or postcards, and a maximum of 10 standard envelopes. - Page 35 Load the stack of paper into the front tray by sliding the stack between the paper guides and then pushing the paper stack into the tray until it will not go any further. Apr 02 Compuprint PageMaster 402N User Guide 2-11 Loading Print Media...
- Page 36 Open the front tray by pulling on the hand grip on the top of the tray. Slide the paper guides all the way to the sides of the front tray. Pull the front tray up and out of the printer, as shown on the label inside the front tray. Apr 02...
- Page 37 CAUTION: Do not press the guides tightly against the stack; the guides should just barely touch the stack of paper. Paper guides that are too tight can cause feed jams. Apr 02 Compuprint PageMaster 402N User Guide 2-13 Loading Print Media...
- Page 38 2-14 Compuprint PageMaster 402N User Guide Loading Print Media Loading Transparencies into the Front Tray Open the front tray by pulling on the hand grip on the top of the tray. Slide the paper guides all the way to the sides of the front tray Load transparencies into the front tray one at a time, sliding each transparency between the paper guides and then pushing the transparency into the tray until it will not go any further.
- Page 39 Open the front tray by pulling on the hand grip on the top of the tray. Slide the paper guides all the way to the sides of the front tray Position the postcard stack so the surface to be printed faces up. Apr 02 Compuprint PageMaster 402N User Guide 2-15 Loading Print Media...
- Page 40 2-16 Compuprint PageMaster 402N User Guide Loading Print Media Load the stack of postcards into the front tray, sliding the stack between the paper guides and then pushing the stack of postcards into the tray until it will not go any further.
-
Page 41: Output Options For Oversize Print Media
Apr 02 Compuprint PageMaster 402N User Guide 2-17 Output Options for Oversize Print Media... - Page 42 2-18 Compuprint PageMaster 402N User Guide Output Options for Oversize Print Media Apr 02...
-
Page 43: Understanding And Navigating The Control Panel Menus
In this Chapter . . . • “About this Chapter” on page 3-2 • “Control Panel Features” on page 3-2 • “Navigating the Control Panel Menus” on page 3-4 • “Menu Structure” on page 3-6 • “Paper Menu” on page 3-6 •... -
Page 44: About This Chapter
Control Panel Features The control panel is located on the front of the printer, and contains the display, indicators, and pushbuttons that allow you to view and change the printer settings. The figure below shows the control panel features. -
Page 45: Led Indicators
LED Indicators The LED indicators also indicate printer status. The four indicators can each be on, off, or blink- ing, indicating different phases of printer operation. The table below explains the LED indicators. Color Green Green Green Yellow Pushbuttons The control panel pushbuttons allow you to access and navigate menus, and also assist you in recov- ering from printer errors. -
Page 46: Navigating The Control Panel Menus
Navigating the Control Panel Menus When you press the MENU button on the control panel, you enter the printer’s menu system. At that point, the first line of the display contains the text “Menu”, indicating that you are in the menu system. - Page 47 Press the NEXT or PREVIOUS button to increase or decrease the number of copies printed. Press the SELECT button to save this setting. Press the START/STOP button to exit the menu system. Apr 02 Compuprint PageMaster 402N User Guide 3-5 Navigating the Control Panel Menus Menu Interface Menu...
-
Page 48: Menu Structure
Menu Structure The following figure shows the structure of the control panel main menus and submenus. For more specific information about using and navigating the printer menu system, see the User Guide pro- vided on the Electronic Library CD-ROM. Paper Menu... - Page 49 Type: Plain Tray Linking This submenu allows you to turn the tray linking function on or off. Apr 02 Compuprint PageMaster 402N User Guide 3-7 Available Settings Procedure for Changing Setting Numbers 1 - 999 Front Tray 1 Tray 2 (optional)
- Page 50 Compuprint PageMaster 402N User Guide Paper Menu Blank Pages Print This submenu allows you to choose to either print or not print blank pages of a document. Output Linking This submenu allows you to turn the output linking function on or off.
-
Page 51: Interface Menu
Interface Menu The Interface Menu provides access to the printer interface settings. Use the following procedure to enter the interface menu: Press the MENU button on the control panel. Press the NEXT button until the text “Interface Menu” is shown on the second line of the display. - Page 52 3-10 Compuprint PageMaster 402N User Guide PS Menu Submenus Default Setting Print PS Errors This submenu allows you to choose to either print or not print PS errors. Manual Feed TO This submenu allows you to set the manual feed timeout—the number of...
-
Page 53: Pcl Menu
Symbol Set 10U:PC-8 CP437 This submenu allows you to choose a symbol set. Apr 02 Compuprint PageMaster 402N User Guide 3-11 Available Settings Portrait Landscape Internal Numbers 0-? 0.08 - 100.00 10U:PC-8 CP437... - Page 54 3-12 Compuprint PageMaster 402N User Guide PCL Menu Macro Filter This submenu allows you to turn the macro filter on or off. Lines Per Page This submenu allows you to change the number of lines per page. CR Mode CR = CR...
-
Page 55: System Menu
This submenu allows you to increase or decrease the time limit (in seconds) for PostScript jobs. A 0 setting indicates no timeout. This setting applies only to PostScript jobs. Apr 02 Compuprint PageMaster 402N User Guide 3-13 Default Setting Available Settings U.S. U.S. Non-U.S. English... - Page 56 3-14 Compuprint PageMaster 402N User Guide System Menu Jam Recovery This submenu allows you to turn jam recovery on or off. Hex Print This submenu allows you to print hexadecimal characters. 1. Press NEXT or PREVIOUS to toggle between ON and OFF.
-
Page 57: Quality Menu
Quality Menu The Quality Menu provides access to the printer settings that are related to print quality. Use the following procedure to enter the Quality Menu: Press the MENU button on the control panel. Press the NEXT button until the text “Quality Menu” is shown on the second line of the dis- play. -
Page 58: Functions Menu
PCL font lists. Status Menu In addition to the main menus listed above, the printer also provides a status menu that allows you to view the current settings for the input and output trays and the toner cartridge. Use the follow- ing procedure to enter the Status Menu: Press the STATUS button on the control panel. - Page 59 Toner Press SELECT to view the status of the toner cartridge. Apr 02 Compuprint PageMaster 402N User Guide 3-17 1. Press NEXT or PREVIOUS to scroll through the media size, media type, and level settings for Tray 1. 2. Press SELECT to view a specific setting.
- Page 60 3-18 Compuprint PageMaster 402N User Guide Status Menu Apr 02...
-
Page 61: Maintaining The Printer
“Upgrading Printer Firmware” on page 4-2 • “Replacing Printer Components” on page 4-3 • “Cleaning the Printer” on page 4-14 • “Moving the Printer” on page 4-26 • “Storing the Printer for Long Periods of Time” on page 4-27 Apr 02 Maintaining the Printer... -
Page 62: Upgrading Printer Firmware
NOTE: If you are using a PC that is not running Windows or if you do not have any printer drivers installed and configured to use the parallel interface, you will need to configure the parallel port for... -
Page 63: Replacing Printer Components
WARNING! Do not dispose of used toner cartridges in an incinerator or in an open fire. Use the following procedure to replace the toner cartridge: Place a drop-cloth or some paper on the table or floor near the printer. Apr 02 Compuprint PageMaster 402N User Guide 4-3 °... - Page 64 Compuprint PageMaster 402N User Guide Replacing Printer Components Locate the finger grip near the top cover of the printer and pull the top cover up and back to open it. Remove the old toner cartridge from the printer and carefully place it on the drop-cloth.
- Page 65 Rock the toner cartridge back and forth and then shake it horizontally to ensure that the toner is evenly distributed. Grasp the toner cartridge firmly and pull the sealing tape straight out from the cartridge. Apr 02 Compuprint PageMaster 402N User Guide 4-5 Replacing Printer Components...
- Page 66 Compuprint PageMaster 402N User Guide Replacing Printer Components Slide the pegs on the toner cartridge into the channels on the inside of the printer, and lower the toner cartridge into the printer. Close the top cover. Disposing of the Print Cartridge Place the used toner cartridge inside the new toner cartridge box and seal the box.
-
Page 67: Replacing The Fuser
NOTE: In the following procedure, the left and right sides of the printer are those to the left and right of a person facing the rear of the printer. Use the following procedure to remove and replace the fuser: Turn the printer off by pressing the [ O ] on the power switch on the right side of the printer, and disconnect the AC power cord from the wall outlet. - Page 68 Replacing Printer Components Locate the hand grip on the rear of the printer and pull it toward you to open the rear cover. Release the fuser by pressing the top of the fuser latch on the left side of the printer.
- Page 69 Ensure that the fuser pins are properly placed into the holes in the printer frame by lifting up on the right end of the fuser. The fuser should not move.
-
Page 70: Replacing The Transfer Roll
Verify that the power switch of the printer is in the [O] (off) position, then insert the plug of the power cord into the AC outlet. Turn the printer on by pressing [ I ] on the power switch on the right side of the printer. Replacing the Transfer Roll The transfer roll is the electrically conductive rubber roll that transfers the toner image from the drum onto the paper. - Page 71 Turn the printer off by pressing the [ O ] on the power switch on the right side of the printer. Locate the finger grip on the right side of the top cover and lift the top cover up and back.
- Page 72 4-12 Compuprint PageMaster 402N User Guide Replacing Printer Components Release the transfer roll by lifting up on the latches at either end. Carefully lift the roll out of the clips and remove it from the printer. Remove the new transfer roll from its packaging and hold it as shown below.
- Page 73 Slide the pegs on the end of the toner cartridge into the slots inside the printer, and lower the toner cartridge into the printer. Close the top cover. Turn the printer on by pressing [ I ] on the power switch on the right side of the printer. Apr 02 Compuprint PageMaster 402N User Guide 4-13...
-
Page 74: Cleaning The Printer
Use the following procedure to clean the exterior of the printer: Turn the printer off by pressing the [ O ] on the power switch on the right side of the printer, and disconnect the AC power cord from the wall outlet. -
Page 75: Cleaning The Interior
Verify that the power switch of the printer is in the [O] (off) position, then insert the plug of the power cord into the AC outlet. Turn the printer on by pressing [ I ] on the power switch on the right side of the printer. Cleaning the Interior... - Page 76 Compuprint PageMaster 402N User Guide Cleaning the Printer Turn the printer off by pressing the [ O ] on the power switch on the right side of the printer, and disconnect the AC power cord from the wall outlet. Remove all of the paper from the main paper tray and from the front paper tray.
- Page 77 Open all printer doors. For minor cleaning, use a soft, dry cloth and carefully wipe only those areas of the printer interior that appear to be dirty. For major cleaning, use a small vacuum cleaner with a disposable bag and crevice tool attach- ment.
- Page 78 4-18 Compuprint PageMaster 402N User Guide Cleaning the Printer Slide the pegs on the end of the toner cartridge into the slots inside the printer, and lower the toner cartridge into the printer. Close the top cover. Reload all paper into the main paper tray and the front paper tray.
-
Page 79: Cleaning Feed Rolls
Verify that the power switch of the printer is in the [O] (off) position, then insert the plug of the power cord into the AC outlet. Turn the printer on by pressing [ I ] on the power switch on the right side of the printer. Cleaning Feed Rolls Rubber feed rolls drive sheets of paper out of the front paper tray into the printer, and also drive sheets of paper out of the main paper tray into the printer. - Page 80 Compuprint PageMaster 402N User Guide Cleaning the Printer Turn the printer off by pressing the [ O ] on the power switch on the right side of the printer, and disconnect the AC power cord from the wall outlet. Remove the main paper tray and set it on a flat level surface.
- Page 81 Using a soft cloth slightly moistened with plain water, carefully wipe the feed roll. Rotate the feed roll back into the feed position. Reinstall the front paper tray. Apr 02 Compuprint PageMaster 402N User Guide 4-21 Cleaning the Printer...
- Page 82 Verify that the power switch of the printer is in the [O] (off) position, then insert the plug of the power cord into the AC outlet. Turn the printer on by pressing [ I ] on the power switch on the right side of the printer. Front Feed Rolls...
- Page 83 Turn the printer off by pressing the [ O ] on the power switch on the right side of the printer, and disconnect the AC power cord from the wall outlet.
- Page 84 Using a soft cloth slightly moistened with plain water, carefully wipe the feed rolls. Slide the pegs on the end of the toner cartridge into the slots inside the printer, and lower the toner cartridge into the printer.
- Page 85 Verify that the power switch of the printer is in the [O] (off) position, then insert the plug of the power cord into the AC outlet. Turn the printer on by pressing [ I ] on the power switch on the right side of the printer. Apr 02...
-
Page 86: Moving The Printer
Use the following procedure to move the printer a long distance: Turn the printer off by pressing the [ O ] on the power switch on the right side of the printer. Unplug the AC power cord from the wall outlet and from the back of the printer. -
Page 87: Storing The Printer For Long Periods Of Time
If you will not be using the printer for several months, use the following procedure to prepare the printer for storage: Turn the printer off by pressing the [ O ] on the power switch on the right side of the printer. Unplug the AC power cord from the AC wall outlet. - Page 88 4-28 Compuprint PageMaster 402N User Guide Storing the Printer for Long Periods of Time Apr 02...
-
Page 89: Chapter 5 Troubleshooting
In this Chapter . . . • “About this Chapter” on page 5-2 • “Installation Problems” on page 5-2 • “Paper Jams” on page 5-4 • “Print Image Quality Problems” on page 5-27 • “Miscellaneous Problems” on page 5-35 • “Warning Messages and Error Messages”... -
Page 90: About This Chapter
Installation Problems It is common for simple oversights during printer installation to cause problems when you first turn the printer on, resulting in noise, smoke, or smell; an inoperative printer; or the absence of a ready message on the control panel. -
Page 91: Inoperative Printer
Inoperative Printer If you have problems turning on the printer, check the possible causes listed in the table below. If the printer will not start after checking these items, turn the printer off, disconnect the power cord from the AC outlet, and contact your dealer or an authorized service provider. -
Page 92: Paper Jams
Connect the printer to the AC wall outlet and turn the printer on by pressing the [ I ] on the power switch on the right side of the printer. - Page 93 Occasional paper jams usually require minor user intervention that involves reloading the paper or cleaning the feed rolls. Apr 02 Compuprint PageMaster 402N User Guide 5-5 Figure 3-12: Paper Jam Locations and Error Codes. Paper Jams...
-
Page 94: Clearing An E1, E2-1 Or E2-2 Paper Jam
Compuprint PageMaster 402N User Guide Paper Jams Frequent paper jams can be caused by anything from foreign material in the paper path to a broken or malfunctioning component. Frequent paper jams may require involved user intervention that includes replacing a consumable item or calling a service technician to troubleshoot and correct the problem. - Page 95 If the jam occurred while feeding from the front paper tray, remove all paper from the front tray, including any paper that may be jammed inside the tray. If the jam occurred while feeding from the main paper tray, remove the main paper tray. Apr 02 Compuprint PageMaster 402N User Guide 5-7 Paper Jams...
- Page 96 Compuprint PageMaster 402N User Guide Paper Jams Remove any jammed or wrinkled paper from the paper tray. Remove any jammed paper from the inside of the paper tray well. Apr 02...
- Page 97 Compuprint PageMaster 402N User Guide 5-9 Paper Jams If the jam occurred while feeding from Tray 2 or 3, remove the paper tray associated with that feeder and inspect the inside of the paper tray well, removing any jammed paper.
- Page 98 5-10 Compuprint PageMaster 402N User Guide Paper Jams Open the rear door of the feeder for tray 2 or tray 3 and remove any jammed paper, then close the rear door of the feeder Apr 02...
- Page 99 Remove the front tray by lifting up slightly and pulling the tray out from the printer. Remove the toner cartridge. Remove any jammed paper from the toner cartridge well. Apr 02 Compuprint PageMaster 402N User Guide 5-11 Paper Jams...
- Page 100 5-12 Compuprint PageMaster 402N User Guide Paper Jams Reinsert the front tray into the printer. Reload any paper into the front tray. Close the front tray cover. Apr 02...
- Page 101 Slide the pegs on the toner cartridge into the channels on the inside of the printer, and lower the toner cartridge into the printer. Reinstall the main paper tray. If you removed either tray 2 or tray 3, reinstall it.
-
Page 102: Clearing An E3 Or E4 Jam
5-14 Compuprint PageMaster 402N User Guide Paper Jams Close the Top Cover. Clearing an E3 or E4 Jam If an E3 or E4 error code precedes the error message on the first line of the control panel display, paper has jammed somewhere between the registration sensor and the exit sensor. Use the following procedure to clear a paper jam in this location: Remove any printed pages from the output tray. - Page 103 If the jam occurred while feeding from the front paper tray, remove all paper from the front tray, including any paper that may be jammed inside the tray. If the jam occurred while feeding from the main paper tray, remove the main paper tray. Apr 02 Compuprint PageMaster 402N User Guide 5-15 Paper Jams...
- Page 104 5-16 Compuprint PageMaster 402N User Guide Paper Jams Remove any jammed or wrinkled paper from the paper tray. Remove any jammed paper from the inside of the paper tray well. Apr 02...
- Page 105 Compuprint PageMaster 402N User Guide 5-17 Paper Jams If the jam occurred while feeding from Tray 2 or 3, remove the paper tray associated with that feeder and inspect the inside of the paper tray well, removing any jammed paper.
- Page 106 5-18 Compuprint PageMaster 402N User Guide Paper Jams Open the rear door of the feeder for Tray 2 or 3 and remove any jammed paper, then close the rear door of the feeder Apr 02...
- Page 107 Remove the front tray by lifting up slightly and pulling the tray out from the printer. Remove the toner cartridge. Remove any jammed paper from the toner cartridge well. NOTE: At this point you must wait at least 10 minutes before proceeding to clear jammed paper from the fuser.
- Page 108 Compuprint PageMaster 402N User Guide Paper Jams Locate the hand grip on the rear of the printer and pull it to open the rear cover of the printer. Open the fuser transport by pulling down on the spring loaded lever (1). Remove any jammed paper from the fuser (2).
- Page 109 Reinsert the front tray into the printer. Reload any paper into the front tray. Close the front tray cover. Apr 02 Compuprint PageMaster 402N User Guide 5-21 Paper Jams...
- Page 110 5-22 Compuprint PageMaster 402N User Guide Paper Jams Slide the pegs on the toner cartridge into the channels on the inside of the printer, and lower the toner cartridge into the printer. Reinstall the main paper tray. If you removed either Tray 2 or Tray 3, reinstall it.
-
Page 111: Clearing An E0 Jam
Use the following procedure to clear a paper jam in this location: Pull the high capacity feeder paper drawer out. Remove any jammed paper from the paper drawer. Apr 02 Compuprint PageMaster 402N User Guide 5-23 Paper Jams... -
Page 112: Clearing An E7 Jam
Push the paper drawer back into the high capacity feeder, making sure the drawer is properly closed. Check the display to make sure the printer is ready for printing. Clearing an E7 Jam If an E7 error code precedes the error message on the first line of the control panel display, paper has jammed at the duplexer. - Page 113 If you can not remove the jammed paper, refer to the procedure for removing jammed paper for an E2-1 error message. WARNING: The fuser unit becomes very hot right after the printer has been used. Be careful not to touch the fuser unit.
-
Page 114: Clearing An E8 Jam
5-26 Compuprint PageMaster 402N User Guide Paper Jams Reinsert the duplex printing unit into the printer, and close the rear cover. Check the display and make sure the printer is ready for printing. Clearing an E8 Jam If an E8 error code precedes the error message on the first line of the control panel display, paper has jammed at the stacker. -
Page 115: Print Image Quality Problems
When functioning correctly, the printer should produce printed paper that is relatively flat and undamaged, containing a fused image of correct intensity—without streaks, smears, spots, or miss- ing areas. If the printed sheets that your printer produces do not meet these qualifications, there is a print image quality problem. -
Page 116: Image Is Extremely Faint And/Or Image Contains Blank Areas
50 prints, call for service. Attempt to increase toner in the printer developer system by running 20 copies of a page with only a few lines of text on it. -
Page 117: Image Is Extremely Dark And/Or White Areas Are Not Clean
If your printer and software does not have an image density adjustment, attempt to decrease the amount of toner in the printer developer system by running 20 pages of dense text or graphics. Do not run a solid black page. -
Page 118: Entire Page Is Black
If one of the steps in this procedure corrects the problem but the identical problem returns in less than 50 prints, call for service. Remove the toner cartridge from the printer, then reinstall it making sure it is securely seated inside the printer. -
Page 119: Black Lines On The Page
Call your service technician. This image quality problem may be caused by a malfunctioning or broken component that requires service. Apr 02 Compuprint PageMaster 402N User Guide 5-31 Print Image Quality Problems... -
Page 120: Black Spots On The Page
A paper jam can cause a small amount of toner to contaminate a paper tray. Print 10 blank pages. Printing blank pages can clean the printer system of small amounts of toner that may have contaminated the paper path as a result of a recent paper jam. -
Page 121: Finished Print Is Damaged
Turn the printer off, wait 10 minutes for the fuser to cool, then open all of the printer access covers and inspect the interior of the printer for toner contamination. Clean off any toner that you find. -
Page 122: Finished Image Rubs Off Of The Page
Turn the printer off and open all of the printer access covers. Inspect the interior of the printer for scraps of paper or obviously broken components that could be obstructing the paper path. -
Page 123: Miscellaneous Problems
Some printer problems may not generate error codes or produce observable print image defects. These miscellaneous problems may effect only the printer or they may effect things outside of the printer, such as the room lights or a nearby radio receiver. - Page 124 Compuprint PageMaster 402N User Guide Miscellaneous Problems Make sure that you push the [ I ]on the main power switch to turn on the printer. Check to make sure the AC power cord is firmly plugged into the AC wall outlet and that the other end of the AC power cord is firmly plugged into the printer.
- Page 125 Interlock switches monitor the position of printer doors and covers for safety reasons. When a door is closed, the interlock switch is activated and the printer can operate. When a door is open, the interlock switch is not activated and the printer cannot operate. If a door is not firmly closed, the interlock switch can bounce between being activated and being not acti- vated—confusing the system and causing erratic printer operation.
-
Page 126: Room Lights Dim Or Flicker When Printer Starts
Room Lights Dim or Flicker When Printer Starts The following characteristics define this type of problem: • Nearby lights dim slightly or flicker when you first turn on the printer or when the printer begins printing. • The lights remain normal when the printer is not on. -
Page 127: Warning Messages And Error Messages
Warning messages use only the second line of the display and indicate conditions that do not pre- vent the printer from operating. For example, if Tray 1 is out of paper but the printer is currently drawing paper from Tray 2, a warning message will appear on the second line of the display indicat- ing that Tray 1 is out of paper—but the printer will continue to operate, drawing paper from Tray... -
Page 128: Warning Messages
5-40 Compuprint PageMaster 402N User Guide Warning Messages and Error Messages Warning Messages The following table lists warning messages, possible causes, and the actions required to correct each cause. Warning Message Line 2 of display Tray 1 Missing Tray 2 Missing... -
Page 129: Error Messages
LOAD PAPER TRAY2 LOAD PAPER TRAY3 LOAD PAPER FRONT OUTPUT TRAY FULL STACKER FULL Apr 02 Compuprint PageMaster 402N User Guide 5-41 Warning Messages and Error Messages Error Message Possible Cause Line 2 Remove Paper There is a paper jam inside the printer. - Page 130 5-42 Compuprint PageMaster 402N User Guide Warning Messages and Error Messages Error Message Line 1 U2 ROS FAILURE U4 FUSER FAILURE HCF UNIT FAILURE STACKER FAIL DUPLEX FAILURE MAIN MOTOR FAIL ENGINE NV FAIL FAN FAILURE MAINTENANCE REQ Error Message...
-
Page 131: Using The Duplexer
In this Chapter . . . • “About this Chapter” on page 6-2 • “About the Duplexer” on page 6-2 • “Installing the Duplexer” on page 6-2 • “Testing the Duplexer” on page 6-5 • “Solving Duplexer Problems” on page 6-6 •... -
Page 132: About The Duplexer
The duplexer is a customer-installed optional device that enables automatic printing on both sides of a sheet of paper. The duplexer is designed to be mounted inside the printer, just below the exit transport in the paper path. The duplexer drives a single-sided print partially out of the exit trans- port, then reverses the direction and pulls the printed page back into the printer to print the second side. - Page 133 Compuprint PageMaster 402N User Guide 6-3 Installing the Duplexer Use the following procedure to install the duplexer: Apr 02...
- Page 134 Compuprint PageMaster 402N User Guide Installing the Duplexer Apr 02...
-
Page 135: Testing The Duplexer
After installing the duplexer, use the following procedure to make sure it transports paper correctly: Turn the printer on by pressing the [ I ] on the power switch on the right side of the printer. Once the printer has warmed up and displays the “Ready” message on the control panel dis- play, use any software application to print a few duplexed sheets. -
Page 136: Installation Problems
Turn the printer off by pressing the [ O ] on the power switch on the right side of the printer. Make sure that the duplexer connector is firmly connected to the printer jack. -
Page 137: Clearing Duplex Paper Jams
Print a few sheets of text or images to make sure the printer is still operational. If the printer is operational when the duplexer is removed, contact either your sales represen- tative or a service provider and report your problem. -
Page 138: Correcting Miscellaneous Duplexer Problems
Some duplexer problems may not cause an error message and may not interfere with the operation of the printer. If you are experiencing one of the problems listed below and there is no error message shown on the control panel display, refer to the procedures in the following sections to check the possible causes of the specific problem. - Page 139 If the connection between the duplexer and the printer is not intact, the duplexer will not receive power or logic commands, resulting in an inoperative duplexer. Examine the printer driver settings to make sure the duplexer is available as an installed option.
- Page 140 Compuprint PageMaster 402N User Guide Solving Duplexer Problems Test the printer by allowing it to run for a few days without the duplexer installed. If the printer operates erratically when the duplexer is not installed, refer to Erratically” on page If the printer does not operate erratically when the duplexer is not installed, reinstall the duplexer and proceed to the next step.
- Page 141 Open the rear cover of the printer and inspect the inside of the duplexer for jammed paper or obviously broken components. Broken components or scraps of paper lodged inside the duplexer may be brushing against moving parts and causing the noise.
-
Page 142: Removing The Duplexer
Turn off the printer and disconnect the AC power cord from the AC wall outlet.. Locate the hand grip on the back of the printer and pull to open the rear cover.. Carefully pull the top of the duplexer out toward you to disengage the upper mounting clips. - Page 143 Close the rear cover. Insert the plug of the AC power cord into the AC wall outlet, and turn the printer on by pressing [ I ] on the power switch on the right side of the printer.
- Page 144 6-14 Compuprint PageMaster 402N User Guide Removing the Duplexer Apr 02...
-
Page 145: Using The 500 Sheet Feeder
In this Chapter . . . • “About the 500 Sheet Feeder” on page 7-2 • “Installing the 500 Sheet Paper Feeders” on page 7-3 • “Testing the 500 Sheet Feeder” on page 7-10 • “Selecting Print Media” on page 7-10 •... -
Page 146: About This Chapter
At the start of a print run the feeder motor switches on and begins to feed a sheet of paper out of a selected tray. Rubber rollers drive the sheet out of the tray, through the feeder, and into the printer. -
Page 147: Installing The 500 Sheet Paper Feeders
Use the following procedure to install one paper feeder: WARNING: Before installing any options, turn the printer off by pressing [ O ] on the power switch on the right side of the unit and disconnect the power cord from the AC outlet. These precautions are necessary to avoid the risk of electric shock. - Page 148 Compuprint PageMaster 402N User Guide Installing the 500 Sheet Paper Feeders Turn the printer off by pressing [ O ] on the power switch on the right side of the unit, and disconnect the power cord from the AC outlet.
- Page 149 Align the three holes on the bottom of the printer with the three pegs on the paper feeder, and lower the printer onto the paper feeder. NOTE: Be sure to lower the printer gently. Components inside the printer may be damaged by lowering the printer quickly.
-
Page 150: Installing Two Paper Feeders
Insert the paper tray all the way into the paper feeder, making sure the tray is properly seated. Insert the plug of the power cord into the AC outlet, and turn the printer on by pressing [ I ] on the power switch on the right side of the printer. - Page 151 Insert the two thumbscrews supplied with the paper feeder into the two holes on the base of the upper paper feeder and turn them until tight. Apr 02 Compuprint PageMaster 402N User Guide 7-7 Installing the 500 Sheet Paper Feeders...
- Page 152 Compuprint PageMaster 402N User Guide Installing the 500 Sheet Paper Feeders Turn the printer off by pressing [ O ] on the power switch on the right side of the unit, and disconnect the power cord from the AC outlet.
- Page 153 Lift the printer and lower it onto the two stacked paper feeders, aligning the three stubs on the upper paper feeder with the holes on the bottom of the printer. NOTE: Be sure to lower the printer gently. Components inside the printer may be damaged by lowering it quickly.
-
Page 154: Testing The 500 Sheet Feeder
Turn the printer on by pressing the [ I ] on the power switch on the right side of the printer. Once the printer has warmed up and displays the “Ready” message on the control panel dis- play, use any software application to print a few sheets from each of the feeder trays. -
Page 155: Correct Paper Storage
Is a sheet of labels that has the backing sheet exposed between individual labels Correct Paper Storage It is important to store paper correctly prior to placing it in the printer, since improper storage can cause frequent paper jams and poor print quality. Use the following guidelines when storing paper for use in the printer: •... -
Page 156: Print Media Weight, Type, And Size
(LEF) or short edge feed (SEF). If you have concerns about a specific brand or type of media, try samples of the media to determine if the resulting printer performance and print quality meet your expectations. Paper Source... -
Page 157: Loading Print Media
The procedure for loading paper shown below illustrates the process using the A4/letter paper tray; however, the procedure is the same for the A3/ledger paper tray. Apr 02 Compuprint PageMaster 402N User Guide 7-13 Weight Paper Type and Feed Direction 16 to 24 lbs. - Page 158 7-14 Compuprint PageMaster 402N User Guide Loading Print Media Use the following procedure to load paper into the 500 sheet A4/letter or A3/ledger paper tray: Apr 02...
- Page 159 To avoid paper jams and other paper transportation problems, make sure the length and width guides are adjusted to match the paper size and are locked firmly into place. Apr 02 Compuprint PageMaster 402N User Guide 7-15 Loading Print Media...
-
Page 160: Solving 500 Sheet Feeder Problems
Solving 500 Sheet Feeder Problems Solving 500 Sheet Feeder Problems When there is a problem with the 500 sheet feeder, the printer control panel displays an error code and error message. Most paper feeder error codes indicate routine status conditions such as a paper tray running out of paper or a paper jam in a specific area of the paper feeder. -
Page 161: Interpreting Paper Feeder Error Messages
Turn the printer off by pressing the [ O ] on the power switch on the right side of the printer. Apr 02... -
Page 162: Clearing An E1, E2-1 Or E2-2 Paper Jam
• If the printer is not operational when the feeder is not attached, refer to Chapter 5: Trou- bleshooting. After correcting the printer problem, return to Chapter 7: Using the 500 Sheet Feeder to reinstall the feeder. - Page 163 Compuprint PageMaster 402N User Guide 7-19 Solving 500 Sheet Feeder Problems If the jam occurred while feeding from Tray 2 or 3, remove the paper tray associated with that feeder and inspect the inside of the paper tray well, removing any jammed paper.
- Page 164 7-20 Compuprint PageMaster 402N User Guide Solving 500 Sheet Feeder Problems Open the rear door of the feeder for tray 2 or tray 3 and remove any jammed paper, then close the rear door of the feeder Apr 02...
- Page 165 Remove the front tray by lifting up slightly and pulling the tray out from the printer. Remove the toner cartridge. Remove any jammed paper from the toner cartridge well. Apr 02 Compuprint PageMaster 402N User Guide 7-21 Solving 500 Sheet Feeder Problems...
- Page 166 7-22 Compuprint PageMaster 402N User Guide Solving 500 Sheet Feeder Problems Reinsert the front tray into the printer. Reload any paper into the front tray. Close the front tray cover. Apr 02...
-
Page 167: Correcting Miscellaneous Paper Feeder Problems
Some paper feeder problems may not cause an error message and may not interfere with the opera- tion of the printer. If you are experiencing one of the problems listed below and there is no error message shown on the control panel display, refer to the procedures in the following sections to check the possible causes of the specific problem. - Page 168 Test the printer by printing a few sheets from the main tray. If you cannot print a sheet of paper from the main tray and the printer does not display an error code, go to main tray, proceed to the next step.
-
Page 169: Maintaining The 500 Sheet Feeder
Cleaning Feed Rolls Rubber feed rolls drive sheets of paper out of the feeder paper trays into the printer. These feed rolls wear with normal use and eventually become coated with paper dust and must be cleaned. Frequent feed jams in the front tray or main tray indicate that the feed rolls need to be cleaned. - Page 170 Turn the printer off by pressing the [ O ] on the power switch on the right side of the printer, and disconnect the AC power cord from the wall outlet.
- Page 171 Rotate the feed roll back into the feed position. Reinstall the feeder paper tray. Verify that the power switch of the printer is in the [O] (off) position, then insert the plug of the power cord into the AC outlet.
- Page 172 7-28 Compuprint PageMaster 402N User Guide Maintaining the 500 Sheet Feeder Turn the printer on by pressing [ I ] on the power switch on the right side of the printer. Apr 02...
-
Page 173: Moving The 500 Sheet Feeder
Use the following procedure to move the printer and 500 sheet feeder a long distance: Turn the printer off by pressing the [ O ] on the power switch on the right side of the printer. Unplug the AC power cord from the wall outlet and from the back of the printer. - Page 174 7-30 Compuprint PageMaster 402N User Guide Moving the 500 Sheet Feeder Apr 02...
-
Page 175: Using The High Capacity Feeder
In this Chapter . . . • “About this Chapter” on page 8-2 • “About the High Capacity Feeder” on page 8-2 • “Installing the High Capacity Feeder” on page 8-3 • “Testing the High Capacity Feeder” on page 8-10 •... -
Page 176: About This Chapter
Rubber rollers drive the sheet out of the tray, through the high capacity feeder, and into the printer. Sensors monitor the progress of the paper as it travels through the high capacity feeder. The high capacity feeder can be installed with either the Printer, or the Printer and one additional 500 Sheet Feeder (optional), as shown below. -
Page 177: Major Components Of The High Capacity Feeder
Use the following procedure to install the high capacity feeder and a paper feeder together:. WARNING: Before installing any options, turn the printer off by pressing [ O ] on the power switch on the right side of the unit and disconnect the power cord from the AC outlet. These precautions are necessary to avoid the risk of electric shock. - Page 178 Compuprint PageMaster 402N User Guide Installing the High Capacity Feeder Turn the printer off by pressing [ O ] on the power switch on the right side of the unit, and disconnect the power cord from the AC outlet. NOTE: Installing the high capacity feeder while the printer is on may damage the printer or the high capacity feeder.
- Page 179 Set aside the small plastic bag containing two thumbscrews. Remove the paper tray from the printer and from the paper feeder. Align the three small holes on the bottom of the paper feeder with the metal stubs on top of the high capacity feeder, and place the paper feeder on top of the high capacity feeder.
- Page 180 Compuprint PageMaster 402N User Guide Installing the High Capacity Feeder Align the small holes on the bottom of the printer with the metal stubs on top of the paper feeder, and lower the printer onto the paper feeder. Insert the two thumbscrews supplied with the paper feeder into the holes on the base of the printer and turn them until tight.
-
Page 181: Installing Only The High Capacity Feeder
AC outlet. These precautions are necessary to avoid the risk of electric shock. Turn the printer off by pressing [ O ] on the power switch on the right side of the unit, and disconnect the power cord from the AC outlet. - Page 182 Installing the High Capacity Feeder NOTE: Installing the high capacity feeder unit while the printer is on may damage the printer or the high capacity feeder. Remove the high capacity feeder from its packaging and place it on a level surface. Remove any cardboard inserts and packing tape.
- Page 183 Align the three small holes on the bottom of the printer with the metal stubs on top of the high capacity feeder, and place the printer on top of the high capacity feeder. Insert the two thumbscrews supplied with the high capacity feeder into the holes on the base of the printer and turn them until tight.
-
Page 184: Testing The High Capacity Feeder
After installing the high capacity feeder, use the following test procedure to verify that the feeder is operating correctly. Turn the printer on by pressing the [ I ] on the power switch on the right side of the printer. Once the printer has warmed up and displays the “Ready” message on the control panel dis- play, use any software application to print a few sheets from the high capacity feeder. -
Page 185: Correct Paper Storage
Correct Paper Storage It is important to store paper correctly prior to placing it in the printer, since improper storage can cause frequent paper jams and poor print quality. Use the following guidelines when storing paper for use in the printer: •... - Page 186 8-12 Compuprint PageMaster 402N User Guide Loading Paper into the High Capacity Feeder Hold a stack of paper with both hands as illustrated in the figure below. Gently place the paper into the paper tray. Make sure the paper stack does not exceed the maximum paper level shown on the high capacity feeder tray.
-
Page 187: Solving High Capacity Feeder Problems
Solving High Capacity Feeder Problems When there is a problem with the high capacity feeder, the printer control panel displays an error code and error message. Most high capacity feeder error codes indicate routine status conditions such as running out of paper or a paper jam. Some error codes indicate much more serious prob- lems that may require the help of a service technician. -
Page 188: Interpreting High Capacity Feeder Error Messages
Solving High Capacity Feeder Problems Interpreting High Capacity Feeder Error Messages The printer control panel displays error messages when there is a problem with the printer or any of the optional paper-handling components. The following table lists all of the error messages associ- ated with the high capacity feeder, the possible cause of the error, and the action to take to correct the problem. -
Page 189: Installation Problems
Turn the printer off by pressing the [ O ] on the power switch on the right side of the printer. Make sure that the printer is properly seated on the high capacity feeder. -
Page 190: Correcting Miscellaneous High Capacity Feeder Problems
Some high capacity feeder problems may not cause an error message and may not interfere with the operation of the printer. If you are experiencing one of the problems listed below and there is no error message shown on the control panel display, refer to the procedures in the following sections to check the possible causes of the specific problem. - Page 191 Test the printer by printing a few sheets from the main tray. If you cannot print a sheet of paper from the main tray and the printer does not display an error code, go to main tray, proceed to the next step.
- Page 192 Compuprint PageMaster 402N User Guide Solving High Capacity Feeder Problems Interlock switches monitor the position of printer doors and covers. When a door is closed, the interlock switch is activated and the high capacity feeder can operate. When a door is open, the interlock switch is not activated and the high capacity feeder cannot operate.
-
Page 193: Maintaining The High Capacity Feeder
Turn the printer off by pressing the [ O] on the power switch on the right side of the printer. Remove the plug of the AC power cord from the AC wall outlet. -
Page 194: Cleaning Feed Rolls
Frequent feed jams in the front tray or main tray indicate that the feed rolls need to be cleaned. Turn the printer off by pressing the [ O ] on the power switch on the right side of the printer. Unplug the AC power cord from the AC wall outlet. -
Page 195: Moving The High Capacity Feeder
Connect the plug of the AC power cord into the AC wall outlet. Turn the printer on by pressing the [ I ] on the power switch on the right side of the printer. Moving the High Capacity Feeder Moving the High Capacity Feeder a Short Distance Use the following procedure to move the high capacity feeder a short distance: Turn the printer off by pressing the [ O ] on the power switch on the right side of the printer. - Page 196 8-22 Compuprint PageMaster 402N User Guide Moving the High Capacity Feeder Repack the high capacity feeder into the original shipping box. CAUTION: The high capacity feeder is heavy. Do not attempt to lift the high capacity feeder by yourself. Once the high capacity feeder is in the new location, refer to Feeder”...
-
Page 197: Using The Stacker
• “About this Chapter” on page 9-2 • “About the Stacker” on page 9-2 • “Installing the Stacker” on page 9-3 • “Testing the Stacker” on page 9-8 • “Solving Stacker Problems” on page 9-8 • “Maintaining the Stacker” on page 9-14 •... -
Page 198: About The Stacker
About the Stacker The Stacker is an optional output tray that attaches to the top rear of the printer and can hold up to 500 printed sheets. The printer supplies all of the operating power that is needed by the Stacker. -
Page 199: Major Components Of The Stacker
Throughout this procedure, the different sides of the printer are referred to as front, rear, left, and right. The front of the printer is the side that holds the control panel. The left and right sides are those to the left and right, respectively, of a person facing the front of the printer. - Page 200 Remove any cardboard inserts or packing tape from the interior and exterior of the stacker. Turn the printer off by pressing [ O ] on the power switch on the right side of the unit, and disconnect the power cord from the AC outlet.
- Page 201 Pull on the recessed area near the top of the rear of the printer to open the rear cover. Insert the tabs on the stacker paper diverter into the matching holes on the right side of the rear cover.
- Page 202 Connect the wiring on the stacker paper diverter to the rear cover. Remove the small cover on the left side of the top of the printer. Gently lower the stacker onto the printer while inserting the metal fittings of the stacker into the slots on the printer.
- Page 203 Tighten the screw attached to the right metal fitting of the stacker. Close the rear cover of the printer. Attach the paper output tray to the stacker. Apr 02 Compuprint PageMaster 402N User Guide 9-7 Installing the Stacker...
-
Page 204: Testing The Stacker
After installing the stacker, use the following test procedure to verify that it is operating correctly. Turn the printer on by pressing the [ I ] on the power switch on the right side of the printer. Once the printer has warmed up and displays the “Ready” message on the control panel dis- play, use any software application to print a few sheets to the stacker. -
Page 205: Interpreting Stacker Error Messages
Turn the printer off by pressing the [ O ] on the power switch on the right side of the printer. Make sure that the stacker is firmly attached to the printer and that the wiring attaching the paper diverter to the printer is intact. -
Page 206: Clearing An Stacker Paper Jam
9-10 Compuprint PageMaster 402N User Guide Solving Stacker Problems Clearing an Stacker Paper Jam If an E8 error code precedes the error message on the first line of the control panel display, paper has jammed at the stacker. Use the following procedure to clear a paper jam in this location: Pull on the hand grip on the rear of the stacker to open the rear cover. -
Page 207: Correcting Miscellaneous Stacker Problems
Some stacker problems may not cause an error message and may not interfere with the operation of the printer. If you are experiencing one of the problems listed below and there is no error message shown on the control panel display, refer to the procedures in the following sections to check the possible causes of the specific problem. - Page 208 Open and then firmly close all of the printer and stacker doors and covers. Interlock switches monitor the position of printer doors and covers. When a door is closed, the interlock switch is activated and the stacker can operate. When a door is open, the inter- lock switch is not activated and the stacker cannot operate.
- Page 209 Compuprint PageMaster 402N User Guide 9-13 Solving Stacker Problems Broken components or scraps of paper lodged inside the stacker may be wedged against mov- ing parts, preventing the offset roll from moving. Call your service technician. This problem may be caused by a malfunctioning or broken component that requires service.
-
Page 210: Maintaining The Stacker
Use the following procedure to move the stacker a short distance: Turn the printer off by pressing the [ O ] on the power switch on the right side of the printer. Disconnect the plug of the AC power cord from the AC wall outlet. -
Page 211: Moving The Stacker
Disconnect the printer from the host computer. Remove the paper diverter from the stacker. Remove the stacker cover from the top rear of the printer and replace it with the original printer cover. Remove the output paper tray from the stacker. - Page 212 9-16 Compuprint PageMaster 402N User Guide Moving the Stacker Apr 02...
-
Page 213: Appendix A Safety Notes And Regulatory Compliance
In this Chapter . . . • “About this Appendix” on page A-2 • “Safety Notes” on page A-2 • “Regulatory Compliance” on page A-2 Apr 02 Safety Notes and Regulatory Compliance... -
Page 214: About This Appendix
Safety Notes • Be sure to switch off and unplug the printer before accessing the interior of the printer for cleaning, maintenance, or fault clearance. Accessing the interior of a live machine exposes you to the risk of electric shock. -
Page 215: Emc Compliance
• AS/NZS 3548:1995 including A1:1997 and A2:1997 • EN55022: 1994 including A1:1995 and A2:1997 • FCC Part 15, Subpart B (CFR 47, 1995) • CISPR22: 1993 including A1:1995 and A2:1996 Apr 02 Compuprint PageMaster 402N User Guide A-3 Regulatory Compliance... - Page 216 Compuprint PageMaster 402N User Guide Regulatory Compliance Apr 02...
Need help?
Do you have a question about the PageMaster 402N and is the answer not in the manual?
Questions and answers