
Related Manuals for HOMCOM 821-017V90


Summary of Contents for HOMCOM 821-017V90
- Page 1 IN221101109V01_UK_FR_DE 821-017V90 821-017V70 821-017V91 821-017V71 IMPORTANT, RETAIN FOR FUTURE REFERENCE: READ CAREFULLY INSTRUCTION MANUAL...
-
Page 2: Product Description
EN_1. BEFORE YOU BEGIN Please read the operating instructions carefully before using your dehumidifier for the first time. 1.1 PRODUCT DESCRIPTION The dehumidifier is used to remove excessive moisture from the air. The resulting reduction in relative humidity protects buildings and their contents from the adverse effects of excess humidity. -
Page 3: The Following Should Always Be Observed For Safety
1.2 THE FOLLOWING SHOULD ALWAYS BE OBSERVED FOR SAFETY ⚫ This appliance is intended to be used by expert or trained users in shops, in light industry and on farms, or for commercial use by lay persons. ⚫ This appliance can be used by children aged from 8 years and above and persons with reduced physical, sensory or mental capabilities or lack of experience and knowledge if they have been given supervision or instruction concerning use of the appliance in a safe way and understand the hazards involved. -
Page 4: For Your Safety
2. FOR YOUR SAFETY Your safety is the most important thing we concerned! Please read this manual carefully and fully understand before operating your dehumidifier. OPERATIONALPRECAUTIONS WARNING- to reduce the risk of fire, electric shock or injury to persons or property: ⚫... - Page 5 ⚫ Do not use means to accelerate the defrosting process or to clean, other than those recommended by the manufacture. ⚫ The appliance shall be stored in a room without continuously operation sources (for example: open flames, an operating gas appliance or an operating electric heater). ⚫...
- Page 6 SAFETY PRECAUTIONS ON SERVICING Please follow these warnings when to undertake the following when servicing a dehumidifier with R290. 2.2.1 Checks to the area Prior to beginning work on systems containing flammable refrigerants, safety checks are necessary to ensure that the risk of ignition is minimized. For repair to the refrigerating system, the following precautions shall be complied with prior to conducting work on the system.
- Page 7 2.2.7 Ventilated area Ensure that the area is in the open or that it is adequately ventilated before breaking into the system or conducting any hot work. A degree of ventilation shall continue during the period that the work is carried out. The ventilation should safely disperse any released refrigerant and preferably expel it externally into the atmosphere.
-
Page 8: Product Overview
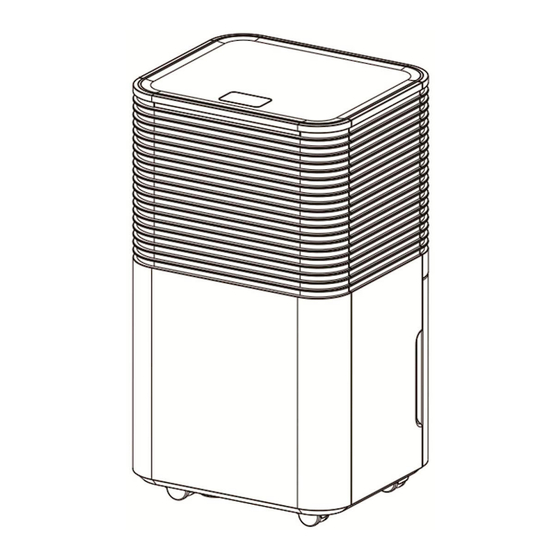
3. PRODUCT OVERVIEW 3.1 PRODUCT VIEW... -
Page 9: Installation
4. INSTALLATION 4.1 LOCATION 1. Place the unit on a firm, level surface in an area with at least 30cm of free space around it to allow for proper air circulation. 2. Never install the unit where it could be subject to: ⚫... -
Page 10: Operating The Device Safely
4.2 OPERATING THE DEVICE SAFELY ⚫ Check the device after unpacking for any damages or scratches on it. Operate this unit in an ambient temperature from 5°C to 35°C. ⚫ ⚫ Do not use in the outdoors. This dehumidifier is intended for indoor residential applications only. -
Page 11: Operation
5. OPERATION CONTROL PANEL After switching on the power, all the indicators and the screen will be on for 1 second and then off. After a buzzer, the power indicator will be on and the machine will be in standby mode. Press this button, the machine starts to run, the machine initial humidity is 60%RH, default automatic mode and high wind operation. - Page 12 In automatic mode or sleep mode, you can operate this key to adjust the set humidity: every time you press the set humidity increase by 5%, according to the cycle of 30%-80%. Long press this key to query the current room temperature, double eight lights display the current room temperature 5 seconds after the automatic return to display the current humidity.
- Page 13 3 Color Digital DispLay: Ambient Humidity<45%, The light show Blue 45≤Ambient Humidity≤65% ,The light show Green Ambient Humidity>65% ,The light show Red If the LED display E0、E2、CL、CH、LO、HI, the light will show red. : DRAINAGE EMPTYING THE WATER TANK When the tank is full, The unit will make a buzzing sound, and the “Water Full” light will turn ⚫...
-
Page 14: Continuous Draining
1. Do not discard water tank magnets and plastic rivets. Otherwise, the machine will not automatically stop working when the water tank is full, and the condensed water will overflow and damage the floor of the room. 2. Please be sure to clean the condensed water in the water tank before resetting the working mode of the machine. -
Page 15: Maintenance
Warning 1. Please do not block the drain or drain pipe, if the phenomenon of blocking, condensed water will flow into the water tank. 2. Please do not bend the drain pipe. The height of the drain pipe should be lower than the outlet. 3. - Page 16 2.Use a vacuum cleaner to gently absorb the dust on the surface. If the filter is very dirty, wash it with water and a soft detergent and dry it thoroughly afterwards. 3.Put the filter back.
-
Page 17: Troubleshooting
TROUBLE SHOOTING FUNCTIONING TEMP. 5° C ≤ Ambient Temp. ≤ 35° C When the ambient temp is lower or higher than the functioning temp, the dehumidifier stops. When 5°C ≤ Ambient temp. ≤ 16°C, the compressor automatically defrosts at intervals; during defrosting, the compressor stops and the fan keeps running. - Page 18 DECOMMISSIONING STORAGE Long-term storage - If you will not be using the unit for an extended period of time (more than a few weeks) it is best to clean the unit and dry it out completely. Please store the unit per the following steps: Press power button to switch off and unplug the unit.
-
Page 19: Description Du Produit
FR_1. AVANT DE COMMENCER Veuillez lire attentivement le mode d'emploi avant d'utiliser votre dé shumidificateur pour la premiè re fois. 1.1 DESCRIPTION DU PRODUIT Le dé shumidificateur est un appareil destiné à é liminer l'humidité excessive de l'air. La ré duction de l'humidité... - Page 20 1.2 POUR DES RAISONS DE SÉCURITÉ, LES CONSIGNES SUIVANTES DOIVENT TOUJOURS ÊTRE OBSERVÉES ⚫ Cet appareil est destiné à ê tre utilisé par des utilisateurs experts ou formé s dans des magasins, dans l'industrie lé gè re et dans les exploitations agricoles, ou à des fins commerciales par des personnes non spé...
-
Page 21: Pour Votre Sécurité
sans é tincelle. Les piè ces composantes ne doivent ê tre remplacé es que par des piè ces de ré paration identiques. LE NON-RESPECT DE CETTE MISE EN GARDE PEUT ENTRAÎ NER UNE EXPLOSION, DES DOMMAGES MATÉRIELS, DES BLESSURES ET MÊME LA MORT. 2. - Page 22 ⚫ Ne pas utiliser de rallonge ou d'adaptateur. ⚫ Ne pas poser d'objets sur l'appareil. ⚫ Ne pas monter ou s'asseoir sur l'appareil. ⚫ Ne pas introduire les doigts ou d'autres objets dans la sortie d'air. ⚫ Ne pas toucher l'entré e d'air ou les ailettes en aluminium de l'appareil. ⚫...
- Page 23 L'entretien doit ê tre effectué uniquement selon les recommandations du fabricant de l'é quipement. L'entretien et la ré paration né cessitant l'aide d'autres personnes qualifié es doivent ê tre effectué s sous la supervision de la personne compé tente dans l'utilisation des ré frigé rants inflammables. En cas d'incompré...
- Page 24 Quiconque intervient sur un systè me de ré frigé ration qui implique l'exposition à un tuyau contenant ou ayant contenu un fluide frigorigè ne inflammable ne doit pas utiliser de sources d'inflammation susceptibles d'entraî ner un risque d'incendie ou d'explosion. Toutes les sources d'inflammation possibles, y compris la cigarette, doivent ê...
-
Page 25: Aperçu Du Produit
né cessaire de poursuivre l'exploitation, une solution temporaire adé quate doit ê tre utilisé e. Cette solution doit ê tre signalé e au proprié taire de l'é quipement afin que toutes les parties soient informé es. Le contrô le initial de sé curité doit porter sur les points suivants: -Que les condensateurs sont dé... - Page 26 Sortie d'air Boî tier arriè re Poigné e Entré e d'air avec Filtre à air Cordon d'alimentation Ré servoir d'eau Orifice de drainage continu Panneau gauche 4. INSTALLATION 4.1 EMPLACEMENT 3. Disposer l'appareil sur une surface ferme et plane, dans un endroit où il y a au moins 30 cm d'espace libre autour de lui pour permettre une bonne circulation de l'air.
- Page 27 AVERTISSEMENT Installer l'appareil dans des piè ces de plus de 4 m² . Ne pas installer l'unité dans un endroit où peuvent s'é chapper des gaz inflammables REMARQUE Le fabricant pourrait vous proposer un autre exemple approprié ou vous fournir des informations supplé mentaires sur l'odeur du ré...
-
Page 28: Panneau De Commande
⚫ Ne pas faire fonctionner l'appareil ou le ranger exposé à la lumiè re directe du soleil ou à la pluie. ⚫ Il est normal que la sortie d'air soit chaude au toucher aprè s un fonctionnement continu pendant les journé... - Page 29 ● Mode Auto: Lorsque l'humidité ambiante ≥ l'humidité réglée +3%, le ventilateur commence à fonctionner et le compresseur commence à fonctionner au bout de 3 secondes. Lorsque l'humidité ambiante ≤ l'humidité réglée -3%, le compresseur cesse de fonctionner ainsi que le ventilateur quelques secondes aprè...
- Page 30 La vitesse du ventilateur ne peut ê tre ré glé e qu'en mode automatique. Appuyez sur cette touche pour passer de la vitesse é levé e à la vitesse faible. L'indicateur de vitesse du ventilateur correspondant s'allume. Appuyez longuement sur cette touche pour activer la fonction de sé curité enfants. L'indicateur de la sé...
- Page 31 ⚫ Si l'indicateur "Eau Pleine" ne s'é teint pas, vé rifiez que le flotteur est bien en place. AVERTISSEMENT 5. Ne jetez pas les aimants du ré servoir d'eau et les rivets en plastique. Sinon, la machine ne s'arrê tera pas automatiquement lorsque le ré...
- Page 32 salle de bain, à l'exté rieur ou à un ré cipient de type seau, ou à la zone de drainage indiqué e. AVERTISSEMENT 4. Veuillez ne pas bloquer le drain ou le tuyau de drainage, en cas de blocage, l'eau condensé e s'é coulera dans le ré...
- Page 33 2. Utilisez un aspirateur pour absorber dé licatement la poussiè re sur la surface. Si le filtre est trè s sale, lavez-le avec de l'eau et un dé tergent doux, puis sé chez-le soigneusement. 3. Remettez le filtre en place.
-
Page 34: Dépannage
DÉPANNAGE TEMPÉRATURE DE FONCTIONNEMENT 5°C ≤ Température ambiante ≤ 35°C Lorsque la tempé rature ambiante est infé rieure ou supé rieure à la tempé rature de fonctionnement, le dé shumidificateur s'arrê te. Lorsque 5°C ≤ Température ambiante ≤ 16°C, le compresseur dégivre automatiquement à intervalles; pendant le dé... - Page 35 fonctionnem instructions. Le conduit d'admission ou le Retirez l'obstruction du conduit d'admission conduit d'é vacuation est-il ou le conduit d'é vacuation. obstrué ? Pas d'entré e Le filtre est-il obstrué ? Lavez le filtre d'air Bruit La machine est-elle posé e sur Posez la machine sur le sol plat important une surface plane?
-
Page 36: Mise Au Rebut
sec et ouvert pendant plusieurs jours pour le sé cher. Une autre faç on de sé cher l'unité est de ré gler le point d'humidité à plus de 5 % au-dessus de l'humidité ambiante pour forcer le ventilateur à sé cher l'é... - Page 37 DE_1. BEVOR SIE BEGINNEN Bitte lesen Sie die Bedienungsanleitung sorgfä ltig durch, bevor Sie Ihren Luftentfeuchter zum ersten Mal verwenden. 1.1 PRODUKTBEZEICHNUNG Der Luftentfeuchter dient dazu, ü berschü ssige Feuchtigkeit aus der Luft zu entfernen. Die daraus resultierende Reduzierung der relativen Luftfeuchtigkeit schü tzt Gebä ude und Einrichtungen vor den negativen Auswirkungen von zu hoher Luftfeuchtigkeit.
- Page 38 1.2 ZUR SICHERHEIT SOLLTE FOLGENDES IMMER BEACHTET WERDEN ⚫ Dieses Gerä t ist fü r die Verwendung durch fachkundige oder geschulte Benutzer in Geschä ften, in der Leichtindustrie und in landwirtschaftlichen Betrieben oder fü r die gewerbliche Verwendung durch Nichtfachleute vorgesehen. ⚫...
-
Page 39: Zu Ihrer Sicherheit
2. ZU IHRER SICHERHEIT Ihre Sicherheit ist uns Wichtig! Bitte lesen Sie dieses Handbuch sorgfä ltig durch und machen Sie sich mit ihm vertraut, bevor Sie Ihren Luftentfeuchter in Betrieb nehmen. 2.1 BETRIEBLICHE VORSICHTSMASSNAHMEN WARNUNG - Um das Risiko eines Brandes, eines Stromschlags oder einer Verletzung von Personen oder Sachschä den zu verringern, beachten Sie folgende Punkte: ⚫... - Page 40 ⚫ Stellen Sie sicher, dass das Gerä t weit entfernt von Feuer, brennbaren oder explosiven Gegenstä nden steht. ⚫ Das Gerä t muss in Übereinstimmung mit den nationalen Verkabelungsvorschriften installiert werden. ⚫ Verwenden Sie keine anderen als die vom Hersteller empfohlenen Mittel zur Beschleunigung des Abtauvorgangs oder zur Reinigung.
- Page 41 2.4 SICHERHEITSVORKEHRUNGEN BEI DER WARTUNG Bitte beachten Sie diese Warnhinweise, wenn Sie bei der Wartung eines Luftentfeuchters mit R290 die folgenden Arbeiten durchfü hren. 2.2.1 Umgebungskontrollen Vor dem Beginn von Arbeiten an Systemen, die entflammbare Kä ltemittel enthalten, sind Sicherheitskontrollen erforderlich, um sicherzustellen, dass das Risiko einer Entzü ndung minimiert wird. Bei Reparaturen an der Kä...
- Page 42 sicherzustellen, dass keine brennbaren Gefahren oder Zü ndgefahren vorhanden sind. Es sind „Rauchverbot“-Schilder anzubringen. 2.2.7 Belü fteter Bereich Stellen Sie sicher, dass der Bereich im Freien liegt oder ausreichend belü ftet ist, bevor Sie das System unterbrechen oder Heiß arbeiten durchfü hren. Ein gewisses Maß an Belü ftung muss wä hrend der Durchfü...
- Page 43 3. PRODUKTÜBERSICHT 3.3 PRODUKTANSICHT Bedienfeld 3-Farben-Digitalanzeige Rechte Platte Vorderes Gehä use Laufrad Luftauslass Rü ckwand Handgriff Lufteinlass mit Luftfilter Netzkabel Wassertank Kontinuierliche Entwä sserung Linke Platte...
-
Page 44: Montage
4. MONTAGE 4.1 STANDORT 5. Stellen Sie das Gerä t auf eine feste, ebene Flä che mit einem Freiraum von mindestens 30 cm um es herum, um eine gute Luftzirkulation zu gewä hrleisten. 6. Stellen Sie das Gerä t niemals an einem Ort auf, an es Folgendem ausgesetzt sein kö nnte: ⚫... -
Page 45: Sicherer Betrieb Des Geräts
4.2 SICHERER BETRIEB DES GERÄTS ⚫ Prü fen Sie das Gerä t nach dem Auspacken auf eventuelle Schä den oder Kratzer am Gerä t. ⚫ Betreiben Sie das Gerä t bei einer Umgebungstemperatur von 5 ° C bis 35 ° C. ⚫... -
Page 46: Betrieb
5. BETRIEB BEDIENFELD POWER Nach dem Einschalten des Gerä ts leuchten alle Anzeigen und der Bildschirm 1 Sekunde lang auf und erlö schen dann. Nach einem Signalton leuchtet die Betriebsanzeige auf und das Gerä t befindet sich im Standby-Modus. Drü cken Sie diese Taste, das Gerä t beginnt zu laufen, die anfä ngliche relative Luftfeuchtigkeit beträ gt 60 %, Standard-Automatik-Modus und hoher Umluftbetrieb. - Page 47 Im Automatik- oder Schlafmodus kö nnen Sie mit dieser Taste die eingestellte Luftfeuchtigkeit einstellen: bei jedem Drü cken erhö ht sich die eingestellte Luftfeuchtigkeit um 5 %, entsprechend dem Zyklus von 30 %-80 %. Drü cken Sie diese Taste lange, um die aktuelle Raumtemperatur abzufragen, doppelte acht Leuchten zeigen die aktuelle Raumtemperatur 5 Sekunden nach der automatischen Rü...
- Page 48 Digitale Farbanzeige: Umgebungsluftfeuchtigkeit < 45 %, die Leuchte zeigt blau 45 ≤ Umgebungsluftfeuchtigkeit ≤ 65 %, die Leuchte zeigt grün Umgebungsluftfeuchtigkeit> 65 %, die Leuchte zeigt rot Wenn das LED E0, E2, CL, CH, LO, HI anzeigt, zeigt die Leuchte rot. ENTWÄSSERUNG: ENTLEEREN DES WASSERTANKS ⚫...
- Page 49 Warnung Werfen Sie die Magnete des Wassertanks und die Kunststoffnieten nicht weg. Andernfalls schaltet sich das Gerä t nicht automatisch ab, wenn der Wassertank voll ist, und das Kondenswasser lä uft ü ber und beschä digt den Boden des Raums. Bitte stellen Sie sicher, dass das Kondenswasser im Wassertank gereinigt wird, bevor Sie den Betriebsmodus des Gerä...
-
Page 50: Wartung
Warnung Bitte blockieren Sie den Abfluss oder das Abflussrohr nicht, da sonst Kondenswasser in den Wassertank fließ t. Bitte biegen Sie das Abflussrohr nicht. Die Hö he des Abflussrohrs sollte niedriger als der Auslass sein. Das Abflussrohr muss fest mit dem Auslass verbunden sein; WARTUNG Hinweis: Schalten Sie das Gerä... - Page 51 2. Verwenden Sie einen Staubsauger, um den Staub auf der Oberflä che vorsichtig aufzusaugen. Wenn der Filter stark verschmutzt ist, waschen Sie ihn mit Wasser und einem sanften Reinigungsmittel und trocknen Sie ihn anschließ end grü ndlich. 3. Setzen Sie den Filter wieder ein.
-
Page 52: Fehlerbehebung
FEHLERBEHEBUNG ARBEITSTEMP. 5 °C ≤ Umgebungstemp. ≤ 35 °C Wenn die Umgebungstemperatur niedriger oder hö her als die Betriebstemperatur ist, schaltet sich der Luftentfeuchter ab. Wenn 5 °C ≤ Umgebungstemp. ≤ 16 °C, taut der Kompressor automatisch in Intervallen ab; während des Abtauens stoppt der Kompressor und der Ventilator lä... - Page 53 Funktion Ist der Ansaug- oder Entfernen Sie die Verstopfung im Ansaug- Ausblaskanal verstopft? oder Ausblaskanal. Keine Luftansaugu Ist der Filter verstopft? Waschen Sie den Filter Steht die Maschine auf einem Lautes Stellen Sie das Gerä t auf den Boden ebenen Platz? Gerä...
- Page 54 ENTSORGUNG WARNUNG!!! Das Freisetzen von Kä ltemittel in die Atmosphä re ist strengstens untersagt! Entsorgen Sie Elektrogerä te nicht als unsortierten Hausabfall, sondern nutzen Sie separate Sammelstellen. Wenden Sie sich an Ihre Gemeindeverwaltung, um Informationen ü ber die verfü gbaren Sammelsysteme zu erhalten.
Need help?
Do you have a question about the 821-017V90 and is the answer not in the manual?
Questions and answers
what setting do i put the de-humidifier on to dry laundry
The "Continuously drying mode" should be used on the HOMCOM 821-017V90 dehumidifier to dry laundry. In this mode, the machine runs continuously without allowing humidity adjustment.
This answer is automatically generated