Table of Contents
Advertisement
INcjd042_UK
821-012
INSTRUCTIONS FOR DEHUMIDIFIER 20 L
Manufactured to a high standard, this product will, if used according to these
instructions, and properly maintained, give you years of trouble free performance.
lMPORTANT: PLEASE READ THESE INSTRUCTIONS CAREFULLY. NOTE THE
SAFE OPERATIONAL REQUIREMENTS & WARNINGS & CAUTIONS. USE THE
PRODUCT CORRECTLY AND WITH CARE FOR THE PURPOSE FOR WHICH IT IS
INTENDED. FAILURE TO Do SO MAY CAUSE DAMAGE AND /OR PERSONAL
INJURY AND WILL INVALIDATE THE WARRANTY.
Pictures inside are for reference only, details shall be in accordance with final
product.
READ AND SAVE THIS INSTRUCTION FOR FUTURE USE
USER MANUAL
1
Advertisement
Table of Contents

Subscribe to Our Youtube Channel
Related Manuals for HOMCOM 821-012


Summary of Contents for HOMCOM 821-012
- Page 1 INcjd042_UK 821-012 INSTRUCTIONS FOR DEHUMIDIFIER 20 L Manufactured to a high standard, this product will, if used according to these instructions, and properly maintained, give you years of trouble free performance. lMPORTANT: PLEASE READ THESE INSTRUCTIONS CAREFULLY. NOTE THE SAFE OPERATIONAL REQUIREMENTS & WARNINGS & CAUTIONS. USE THE PRODUCT CORRECTLY AND WITH CARE FOR THE PURPOSE FOR WHICH IT IS INTENDED.
-
Page 2: Electrical Safety
1. SAFETY 1.1 ELECTRICAL SAFETY WARNING! It is the user ’ s responsibility to check the following: Check all electrical equipment and appliances to ensure that they are safe before using. Inspect power supply leads, plugs and all electrical connections for wear and damage. If the dehumidifier is used on business premises, it must be maintained in a safe condition and routinely PAT (Portable Appliance Test) tested. - Page 3 Use recommended parts only. Unauthorised parts may be dangerous and will invalidate the warranty. DO NOT stand or place any object within 10cm from the front of the unit, 40cm from the rear and sides of the unit, and 40cm above the unit. DO NOT obstruct the air intakes or outlets of the dehumidifier.
- Page 4 Before attempting to move the dehumidifier, empty the contents of the collection tank. Switch off and disconnect it from the mains before cleaning or other maintenance work. Ensure the dehumidifier is correctly turned off when not in use, and stored in a safe, dry area, out of reach of children.
-
Page 5: Specification
3. SPECIFICATION Model no.: ..........821-012 Power:…..........360W Supply: ...........220-240V Dehumidifying capacity: ......20L/day Working space: ........80mtr Maximum airflow: ...………………………200mtr3/hr Refrigerant: ..........R290A Condensate tank: ..………………………8L(with auto shut-off) Working temperature range: ....5-35℃ Weight: ...........15.5kgs 4. OPERATION 4.1 SITING REQUIREMENTS 4.1.1 Make sure there is at least 400mm of space behind and above the dehumidifie『 for operation. -
Page 6: Starting And Stopping
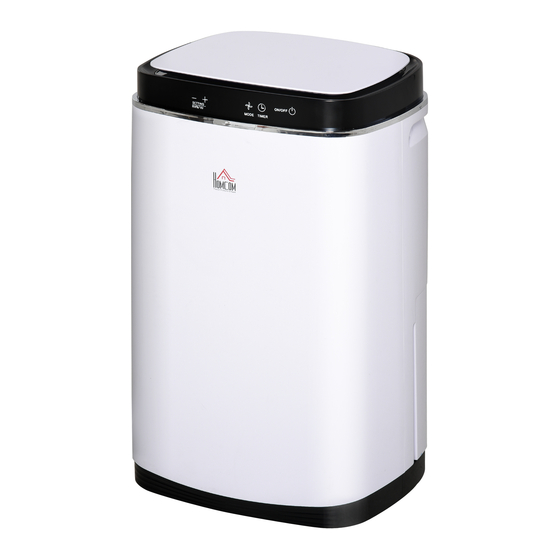
LED Display 一 • Front cover 4.2 STARTING AND STOPPING 4.2.1 Check the water tank is empty and in place 4.2.2 Each time the mains supply is switched off or there is an interruption to the power supply, the controls will go back to their original setting. 4.2.3. -
Page 7: Water Tank
4.2.7 Plug the unit into the mains supply. Press the ON/OFF button to turn the dehumidifier on (the power light is lit). 4.2.8 Press the “Mode” button, to choose the operation mode, sequentially: automatic, dry clothes, or continuous dehumidifying, defrosting, tank full (pre-set is automatic dehumidifying) 4.2.9 Press the humidity adjustment key to set the humidity (humidity adjustment is only effective in continuous mode), and the setting range is 25%-95%(5% pitch coefficient)-CO (forced... - Page 8 4.5 MODE SELECTION 4.5.1 Press the ON/OFF button to turn on then press Mode button. Scroll through: Automatic: Adjusts the fan speed automatically, in order to reach the most body’s most suitable (55%)relative humidity. When the environmental humidity is 70% or higher , the dehumidifier will operate automatically.
-
Page 9: Digital Display Screen
DIGITAL DISPLAY SCREEN 4.7.1 The screen will display the relative humidity and time ( depending on the setting). 4.7.2 When the dehumidifier is operating at the required humidity mode, the screen will display the environmental humidity. 4.7.3 After selecting the timing, the screen will display the running time which the dehumidifier is setting, 1-24 hours. -
Page 10: Troubleshooting
4.11 AIR FILTER NET 4.11.1 The filte「net needs to be cleaned every two weeks for effective operation of the dehumidifier. 4.11.2 Remove the plug from the mains supply. 4.11.3 Place finger into each of the recesses on the top edge of the filter and push down to allow the filter to be removed. - Page 11 Dehumidifying capacity is too weak: -Check the filter net is not blocked – remove and clean as per instructions if blocked -Dehumidifying capacity will be weaker if the temperature and humidity levels are too low -Check if air inlet is blocked- clean Expected humidity takes long to be reached: -Check whether doors and windows are open -Check if anything is producing vapour...
Need help?
Do you have a question about the 821-012 and is the answer not in the manual?
Questions and answers