Advertisement
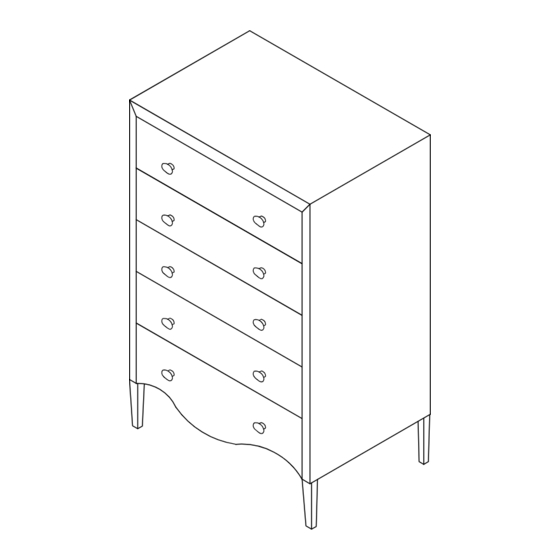
Murano 5 Drawer Chest
Assembly lnstructions - Please keep for future reference
332/6138
Dimensions
Depth - 50 cm
Width - 92 cm
Height - 122 cm
Important - Please read these instructions fully before starting assembly
If you need help or have damaged or missing parts, call the Customer Helpline: 0345 6400 800
Issue 1- 03-12-14
Advertisement
Table of Contents

Related Manuals for Argos Murano 332/6138


Summary of Contents for Argos Murano 332/6138
- Page 1 Murano 5 Drawer Chest Assembly lnstructions - Please keep for future reference 332/6138 Dimensions Depth - 50 cm Width - 92 cm Height - 122 cm Important - Please read these instructions fully before starting assembly If you need help or have damaged or missing parts, call the Customer Helpline: 0345 6400 800 Issue 1- 03-12-14...
- Page 2 Safety and Care Advice Important - Please read these instructions fully before starting assembly Check you have all the Assemble the item as close We do not components and tools listed on to its final position (in the same recommend the pages 2 and 3.
- Page 3 Components - Parts lf you have damaged or missing components. call the Customer Helpline: 0345 6400 800 1 Main body 2 Drawer (72.5 x 39.5 x 18cm) x 10 (50 x 92 x 122 cm) (Handles pre-assembled inside)
- Page 4 Components - Fittings 0345 6400 800 15 mm Dia Flat washer x 10 4 x 22 mm Screw x 10 18mm Dia Plastic washer x 10 Wall strap x 2 7x16mm Screw x 2 Drawer Handle x 10 All pre-assembled inside drawers Tools required Phillips Ruler/tape...
- Page 5 Assembly Instructions Attaching handles Pull out the drawers. Remove handles that have been pre-assembled inside the drawers. Inside drawer Re-secure handles to the outside of the drawers using fixings Inside drawer...
- Page 6 Assembly Instructions Fixing the wall Assemble wall straps to the back of the unit using screws With help, move the unit to the desired location. Mark the fixing hole locations on the wall and remove the unit. Drill the wall and fit suitable plugs for your wall type.
Need help?
Do you have a question about the Murano 332/6138 and is the answer not in the manual?
Questions and answers