
Related Manuals for DR 10 HP CHIPPER


Summary of Contents for DR 10 HP CHIPPER
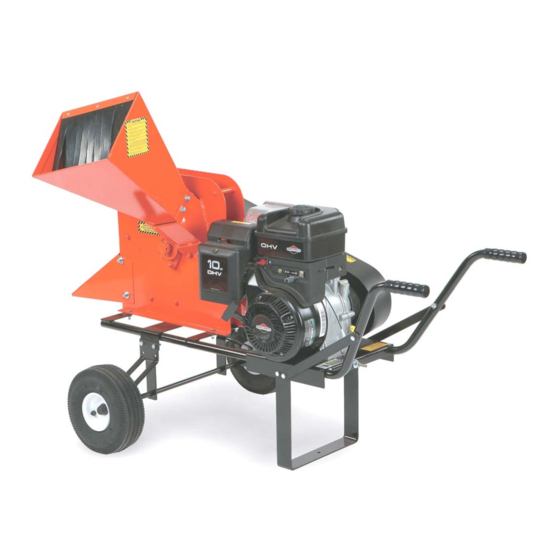
- Page 1 ® 10 HP CHIPPER SAFETY & OPERATING INSTRUCTIONS READ AND UNDERSTAND THIS MANUAL AND ALL INSTRUCTIONS BEFORE OPERATING THIS CHIPPER.
- Page 2 DR 10 HP CHIPPER! We have done our utmost to ensure that your DR 10 HP CHIPPER will be one of the most trouble-free and satisfying pieces of equipment you have ever owned. Please let us know of any questions you may have. We want to answer or correct them as quickly as possible.
-
Page 3: Table Of Contents
A Note to All Users ... 9 Additional Information and Potential Changes ... 9 CHAPTER 3 ... 11 SETTING UP YOUR DR 10 HP CHIPPER ... 11 Unpacking ... 11 Attaching the Chipper Hopper ... 13 Check the Tire Pressure ... 13 Adding the Engine Oil and Gasoline... - Page 4 ® 10 HP CHIPPER...
-
Page 5: Chapter 1
INTRODUCING THE DR 10 HP CHIPPER This manual will help you set up and safely operate your new DR 10 HP CHIPPER. Careful adherence to the safety and operating instructions in this manual will ensure many years of productive use. - Page 6 ® 10 HP CHIPPER...
-
Page 7: Chapter 2
Labels Your DR 10 HP CHIPPER carries prominent labels as reminders for its proper and safe use. Shown below are copies of all the labels that appear on the equipment. Take a moment to study them and make a note of their location on your DR 10 HP CHIPPER as you assemble and damaged or missing safety and information labels immediately. - Page 8 ® 10 HP CHIPPER ALWAYS turn OFF the engine, wait five (5) minutes to make certain the flywheel and all moving parts have come to a complete stop and cool and then disconnect the spark plug wire before opening this access panel. (#080-0970) To avoid injury, keep your hands and feet out of the Inlet and Discharge Chutes.
-
Page 9: Before Starting Engine
SEE OWNER’S MANUAL FOR ADDITIONAL OPERATING INSTRUCTIONS AND TIPS. The DR 10 HP CHIPPER is made in the U.S.A. (#091-0062) Always check the engine oil before starting the DR 10 HP CHIPPER. (#091-0256) Always use care when loading the DR 10 HP CHIPPER. -
Page 10: Protecting Yourself And Those Around You
• NEVER, UNDER ANY CONDITIONS, REMOVE, BEND, CUT, FIT, WELD, OR OTHERWISE ALTER STANDARD PARTS ON THE DR 10 HP CHIPPER. THIS INCLUDES ALL SHIELDS AND GUARDS. MODIFICATIONS TO YOUR MACHINE COULD CAUSE PERSONAL INJURIES AND PROPERTY DAMAGE AND WILL VOID YOUR WARRANTY. -
Page 11: Safety For Children And Pets
BE ALERT AND TURN THE MACHINE OFF IF CHILDREN OR PETS ENTER THE WORK AREA. • NEVER ALLOW CHILDREN TO OPERATE THE CHIPPER. Safety with Gasoline - Powered Engines GASOLINE IS A HIGHLY FLAMMABLE LIQUID. GASOLINE ALSO GIVES OFF FLAMMABLE VAPOR THAT CAN BE EASILY IGNITED AND CAUSE A FIRE OR EXPLOSION. -
Page 12: General Safety
OCCURRING TO OTHER PEOPLE, THEIR PROPERTY, AND THEMSELVES. • YOUR DR 10 HP CHIPPER IS A POWERFUL TOOL, NOT A PLAYTHING. EXERCISE EXTREME CAUTION AT ALL TIMES. THE DESIGN OF YOUR MACHINE IS TO CHIP WOOD. DO NOT USE IT FOR ANY OTHER PURPOSE. -
Page 13: A Note To All Users
RECOMMENDATION; SEE PAGE 21. PERSONAL INJURY OR DAMAGE TO THE MACHINE COULD RESULT. • WHILE USING THE DR 10 HP CHIPPER, DO NOT HURRY OR TAKE THINGS FOR GRANTED. WHEN IN DOUBT ABOUT THE EQUIPMENT OR YOUR SURROUNDINGS, STOP THE MACHINE AND TAKE THE TIME TO LOOK THINGS OVER. - Page 14 ® 10 HP CHIPPER...
-
Page 15: Chapter 3
CHAPTER 3 SETTING UP YOUR DR 10 HP CHIPPER This chapter outlines unpacking and a few simple steps you will need to follow to set up your new machine before you use it. If you have any questions at all, please feel free to contact our Customer Service Representatives at our toll free number: 1-800-DR-OWNER (376-9637). - Page 16 4. Compare the contents of the shipping carton and the Parts Box with the Parts Supplied list on the previous page. If any of the parts are missing, contact 1-800-DR-OWNER (376-9637). Do not discard your packaging material until you are fully satisfied with your new DR 10 HP CHIPPER. ®...
-
Page 17: Attaching The Chipper Hopper
1. Attach the Chipper Hopper to the machine using four (4) 5/16"-18 x 3/4" Carriage Bolts, four (4) 5/16" Flat Washers and four (4) 5/16"-18 Nylon Lock Nuts. NOTE: Be sure to insert the bolts from the inside of the Chipper Hopper so that the threads are sticking out (Figure 1). -
Page 18: Adding The Engine Oil And Gasoline
NOTE: To refill the gas tank, turn the engine OFF and let the engine cool at least two (2) minutes before removing the gas fill cap. ® 10 HP CHIPPER Capacities SAE 30 - 28 oz. (.83L) Unleaded gasoline, 1 US gal. (3.8 L) - Page 19 Front Back Figure 2 CALL TOLL FREE 1-800-DR-OWNER...
- Page 20 ® 10 HP CHIPPER...
-
Page 21: Chapter 4
CHAPTER 4 OPERATING YOUR DR 10 HP CHIPPER This chapter covers the procedures for starting and stopping your new DR 10 HP CHIPPER and discusses basic operation features. • THE DESIGN OF THIS CHIPPER IS FOR CHIPPING LIMBS OR BRANCHES. NEVER USE THIS MACHINE FOR ANY OTHER PURPOSE AS IT COULD CAUSE SERIOUS INJURY. -
Page 22: Operation Notes
NOTE: Check for shaft movement while starting the engine. If the shaft does not turn, clean out the Chipper as instructed on page 22. • At engine start-up, the engine of your DR 10 HP CHIPPER operates under no load until approximately 1200-1400 RPM, at which speed the Centrifugal Clutch engages and begins driving the Rotor Assembly. -
Page 23: Processing Limbs And Branches
• Make sure the DR 10 HP CHIPPER finishes processing material in the Hopper before shutting the engine off. USE COMMON SENSE WHEN USING THE MACHINE. LEARN TO RECOGNIZE THE CHANGE IN SOUNDS WHEN OVERLOADED. -
Page 24: Starting And Stopping The Engine
Control lever to the far right (Figure 3 on page 17). 2. Grasp the recoil starter handle and slowly pull until you feel resistance, then pull the cord with a smooth accelerating motion to start the engine. One or two pulls usually starts the DR 10 HP CHIPPER. -
Page 25: Using The Chipper Hopper
3-1/2" in diameter. Cut your materials into manageable lengths before feeding them into the Chipper Hopper. THE CHIPPER HOPPER MUST BE SECURELY BOLTED TO THE SIDE OF YOUR DR 10 HP CHIPPER BEFORE USING THE MACHINE! •... -
Page 26: To Free A Jammed Flywheel
2. Place a 5/16" Flat Washer on a 5/16"-18 x 4" Bolt and then slide the Bolt through both the top two (2) holes of the Chipper body and the Deflector. NOTE: Be certain that the Bolt attaching the Deflector to the Chipper passes through the pipe (tube) welded to the Scroll (Figure 5). - Page 27 4. Repeat Steps 2 and 3 for the lower Deflector attachment Bolt. 5. Pull up on the end of the Deflector and tighten the two (2) Lock Nuts. 6. Reconnect the spark plug wire and start the Chipper engine; allowing the material in the Chipping Chamber to discharge.
- Page 28 ® 10 HP CHIPPER...
-
Page 29: Chapter 5
This chapter covers regular maintenance procedures that will ensure the best performance and long life of your DR 10 HP CHIPPER. For engine maintenance, please refer to the Engine Owner’s Manual that came with your DR 10 HP CHIPPER. Service intervals listed in the checklist below supercede those listed in the Engine Owner’s Manual. -
Page 30: Grease Fittings
Grease Fittings Your DR 10 HP CHIPPER was greased at the Factory. The operator needs to lubricate the Chipper Side and Drive Side Bearings periodically. BEFORE PERFORMING ANY MAINTENANCE PROCEDURE OR INSPECTION, STOP THE ENGINE, WAIT FIVE (5) MINUTES TO ALLOW ALL MOVING PARTS TO COME TO A COMPLETE STOP AND COOL. DISCONNECT THE SPARK PLUG WIRE, KEEPING IT AWAY FROM THE SPARK PLUG. -
Page 31: Removing And Replacing The Engine Oil
Removing and Replacing the Engine Oil BEFORE PERFORMING ANY MAINTENANCE PROCEDURE OR INSPECTION, STOP THE ENGINE, WAIT FIVE (5) MINUTES TO ALLOW ALL MOVING PARTS TO COME TO A COMPLETE STOP AND COOL. DISCONNECT THE SPARK PLUG WIRE, KEEPING IT AWAY FROM THE SPARK PLUG. Tools and Supplies Needed: •... -
Page 32: Adjusting Or Removing And Replacing The Drive Belt
USE ONLY A DR BELT ON YOUR MACHINE. THE BELT HAS BEEN THOROUGHLY TESTED AND PROVEN FOR MANY HOURS OF USE. The belt on your DR 10 HP CHIPPER should deflect 3/8" under approximately three (3) pounds of pressure as shown in Figure 8; if it does not, adjust per the following directions. - Page 33 NOTE: After you perform the adjustment, make sure that the Key remained in the Rotor Shaft and flush with the end surface of the Shaft (Figure 11 on page 30). ® c) Apply Loctite 243 to the threads of the Set Screws and reinsert them into the Drive Pulley Hub. d) Tighten the Set Screws while maintaining the alignment of the Clutch and Rotor Pulley (Figure 11).
- Page 34 Drive Belt Drive Pulley Rotor Shaft ® 10 HP CHIPPER Set Screw – 2 places Figure 11 Rotor Pulley Adjust Bolt...
-
Page 35: Removing And Replacing The Chipper Knife
Removing and Replacing the Chipper Knife ROUTINELY CHECK THE CHIPPER KNIFE FOR SHARPNESS. USING A DULL KNIFE WILL DECREASE PERFORMANCE AND CAUSE EXCESSIVE VIBRATION THAT WILL CAUSE DAMAGE TO THE DR 10 HP CHIPPER ENGINE. BEFORE PERFORMING ANY MAINTENANCE PROCEDURE OR INSPECTION, STOP THE ENGINE, WAIT FIVE (5) MINUTES TO ALLOW ALL MOVING PARTS TO COME TO A COMPLETE STOP AND COOL. - Page 36 1. Using a 5/16" Wrench, remove both Access Covers (Chipper and Drive Side) from the Chipper Box (Figure 14). 2. Rotate the Chipper Disk using a stick until the three (3) countersunk Allen Screws and Lock Nuts attaching the Knife to the Flywheel are visible through the Access Openings (Figure 14).
-
Page 37: Adjusting The Knife To Wear Plate Gap
• Gap Gauge (provided) 1. Remove the Chipper Hopper by performing the steps on page 13 in the reverse order. 2. Rotate the Chipper Disk using a stick until the Knife is opposite the Wear Plate. 3. To adjust the Wear Plate Gap, loosen the three (3) 1/4" Nuts and Bolts while holding the Wear Plate in place. -
Page 38: Removing And Replacing The Clutch
DR 10HP CHIPPER Engine at less than full RPM. NOTE: At engine start-up, the engine of your chipper operates under no load until approximately 1100-1200 RPM, at which speed the centrifugal clutch engages and begins driving the rotor. Proper rotor speed is 2400-RPM +/- 200 RPM. -
Page 39: Installing A New Clutch Assembly
Installing a New Clutch Assembly If you have problems with the Clutch, we recommend replacing your Clutch as a complete assembly. Tools and Supplies Needed: • (2) 1/2" Wrench • 9/16" Socket with Extension • Anti-seize compound 1. Remove the Belt Guard and loosen the Engine Bolts as outlined in Steps 1 and 2 on page 28. 2. - Page 40 3/8" Bolt. Tighten the Bolt securely. 10. Reinstall the Drive Belt and set the Drive Belt tension and alignment per Steps 3 through 5 on page 28. 11. Reinstall the Belt Guard. Retainer Ring Flat Washer ® 10 HP CHIPPER Drum Figure 16 Shoe Spring...
-
Page 41: End Of Season And Storage
If your engine has a fuel filter, replace it. • If your DR 10 HP CHIPPER will be idle for more than 30 days, we recommend using a gas stabilizer. This will prevent sediment from gumming up the carburetor. If there is dirt or moisture in the gas or tank, remove it by draining the tank. - Page 42 ® 10 HP CHIPPER...
-
Page 43: Chapter 6
TROUBLESHOOTING Most problems are easy to fix. Consult the Troubleshooting Table below for common problems and their solutions. If you continue to experience problems, call Country Home Products, Inc. for support. Troubleshooting Table BEFORE PERFORMING ANY MAINTENANCE PROCEDURE OR INSPECTION, STOP THE ENGINE, WAIT FIVE (5) MINUTES TO ALLOW ALL MOVING PARTS TO COME TO A COMPLETE STOP AND COOL. - Page 44 ⇒ Turn the flywheel with a wooden stick to be sure it turns freely. If the Flywheel still will not turn, call 1(800) DR-OWNER (376-9637) for assistance. ⇒ Drive Belt burns. The Chipper is being overloaded; process material at a slower rate. ⇒ The Flywheel is jammed. See the Symptom above. ⇒...
- Page 45 ⇒ Loose Drive Belt; adjust the Drive Belt tension. See page 28. ⇒ Remove any built-up debris from the Chipper Hopper Inlet and Discharge Chute. ⇒ The engine speed is too slow causing the belt to slip. Run the engine at full throttle.
-
Page 46: Chapter 7
CHAPTER 7 PARTS LISTS, SCHEMATIC DIAGRAMS AND WARRANTY Parts List - DR 10 HP CHIPPER NOTE: Part numbers listed are available through Country Home Products, Inc. Ref# Part# Description 16193 Engine, 10 HP Briggs & Stratton Intek 15979 Bolt, 5/16"-18 x 1-3/4", HHCS 20881 Grip, Handle, 1"... -
Page 47: Schematic - Dr 10 Hp Chipper
Schematic - DR 10 HP CHIPPER 060120 CALL TOLL FREE 1-800-DR-OWNER... -
Page 48: Parts List - Chipper Assembly
Parts List - Chipper Assembly NOTE: Part numbers listed are available through Country Home Products, Inc. Ref# Part# Description 18301 Ring, Retaining 15526 Shim 15512 Screw, 10-32 x 3/8" 16798 Cover, Access 21636 Panel, Drive Side 14313 Nut, Lock, Nylon, 5/16"-18... -
Page 49: Schematic - Chipper Assembly
Schematic - Chipper Assembly 060101 CALL TOLL FREE 1-800-DR-OWNER... -
Page 50: Notes
Notes ® 10 HP CHIPPER... -
Page 51: Warranty
® The DR 10 HP CHIPPER is warranted for two (2) years against defects in materials or workmanship when put to ordinary and normal consumer use; ninety (90) days for any other use. The engine manufacturer warrants the engine separately. - Page 52 Daily Checklist for the DR 10 HP CHIPPER To help maintain your DR 10 HP CHIPPER for optimum performance, we recommend you follow this checklist each time you use your machine. [ ] OIL: With the machine on a level surface, check the engine oil level with the dipstick and add more if necessary (only add oil to the level indicated on the dipstick - DO NOT OVERFILL).
Need help?
Do you have a question about the 10 HP CHIPPER and is the answer not in the manual?
Questions and answers