Table of Contents
Advertisement
®
DR
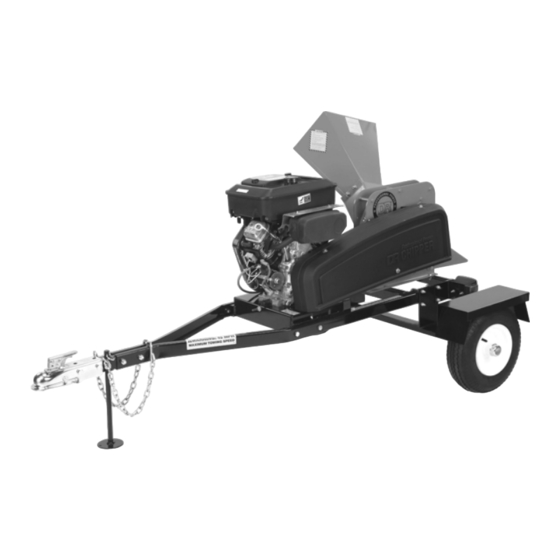
ROAD-TOWABLE CHIPPER
SAFETY & OPERATING INSTRUCTIONS
Models: 18 HP, Road-Towable, Bottom Discharge
19 HP, Road-Towable, Top Discharge
18 HP, Road-Towable, Bottom Discharge
19 HP, Road-Towable, Top Discharge
READ AND UNDERSTAND THIS MANUAL AND ALL INSTRUCTIONS
BEFORE OPERATING THIS WOOD CHIPPER.
Advertisement
Table of Contents

Subscribe to Our Youtube Channel
Related Manuals for DR 18 HP


Summary of Contents for DR 18 HP
- Page 1 ® ROAD-TOWABLE CHIPPER SAFETY & OPERATING INSTRUCTIONS Models: 18 HP, Road-Towable, Bottom Discharge 19 HP, Road-Towable, Top Discharge 18 HP, Road-Towable, Bottom Discharge 19 HP, Road-Towable, Top Discharge READ AND UNDERSTAND THIS MANUAL AND ALL INSTRUCTIONS BEFORE OPERATING THIS WOOD CHIPPER.
- Page 2 And congratulations on your purchase of a new DR ROAD-TOWABLE CHIPPER! We have done our utmost to ensure that your DR ROAD-TOWABLE CHIPPER will be one of the most trouble- free and satisfying pieces of equipment you have ever owned. Please let us know of any questions you may have.
-
Page 3: Table Of Contents
A Note to All Users ... 11 Additional Information and Potential Changes... 11 CHAPTER 3... 13 SETTING UP YOUR DR ROAD-TOWABLE CHIPPER ... 13 Unpacking the DR ROAD-TOWABLE CHIPPER... 14 Attaching the Chipper Hopper ... 15 Attaching the Hitch Arms and Hitch Assembly ... 16 Attaching the Discharge Chute (19 HP Top Discharge model)... - Page 4 CHAPTER 7... 50 PARTS LISTS, SCHEMATIC DIAGRAMS AND WARRANTY... 50 Parts List - DR ROAD-TOWABLE CHIPPER Assembly - 18 HP, Bottom Discharge ... 50 Schematic - DR ROAD-TOWABLE CHIPPER Assembly - 18 HP, Bottom Discharge . 51 Parts List - DR ROAD-TOWABLE CHIPPER Assembly - 19 HP, Top Discharge ... 52 Schematic - DR ROAD-TOWABLE CHIPPER Assembly - 19 HP, Top Discharge ...
-
Page 5: Chapter 1
Chipper. NOTE: This information may be helpful to you. If you are ever unsure about an action you are about to take, don’t do it, contact Country Home Products’ toll-free support at 1-800-DR-OWNER (376-9637) for help or information. COULD RESULT... - Page 6 ® 18 and 19 HP ROAD-TOWABLE CHIPPER...
-
Page 7: Chapter 2
SPEEDS. YOU MUST USE PROPER CLOTHING AND SAFETY GEAR WHEN OPERATING THIS MACHINE TO PREVENT OR MINIMIZE THE RISK OF SEVERE INJURY. THIS MACHINE CAN CRUSH, GRIND, CUT, AND SEVER PARTS OF YOUR BODY IF THEY ENTER THE INLET OR DISCHARGE AREA OF YOUR CHIPPER. Labels Your DR ROAD-TOWABLE CHIPPER carries prominent labels as reminders for its proper and safe use. - Page 8 (5) minutes to make certain the flywheel and all moving parts have come to a complete stop and cool and then disconnect the spark plug wires. (#091-0378) ® 18 and 19 HP ROAD-TOWABLE CHIPPER ALWAYS turn OFF the engine, wait five (5) minutes to make certain the flywheel and all moving parts have come to a complete stop and cool and then disconnect the spark plug wires before opening this access panel.
- Page 9 ALWAYS wear eye protection and know where the Discharge Chute and Deflector are pointing. Be aware of your surroundings. (#091-0379) NEVER operate the Chipper without the Discharge Chute properly secured in place. (#091-0444) CAUTION CLUTCH DAMAGE DUE TO ENGINE OVERLOAD CAN BE VERY COSTLY AND MAY NOT BE COVERED UNDER WARRANTY.
-
Page 10: Before Starting Engine
WARNING: Check Oil Before Starting Engine The DR 19 HP, Top Discharge, ROAD-TOWABLE CHIPPER Control Panel Label. (#211721) ® 18 and 19 HP ROAD-TOWABLE CHIPPER ALWAYS turn OFF the engine, wait five (5) minutes to make certain the flywheel and all moving parts have... -
Page 11: Protecting Yourself And Those Around You
OPERATION TO USE YOUR MACHINE. • NEVER PLACE YOUR HANDS, FEET, OR ANY PART OF YOUR BODY IN THE CHIPPER HOPPER, DISCHARGE OPENING, OR NEAR OR UNDER ANY MOVING PART WHILE THE MACHINE IS RUNNING. KEEP AREA OF DISCHARGE CLEAR OF PEOPLE, ANIMALS, BUILDINGS, GLASS, OR ANYTHING ELSE THAT WILL OBSTRUCT CLEAR DISCHARGE, CAUSE INJURY, OR DAMAGE. -
Page 12: Safety For Children And Pets
BE ALERT AND TURN THE MACHINE OFF IF CHILDREN OR PETS ENTER THE WORK AREA. • NEVER ALLOW CHILDREN TO OPERATE THE DR ROAD-TOWABLE CHIPPER. Safety with Gasoline - Powered Engines GASOLINE IS A HIGHLY FLAMMABLE LIQUID. GASOLINE ALSO GIVES OFF FLAMMABLE VAPOR THAT CAN BE EASILY IGNITED AND CAUSE A FIRE OR EXPLOSION. -
Page 13: Towing Safety
NEVER TRANSPORT ANYTHING ON THE MACHINE. • OBEY LOCAL, STATE, AND FEDERAL REGULATIONS WHEN YOU TOW THE CHIPPER ON PUBLIC ROADS AND HIGHWAYS. NOTE: Some states may require the machine to be registered with the State Department of Motor Vehicles. -
Page 14: General Safety
NEVER COVER THE MACHINE WHILE THE MUFFLER IS STILL HOT. • SEE MANUFACTURER’S INSTRUCTIONS FOR PROPER OPERATION AND INSTALLATION OF ACCESSORIES. ONLY USE ACCESSORIES APPROVED BY COUNTRY HOME PRODUCTS, INC. • IF THE CUTTING MECHANISM STRIKES A FOREIGN OBJECT OR IF YOUR MACHINE SHOULD START MAKING AN UNUSUAL NOISE OR VIBRATION, STOP THE ENGINE AND WAIT FIVE (5) MINUTES FOR ALL MOVING PARTS TO COME TO A COMPLETE STOP AND COOL. -
Page 15: A Note To All Users
Additional Information and Potential Changes Country Home Products, Inc. reserves the right to discontinue, change, and improve its products at any time without notice or obligation to the purchaser. The descriptions and specifications contained in this manual were in effect at printing. Equipment described within this manual may be optional. Some illustrations may not be applicable to your machine. - Page 16 ® 18 and 19 HP ROAD-TOWABLE CHIPPER...
-
Page 17: Chapter 3
CHAPTER 3 SETTING UP YOUR DR ROAD-TOWABLE CHIPPER This chapter outlines unpacking and a few simple steps you will need to follow to set up your new machine before you use it. If you have any questions at all, please feel free to contact our Customer Service Representatives at our toll free number: 1-800-DR-OWNER (376-9637). -
Page 18: Unpacking The Dr Road-Towable Chipper
Unpacking the DR ROAD-TOWABLE CHIPPER NOTE: Unpacking the DR ROAD-TOWABLE CHIPPER is a two-person job. We recommend you have an extra set of hands available before you begin as the 18 HP model weighs 385 lbs. and the 19 HP model weighs 470 lbs. -
Page 19: Attaching The Chipper Hopper
1. Attach the Chipper Hopper to the machine using four (4) 5/16"-18 x 3/4" Carriage Bolts, four (4) 5/16" Flat Washers and four (4) 5/16"-18 Nylon Lock Nuts. NOTE: Be sure to insert the bolts from the inside of the Chipper Hopper so that the threads are sticking out (Figure 1). -
Page 20: Attaching The Hitch Arms And Hitch Assembly
Cotter Pin (Figure 2). 1/2" x 1-1/4" Bolt (4) Hitch Arm (2) 1/2" Lock Nut (2) Trailer Hitch Assembly Trailer Stand ® 18 and 19 HP ROAD-TOWABLE CHIPPER Hitch Plate (2) 1/2" x 3" Bolt (2) Hairspring Cotter Pin Figure 2... -
Page 21: Attaching The Discharge Chute (19 Hp Top Discharge Model)
(2) 1/2" Wrench or Socket 1. Loosen the two (2) 5/16"-18 x 4" Bolts on the Chipper Rear Side Panel (Figure 3) just enough so that the top L-shaped notches in the Mounting Plates on the Discharge Chute will slide onto the Bolt. -
Page 22: Attaching The Swivel Top And Deflector (19 Hp Top Discharge Model)
NEVER perform this adjustment with the engine running or the flywheel turning. Swivel Top Lock Nut (2) Carriage Bolt (2) Discharge Chute ® 18 and 19 HP ROAD-TOWABLE CHIPPER 3/4" Bolt (2) Locking Knob Swivel Base Flat Washer (2) Figure 4... -
Page 23: Attaching The Wire Harness
Attaching the Wire Harness The wire harness supplied must be installed on the trailer of your new DR ROAD-TOWABLE CHIPPER before you can transport the machine on public roadways. Identify the “Road Side” and “Curb Side of the trailer from Figure 5 below. -
Page 24: Connecting The Battery Cable
Connecting the Battery Cable We ship all DR ROAD-TOWABLE CHIPPERS with the negative terminal battery cable disconnected. This prevents the battery from discharging during shipment. Before using your DR ROAD-TOWABLE CHIPPER, you must connect the battery cable. Tool Needed: •... -
Page 25: Adding Engine Oil And Gasoline
Briggs & Stratton 18.0 HP Vanguard OHV Engine Kawasaki 19.0 HP Engine Briggs & Stratton Gasoline Tank - 18 HP Kawasaki Gasoline Tank - 19 HP Tip: To avoid confusion, we recommend leaving the caps on the gas and oil fills until you are ready to pour either gasoline or oil into the correct fill. -
Page 26: Check The Tire Pressure
Fuel Filter Check the Tire Pressure There should be 60 psi in each tire. ® 18 and 19 HP ROAD-TOWABLE CHIPPER Briggs and Stratton 18 HP Engine Dip Stick Kawasaki 19 HP Engine Figure 7 Gas Fill Gas Tank Gas Fill... -
Page 27: Chapter 4
CHAPTER 4 OPERATING YOUR DR ROAD-TOWABLE CHIPPER This chapter covers the procedures for starting and stopping your new DR ROAD-TOWABLE CHIPPER and discusses basic operation features. • THIS CHIPPER IS DESIGNED FOR CHIPPING WOOD. NEVER USE THIS MACHINE FOR ANY OTHER PURPOSE AS IT COULD CAUSE SERIOUS INJURY. -
Page 28: Operation Notes
Operation Notes • Visually check the Chipper Knife for damage each time you use the machine. NOTE: Check for shaft movement while starting the engine. If the shaft does not turn, clean out the Chipper as instructed on page 28. •... -
Page 29: Processing Material
WE RECOMMEND WEARING GLOVES WHILE CHIPPING. BE SURE YOUR GLOVES FIT PROPERLY AND DO NOT HAVE LOOSE CUFFS OR DRAWSTRINGS. • WEAR SHOES WITH NON-SLIP TREADS WHEN USING YOUR CHIPPER. IF YOU HAVE SAFETY SHOES, WE RECOMMEND WEARING THEM. DO NOT USE THE MACHINE WHILE BAREFOOT OR WEARING OPEN SANDALS. -
Page 30: Electric-Starting
To remove the Key, push it in and then quickly and firmly pull it out. If the Key becomes difficult to remove, spray FLUID FILM NOTE: Close the fuel Shut-Off Valve when transporting or storing the DR ROAD-TOWABLE CHIPPER. NEVER STOP THE ENGINE BY MOVING THE CHOKE LEVER TO THE CHOKE POSITION. THIS COULD CAUSE AN ENGINE BACKFIRE RESULTING IN ENGINE DAMAGE. -
Page 31: Using The Chipper Hopper
Using the Chipper Hopper The Chipper Hopper is mounted on the side of the machine and is designed to chip wood only. The revolving Chipper Knife mounted on a flywheel turns branches fed into the hopper into “chips”. The Chipper can chip branches and vines ranging in size up to 4-1/2" in diameter. Cut your materials into manageable lengths before feeding them into the Chipper Hopper. -
Page 32: To Free A Jammed Flywheel
1. Disconnect the battery at the negative terminal (Figure 6 on page 20). 2. Remove any material left in the Chipper Hopper and then remove the Deflector (Bottom Discharge model) by removing the two (2) 5/16" x 4" Bolts (Figure 10). For the Top Discharge model, remove the Discharge Chute (Figure 3 on page 17) by just loosening the two (2) 5/16"... - Page 33 Bottom Discharge model: 1. Hold the Deflector (Figure 10 on page 28) in place at the Discharge opening of the Chipper. 2. Place a 5/16" Flat Washer on a 5/16"-18 x 4" Bolt and then slide the Bolt through both the top two (2) holes of the Chipper body and the Deflector.
- Page 34 ® 18 and 19 HP ROAD-TOWABLE CHIPPER...
-
Page 35: Chapter 5
Check the Tire Pressure Change Engine Oil and Filter* Replace Drive Belt Replace Spark Plugs Replace Air Filter and Precleaner * The engine on your DR ROAD-TOWABLE CHIPPER may not have a Precleaner or Oil Filter. Before Each Use Every 8-10 Hours ▲... -
Page 36: Grease Fittings
1. Wipe all dirt, etc., from the grease fittings with a clean cloth (Figure 11). 2. Apply no more than three (3) pumps of quality general-purpose lithium grease with a hand- pumped grease gun to each grease fitting, one (1) on the Chipper Side Bearing and one (1) on the Drive Side Bearing. -
Page 37: Removing And Replacing The Engine Oil And Filter
Removing and Replacing the Engine Oil and Filter BEFORE PERFORMING ANY MAINTENANCE PROCEDURE OR INSPECTION, STOP THE ENGINE, WAIT FIVE (5) MINUTES TO ALLOW ALL MOVING PARTS TO COME TO A COMPLETE STOP AND COOL. DISCONNECT THE SPARK PLUG WIRES, KEEPING THEM AWAY FROM THE SPARK PLUGS. Tools and Supplies Needed: •... - Page 38 Oil Drain Valve Oil Drain Valve Filter Oil Filter Briggs and Stratton 18 HP Engine Kawasaki 19 HP Engine Figure 12 ® 18 and 19 HP ROAD-TOWABLE CHIPPER...
-
Page 39: Adjusting Or Removing And Replacing The Drive Belts
USE ONLY DR BELTS ON YOUR MACHINE. THE BELTS HAVE BEEN THOROUGHLY TESTED AND PROVEN FOR MANY HOURS OF USE. The belts on your DR ROAD-TOWABLE CHIPPER should deflect 3/8" under approximately three (3) pounds of pressure as shown in Figure 13; if they do not, adjust per the following directions. - Page 40 Recheck the alignment after tightening the Bolts, and then retighten the Drive Pulley Hub Bolt. 6. Reinstall the Belt Guard. NOTE: Check and re-tighten the Drive Belts, if necessary, after an initial break-in period of one (1) hour. Clutch ® 18 and 19 HP ROAD-TOWABLE CHIPPER Engine Bolts, Front Figure 14 Belts Straight Edge...
- Page 41 Bushing Saw Slot Drive Pulley Bushing Threaded Holes (3) Rotor Shaft Figure 16 Hub Retaining Bolt (3 places) Drive Pulley Hub Bolt CALL TOLL FREE 1-800-DR-OWNER...
-
Page 42: Removing And Replacing The Chipper Knife
How many times a Knife can be sharpened is determined by how much material needs to be taken off to sharpen or to compensate for dents or gouges. • A new Chipper Knife has 5/16" measurement between the short side bevel edge and the Knife mounting holes. See Figure 17. Short Side Beveled Edge •... - Page 43 1. Using a 5/16" Wrench, remove both Access Covers (Chipper and Drive Side) from the Chipper Box (Figure 1 on page 15). 2. Rotate the Chipper Disk using a stick until the three (3) countersunk Allen Screws and Lock Nuts attaching the Knife to the Flywheel are visible through the Access Openings.
-
Page 44: Adjusting The Knife To Wear Plate Gap
PARTS BEFORE STARTING THE DR ROAD-TOWABLE CHIPPER. • IF AT ANY TIME IT BECOMES NECESSARY TO DISASSEMBLE THE CHIPPER FOR REPAIRS, THE CHIPPER DISK MUST BE RE-INSTALLED IN EXACTLY THE SAME POSITION ON THE ROTOR SHAFT. 5. Re-connect the negative battery terminal wire and the spark plug wires. -
Page 45: Removing And Replacing The Clutch
ROAD-TOWABLE CHIPPER Engine at less than full RPM. NOTE: At engine start-up, the engine of your chipper operates under no load until approximately 1000-1200 RPM for both the 18 and 19 HP models, at which speed the centrifugal clutch engages and begins driving the rotor. -
Page 46: Installing A New Clutch Assembly
If you have problems with the Clutch, we recommend replacing your Clutch as a complete assembly. Tools and Supplies Needed: • (2) 1/2" Wrench • 9/16" Socket with Extension (18 HP) • 5/8" Socket with Extension (19 HP) • Anti-seize compound 1. - Page 47 Clutch Removal, Disassembly, and Re-Assembly If it is necessary to disassemble your Clutch, follow these steps. Tools and Supplies Needed: • 9/16" Socket with Extension (18 HP) • 5/8" Socket with Extension (19 HP) • Pliers, Retainer Ring • Pliers (wrap the gripping surface in tape to avoid scratching the spring surface) •...
-
Page 48: Battery Care
At 2 amps, the battery may need to be charged for as long as 24 hours. To connect a battery charger to your DR ROAD-TOWABLE CHIPPER, follow the steps listed below. 1. Detach the two battery cables going to the battery on your machine. -
Page 49: End Of Season And Storage
If your engine has a fuel filter, replace it. • If your DR ROAD-TOWABLE CHIPPER will be idle for more than 30 days, we recommend using a gas stabilizer. This will prevent sediment from gumming up the carburetor. If there is dirt or moisture in the gas or tank, remove it by draining the tank. - Page 50 ® 18 and 19 HP ROAD-TOWABLE CHIPPER...
-
Page 51: Chapter 6
TROUBLESHOOTING Most problems are easy to fix. Consult the Troubleshooting Table below for common problems and their solutions. If you continue to experience problems, call Country Home Products, Inc. for support. Troubleshooting Table BEFORE PERFORMING ANY MAINTENANCE PROCEDURE OR INSPECTION, STOP THE ENGINE, WAIT FIVE (5) MINUTES TO ALLOW ALL MOVING PARTS TO COME TO A COMPLETE STOP AND COOL. - Page 52 ⇒ Turn the flywheel with a wooden stick to be sure it turns freely. - Belt burns. ⇒ Check the Drive Belt tension. See page 35. - Flywheel won’t ⇒ Remove any built-up debris from the Chipper Hopper Inlet and Discharge Chute. turn. ® 18 and 19 HP ROAD-TOWABLE CHIPPER AUSE...
- Page 53 ⇒ Loose Drive Belt; adjust the Drive Belt tension. See page 35. ⇒ Remove any built-up debris from the Chipper Hopper Inlet and Discharge Chute. The machine’s ⇒ Check the tire pressure. There should be 60 psi in each tire.
-
Page 54: Chapter 7
CHAPTER 7 PARTS LISTS, SCHEMATIC DIAGRAMS AND WARRANTY Parts List - DR ROAD-TOWABLE CHIPPER Assembly - 18 HP, Bottom Discharge NOTE: Part numbers listed are available through Country Home Products, Inc. Ref# Part# Description 148430 Deflector 182351 Chipper, Basic Machine 167900 Engine, 18 HP, B&S, E/S... -
Page 55: Schematic - Dr Road-Towable Chipper Assembly - 18 Hp, Bottom Discharge
Schematic - DR ROAD-TOWABLE CHIPPER Assembly - 18 HP, Bottom Discharge 060103 CALL TOLL FREE 1-800-DR-OWNER... -
Page 56: Parts List - Dr Road-Towable Chipper Assembly - 19 Hp, Top Discharge
Parts List - DR ROAD-TOWABLE CHIPPER Assembly - 19 HP, Top Discharge NOTE: Part numbers listed are available through Country Home Products, Inc. Ref# Part# Description 030-0463 Engine, 19 HP, Kawasaki, E/S 14529 Bolt, Carriage, 5/16" - 18 x 3/4"... -
Page 57: Schematic - Dr Road-Towable Chipper Assembly - 19 Hp, Top Discharge
Schematic - DR ROAD-TOWABLE CHIPPER Assembly - 19 HP, Top Discharge 060103 CALL TOLL FREE 1-800-DR-OWNER... -
Page 58: Parts List - 19 Hp Control Panel Assembly
Parts List - 19 HP Control Panel Assembly NOTE: Part numbers listed are available through Country Home Products, Inc. Ref# Part# Description 913-0446 Frame 913-0432 Support, Tank 202131 Screw, 10 - 24 x 3/4" 913-0433 Cover, End 143130 Nut, Nylon Lock, 5/16" - 18... -
Page 59: Schematic - 19 Hp Control Panel Assembly
Schematic - 19 HP Control Panel Assembly 060103 CALL TOLL FREE 1-800-DR-OWNER... -
Page 60: Parts List - Basic Machine Assembly - 18 And 19 Hp
Parts List - Basic Machine Assembly - 18 and 19 HP NOTE: Part numbers listed are available through Country Home Products, Inc. Ref# Part# Description 18613 Nut, Lock, 5/16" - 18 18605 Bearing, Side 14515 Washer, Flat, 5/16" USS 090-0049 Nut, Lock, 3/8"-16... -
Page 61: Schematic - Basic Machine Assembly - 18 And 19 Hp
Schematic - Basic Machine Assembly - 18 and 19 HP 060103 CALL TOLL FREE 1-800-DR-OWNER... -
Page 62: Notes
Notes ® 18 and 19 HP ROAD-TOWABLE CHIPPER... -
Page 63: Customer Service Hotline
Country Home Products, Inc. (home of DR for ordinary purposes for which a product of this type is used. Country Home Products, Inc. however, limits the implied warranties of merchantability and fitness in duration to a period of two (2) years in consumer use, ninety (90) days for any other use. - Page 64 Daily Checklist for the DR ROAD-TOWABLE CHIPPER To help maintain your DR ROAD-TOWABLE CHIPPER for optimum performance, we recommend you follow this checklist each time you use your machine. [ ] OIL: With the machine on a level surface, check the engine oil level with the dipstick and add more if necessary (only add oil to the level indicated on the dipstick - DO NOT OVERFILL).
Need help?
Do you have a question about the 18 HP and is the answer not in the manual?
Questions and answers