Table of Contents
Advertisement
Quick Links
Forno incasso 60
60 cm built-in ovens
Manuale d'installazione e uso
Installation and use manual
Questo manuale d'istruzione è fornito da trovaprezzi.it. Scopri tutte le offerte per
o cerca il tuo prodotto tra le
migliori offerte di Forni
Barazza 1FWLMP
1FSLMP#-00--
FISLMI*09-01
1FWLMP#-00--
FIWLMI*09-01
1FLBMP#-00--
FITAMI*09-01
FIBFM*
1FUNMV#-00--
1FOFMO#-00--
taste of design
Advertisement
Table of Contents

Related Manuals for Barazza 1FSLMP Series


Summary of Contents for Barazza 1FSLMP Series
- Page 1 Questo manuale d’istruzione è fornito da trovaprezzi.it. Scopri tutte le offerte per Barazza 1FWLMP o cerca il tuo prodotto tra le migliori offerte di Forni 1FSLMP#-00-- FISLMI*09-01 1FWLMP#-00-- FIWLMI*09-01 1FLBMP#-00-- FITAMI*09-01 FIBFM* 1FUNMV#-00-- 1FOFMO#-00-- Forno incasso 60 60 cm built-in ovens taste of design Manuale d’installazione e uso...
- Page 2 Complimenti per aver acquistato un forno Barazza! Congratulations on purchasing a Barazza oven! Questa è un’apparecchiatura di grande qualità in This safe and reliable high-quality appliance can grado di accompagnarvi nel Vostro lavoro per lungo assist you in your work with long-lasting top-level tempo in modo affidabile e sicuro fornendo presta- performance.
- Page 3 INDICE INDEX DESCRIZIONE PAG. DESCRIPTION PAGE DATI TECNICI TECHNICAL DATA INSTALLAZIONE INSTALLATION Avvertenze di sicurezza Safety warnings Controllo e movimentazione Checks and handling Smaltimento degli imballi Disposal of the packaging Collegamento elettrico Connection to the power mains Incasso apparecchiatura Built-in unit installation USAGE Avvertenze di sicurezza Safety warnings...
-
Page 4: Dati Tecnici
DATI TECNICI TECHNICAL DATA Insulating Energy L=90cm class class [cm] Dati tecnici Technical data Tensione 220-230 Voltage Frequenza Frequency Potenza Power Totale assorbita 2,65 Total power absorbed Resistenza cielo Upper heating element Resistenza grill 1800 Grill heating element Resistenza suola Lower heating element Resistenza circolare posteriore 1700... -
Page 5: Installazione
INSTALLAZIONE INSTALLATION AVVERTENZE DI SICUREZZA SAFETY WARNINGS Leggere attentamente questo libretto di istruzioni Read this instruction booklet carefully before instal- prima dell’installazione e/o dell’uso dell’appa- lation and/or use of the appliance and keep it handy recchiatura e conservarlo in un luogo accessibile a so that all the users can consult it;... -
Page 6: Controllo E Movimentazione
CONTROLLO E MOVIMENTAZIONE CHECKS AND HANDLING Dopo aver disimballato l’apparecchiatura rimuovendo After having unpacked the appliance and removed all tutti i materiali di imballo e le pellicole a protezione the packing materials and protective films from the sur- delle superfici, controllare se si notano anomalie faces, check for any anomalies: if you find an anomaly, evidenti: in caso affermativo, non procedere all’in- do not proceed with the installation but contact your... -
Page 7: Collegamento Elettrico
4) or with a cable which is not up to standard; tecnici” pag. 4) o non a norma; - be lengthened with extensions. - essere allungato con prolunghe. H05V2V2-F 3x1,5mm 90 cm F.lli Barazza S.r.l MADE IN ITALY Mod. Art. N° ...V ...Hz ...Kw Questo apparecchio deve essere installato conformemente alle norme in vigore. -
Page 8: Incasso Apparecchiatura
INCASSO APPARECCHIATURA BUILT IN UNIT INSTALLATION Accertarsi del perfetto stato e della stabilità Make certain that the cabinet in which you del mobile nel quale saranno incassate le apparec- will be installing the appliance is in perfect condition chiature (Normativa DIN 68930). and completely stable (Standard DIN 68930). - Page 9 Si consiglia di installare l’apparecchiatura a una It is recommended that you install the appliance far distanza da frigoriferi e congelatori tale che il calore from refrigerators and freezers so that the heat produced non pregiudichi il buon funzionamento di questi does not compromise the good operation of these ap- ultimi (fig.
-
Page 10: For Safe And Correct Use
USAGE AVVERTENZE DI SICUREZZA SAFETY WARNINGS PER UN USO CORRETTO E SICURO FOR SAFE AND CORRECT USE Questa apparecchiatura è stata concepita e This appliance has been designed and manufac- realizzata esclusivamente per la cottura degli alimenti. tured exclusively for cooking food. Any other use is consid- Un uso diverso è... - Page 11 Nelle apparecchiature provviste di programmatore In the case of equipment with a digital programmer, digitale, l’intervento del termostato di sicurezza pro- the activation of the safety thermostat shuts off the voca lo spegnimento del programmatore. Al riavvio programmer. It must be reprogrammed when the oven deve essere quindi riprogrammato.
-
Page 12: Prima Di Cominciare
17 guide estraibili (optional) 17 telescopic oven rails (optional) 18 teglia in Pirex® (optional) 18 Pyrex® baking tray (optional) Optional F.lli Barazza S.r.l MADE IN ITALY Mod. Art. N° ...V ...Hz ...Kw Questo apparecchio deve essere installato conformemente alle norme in vigore. -
Page 13: É Bene Sapere Che
É BENE SAPERE CHE USEFUL INFORMATION Il presente libretto fornisce indicazioni sul This booklet provides information about the funzionamento e la manutenzione di diversi operation and maintenance of various oven modelli di forno; seguire quelle specifiche per models; follow the ones specific to your oven. il modello in Vostro possesso. -
Page 14: Qualche Consiglio Di Cottura
QUALCHE CONSIGLIO DI COTTURA SOME COOKING SUGGESTIONS • Disporre all’interno dei recipienti o della leccarda i • Arrange the food to be cooked in the containers or cibi da cuocere in modo uniforme e ben distribuito on drip tray in a well-distributed uniform manner senza eccedere nelle quantità. -
Page 15: Uso Dell'apparecchiatura
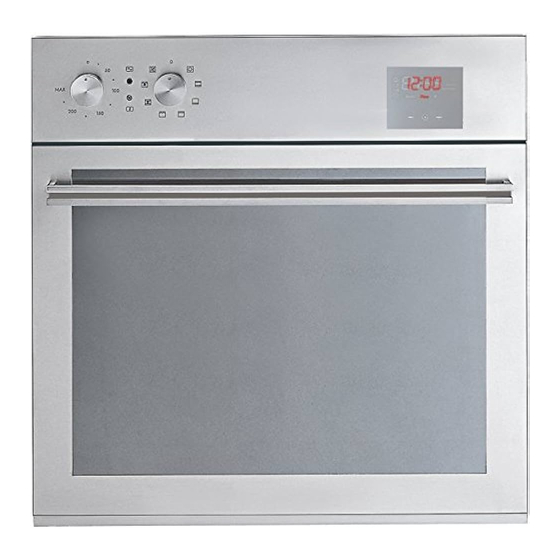
USO DELL’APPARECCHIATURA USING THE APPLIANCE 1FWLMP#-00-- FIWLMI*09-01 1FSLMP#-00-- FISLMI*09-01 FIBFM* 1FLBMP#-00-- 1 4 3 2 FITAMI*09-01 1FOFMO#-00-- 1 3 2 1FUNMV#-00-- 1 manopola termostato: permette di impostare 1 thermostat knob: used to set the desired tempe- la temperatura desiderata rature 2 manopola selettore: permette di scegliere il 2 selector knob: used to select the desired cooking tipo di cottura desiderata... - Page 16 A pag. 22 è disponibile una tabella con tem- On page 22 you will find a table with approxi- perature e tempi di cottura indicativi. mate cooking times and temperatures. : attraverso la manopola selettore (2) : the selector knob (2) is used to activate IPO DI COTTURA OOKING TYPE si attivano le diverse resistenze della cavità...
- Page 17 Utilizzo del programmatore digitale (5) (fig. 11) Using the digital programmer (5) (fig. 11) Descrizione comandi Description commands 1 - Programmazione contaminuti 1 - Timer programming 2 - Programmazione durata cottura 2 - Programming the cooking time 3 - Programmazione fine cottura 3 - Programming the cooking end time 4 - Programmazione manuale 4 - Manual programming...
- Page 18 • Se durante il funzionamento del forno dovesse man- • If there is a power failure while the oven is operating, care la corrente, al ripristino, i parametri programmati when it is restored the programmed parameters will NON saranno tenuti in memoria e quindi il program- NOT be kept in the memory, therefore the programmer matore va nuovamente impostato.
- Page 19 A) Cottura manuale senza contaminuti: A) Manual cooking without a timer: Per far funzionare il forno, è sufficiente impostare To operate the oven, use knobs (1) and (2) to set the tramite le manopole (1) e (2) la temperatura e il tipo desired temperature and cooking type without using di cottura desiderate senza bisogno di utilizzare il the programmer.
- Page 20 B) Fine cottura programmata (fig. 16) B) Programmed end of cooking time (fig. 16) Premere il tasto (3) e impostare l’orario di fine cot- Press button (3) and set the end of cooking time using tura con i tasti “-” e “+”; successivamente ruotare the “-”...
- Page 21 3) Ruotare le manopole (1) e (2) sulla temperatura e il 3) Turn the knobs (1) and (2) to the desired temperature tipo di cottura desiderate. and cooking time. Il forno non partirà immediatamente ma il program- The oven will not start immediately but the program- matore calcolerà...
- Page 22 Utilizzo del programmatore Touch (5) (fig. 18) Using the Touch programmer (5) (fig. 18) Descrizione comandi Control panel descriptions 1 - Timer 1 - Timer 2 - Durata cottura 2 - Cooking time 3 - Fine cottura 3 - End of cooking 4 - Ora 4 - Hour h:min...
- Page 23 Impostare l’ora Setting the time Scorrere la sequenza delle funzioni toccando il tasto Step through the sequences of function with Touchpad SELECT fino a trovare il simbolo che lampeggia. SELECT until the symbol flashes. Set the TIME by Impostare l’ora del giorno utilizzando i tasti “+” o “-“. “+”...
- Page 24 Impostare il volume del segnale acustico Setting acoustic signal volume Scorrere la sequenza delle funzioni toccando il tasto Step through the sequences of function with Touchpad SELECT fino a che il display non mostrerà la scelta SELECT until the display shows the chosen ACOUSTIC del SEGNALE ACUSTICO “L1, L2 o L3”.
- Page 25 5 sec. h:min h:min h:min min:sec min:sec min:sec 5 sec. h:min h:min h:min min:sec min:sec min:sec BEEP Cominciare a cucinare Starting to cook Impostare il programmatore scegliendo la modalità Set the programmer by selecting a cooking mode: MA- di cottura MANUALE, MANUALE CON IMPOSTAZIONE NUAL, MANUAL WITH SEMIAUTOMATIC SETTINGS or SEMIAUTOMATICA o MANUALE CON IMPOSTAZIONE MANUAL WITH AUTOMATIC SETTINGS...
- Page 26 MANUALE CON IMPOSTAZIONE SEMIAUTOMATICA MANUAL WITH SEMIAUTOMATIC SETTINGS (accensione manuale e spegnimento automatico) (the oven is turned on manually and turns off automatically) In questa modalità è possibile programmare lo spe- In this mode, you can programme the oven to turn off gnimento automatico in base alla durata di cottura.
- Page 27 C) Modifica /Disattivazione impostazioni (fig. 26) C) Modifying / Deleting the settings (fig. 26) Scorrere la sequenza delle funzioni toccando il Step through the sequences of function with Touchpad tasto SELECT fino a trovare il simbolo SELECT until the symbol flashes.
- Page 28 A) Impostare la durata di cottura (fig. 27) A) Set cooking time (fig. 27) Scorrere la sequenza delle funzioni toccando il tasto Step through the sequences of function with Touchpad SELECT fino a trovare il simbolo che lampeg- SELECT until the symbol flashes.
- Page 29 D) Modifica /Disattivazione impostazioni (fig. 30) D) Modifying / Deleting the settings (fig. 30) Scorrere la sequenza delle funzioni toccando il Step through the sequences of function with Touchpad tasto SELECT fino a trovare il simbolo SELECT until the symbol flashes.
- Page 30 Tabella consigli per cotture Cooking suggestions table La seguente tabella è indicativa: i tempi di cottura The following table is approximate: the cooking times may possono essere influenzati da fattori molteplici. be affected by multiple factors. Nel caso di cotture su più livelli contemporaneamente, If the cooking is being carried out on several levels simultaneou- i tempi potrebbero allungarsi di circa 15 minuti.
- Page 31 Tabella simbologie per tipo di cottura / Cooking type symbols table Contatti generali e lampada forno Main contacts and oven light Cottura tradizionale Static oven Resistenza superiore + resistenza infe- Upper heating element + lower heating riore. Cottura di qualsiasi tipo di piatto, element.
-
Page 32: Possibili Cause Di Insuccesso
POSSIBILI CAUSE DI INSUCCESSO TROUBLESHOOTING Risultato: Possibile causa Result: Possible cause Altezza di inserimento non Incorrect insertion height Pietanze poco dorate/ corretta Food not browned/ cotte in superficie o cooked enough on the bruciate nella parte Tipologia di cottura errata surface or burned on Incorrect cooking type inferiore... -
Page 33: Pannelli Autopulenti
ACCESSORI ACCESSORIES GRIGLIE ESTRAIBILI TELESCOPIC OVEN RAILS La manipolazione e l’estrazione delle pietanze e degli The handling and extraction of the dishes and cooking tools is made easier by the removable racks (fig. 32) which are strumenti di cottura sono facilitate da guide estraibili (fig. secured by a stop locking device. -
Page 34: Manutenzione Ordinaria
MANUTENZIONE MAINTENANCE AVVERTENZE DI SICUREZZA SAFETY WARNINGS Chiudere sempre l’interruttore elettrico Always switch off the main electrical switch principale durante la manutenzione ordinaria o during routine maintenance or if the appliance will in caso di lunga inattività. not be used for an extended period. Effettuare la pulizia a forno freddo dopo ogni Clean the oven after each use once it has cooled: uso: ciò... - Page 35 45° 90° 20° 20° 20°...
- Page 36 20° 20° 90° SOSTITUZIONE LAMPADINA LAMP REPLACEMENT Chiudere sempre l’interruttore elettrico Always switch off the main electrical switch principale durante la manutenzione ordinaria o during routine maintenance or if the appliance will in caso di lunga inattività. not be used for an extended period. Dopo aver rimosso le griglie per livelli di cottura (fig.
-
Page 37: End Of Life Disposal
ASSISTENZA POST VENDITA AFTER SALES SERVICE Barazza srl Vi assicura la massima collaborazione Barazza srl ensures you the utmost collaboration in the nell’eventualità dovessero sorgere problemi tecnici o event of technical problems or for any other needs you qualunque altra necessità. - Page 38 Note ..............................................................................................................................................................................................................................................................................................................................................................................................................................................................................................................................................................................................................................................
- Page 40 Barazza srl 31025 Sarano di S.Lucia di Piave (TV) ITALIA Via Risorgimento, 14 Tel. +39 0438 62888 Fax +39 0438 64901 info@barazzasrl.it www.barazzasrl.it...
Need help?
Do you have a question about the 1FSLMP Series and is the answer not in the manual?
Questions and answers