Advertisement
Installation Instructions
MODELS:
CLS-AOCH/60-XX
Version)
CP-AOCH/60-XX
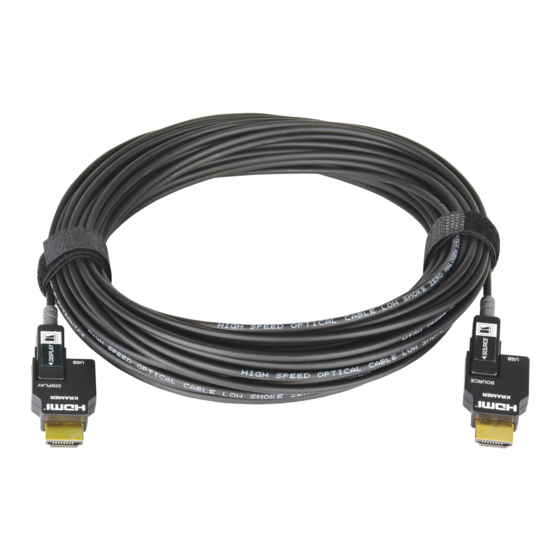
Active Optical UHD Pluggable HDMI Cable
SAFETY WARNING
Disconnect the unit from the power supply before opening and servicing
For the latest information on our products and a list of Kramer distributors, visit our Web site where
updates to this user manual may be found.
We welcome your questions, comments, and feedback.
www.kramerAV.com
info@kramerel.com
(Low Smoke & Halogen Free
(Plenum Version)
P/N:
4
Rev:
Advertisement
Table of Contents

Related Manuals for Kramer CLS-AOCH/60 Series


Summary of Contents for Kramer CLS-AOCH/60 Series
- Page 1 SAFETY WARNING Disconnect the unit from the power supply before opening and servicing For the latest information on our products and a list of Kramer distributors, visit our Web site where updates to this user manual may be found. We welcome your questions, comments, and feedback.
- Page 2 CLS-AOCH/60-XX / CP-AOCH/60-XX Active Optical UHD Pluggable HDMI Cable Congratulations on purchasing your Kramer CLS-AOCH/60-XX / CP-AOCH/60-XX Plug and Play active Active Optical UHD Pluggable HDMI Cable which is suited for critical and versatile installations. The CLS-AOCH/60-XX / CP-AOCH/60-XX provides an extremely high quality signal over a wide range of resolutions, up to 4K@60Hz (4:4:4).
- Page 3 CLS-AOCH/60-XX / CP-AOCH/60-XX Plug and Play Installation Before installing the cable, make sure that you have an HDMI graphic card or devices with an HDMI port (for example, a PC, laptop, DVD/Blue-ray player or any other video/audio signal source device). Optical fiber cable is not robust physically compared to conventional copper cable materials.
- Page 4 Plug the DISPLAY connector head of the cable into the display devices. Do not plug the DISPLAY connector to the source device. Switch on the power of the source and display devices. 10. If required, connect an external power source via the micro-USB connector on the DISPLAY side.
Need help?
Do you have a question about the CLS-AOCH/60 Series and is the answer not in the manual?
Questions and answers