
Related Manuals for HME DX121 EU


Summary of Contents for HME DX121 EU
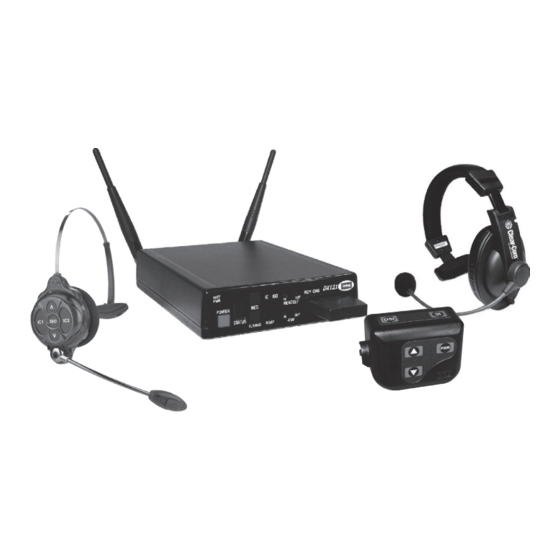
- Page 1 DX121 EU One-to-One Wireless Intercom System Operating Instructions HME# 400G762 Rev. A 5/4/17...
-
Page 3: Table Of Contents
HM Electronics, Inc. is not responsible for equipment malfunctions due to erroneous translation of its publications from their original English version. © 2017 HM Electronics, Inc. The HME logo and product names are registered trademarks of HM Electronics. All rights reserved. - Page 4 Use only manufacturer or dealer supplied antennas, power supplies, batteries and battery chargers. All products are compliant with regulatory requirements when installed correctly per HME installation instructions.. The Federal Communications Commission has adopted a safety standard for human exposure to RF (Radio Frequency) energy, which is below the OSHA (Occupational Safety and Health Act) limits.
- Page 5 The European Union (EU) WEEE Directive 2012/19/EU places an obligation on producers (manufacturers, distributors and/or retailers) to take-back electronic products at the end of their useful life The WEEE Directive covers most HME products being sold into the EU as of August 13, 2005. Manufacturers, distributors and retailers are obliged to finance...
- Page 6 DX121 Quick Reference Guide Base Station ¾ Connect power ― See page 7 Power ¾ Press POWER button to turn base station on/off ― Red light above button indicates power on ¾ BATT PWR light (not used in this product) ¾...
-
Page 7: Section 1. Introduction
SECTION 1. INTRODUCTION The DX121 is a 2 4 GHz Wireless Intercom System The Base Station will connect to a dynamic microphone headset jack or the 4-Wire connector of a hardwired intercom station It also provides battery-charging capability for one battery The system typically uses BP200 Beltpacs, but it can also be used with the WH220 All-in-One Headset Once connected to your system, you can leave your console or intercom station while using a beltpac or headset ¾... - Page 8 Radio Communication Center Broadcasting Theater...
-
Page 9: Equipment Identification
Equipment Identification The DX121 One-to-One Wireless Intercom System includes a base station and may include any combination of beltpacs and headsets Other optional equipment may also be used with your system As you unpack the equipment, check the enclosed shipping document to be sure you received all items listed Base Station Base Station Antennas... -
Page 10: Main Equipment Features
Main Equipment Features Base Station Features Front Panel POWER button IC indicator light POWER light ISO indicator light BATT PWR light (not used) 10 HEADSET and 4W (4-Wire) IN and OUT audio level controls STATUS display 11 Battery charger port (BAT41 battery only) CLR/BND (clear/band) button 12 RDY (battery ready) light REG (registration) button... - Page 11 Beltpac Features (Uses BAT41 Battery) Headset cable connector Volume-up button Beltpac power and transmit lights Volume-down button ISO (Isolate) button Battery IC (Intercom) button Battery release latch PWR (Power) button WH220 Headset Features (Uses BAT50 Battery) IC1 button Power/mode light ISO (Isolate) button Microphone...
-
Page 12: Section 2. Base Station Setup
SECTION 2. BASE STATION SETUP Basic Base Station Setup The following description is for a basic, stand-alone DX121 One-to-One Wireless Intercom System setup Intercom headset, 4-Wire intercom and relay connections are described on page 17 Set up the Base Station as follows: Approximate 90°... -
Page 13: Ac50 Battery Charger Setup
3. Charge batteries - IMPORTANT! – Before using the DX121 system, charge the batteries for the Beltpacs and/or WH220 Headsets Charging time for fully-discharged batteries is about 3 hours per battery ¾ One battery can be charged in the battery Green battery- ready light Red battery- charging light charger at a time... -
Page 14: Ac40 Battery Charger Setup
AC40 Battery Charger Setup The AC40 is the charger for Beltpac batteries Before installing the system, connect the AC power supply to the AC40 Battery Charger and plug it into an electrical outlet Charge all the batteries for the Beltpacs while the other equipment is being installed Charging time is about 2 5 hours Connect AC Power Supply To connect the AC power supply to the battery charger: ¾... -
Page 15: Multiple Base Station Setup
Multiple Base Station Setup This mode of operation can be used to expand the number of users communicating through multiple HME Base Stations operating in the same portion of the 2 4 GHz to 2 48 GHz frequency band Primary and Secondary Base Station Settings One Base Station must be designated as “Primary”... - Page 16 Base Station Initialization For multiple HME Base Stations to operate without interference, they must be properly initialized before performing any other setups After initializing each Base Station, register each beltpac or headset that will be used with that base according to the procedures on pages 13 –...
- Page 17 Repeat these steps for each remaining secondary base Use a different number for each Only the primary base and the secondary base you are working with should have power on during initialization All other equipment should be off After all secondary bases are initialized with beltpacs and headsets registered, power up all bases 10 Press RESET on the primary base, and let it recover Turn on the primary beltpacs or headsets to allow them to link 11 Press RESET on each secondary base (one at a time), and let it initialize to the primary (indicated by a single bar) 12 Turn on the beltpacs or headsets associated with the secondary bases Complete one group at a time until they have all...
-
Page 18: Beltpac / All-In-One Headset Setup And Registration
Beltpac / All-In-One Headset Setup and Registration The first time you operate the DX121 system, you must register each BP200 Beltpac and/or WH220 All-In-One Headset for use with a specific Base Station. The Base Station will then recognize all registered beltpacs and headsets when their power is on and differentiate between them and other electronic equipment operating on the same frequencies If a beltpac or headset is added, replaced or repaired later, the new one must be registered and the replaced one remains in memory A maximum of 4 beltpacs and headsets can be registered to a single Base Station at one time If the maximum number of 4 is exceeded, you must clear all... - Page 19 If registration is successfully completed: ¾ A voice message in the headset will say “Power on, Beltpac #, Version #, Begin registration, Registration complete, …” ¾ After a delay of up to 15 seconds, the STATUS display will show the ID number assigned to this Beltpac for about 10 seconds NOTE: ID numbers are assigned sequentially as 0 through 3 ¾...
-
Page 20: Set Up All-In-One Headsets
Set Up All-In-One Headsets Battery-release latch Before registering them, insert a fully charged battery in each Headset When a (blue button) battery weakens, you will hear “Change battery” At this time, remove the battery from the headset by pressing the blue battery-release latch to remove the battery Power On/Off ¾... - Page 21 If the registration is successfully completed: ¾ A voice message in the Headset will say “Power on, Headset #, Version #, Begin registration, Registration complete, …” ¾ After a delay of up to 15 seconds, the STATUS display will show the ID number assigned to this Headset for about 10 seconds NOTE: ID numbers are assigned sequentially as 0 through 3 ¾...
-
Page 22: Intercom And Relay Connections
Intercom and Relay Connections If using your DX121 with a wired intercom system, connect the intercom to the HEADSET/4-WIRE connector on the rear panel of the Base Station as shown below Also, the RELAY connector shown below can be used as a “dry contact” for any outside equipment Base Station rear panel showing HEADSET/4-WIRE and RELAY connectors Base Station front panel showing HEADSET and 4W (4-Wire) input and output level adjustments... -
Page 23: Section 3. Equipment Operation
SECTION 3. EQUIPMENT OPERATION Base Station Operation Front Panel Controls, Indicators and Connector Power button Press the POWER button to turn the power on A red light above the button will be lit when the Base Station power is on Press the button again to turn the power off The light will go off All settings are preserved when the power is turned off, and will be restored when the power is turned on again Registration Controls and Status Indicator... -
Page 24: Beltpac Operation
Beltpac Operation The Beltpac control buttons have a snap action. They will activate when pressed firmly. Use your fingertips, not your fingernails, to press the buttons Power On/Off Power Lights ¾ Power On — Press and release the PWR (power) button A voice message in the earpiece will say “Power on, Beltpac #, Version #”, and the red power lights at the corners of the IC and ISO buttons will turn on After a short time, one light will go off and the other will change to green indicating the Beltpac is ready for... - Page 25 Volume Up/Down ¾ Volume Up Adjustment — Each time you press and release the volume-up button, you will hear a higher pitch beep in the earpiece as the volume increases one step If you press and hold the volume-up button, you will hear beeps of ascending pitch as the volume steps up to maximum When maximum volume is reached, you will hear “maximum”...
-
Page 26: All-In-One Headset Operation
All-In-One Headset Operation The Headset control buttons will activate when pressed lightly Use your Power button fingertips, not your fingernails, to press the buttons. Power On/Off ¾ Power On — Press and release the power button on the inside of the Headset housing A voice message in the earpiece will say “Power on, Headset #, Version #”... - Page 27 Volume Up/Down ¾ Volume Up Adjustment — Each time you press and release the volume-up button, you will hear a higher pitch beep in the earpiece as the volume increases one step If you press and hold the volume-up button, you will hear beeps of ascending pitch as the volume steps up to maximum When maximum volume is reached, you will hear “maximum”...
-
Page 28: Section 4. Eu Base Station Adaptive Frequency Hopping
SECTION 4. EU BASE STATION ADAPTIVE FREQUENCY HOPPING Hereby, HM Electronics, Inc , declares that DX121 is in compliance with the essential requirements and other relevant provisions of the Radio Equipment Directive (RED) In AFH mode, DX121 complies with European Telecommunications Standards Institute (ETSI) harmonized European standard EN 300 328 Customers, Distributors or Installers operating in a CE regulated country that switch off or disable AFH will render the product non-compliant with the directive and will be considered the manufacturer of the product... -
Page 29: Required Afh Equipment
¾ Physical separation If possible, equipment operating in the 2 4 GHz spectrum should be operating as far as physically possible from the HME base station A Wi-Fi access point or router is a common piece of equipment that could interfere with the DX121 system, or vice versa These two pieces of equipment in particular should not be located close together ¾... -
Page 30: Section 5. Troubleshooting
In the event of an electrical power outage — such as from a lightning storm or power generator failure, if you experience problems with your HME equipment after the electricity comes on again, unplug the AC power supplies from their electrical outlets and wait 15 seconds, then plug them back in... -
Page 31: Section 6. Dx Series Led Aid
SECTION 6. DX SERIES LED AID Powering on any DX base station will produce on the LED display the number “8” for approximately 3 seconds Blank display indicates the base is ready for operation You can register belt packs under this condition. Single horizontal bar indicates the base is in secondary mode and registering to a base has been initiated and successfully linked with a primary base You can register beltpacs in this mode. - Page 32 The lower case “c” will appear when the registry on the base station is cleared To clear the registry power down the base Hold down the CLR/BND or RESET REGISTRATION* button first and then power the base on when you see the “8”...
-
Page 33: Section 7. Technical Data
SECTION 7. TECHNICAL DATA DX121 Equipment Specifications BS121 Base Station GENERAL Frequency Range All, 2400 to 2483 5 MHz Low, 2401 92 to 2439 94 MHz High, 2443 39 to 2481 41 MHz Frequency Response 200 Hz to 3 5 kHz Power Requirements 100-240VAC, 50-60Hz or 12-14VDC Temperature Range... - Page 34 BP200 BELTPAC Frequency Range 2400 MHz – 2483 5 MHz Antenna Internal, horizontal/vertical diversity Frequency Response 200 Hz to 3 5 kHz Transmit Power 100mW burst RF Sensitivity <–0dBm w 10-3 BER Battery Requirements 3 6V lithium ion, rechargeable Battery Life Hands-free –...
-
Page 35: Section 8. Index
SECTION 8. INDEX Base Station Antenna mounting Battery charging Block diagram EU Base Adaptive Frequency Hopping Features Initialization (multiple base stations) Intercom and relay connections Interference avoidance Operation Power connection Setup (multiple base stations) Setup (single base station) Setup (split-band) Specifications Beltpac Battery changing... -
Page 36: Base Station Block Diagram
BASE STATION BLOCK DIAGRAM... -
Page 37: General Battery Safety Instructions For Battery Model Bat41, Bat50, Bat60
GENERAL BATTERY SAFETY INSTRUCTIONS FOR BATTERY MODEL BAT41, BAT50, BAT60... -
Page 38: Directives De Sécurité Générales Pour Les Modèles De Batterie Suivants : Bat41, Bat50, Bat60
Directives de sécurité générales pour les modèles de batterie suivants : BAT41, BAT50, BAT60... -
Page 39: Instrucciones Generales De Seguridad Para Baterías Para Cada Modelo De Batería: Bat41, Bat50, Bat60
Instrucciones generales de seguridad para baterías para cada modelo de batería: BAT41, BAT50, BAT60... -
Page 40: 배터리 모델의 일반적인 배터리 안전 지침: Bat41, Bat50, Bat60
배터리 모델의 일반적인 배터리 안전 지침: BAT41, BAT50, BAT60...
Need help?
Do you have a question about the DX121 EU and is the answer not in the manual?
Questions and answers