
Subscribe to Our Youtube Channel
Related Manuals for Creative Play carousel mini


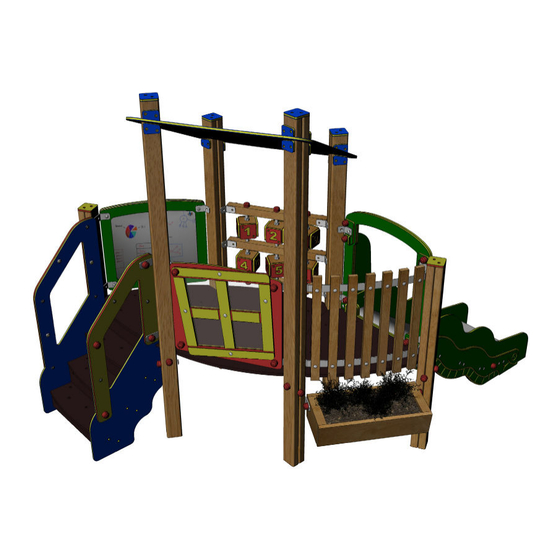
Summary of Contents for Creative Play carousel mini
- Page 1 Installation + Assembly Instructions CR102 CR103 REF: CR101 - CAROUSEL MINI pg 1 of 19...
-
Page 2: Parts Required
QTY: 2 MS2b (90mm x 90mm) (2 with BLUE end cap) (triangular floor) (square floor) (M12 110* square hex bolt) (End Caps) (triangular floor SLIDE - has a straight edge) (M12 Nylocs) pg 2 of 19 REF: CR101 - CAROUSEL MINI... - Page 3 2 for STAIRS / 2 for WINDOW PLANTER *many parts are pre-assembled with the brackets attached - totals above are for ‘loose’ brackets SQUARE ROOF STAIRS (inc 16 roof clips - same colour as roof) pg 3 of 19 REF: CR101 - CAROUSEL MINI...
- Page 4 PARTS required continued... THREAD BAR SLIDE ASSEMBLY slide SUPPORT FRAME 123 BOARD PLAYTEC WASHERS WINDOW GUARD RAIL WHITE BOARD (with COMBINATION BRACKETS) WINDOW PLANTER TIMBER GUARD RAIL pg 4 of 19 REF: CR101 - CAROUSEL MINI...
-
Page 5: Tools Required
4 x Thickness to go through = 36mm 1 x Thickness to go through = 41mm 6 x Thickness to go through = 52mm) (40mm brass screws) (End Caps) To be used for TORK TAINERS TOOLS required pg 5 of 19 REF: CR101 - CAROUSEL MINI... -
Page 6: Foundation Details
Foundation Details STAIRS FOUNDATION SLIDE FOUNDATION *MAIN POSTS ARE POSITIONED @ 750mm centres *attacments such as slide and stairs alter - shown above pg 6 of 19 REF: CR101 - CAROUSEL MINI... - Page 7 *REMEMBER - 600mm below FINISHED GROUND LEVEL - if WETPOUR / MULCH / PLAYSAFE is to be laid amend as required SOIL TIMBER SUPPORT POST CONCRETE Slide Details AS SHOWN LEFT SOIL SLIDE SUPPORT FRAME CONCRETE pg 7 of 19 REF: CR101 - CAROUSEL MINI...
- Page 8 Installation + Assembly Instructions Construct the main assembly BEFORE laying concrete foundations STEPS pg 8 of 19 REF: CR101 - CAROUSEL MINI...
- Page 9 PLEASE NOTE: The following pages show images which are not necessarily for the specific version and are used to show the assembly / installation for the specific component /sub assembly ONLY pg 9 of 19 REF: CR101 - CAROUSEL MINI...
- Page 10 ’fixed’ Use 80mm brass screws to secure assem- bly (STANDARD METAL BRACKETS) to the main upright supports STANDARD METAL BRACKET is positioned in the centre of the upright support pg 10 of 19 REF: CR101 - CAROUSEL MINI...
- Page 11 The combined bracket is pre-assembled with the whiteboard POSITION THE WHITEBOARD as shown below Use 80mm brass screws for the COMBINED BRACKET & 40mm screws for the STANDARD BRACKET 80mm brass screws 40mm brass screws pg 11 of 19 REF: CR101 - CAROUSEL MINI...
- Page 12 The holes in the roof are SHAPED and should ‘want’ to position itself at an angle ROOF IS NOT LEVEL ensure the drawing right is followed (measurements are from top of PLATFORM / hex board) pg 12 of 19 REF: CR101 - CAROUSEL MINI...
- Page 13 Using 6 x 40mm brass screws, 6 x STANDARD METAL BRACKETS, tork tainers and 123 Board assembly TOP VIEW DETAIL Platform ‘SIDE’ Out‘SIDE’ 6 x TORKTAINER Thickness to go through = 52mm pg 13 of 19 REF: CR101 - CAROUSEL MINI...
- Page 14 Installation + Assembly Instructions Attach Timber Guard Rail Using 40mm brass screws METAL BRACKET is positioned in the centre of the upright support 0.00 = TOP of BASE / HEX BOARD pg 14 of 19 REF: CR101 - CAROUSEL MINI...
- Page 15 Using 40mm brass screws, NYLOCS, TORKTAINERS & ENDCAPS PLAYTEC WASHER *Window always faces OUT - Yellow frame OUTWARDS (away from platform) 3 x TORKTAINER @ 29mm thickness 1 x TORKTAINER @ 41mm thickness pg 15 of 19 REF: CR101 - CAROUSEL MINI...
- Page 16 Attach the Window Planter Using 80mm brass screws, NYLOCS, TORKTAINERS & ENDCAPS MB-A ATTACHMENT METAL BRACKET 10mm from the end of the timber (timber face) 2 x TORKTAINER @ 29mm thickness pg 16 of 19 REF: CR101 - CAROUSEL MINI...
- Page 17 Installation + Assembly Instructions Installation + Assembly COMPLETE Ensure all END CAPS are present - make any final checks ... pg 17 of 19 REF: CR101 - CAROUSEL MINI...
- Page 18 Dimensions pg 18 of 19 REF: CR101 - CAROUSEL MINI...
- Page 19 NOTES: This space can be used to make any notes relating to installation / assembly of the MINI - pass this sheet back to PRODUCT DEVELOPMENT to review the notes pg 19 of 19 REF: CR101 - CAROUSEL MINI...
Need help?
Do you have a question about the carousel mini and is the answer not in the manual?
Questions and answers