
Subscribe to Our Youtube Channel
Related Manuals for Cole Parmer SP-300 Series


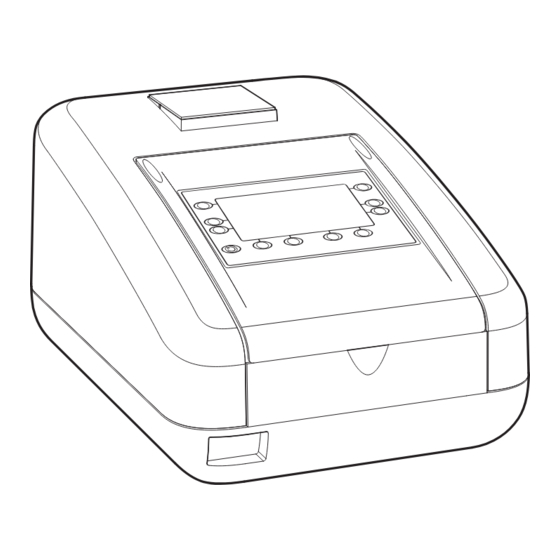
Summary of Contents for Cole Parmer SP-300 Series
- Page 1 Cole-Parmer ® SP-300 Series Spectrophotometer Accessory Fitting & Operation Instruction Manual 061672-CPB Rev D...
- Page 2 Safety Please read this information carefully prior to installing or using this equipment. 1. The unit described in this manual is designed be operated only by trained personnel. Any adjustments, maintenance and repair must be carried out as defined in this manual, by a person qualified to be aware of the hazards involved.
-
Page 3: Section 1 - Accessories And Spare Parts
SECTION 1 – Accessories and Spare Parts OPTIONAL ACCESSORIES Order Code Part Code Description of Accessory 83070-39 660101 Internal printer 83070-31 735401 Automatic 8 cell turret 83070-33 735201 Sipper pump 83070-35 735301 Peltier 83070-37 735701 Combined sipper peltier pump 83070-41 630204 10x10mm path length cuvette holder 83070-43... -
Page 4: Passive Accessories
Squeeze the grey plastic clips together so that the printer top opens. Slot the printer into the top of the instrument and push down until it fits flush to all four sides. Insert the paper roll into the printer – ensuring that there is some paper sticking out of the printer before clicking the grey plastic back into place. - Page 5 1.2.3.1 Automatic 8 cell turret Take the 8 cell turret base plate. Connect the power supply in the bottom of the sample chamber to the connector on the underside of the baseplate. Place the base plate in the sample chamber. Replace screws 1 to 4. Take the 8 cell carousel and place on top of the motor, taking care to align the three ball bearings with the grooves on the motor shaft.
- Page 6 1.2.3.3 Sipper pump For this accessory as well as removing the passive accessory base plate, the front panel of the instrument must also be removed. Loosen screws 5 and 6 until the front panel can be lifted out in a forward direction. Take the sipper base plate.
- Page 7 7. Cut a small length of the sipper pump tube and push this over one end of the capillary tube. Connect this to the inlet port of the flow-through cuvette. 8. Route the tube into the two retaining clips located on the base plate at the side of the pump head.
-
Page 8: Using The Accessories
USING THE ACCESSORIES 1.3.1 Automatic 8 cell turret When the automatic 8 cell turret is in use the 8 cell turret 0.000 icon is displayed in the bottom right hand corner of the screen. The current cell position is displayed adjacent to 0.000 the 8 cell turret icon. -
Page 9: Manual Sipper Pump Settings
1.3.2 Peltier When the peltier is in use the peltier icon is displayed in 0.000 the bottom right hand corner of the screen. The current temperature is displayed above the set point temperature 100.0 adjacent to the peltier icon. Below the peltier icon there is an arrow icon to indicate if the current temperature is below or above the set temperature. -
Page 10: Timed Sipper Pump Settings
Confirmation will be needed to start the sipper pump. 0.000 Press the key adjacent to the tick icon to confirm and start the sipper pump. Press the key adjacent to the cross 100.0 icon to cancel and return to the expanded operating menu. - Page 11 To fine tune the amount of sample uptake press the key below the plus or minus icon to increase or decrease the amount of sample taken up. The recorded time will be adjusted accordingly. Once the fine tuning is complete, or if none is required, press the key adjacent to the tick icon to move to the next stage of the calibration sequence.
- Page 12 To perform a measurement place the sipper tubing into 0.000 the sample and press the key below the sipper pump icon. 100.0 09: 02 Confirmation will be needed to start the sipper pump. 0.000 Press the key adjacent to the cross icon to cancel and return to the expanded operating menu.
- Page 13 The pump direction is displayed by an arrow icon below the sipper peltier icon. The combined sipper peltier pump combines the functionality of the peltier and sipper pump. To open the sipper peltier settings hold the key below the sipper peltier icon for 2 seconds. The settings menu is the same as the sipper pump settings except for the peltier icon in the top left hand corner.
- Page 14 India T: +44 (0) 1480 272279 T: +9122 61394444 E: uk.sales@antylia.com E: info@coleparmer.in W: coleparmer.co.uk W: coleparmer.in Germany China T: +49 (0) 9377 92030 T: +1 847 549 7600 E: de.sales@antylia.com E: sales@antylia.com W: coleparmer.de W: coleparmer.com France T: +33 (0) 1486 37800 T: +1 847 549 7600 E: fr.sales@antylia.com E: sales@antylia.com...
Need help?
Do you have a question about the SP-300 Series and is the answer not in the manual?
Questions and answers