Table of Contents
Advertisement
Quick Links
Advertisement
Table of Contents

Subscribe to Our Youtube Channel
Related Manuals for Cole Parmer MB-200-40


Summary of Contents for Cole Parmer MB-200-40
- Page 1 MB-200-40 Moisture Analyzer (P.N. 3076611320, Revision B, July 2022) © 2022...
- Page 2 © 2022...
-
Page 4: Table Of Contents
Page 1 of 60 1.0 CONTENTS CONTENTS ........................1 INTRODUCTION......................... 3 SET UP ..........................4 UNPACKING AND SETTING UP YOUR ANALYZER ..................4 ASSEMBLING THE ANALYZER ........................5 LEVELING THE ANALYZER.......................... 6 WARM-UP TIME ............................6 LOCATING AND PROTECTING YOUR ANALYZER ..................7 SAFETY ................................. - Page 5 Page 2 of 60...
-
Page 6: Introduction
Page 3 of 60 2.0 INTRODUCTION This Instruction Manual will familiarize you with the installation, accessories, trouble-shooting, after sales service information, general maintenance of the analyzer, etc. and will guide you through the various applications. Please read this Manual thoroughly before starting the operation. If you need any clarifications, feel free to contact your supplier. -
Page 7: Set Up
Page 4 of 60 3.0 SET UP UNPACKING AND SETTING UP YOUR ANALYZER Remove the balance from the packing by carefully lifting it out of the box. Inside the box you will find everything needed to start using the analyzer- AC power cable Pan Support Stainless Steel Lower Chamber Insert... -
Page 8: Assembling The Analyzer
Page 5 of 60 ASSEMBLING THE ANALYZER For best performance, let the analyzer warm up for 30 minutes before using. Locate the balance on a solid surface, free from vibration with good ventilation around it. Place the lower reflector (1) into the base of the weighing chamber Gently place the pan support (2) into the access hole. -
Page 9: Leveling The Analyzer
Page 6 of 60 LEVELING THE ANALYZER After placing the balance in a suitable location, level it by using the spirit level on the rear of the analyzer. To level the balance turn the two adjustable feet at the rear of the analyzer until the bubble in the spirit level is centered. -
Page 10: Locating And Protecting Your Analyzer
Page 7 of 60 LOCATING AND PROTECTING YOUR ANALYZER In order to keep your analyzer functioning at its best we suggest that you do the following: Avoid extremes of temperature. Do not place in direct sunlight or near air conditioning vents. Make sure there are no heat sensitive or flammable materials above the analyzer. -
Page 11: Safety
Page 8 of 60 SAFETY This Moisture Analyzer complies with the European Council Directives and international standards for electromagnetic compatibility, and safety requirements. Improper use or handling can result in damage or injury. To prevent damage to the equipment, read these operating instructions thoroughly. - Page 12 Page 9 of 60 • Protect the Moisture Analyzer from external liquids. Clean any spills immediately. • If there is any visible damage to the Moisture Analyzer or the power cable, stop using the instrument immediately. Unplug the power and isolate the analyzer.
- Page 13 Page 10 of 60 • Materials that emit toxic, caustic or noxious fumes should only be tested in suitable fume hoods or with other ventilation. • Materials that will have a film on the surface during drying may cause high internal pressures to be present.
-
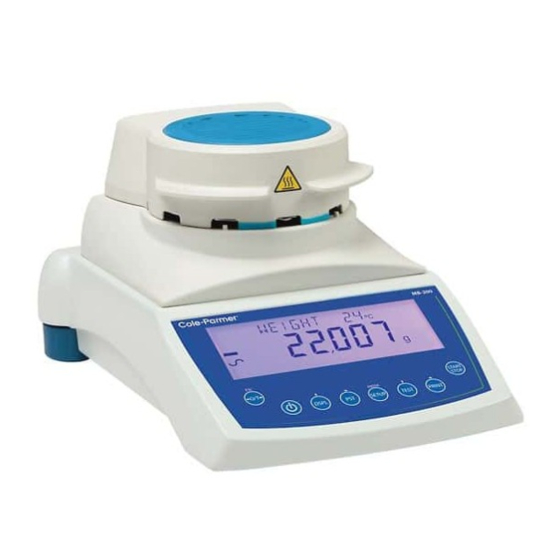
Page 14: Display And Keypad
Page 11 of 60 4.0 DISPLAY KEYPAD The LCD has unique symbols to indicate the following: 0 Zero Stable Net weight Note: Some symbols shown on the display are not used in the analyzers. During the moisture test the main display will show the percent moisture. It can be switched to other values using the [Dspl/ ] key, for example, current mass. - Page 15 Page 12 of 60 The keypad has dual purpose function keys to allow a selected menu item or value to be incremented or changed. Right/left shift to change the active digit and up/down to increment or decrement a value. The keypad has the following keys to operate the analyzer. Keys Primary function Secondary function...
-
Page 16: Numeric Entry Method
Page 13 of 60 Keys Primary function Secondary function [PST/ Store or Recall pre-stored test To advance a flashing digit by parameters. one position to the right. To go back by one step during setup functions ] Instructs the analyzer to print data To advance a flashing digit by [Print/... -
Page 17: Rear Panel Interfaces
Page 14 of 60 5.0 REAR PANEL INTERFACES The rear panel has connectors for the data interface, fuse holder, security lock location and power supply input. POWER Make certain your balance is compatible with the power supply in your area. If the voltage is not the same the analyzer can be damaged. -
Page 18: Basic Operation
Page 15 of 60 6.0 BASIC OPERATION When first turned on the balance will act as a basic balance showing grams weight on the display. If a passcode has been set to limit access to the weighing functions of the analyzer the display will show “PASSCODES”. - Page 19 Page 16 of 60 Interval Set the time interval at which the results are computed and printed. Range is 1 to 99 seconds. End Point Determination (manual stop active in all tests) The analyzer ends a test when the results are stable within a value set by the user.
-
Page 20: Manually Setting Test Procedures
Page 17 of 60 6.1.1 MANUALLY SETTING TEST PROCEDURES Press the [Test/ ] key to set the test procedure. During the process use the numeric entry procedure described in section 4.1 to enter or change a setting. ] at any time during this procedure will print a list of the Pressing [Print/... - Page 21 Page 18 of 60 moisture or solid at the time interval desired. The new result will be displayed and printed as described below. Display “Interval” “Sec XX” The user can change the value using the arrow keys. Range is 01 to 99 Seconds. Typical results will be computed every 5- 15 seconds.
- Page 22 Page 19 of 60 Print Control The analyzer can print the results during the test. If the print is set to ON, the analyzer will also store the results to memory using the filename given by the user. See Section 8.0 Display will show PRINT TEST Options are “On”...
-
Page 23: Print Current Settings
Page 20 of 60 6.1.2 PRINT CURRENT SETTINGS ] key will cause the current When setting the test parameters the [Print/ parameters to be printed as shown below. However if the display is awaiting ] key will move the flashing digit to the left. a numeric entry the [Print/... - Page 24 Page 21 of 60 PST STORE If Store is selected the display will then show “PST STORE XX” with the number showing the ID for the next empty location. For example if PST 01, 02, & 03 are already stored the next number is PST 04. If the user wishes to overwrite a previously stored value they can change the number and continue.
-
Page 25: Recall Test Settings
Page 22 of 60 Up to 10 characters can be used to describe the test. Press [Setup/Enter] at any time to finish the description. If no name is added the field will be shown as blanks when the name is shown during the recalling process. PST NAME BREAD-4 RECALL TEST SETTINGS... -
Page 26: Delete Test Settings
Page 23 of 60 BREAD-3 PST 07 Press the [Setup/Enter] key to recall PST 07. The display will show: RECALL OK The analyzer will then return to normal. DELETE TEST SETTINGS To delete any test setting select “PST DELETE” then scroll through the stored settings using the [Dspl/ ] or [Test/ ] arrow keys to find the desired settings and then pressing the [Setup/Enter] key to delete it. -
Page 27: Running A Test
Page 24 of 60 7.0 RUNNING A TEST If necessary the user can set a new set of values for a test setting or recall a pre-stored set of values. See section 6. The last used set of values is stored so they are always shown initially, even after power has been turned off. - Page 28 Page 25 of 60 The top line will show the elapsed time of the test and the chamber temperature. The main display will show the current result, updated at the interval time selected when setting test parameters. 03:45 RA 100 ºC 16.
- Page 29 Page 26 of 60 The Alternate displays in order are: Mass % Moisture % Solid % Atro Moisture % Atro Solid During the test the user can stop the test at any time by pressing the [Start] key again. Otherwise it continues until the stop condition is met. When the test has stopped the beeper will sound 3 short beeps (if enabled, see sec.
-
Page 30: Print Results
Page 27 of 60 8.0 PRINT RESULTS If the test parameters are set to allow the test results to be printed (see section 6.1.1) then the results of the test are printed both before and after the test is complete. The initial part of the printout will show the test conditions. If the test printing parameter has been set to complete then the results will be printed at the interval time. -
Page 31: Analyzer Menus
Page 28 of 60 10.0 ANALYZER MENUS The balance has a number of submenus for setting the operation of the analyzer and the communications. The main topics are: PASSCODES To control unauthorized access to the menu system. ANALYZER SETTINGS Setting of date and time Date format, YMD, MDY, DMY User ID Key Buzzer On/Off... -
Page 32: Supervisor Menus
Page 29 of 60 10.1 SUPERVISOR MENUS Pressing the [Setup/Enter] key while in normal weighing gives access to the menus. When [Setup/Enter] is pressed and passcodes are not enabled the display will show the first section of the menus, Serial interface. If passcodes are enabled, the analyzer will ask for it by displaying : PASSCODE 000000... -
Page 33: Serial Interface Parameters
Page 30 of 60 10.1.1 SERIAL INTERFACE PARAMETERS The parameters affecting the serial setup are set in a similar manner to the other parameters. Press [Setup/Enter] when “SERIAL” is displayed to enter the sub-menu. The parameters that can be set are shown below, default values are in bold: BAUD RATE Set the Baud Rate to 2400, 4800, 9600, 19200 or 38400... -
Page 34: Setup Parameters
Page 31 of 60 10.1.2 SETUP PARAMETERS The user parameters that control the balance are shown under the SETUP. When “SETUP” is displayed, press the [Setup/Enter] key. The options for each parameter can be scrolled through by using the [Dspl/ ] or [Test/ ] keys. - Page 35 Page 32 of 60 FILTER Set the amount of filtering used for weighing. If sever vibration is present a slower filter may be helpful, for maximum speed use the fast filter. Select SLOW, NORMAL or FAST LANGUAGE Select the language, English, German, French or Spanish PREVIEW Allows the test settings to be previewed...
-
Page 36: Calibration
Page 33 of 60 10.1.3 CALIBRATION This menu allows the user to calibrate the weight or the chamber temperature. Press [Setup/Enter] when “CALIBRATE” is displayed. The options for each parameter can be scrolled through by using the [Dspl/ ] or [Test/ ] key CAL MASS Begin the mass calibration function. -
Page 37: Temperature Calibration
Page 34 of 60 Place the calibration weight shown on the center of the weighing pan. When the stable indicator is on press [Setup/Enter]. The analyzer will calibrate to the weight selected. When calibration is complete the display will return to weighing. If there is a problem an error message will be show. - Page 38 Page 35 of 60 with the timer running. The timer will count up to 20:00 to allow time for the chamber to come to a steady (room) temperature. During this time observe the temperature in the chamber. During this time the beeper will sound every minute to remind you that a calibration is in progress.
- Page 39 Page 36 of 60 The balance will return to normal weighing. Leave the analyzer to cool . During the 20 minute soaking time you can force the timers to stop if you observe the chamber temperature is stable by pressing the [Setup/Enter] key.
-
Page 40: Calibration Report
Page 37 of 60 10.1.3.3 CALIBRATION REPORT During weight or temperature calibration the analyzer can print a report showing details of the calibration. The format of the reports is: MASS CALIBRATION TEMPERATURE CALIB. DATE: 21/02/2009 DATE: 21/02/2009 From Analyzer RTC TIME: 14:21:32 TIME:... -
Page 41: Passcodes
Page 38 of 60 10.1.4 PASSCODES To enable the security features in the balance it is necessary to set passcodes. There are 2 passcodes called Operator Passcode and Supervisor Passcode. The Operator Passcode allows an authorized user to operate the basic weighing functions of the analyzer but will not allow access to the Supervisor Menus if the Supervisor Passcode has been set. -
Page 42: Serial Interface
Page 39 of 60 11.0 SERIAL INTERFACE The balance has the ability to send or receive data over the serial interface. The test data can be sent over the interface either automatically or when the ] key. user presses the [Print/... -
Page 43: Printing Results
Page 40 of 60 Basic Input Commands: !KT<CR> Tares the analyzer to display the net weight. This is the same as / Esc] key when the analyzer is in the normal pressing the [ 0/T weighing mode. !KS<CR>... - Page 44 Page 41 of 60 A typical test report will look as: MOISTURE TEST Heading DATE: 13/12/2008 From Analyzer TIME: 09:38:07 SER NO: XXXX45678 Serial number TEST NO: _ _ _ _ _ _ _ _ _ A blank line for users to fill in a number if they wish. USER NO: 9876543210 Result:...
- Page 45 Page 42 of 60 FILE NAME: RES00032 File name used by analyzer to store result DATE: 13/12/2008 TIME: 09:38:07 From Analyzer SER NO: XXXXXXXXXXX Serial number USER NO: XXXXXXXXXXX User number TEST NO: _ _ _ _ _ _ _ _ _ Leave a blank line for users to fill in a number if Preset: PST 05...
-
Page 46: Analyzer Configuration Through The Serial Interface
Page 43 of 60 11.5 ANALYZER CONFIGURATION THROUGH THE SERIAL INTERFACE The analyzer can use the serial interface to set parameters for weighing test and for analyzer configuration. The parameters are set by sending a line of data that has the description and the setting desired. It is possible to create a text file that contains all the data necessary to set he test conditions for a particular test (or analyzer configuration) and send this to the analyzer. -
Page 47: Balance Setup Parameters
Page 44 of 60 The current settings can be printed or observed as described in sections 6.1.2 and 6.3. 11.5.2 BALANCE SETUP PARAMETERS The parameters related to analyzer configuration are listed below. To change a test parameter it is necessary to send a command for the parameter to modify along with the value to change. -
Page 48: Analyzer Recall Parameters
Page 45 of 60 When the analyzer receives a valid command, it will return the message E0. If an invalid input command is received, the command is returned as follows: Message returned Remarks The analyzer can not recognise this command. String length is not right. -
Page 49: Continuous Output
Page 46 of 60 11.6 CONTINUOUS OUTPUT The balance can use the interface to send the weight only to the output. This setting is configured in the Serial Communications parameters, see section 10.1.1. When the output is set for Continuous the test reports are not printed during a drying test and test results are not stored. -
Page 50: Specifications & Features
Page 47 of 60 12.0 SPECIFICATIONS & FEATURES Capacity Readability 0.001g / 0.01% Repeatability 0.002g s.d. weighing Stabilisation ~3-4 sec. Time Weighing Suggested Minimum Sample size Repeatability moisture determination 3g sample 0.15% (Sample is 10g sample 0.05% sodium tartrate dihydrate) Pan size 90mm %moisture... - Page 51 Page 48 of 60 Temperature 50 -160C chamber set in 1C steps Temperature Standard (one step) profile RS-232 Bi-directional serial port Stored Test 1 Default setting, 49 user settings Setting Data Output Ability to send data out via RS-232 Serial port To sound when keys are pressed or to announce end of a Beeper test, independently enable/disable...
-
Page 52: Menu Structure
Page 49 of 60 13.0 MENU STRUCTURE WEIGHING OPERATOR [0/I] key Standby/operate / Esc] Zero/Tare function 0/T ] key [Print/ Print results [Start] key Begin drying a sample [Dspl/ ] key Display alternate data on LCD [PST/ ] key Store/Recall preset Test... - Page 53 Page 50 of 60 [Test/ ] key Set Test Conditions Result % moisture % Solid % ATRO Moisture % ATRO Solid Heat Single Set Temperature Interval Set Interval time Stop Stable Set Stable value Set Stable Time Start Manual Auto Print Test On Format Complete...
- Page 54 Page 51 of 60 SUPERVISOR MENU SERIAL Setup Interface Parameters Baud Rate 2400/4800/9600/19200/38400 Parity Off / Even/ Odd Continuous On/Off Interval 01 to 99 seconds SETUP Setup analyzer parameters Time Hour Set 00 to 23 Minute Set 00 to 59 Second set 00 to 59 Date Format...
- Page 55 Page 52 of 60 CALIBRATION CAL Mass Start weight calibration CAL Temp Start Chamber Temperature Calibration Calibration Report OFF / ON PASSCODES Set Passcodes Operator Enter old Enter new Supervisor Enter old Enter new...
-
Page 56: Sample Preparation
Page 53 of 60 14.0 SAMPLE PREPARATION Sample preparation is the single most important item for accurate results. The sample must be prepared so the whole of the sample is heated uniformly and the moisture is near the surface of the material. For powders no further preparation is necessary. - Page 57 Page 54 of 60 Some plastics also are not suitable for this type of method due to the very low percent moisture and the heat required to extract this moisture. KNOW THE MATERIAL In addition it is important to know enough about the materials so that you do not endanger or inconvenience others.
-
Page 58: Guidance Notes
Page 55 of 60 15.0 GUIDANCE NOTES The following guide notes are offered as examples of temperature, display update time and expected results when drying various substances. The preparation, distribution and amount of product can all significantly affect the results. It is important to find suitable procedures to process the material, usually by trial and error. - Page 59 Page 56 of 60 MOISTURE ANALYZER EXAMPLES MATERIAL SAMPLE DRYING STROBE AVERAGE STANDARD DRYING MASS TEMPERA- TIME(s) WATER DEVIATION TIME(min) TURE.(º C) CONTENT BUTTER 16.3 CEMENT 8-12 CHARCOAL 8-10 8-10 CHOCOLATE POWDER COCOA POWDER COFFEE 78.5 CREAMER POWDER CORNFLAKES APPLE 76.5 10-15 PULP...
- Page 60 Page 57 of 60 © 2022 Page...
Need help?
Do you have a question about the MB-200-40 and is the answer not in the manual?
Questions and answers