Table of Contents
Advertisement
Quick Links
Advertisement
Table of Contents

Subscribe to Our Youtube Channel
Related Manuals for Almost Heaven Saunas Himalaya Corner


Summary of Contents for Almost Heaven Saunas Himalaya Corner
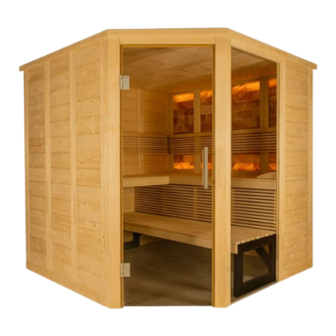
- Page 1 Himalaya Corner 6 Person Sauna Installation & Owner’s Manual...
-
Page 2: Electrical Requirements
1 – Door Magnet & Sleeve Plate It is suggested that you lay out all of the components so that it is easy to identify the pieces once you get started with assembly. Page | 2 HIMALAYA CORNER 6 PERSON SAUNA INSTALLATION... -
Page 3: Wall Assembly
(6). Now place three more similar panels next to it (7). A rubber mallet may be needed to lightly tap the panels together for a snug fit. Figure 7 Figure 5 Figure 6 Page | 3 HIMALAYA CORNER 6 PERSON SAUNA INSTALLATION... - Page 4 (12). Repeat for the other side with the 45° post with multiclips (13). Tap them on the top with a rubber mallet as required to get them into place (14). Figure 12 Figure 13 Figure 14 Page | 4 HIMALAYA CORNER 6 PERSON SAUNA INSTALLATION...
- Page 5 FRONT GLASS ASSEMBLY Take the window glass with and apply the aluminum “U” channel to the bottom, then place into the groove on the right post. (19-20). Figure 20 Figure 19 Page | 5 HIMALAYA CORNER 6 PERSON SAUNA INSTALLATION...
-
Page 6: Roof Assembly
On the two long supports, drill two additional holes 27” in from each end. Screw roof supports top of each wall using holes you drilled in previous step; ensure the top of the support is flush with the top of the wall (28-31). Page | 6 HIMALAYA CORNER 6 PERSON SAUNA INSTALLATION... - Page 7 Next to it, place the panel with tongue and groove (34) and lastly the panel with the groove to sit on the roof support. You may need to lift the last two panels so the tongue and groove fit together (35). Page | 7 HIMALAYA CORNER 6 PERSON SAUNA INSTALLATION...
- Page 8 Fasten the legs to the bench top (38). Figure 37 Figure 38 Next place the struts in place by insert the dowel pins into the holes (39). Then fasten the struts to the legs and bench top (40-41). Page | 8 HIMALAYA CORNER 6 PERSON SAUNA INSTALLATION...
-
Page 9: Bench Assembly
Place the bench screen mounting slats beneath the front end of the bench support slats installed that go away from the salt panel wall and fasten into place (44). Then fasten the bench screen to the slats (45). Figure 44 Figure 45 Page | 9 HIMALAYA CORNER 6 PERSON SAUNA INSTALLATION... -
Page 10: Backrest Installation
11” mark and fasten into place (45-46). Repeat for the remaining backrest (47). Place the sliding bench in the sauna below the bench screen (48). Figure 46 Figure 45 Figure 47 Figure 48 Page | 10 HIMALAYA CORNER 6 PERSON SAUNA INSTALLATION... -
Page 11: Door Installation
41” off the floor (54). Then install the door catch so that it is at the same height as the door magnet (55). You may need to apply slight pressure to pinch the catch into place. Figure 52 Figure 53 Figure 54 Figure 55 Page | 11 HIMALAYA CORNER 6 PERSON SAUNA INSTALLATION... - Page 12 Roof cover slats will around the roof to cover the joint of the roof panels and roof support braces. Fasten the cover slats in place so they sit just inside the wall panel profile (62-63). Figure 62 Figure 63 Page | 12 HIMALAYA CORNER 6 PERSON SAUNA INSTALLATION...
- Page 13 Prepare to feel refreshed for the day or to have an amazing night’s sleep! Whatever your sauna routine, it is imperative that you STAY HYDRATED! Optional accessories for your sauna, including a back rest, robe hook and much more are available at almostheaven.com/sauna-accessories/ Page | 13 HIMALAYA CORNER 6 PERSON SAUNA INSTALLATION...
Need help?
Do you have a question about the Himalaya Corner and is the answer not in the manual?
Questions and answers