Table of Contents

Related Manuals for Almost Heaven Saunas Barrel Sauna


Summary of Contents for Almost Heaven Saunas Barrel Sauna
- Page 1 ® Barrel Sauna Installation & Owner’s Manual In addition to reading this manual through to the end before proceeding with assembly you may find our instruction video helpful. You can find it at: youtube.com/user/almostheavensauna...
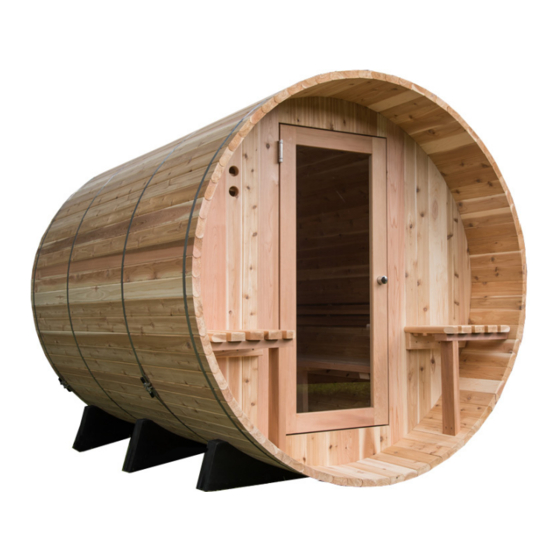
- Page 2 Read this entire manual through to the end before proceeding with the assembly. Congratulations on your purchase of an Almost Heaven barrel sauna! The barrel sauna is unique to Almost Heaven, and has been our most popular product for over 40 years. We are delighted you have decided to partake in the sauna tradition! A WORD ABOUT BARREL SAUNAS While there are various barrel sauna models with different features, this manual is designed for all Almost Heaven barrel saunas.
-
Page 3: Electrical Requirements
Because the traditional sauna experience involves a heating-cooling-resting regimen, it is important to plan ahead before installing your sauna. Our method of construction affords the widest number of possible choices because an Almost Heaven Barrel Sauna can be placed in either an indoor or outdoor setting. - Page 4 (11-12). Note: the metal vents are to be on the bottom on the back end, and the vent holes are to be on the top on the door end (13). Place a level on the uppermost horizontal support boards on the front and back ends to ensure each end is level (14). Adjust as necessary. Image 15 shows what your assembly should look like at this point of the installation process. (15) vents on top vents on bottom Image 11 Image 12 Image 13 page 3 Image 14 Image 15 BARREL SAUNA INSTALLATION MANUAL...
- Page 5 Each barrel sauna includes 2 pre-assembled benches that are side specific. Be sure the shorter bench slat is in front and against the doorframe (21). Lay the benches on the lower cleats, which are mounted on each end panel (22). Fasten the benches into the cleats using the pre-drilled holes (23). Be sure to countersink the fasteners slightly below the surface of the wood. For the 6’ and 8’ models, fasten the center bench support...
- Page 6 It is recommended that you insert enough filler staves so that some of the staves between the 10 – 2 position actually “lift off” the front and end panel. In other words, the radius of that the staves create will actually be slightly larger than the radius of the barrel end panels (38). This will ensure the tightest seal possible when the bands are tightened. Staves slightly lift off the ends of the barrel Image 35 Image 36 Image 37 Image 38 page 5 BARREL SAUNA INSTALLATION MANUAL...
- Page 7 You may also wish to have your electrician hardwire the light to a 110V circuit. Image 44 Image 45 ACCESSORIES Mount the thermometer on the opposite wall of the heater approximately 12” from the highest point of the barrel. Install doorknob (46) page 6 Image 46 BARREL SAUNA INSTALLATION MANUAL...
- Page 8 TRADITIONAL SAUNA USE Congratulations! You are ready to enjoy your barrel sauna! You may use your sauna in a wet or dry fashion. Dry meaning you do not sprinkle any water onto the stones, wet meaning you increase the humidity of the room by sprinkling water on the stones. Please note, not much water is needed to achieve a wet sauna experience.
Need help?
Do you have a question about the Barrel Sauna and is the answer not in the manual?
Questions and answers