
Related Manuals for Rockwell Automation Allen-Bradley Kinetix 7000


Summary of Contents for Rockwell Automation Allen-Bradley Kinetix 7000
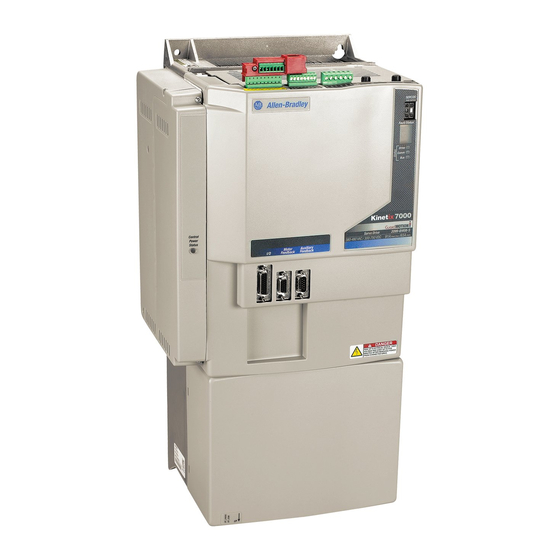
- Page 1 Kinetix 7000 High Power Servo Drive Catalog Numbers 2099-BM06-S, 2099-BM07-S, 2099-BM08-S, 2099-BM09-S, 2099-BM10-S, 2099-BM11-S, 2099-BM12-S User Manual Original Instructions...
- Page 2 If this equipment is used in a manner not specified by the manufacturer, the protection provided by the equipment may be impaired. In no event will Rockwell Automation, Inc. be responsible or liable for indirect or consequential damages resulting from the use or application of this equipment.
-
Page 3: Table Of Contents
Digital Inputs (IOD Connector) ......52 Rockwell Automation Publication 2099-UM001G-EN-P - December 2022... - Page 4 (GPIO) Connectors ......... . 90 Rockwell Automation Publication 2099-UM001G-EN-P - December 2022...
- Page 5 AC Line Filter Specifications........155 Rockwell Automation Publication 2099-UM001G-EN-P - December 2022...
- Page 6 ..............189 Rockwell Automation Publication 2099-UM001G-EN-P - December 2022...
-
Page 7: Preface
Sercos interface module. If you do not have a basic understanding of the Kinetix 7000 drive, contact your local Rockwell Automation sales representative before using this product for the availability of training courses. Conventions Used in This These conventions are used throughout this manual. - Page 8 Provides information on the CE marking process, with references to key European requirements and resources, and examples of safety component applications. Allen-Bradley Industrial Automation Glossary, publication AG-7.1 A glossary of industrial automation terms and abbreviations. Rockwell Automation Publication 2099-UM001G-EN-P - December 2022...
-
Page 9: Start
Start Use this chapter to become familiar with the design and installation requirements for Kinetix 7000 drive systems. Topic Page About the Drive System Typical Drive System Diagrams Catalog Number Explanation Agency Compliance Rockwell Automation Publication 2099-UM001G-EN-P - December 2022... -
Page 10: About The Drive System
Individual components can be purchased separately in place of the LIM. External Shunt External Shunt Modules on page 157 for active shunt solutions from Rockwell Automation® Encompass™ partners and Modules intended for use with Kinetix 7000 drives. (1) See the Kinetix Safe Torque Off Feature Safety Reference Manual, publication GMC-RM002, for more information. -
Page 11: Typical Drive System Diagrams
AC Line Filter External Shunt Module (optional component). See Encoder External Shunt Modules on page 157 for more Feedback information. Cable Motor Power Cable Kinetix HPK, MMA, MPL, MPM, and RDB Servo Motors Rockwell Automation Publication 2099-UM001G-EN-P - December 2022... - Page 12 AC Line Filter Encoder External Shunt Module (optional component). Feedback See External Shunt Modules on page 157 for more Cable information. Motor Power Cable Kinetix HPK, MMA, MPL, MPM, and RDB Servo Motors Rockwell Automation Publication 2099-UM001G-EN-P - December 2022...
- Page 13 Input Power MPL-B5xxx, MPL-B6xxx, MPL-B8xxx, and MPL-B9xxx (shown) Servo Motors Input Magnetic 2090-XXLF-TCxxxx 1321-3R Type Line Reactor, Fusing Contactor AC Line Filter 3% compatible with (required for CE and UK) Kinetix 7000 Drive Rockwell Automation Publication 2099-UM001G-EN-P - December 2022...
- Page 14 DC Bus Encoder Feedback Cable Motor Motor Encoder Power Cable Power Cable Feedback Cable Kinetix RDB, MPM-B165xx and MPM- B215xx, and MPL-B5xxx, MPL-B6xxx, Kinetix HPK and MMA motors MPL-B8xxx, and MPL-B9xxx (shown) Servo Motors Rockwell Automation Publication 2099-UM001G-EN-P - December 2022...
- Page 15 Encoder Feedback Cable Motor Power Cable Motor Power Cable Encoder Feedback Cable Kinetix RDB motors, MPM-B165xx and Kinetix HPK and MMA motors MPM-B215xx, and MPL-B5xxx, MPL- B6xxx, MPL-B8xxx, and MPL-B9xxx (shown) Servo Motors Rockwell Automation Publication 2099-UM001G-EN-P - December 2022...
-
Page 16: Catalog Number Explanation
For grounding examples, see Grounded Power Configurations on page 73. For more information on electrical noise reduction, see the System Design for Control of Electrical Noise Reference Manual, publication GMC-RM001. Rockwell Automation Publication 2099-UM001G-EN-P - December 2022... -
Page 17: Ce And Uk Requirements - System Without Lim
• All shielded cables should terminate with a properly shielded connector. See the System Design for Control of Electrical Noise Reference Manual, publication GMC-RM001, for information on electrical noise reduction and grounding practices. Rockwell Automation Publication 2099-UM001G-EN-P - December 2022... -
Page 18: Ce And Uk Requirements - System With Lim
Interconnect Diagrams beginning on page 161. • Install a single-phase line filter when attaching an AC line input to the RPS MC1/2 circuit as indicated in the Interconnect Diagrams beginning on page 161. Rockwell Automation Publication 2099-UM001G-EN-P - December 2022... -
Page 19: Install The Kinetix 7000 Drive System
Because the system is of the open type construction, be careful to keep any metal debris from falling into it. Metal debris or other foreign matter can become lodged in the circuitry, which can result in damage to components. Rockwell Automation Publication 2099-UM001G-EN-P - December 2022... -
Page 20: System Design Guidelines
Kinetix 7000 drive, refer to the manufacturer continuous output power specification. If using an autotransformer, make sure that the phase to neutral/ground IMPORTANT voltages do not exceed the input voltage ratings of the drive. Rockwell Automation Publication 2099-UM001G-EN-P - December 2022... -
Page 21: Circuit Breaker/Fuse Selection
Enclosure Selection To assist you in sizing an enclosure, the following example is provided. The example system consists of the following components. • 2-axis Kinetix 7000 servo drive system • ControlLogix® chassis and modules Rockwell Automation Publication 2099-UM001G-EN-P - December 2022... - Page 22 Description Loading Heat Dissipation Component (Motion Analyzer) Watts 2099-BM08-S Kinetix 7000 Servo Drive 2099-BM11-S Kinetix 7000 Servo Drive 1275 Total Wattage of Kinetix 7000 system 1727 (1) Loading determined using Motion Analyzer software. Rockwell Automation Publication 2099-UM001G-EN-P - December 2022...
- Page 23 Figure 6 - ControlLogix Real Power 1756-P B72 Backplane 1756-P B75 Power Load (Watts) Real Power (Watts) For backplane power loading requirements of other ControlLogix power supplies, see the ControlLogix Selection Guide, publication 1756-SG001. Rockwell Automation Publication 2099-UM001G-EN-P - December 2022...
- Page 24 If the enclosure size is considerably larger than what is necessary to house the system components, it may be more efficient to provide a means of cooling in a smaller enclosure. Contact your enclosure manufacturer for options available to cool your enclosure. Rockwell Automation Publication 2099-UM001G-EN-P - December 2022...
-
Page 25: Minimum Clearance Requirements
Minimum cabinet depth = 300 mm (11.8 in.) Cable bend radius requires a minimum of 60 mm (2.4 in.) from the front panel connections. 101.6 mm (4.0 in.) clearance for airflow and installation See page for power dissipation specifications. Rockwell Automation Publication 2099-UM001G-EN-P - December 2022... -
Page 26: Minimizing Electrical Noise
Improper bonding blocks the direct return path and routes high-frequency energy to elsewhere in the cabinet. Excessive high-frequency energy can affect the operation of other microprocessor-controlled equipment. Figure 8 shows details of recommended bonding practices for painted panels, enclosures, and mounting brackets. Rockwell Automation Publication 2099-UM001G-EN-P - December 2022... - Page 27 Flat Washer Star Washer Flat Washer If the mounting bracket is coated with a non-conductive material (anodized, or painted for example), scrape the Star Washer material around the mounting hole. Rockwell Automation Publication 2099-UM001G-EN-P - December 2022...
-
Page 28: Bonding Multiple Subpanels
Scrape the paint around each fastener to maximize metal to metal contact. Establish Noise Zones When designing a panel for a Kinetix 7000 system, observe the following guidelines with additional attention to zone locations. Rockwell Automation Publication 2099-UM001G-EN-P - December 2022... - Page 29 Shielded Cable or Breaker Contactor Keep very dirty (VD) connections as short as Conduit possible and segregated (not in wireway) Harmonic 24V DC Filter Power Supply Motor Power Shielded Cable Route Encoder/Analog/Registration Shielded Cable Rockwell Automation Publication 2099-UM001G-EN-P - December 2022...
- Page 30 Shielded Cable or Conduit Line Reactor Keep very dirty connections as short as possible and segregated (not in wireway) 24V DC 8720MC -LR10-100B Power Line Reactors Supply Motor Power Shielded Cable Route Encoder/Analog/Registration Shielded Cable Rockwell Automation Publication 2099-UM001G-EN-P - December 2022...
- Page 31 Shielded Cable When space does not permit the 150 mm (6.0 in.) partitioning, use a grounded steel shield instead. For examples, see the System Design for Control of electrical Noise Reference Manual, publication GMC-RM001. Rockwell Automation Publication 2099-UM001G-EN-P - December 2022...
- Page 32 Route dirty wireways directly above the ControlLogix rack (shielded by the chassis). AC Line Filter Spare Slots Line Filter/Power Supply Dirty I/O Clean I/O Connections Segregated (24V DC I/O, AC I/O) (Analog, Encoder (not in wireway) Registration) Rockwell Automation Publication 2099-UM001G-EN-P - December 2022...
-
Page 33: Cable Categories For Kinetix 7000 Systems
24V DC (PWR), COM, unfiltered 24V DC (PWR), COM, safety enable, and feedback signals for Safe Torque Off feature Motor Feedback Auxiliary Feedback Registration and Analog Outputs Others Fiber-optic Rx and Tx No Restrictions Rockwell Automation Publication 2099-UM001G-EN-P - December 2022... -
Page 34: Noise Reduction Guidelines For Drive Accessories
• Separate input and output wiring as far as possible. CE and UK test certification applies only to the AC line filter and single drive. IMPORTANT Sharing a line filter with multiple drives may perform satisfactorily, but the user takes legal responsibility. Rockwell Automation Publication 2099-UM001G-EN-P - December 2022... - Page 35 2 twists per foot min. (3rd choice) equipment within 150 mm (6.0 in.) Kinetix 7000 drive I/O and Feedback Very dirty connections segregated (not Cables in wireway) Route 24V DC I/O Shielded Cable Motor Power Cables Enclosure Rockwell Automation Publication 2099-UM001G-EN-P - December 2022...
- Page 36 See Wire Motor Output Power on page for wiring guidelines specific to your drive/motor combination, and to Interconnect Diagram Notes on page the interconnect diagram of your drive/motor combination. Rockwell Automation Publication 2099-UM001G-EN-P - December 2022...
-
Page 37: Mount The Kinetix 7000 Drive
Follow the recommended high-frequency (HF) bonding techniques as shown in Bonding Modules beginning on page 26. Follow the lifting instructions found in the Kinetix 7000 High Power Servo Drive Installation Instructions, publication 2099-IN003. 3. Tighten all mounting fasteners. Rockwell Automation Publication 2099-UM001G-EN-P - December 2022... - Page 38 625.0 (24.61) 225.0 (8.86) 37.5 (1.48) M6 (0.25) 2099-BM11-S 977.1 (38.47) 429.2 (16.90) 282.7 (11.13) 824.0 (32.44) 300.0 (11.81) 49.6 (1.95) M8 (0.3125) 2099-BM12-S IMPORTANT Each Kinetix 7000 drive requires four mounting screws. Rockwell Automation Publication 2099-UM001G-EN-P - December 2022...
-
Page 39: Kinetix 7000 Connector Data
This chapter provides power, feedback, and I/O connector locations and signal descriptions for a Kinetix 7000 drive. Topic Page Locate and Identify Connectors and Indicators Control Signal Specifications Control Power Specifications Motor (MF) and Auxiliary Feedback (AF) Connections Rockwell Automation Publication 2099-UM001G-EN-P - December 2022... -
Page 40: Locate And Identify Connectors And Indicators
Auxiliary Feedback Connector 15-pin high-density D-shell (male) Motor Feedback Connector 15-pin high-density D-shell (female) Digital and Analog Input/Output Connector 26-pin high-density D-shell – Control Power Status Indicator – Power Terminal Block Terminal block Rockwell Automation Publication 2099-UM001G-EN-P - December 2022... - Page 41 General-purpose Relay Terminal Block 6-position plug/header Sercos Fiber-optic Receive Port Sercos fiber-optic DPI™ Device Peripheral Interface Connector – – Sercos Fiber-optic Transmit Port Sercos fiber-optic Communication rate Sercos communication rate and Optical Power – Switches Rockwell Automation Publication 2099-UM001G-EN-P - December 2022...
- Page 42 Kinetix 7000 Connector Data Figure 19 - Kinetix 7000 Bottom Panel Connectors Bottom View 2099-BM06-S and 2099-BM07-S shown Item Designator/Label Description Connector See Page Control Power Terminal Block 2-position terminal Power Terminal Block Access Terminal block Rockwell Automation Publication 2099-UM001G-EN-P - December 2022...
-
Page 43: Digital And Analog Input/Output (Iod) Connector Pinout
Power The Drive supplied +24V DC and Common source signals (at pins 1, 3, 4, 6, IMPORTANT 7, 9, 10, and 12) can only be used for the inputs that are listed above. Rockwell Automation Publication 2099-UM001G-EN-P - December 2022... -
Page 44: General-Purpose I/O (Gpio) Terminal Block Connections
24V DC customer-supplied power input for Relay 1 24VDC Programmable N.O. Relay 1 output GPR1+ Programmable Relay 1 common GPR1- 24V DC customer-supplied power supply common Programmable N.O. Relay 2 output GPR2+ Programmable Relay 2 common GPR2- Rockwell Automation Publication 2099-UM001G-EN-P - December 2022... -
Page 45: Motor Feedback (Mf) Connector Pinouts
Encoder power (+9V) EPWR_9V Reserved — Single-ended 5V hall effect commutation (1) Not applicable unless motor has integrated thermal protection. (2) Encoder power supply uses either 5V or 9V DC based on encoder/motor used. Rockwell Automation Publication 2099-UM001G-EN-P - December 2022... - Page 46 (2) S1 = 1024 sin/cos, Absolute Single-turn Encoder (Hiperface protocol), S3 = 2048 sin/cos, Absolute Single-turn Encoder (EnDat protocol), M1 = 1024 sin/cos, Absolute Multi-turn Encoder (Hiperface protocol), M3 = 2048 sin/cos Absolute Multi-turn Encoder (EnDat protocol) (3) Additional modifications may be needed to convert the drive 5V power to receive the Kinetix MMA 9V power. Rockwell Automation Publication 2099-UM001G-EN-P - December 2022...
-
Page 47: Auxiliary Feedback (Af) Connector Pinouts
Index pulse+ Reserved — Common ECOM Encoder power (+5V) EPWR_5V Encoder power (+9V) EPWR_9V Reserved — Reserved — (1) Encoder power supply uses either 5V or 9V DC based on encoder that is used. Rockwell Automation Publication 2099-UM001G-EN-P - December 2022... -
Page 48: Safe Torque Off (Sto) Terminal Block Connections
SO_COM Terminals 8 and 9 (24V+ and Common) are only used by the motion- IMPORTANT allowed jumper. When using the Safe Torque Off feature, the 24V supply must come from an external source. Rockwell Automation Publication 2099-UM001G-EN-P - December 2022... -
Page 49: Control Power (Cp) Terminal Block Connections
2099-BM09-S and 2099-BM10-S, and 138 VA for the 2099-BM11-S and 2099- BM12-S drives. The 2099-BM06-S, 2099-BM07-S, and 2099-BM08-S drives (frame 3) use the internal power supply for fan power and thus no terminals are provided. Rockwell Automation Publication 2099-UM001G-EN-P - December 2022... - Page 50 Figure 27 - 2099-BM06-S, 2099-BM07-S, and 2099-BM08-S Cable clamps for Motor and AC inputs. Figure 28 - 2099-BM09-S Fan Terminals Enlarged View Motor AC Line Figure 29 - 2099-BM10-S Fan Terminals Enlarged View Motor AC Line Rockwell Automation Publication 2099-UM001G-EN-P - December 2022...
- Page 51 Main 380…480V AC +/-10% Input Power, Three-phase to R, S, and T Input Terminals S-L2 T-L3 120VAC +120V AC Input for Fan Power VAC_FAN_1 240VAC +240V AC Input for Fan Power VAC_FAN_2 0VAC Fan Common GND_FAN For factory use only – For factory use only – Rockwell Automation Publication 2099-UM001G-EN-P - December 2022...
-
Page 52: Control Signal Specifications
The supply is protected with an automatically reset fuse. A temperature versus time curve automatically controls closing of the fuse. A common mode choke filters the registration power connection. An additional common mode choke is provided for the remaining inputs. Rockwell Automation Publication 2099-UM001G-EN-P - December 2022... - Page 53 IOD-3 IO_COM 1k Ω Customer-supplied Input Device Kinetix 7000 Drive (1) +24V DC source (range) = 21.6V…26.4V (supplied by the drive, not to exceed 300 mA total). Maximum current input = 10 mA. Rockwell Automation Publication 2099-UM001G-EN-P - December 2022...
- Page 54 IOD-6 IO_COM 1k Ω Customer-supplied Input Device Kinetix 7000 Drive (1) +24V DC source (range) = 21.6…26.4V (supplied by the drive, not to exceed 300 mA total). Maximum current input = 10 mA. Rockwell Automation Publication 2099-UM001G-EN-P - December 2022...
- Page 55 IOD-9, 12 IO_COM 1k Ω Customer-supplied Input Device Kinetix 7000 Drive (1) +24V DC source (range) = 21.6…26.4V (supplied by the drive, not to exceed 300 mA total). Maximum current input = 10 mA. Rockwell Automation Publication 2099-UM001G-EN-P - December 2022...
- Page 56 The schematic below depicts the Registration circuits. It is provided as a reference only. Rockwell Automation Publication 2099-UM001G-EN-P - December 2022...
- Page 57 IOD-15, or -18 HCPL-0631 IO_COM Customer-Supplied Kinetix 7000 Drive Registration Input Device (1) +24V DC source (range) = 21.6V…26.4V (supplied by the drive, not to exceed 300 mA total). Maximum current input = 10 mA. Rockwell Automation Publication 2099-UM001G-EN-P - December 2022...
-
Page 58: Analog Inputs (Iod Connector)
100 Ω Anlg In 1 0.1 μF V– Analog_Input_1 0.1 μF IOD-19 Analog_Input_2_Ret Sense – IOD-22 100 Ω Anlg In 2 0.1 μF V– 0.1 μF Analog_Input_2 IOD-21 Customer-supplied Kinetix 7000 Drive Input Device Rockwell Automation Publication 2099-UM001G-EN-P - December 2022... - Page 59 Module Properties dialog, the corresponding bit value displays as in the example below. Divide the value displayed by 100 to determine the actual voltage on the input. 6978 / 100 = 69.78% or 6.98V DC. Rockwell Automation Publication 2099-UM001G-EN-P - December 2022...
-
Page 60: Analog Outputs (Iod Connector)
10 kΩ Analog_Out_1_Ret IOUT1B LDAC IOD-24 IOUT2B VRBFA 10 kΩ 10 kΩ VRBFB 3.9 μF – 4.09 kΩ – 100 kΩ 10 kΩ Analog_Out_2 IOD-25 V– V– 2.2 μF 10 kΩ Analog_Out_2_Ret IOD-26 Rockwell Automation Publication 2099-UM001G-EN-P - December 2022... -
Page 61: General-Purpose I/O (Gpio Connector)
IDN function. Figure 39 - General-purpose I/O Digital Output Diagram Dig_Out_1 1 kΩ DO_24VDC_1 0.1 μF 3.32 kΩ 10 Ω Digital_Out_1 Dig_Out_2 1 kΩ DO_24VDC_2 0.1 μF 3.32 kΩ 10 Ω Digital_Out_2 Rockwell Automation Publication 2099-UM001G-EN-P - December 2022... -
Page 62: General-Purpose Relay (Gpr Connector)
Default Relay Setting in Description RSLogix Software GPR1+ Motor Brake Turn-on and turn-off delays are specified by the Brake Engage Delay Time and Brake Release Delay Time in RSLogix software. GPR2+ Drive OK (DROK) Rockwell Automation Publication 2099-UM001G-EN-P - December 2022... -
Page 63: Sercos Connections
(SO) Connector Wiring Plug Header Control Power Specifications The following table provides specifications for the Control Power (CP) connector. Attribute Value Auxiliary DC input voltage 24V DC, 3 A max, range 18…30 V DC Rockwell Automation Publication 2099-UM001G-EN-P - December 2022... -
Page 64: Motor (Mf) And Auxiliary Feedback (Af) Connections
2090-K7CK-KENDAT low-profile feedback module. Third-party motor requests must be pre-qualified and a custom motor file developed. Contact your local distributor or Rockwell Automation Sale Representative for more information. Kinetix 7000 drives cannot drive open loop (no feedback) or other motor types that are not defined in the Kinetix motor database. - Page 65 30 mA AM, BM Input Frequency of the AM or BM signal inputs. The count — 5.0 MHz Signal Frequency frequency is 4 times this frequency, since the circuitry counts all four transitions. Rockwell Automation Publication 2099-UM001G-EN-P - December 2022...
- Page 66 • TTL devices must be 5V devices within the input voltage specification. • Use the Low Profile Connector Kit, catalog number 2090-K6CK-D15F to access the Auxiliary Feedback signals. You must supply cabling that has shielding, and other EMI protection for motor feedback cables. Rockwell Automation Publication 2099-UM001G-EN-P - December 2022...
- Page 67 (2) 275 mA on the 9V supply split in any manner between the channels with no load on the 9V supply. (3) 300 mA on the 5V supply on one channel with 150 mA on the 9V supply on the second channel. Rockwell Automation Publication 2099-UM001G-EN-P - December 2022...
- Page 68 Chapter 3 Kinetix 7000 Connector Data Notes: Rockwell Automation Publication 2099-UM001G-EN-P - December 2022...
-
Page 69: Connect The Kinetix 7000 Drive System
National Electrical Code, local electrical codes, special operating temperatures, duty cycles, or system configurations take precedence over the values and methods provided. Rockwell Automation Publication 2099-UM001G-EN-P - December 2022... -
Page 70: Building Your Own Motor Cables
(PE) connection and the motor frame. Make the connection at both ends to minimize the external magnetic field. If you use cable trays or large conduits to distribute the motor leads for multiple drives, use shielded cable to reduce noise from the motor leads. Rockwell Automation Publication 2099-UM001G-EN-P - December 2022... -
Page 71: Cable Sizes
If practical, each conduit should contain only one set of motor leads. • You should use a thick insulation lead wire, such as type RHW-2 or equal. Rockwell Automation Publication 2099-UM001G-EN-P - December 2022... -
Page 72: General Wire Guidelines
See Minimizing Electrical Noise on page for examples of routing high and low voltage cables in wireways, and to the System Design for Control of Electrical Noise Reference Manual, publication GMC-RM001, for more information. Rockwell Automation Publication 2099-UM001G-EN-P - December 2022... -
Page 73: Determine The Input Power Configuration
Bonded Cabinet Ground Ground Grid or To Ground Stud Power Distribution Ground If you determine that you have grounded power distribution in your facility, IMPORTANT you do not need to set the ground jumper. Rockwell Automation Publication 2099-UM001G-EN-P - December 2022... - Page 74 Connect the Kinetix 7000 Drive System Figure 45 - Corner-grounded Power Configuration 2099-BM08-S Shown with Lower Front Panel Removed Transformer (Delta) Secondary Transformer Line Filter Bonded Cabinet Ground To Ground Stud Ground Grid or Power Distribution Ground Rockwell Automation Publication 2099-UM001G-EN-P - December 2022...
- Page 75 Power Distribution Ground Even though impedance-grounded and corner-grounded power configurations IMPORTANT have a ground connection, treat them as ungrounded when installing Kinetix 7000 drives. Interconnect Diagrams beginning on page for input power interconnect diagrams. Rockwell Automation Publication 2099-UM001G-EN-P - December 2022...
-
Page 76: Ungrounded Power Configurations
Figure 47 - Ungrounded Power Wiring 2099-BM08-S Shown with Lower Front Panel Removed Conduit/4-Wire Cable Three-Phase Input Ground Bonded Cabinet Ground to Ground Stud Ground Grid or Power Distribution Ground Rockwell Automation Publication 2099-UM001G-EN-P - December 2022... -
Page 77: Set The Ground Jumper In Select Power Configurations
2099-BM12-S wire terminal block. Insulate and secure each of these wires to prevent unintentional contact with the chassis or components. See Remove the Ground Wires on 2099-BM11-S and 2099-BM12-S Drives on page MOVs Rockwell Automation Publication 2099-UM001G-EN-P - December 2022... -
Page 78: Remove The Ground Jumper On 2099-Bm06-S, 2099-Bm07-S, And 2099-Bm08-S Drives
} TORQUE 1.4 N-M } TORQUE 1.8 N-M AUX IN BR1 BR2 DC+ DC- U/T1 V/T2 W/T3 R/L1 S/L2 T/L3 + – SHLD SHLD Important: Do not discard or replace the grounding hardware. Rockwell Automation Publication 2099-UM001G-EN-P - December 2022... -
Page 79: Drives
5 and the MOV ground wire is indicated by callout 6. Figure 50 - Ground Wire Location on Power Terminal Block of 2099-BM11-S and 2099-BM12-S DO NOT REMOVE OUTPUT INPUT CM Cap Rockwell Automation Publication 2099-UM001G-EN-P - December 2022... -
Page 80: Drives
See the Interconnect Diagram Notes diagrams beginning on page 162. Figure 51 - Drive Chassis Ground Connection Bonded Cabinet Ground * Kinetix 7000 Drive Ground grid or power Braided Ground Strap * distribution ground * * Indicates customer-supplied item. Rockwell Automation Publication 2099-UM001G-EN-P - December 2022... -
Page 81: Grounding Multiple Subpanels
An area of the power cable shield must be exposed and terminated for 360° at the drive. In a similar manner, conduit enclosing discrete power cables must be terminated for 360° at the drive. Rockwell Automation Publication 2099-UM001G-EN-P - December 2022... -
Page 82: Kinetix Mpl Motor Connectors
Figure 54 - Bayonet and Circular DIN Motor Connectors Circular DIN Connectors Bayonet Connectors Bayonet Connectors with Brake without Brake Feedback / Power / Brake Feedback / Power Motor Connectors Motor Connectors Power and Brake Feedback Motor Motor Connector Connector Rockwell Automation Publication 2099-UM001G-EN-P - December 2022... - Page 83 Power Terminal Block (PTB) Connections diagram on page for the location of the U, V, W, and ground (PE) motor power terminals. Securing the cable shield in the clamp with a tie wrap is recommended to IMPORTANT improve stress relief. Rockwell Automation Publication 2099-UM001G-EN-P - December 2022...
-
Page 84: Input Power Wiring Requirements
In addition, a braided shield should be included and be specified by the cable manufacturer as having coverage of at least 75%. An additional foil shield can greatly improve noise containment. Rockwell Automation Publication 2099-UM001G-EN-P - December 2022... -
Page 85: Contactors
AC line to the drive. An auxiliary braking method also may be required. It is recommended that the drive Safe Torque Off function be used to IMPORTANT minimize contactor cycling. Rockwell Automation Publication 2099-UM001G-EN-P - December 2022... -
Page 86: Power Wire Specifications
Do not use them to turn the unit on and off. To avoid personal injury and/or equipment damage, be sure the shielded power cables are grounded to prevent potentially high voltages on the shield. Rockwell Automation Publication 2099-UM001G-EN-P - December 2022... -
Page 87: Power Wiring Guidelines
Table 36 - Control Power Connections Signal Terminal Recommended Wire Size Strip Length Torque (AWG) m (lb • • (in.) CP_24VDC 0.75 (18) (stranded wire with ferrule) CP_COM 7.0 (0.275) 0.235 (2.0) 1.5 (16) (solid wire) Rockwell Automation Publication 2099-UM001G-EN-P - December 2022... -
Page 88: Wire Ac Input Power
DC power from the regenerative power supply (8720MC-RPS) is typically IMPORTANT routed to a power distribution box. Fusing will be placed before and after the distribution box, providing protection for both the 8720MC-RPS and Kinetix 7000 drive. Rockwell Automation Publication 2099-UM001G-EN-P - December 2022... -
Page 89: Wire The Safe Torque Off (Sto) Connector
Recommended Wire Size Strip Length Torque (AWG) m (lb • • (in.) FDBK2+ FDBK2- FDBK1+ 0.75 (18) FDBK1- (stranded wire with ferrule) ENABLE2+ 7.0 (0.275) 0.235 (2.0) 1.5 (16) ENABLE- (solid wire) ENABLE1+ SO_24VDC SO_COM Rockwell Automation Publication 2099-UM001G-EN-P - December 2022... -
Page 90: Wire The General Purpose Relay (Gpr) And General Purpose I/O
Strip Length Torque Value (AWG) mm (in.) N•m (lb•in) Regen_OK+ Regenerative power supply status 0.75 (18) (stranded wire with ferrule) Regen_OK- Regenerative power supply status common 7.0 (0.275) 0.235 (2.0) 1.5 (16) (solid wire) Rockwell Automation Publication 2099-UM001G-EN-P - December 2022... -
Page 91: Wire Motor Output Power
Notes: Kinetix HPK motor brake terminations are BR+ and BR-. Kinetix RDB motors do not have a motor brake. Kinetix MMA motor brake configuration and options vary, the standard option is to have no brake. Rockwell Automation Publication 2099-UM001G-EN-P - December 2022... -
Page 92: Feedback And I/O Cable Connections
Table 46 - Motor Feedback Cable Compatibility - Circular DIN Feedback Cable Connector Motor/Actuator Feedback Type Type Premolded Flying-lead 2090-CFBMxDF-CDAFxx (continuous-flex) 2090-CFBMxDF-CEAFxx HPK-B/Exxxxx (continuous-flex) Circular DIN Absolute encoder 2090-CFBMxDF-CEAAxx (standard, non-flex) 2090-CFBMxDF-CDAFxx MMA-Bxxxxxx (continuous-flex) Rockwell Automation Publication 2099-UM001G-EN-P - December 2022... -
Page 93: Flying-Lead Feedback Cable Pinouts
Cos- Data+ Data- Reserved – Reserved – EPWR_9V ECOM – Reserved – Reserved – Reserved – (1) The 2090-XXxFMP-Sxx cables are available as standard, non-flex (catalog number 2090-XXNFMP-Sxx) and continuous-flex (catalog number 2090-XXTFMP-Sxx). Rockwell Automation Publication 2099-UM001G-EN-P - December 2022... - Page 94 Table 50 - 2090-XXNFMF-Sxx and 2090-CFBMxDF-CDAFxx Feedback Cable Motor Circular DIN 2090-K7CK-KENDAT MMA-Bxxxxxx-S3/M3 and Connector Pin RDB-Bxxxxx-3/7 Motors Signal Sin+ Sin- Cos+ Cos- Data+ Data- CLK+ CLK- EPWR_5V ECOM Reserved – Reserved – – Reserved – Reserved – Reserved – Rockwell Automation Publication 2099-UM001G-EN-P - December 2022...
-
Page 95: Wire Feedback And I/O Connectors
When using Kinetix 2090 cables with premolded connectors, tighten the IMPORTANT mounting screws (finger tight) to improve system performance. Figure 55 - Premolded Motor Feedback Cable Connection Kinetix 7000 Drive (Side View) Premolded Connector Cable: 2090-CFBM7DD-CEAAxx (standard, non-flex) 2090-CFBM7DD-CEAFxx (continuous flex) Rockwell Automation Publication 2099-UM001G-EN-P - December 2022... -
Page 96: Wire Panel-Mounted Breakout Board Kits
Figure 56 - Panel-mounted Breakout Board Connection Example Kinetix 7000 Drive (Side View) See the Motor Feedback Breakout Board Installation Instructions, publication 2090-IN006, for Connector Breakout Board Specifications. 2090-UXBB-D15 2090-UXBC-D15xx Panel-mounted Breakout Board Breakout Cable Rockwell Automation Publication 2099-UM001G-EN-P - December 2022... -
Page 97: Wire Low-Profile Connectors
Tightening the mounting screws is essential to be IMPORTANT sure of shield integrity between the low-profile connector covers and the drive feedback connector D-shells. Tightening torque is 0.4 N • (35 lb in). • Rockwell Automation Publication 2099-UM001G-EN-P - December 2022... - Page 98 The purpose of the cable shield clamp is to provide a proper ground and IMPORTANT improve system performance, not stress relief. Clamping the exposed braid under the shield clamp is critical. Turn the clamp over, if necessary, to be sure of a proper ground. Rockwell Automation Publication 2099-UM001G-EN-P - December 2022...
- Page 99 The purpose of the cable shield clamp is to provide a proper ground and IMPORTANT improve system performance, not stress relief. Clamping the exposed braid under the shield clamp is critical. Turn the clamp over, if necessary, to be sure of a proper ground. Rockwell Automation Publication 2099-UM001G-EN-P - December 2022...
-
Page 100: External Shunt Module Connections
Front View Sercos Transmit Connector, Tx Tx (rear) Rx (front) Front View Tx (rear) Sercos Receive Connector, Rx Rx (front) Bottom View Sercos Receive Connector, Rx (front) Sercos Transmit Connector, Tx (rear) Rockwell Automation Publication 2099-UM001G-EN-P - December 2022... - Page 101 Instructions, publication 2090-IN010. Figure 61 - Fiber-optic Cable Connections to a SoftLogix Module SoftLogix 1784-PM16SE Sercos interface PCI Card Transmit Receive Sercos Fiber-optic Ring Receive Transmit Receive Transmit Kinetix 6000 System Kinetix 7000 Drive Rockwell Automation Publication 2099-UM001G-EN-P - December 2022...
- Page 102 Clean the fiber-optic cable connectors prior to installation. Dust in the IMPORTANT connectors can reduce signal strength. See the Fiber-optic Cable Installation and Handling Instructions, publication 2090-IN010, for more information. Rockwell Automation Publication 2099-UM001G-EN-P - December 2022...
- Page 103 Logix Chassis Fiber-optic (ControlLogix is shown) Bulkhead Adapter Tx (rear) Rx (front) Transmit Receive Sercos Fiber-optic Ring Sercos Ring Receive Receive Transmit Transmit Sercos Fiber-optic Bulkhead Adapter Kinetix 6000 System Kinetix 7000 Drive System Rockwell Automation Publication 2099-UM001G-EN-P - December 2022...
- Page 104 Chapter 4 Connect the Kinetix 7000 Drive System Notes: Rockwell Automation Publication 2099-UM001G-EN-P - December 2022...
- Page 105 Before you begin, make sure you know the characteristics of the following system components. • Logix processor • Logix module(s), including the Sercos module • Kinetix 7000 drive(s) and accessories • Servo motor(s)/actuator(s) • Transmission/load for the conversion constant Rockwell Automation Publication 2099-UM001G-EN-P - December 2022...
-
Page 106: Configure The Drive Modules
The base node address setting takes effect only after the drive is IMPORTANT initialized. 4. Set the Sercos communication rate using DIP™ switches 2 and 3. For This Communication Rate Set Switch 2 Set Switch 3 4 Mbps 8 Mbps Rockwell Automation Publication 2099-UM001G-EN-P - December 2022... - Page 107 (typical orientation around DPI™ connector) Switch in OFF Position Sercos Baud Rate Switch in ON Position and Optical Power Switches Note: 8 Mbps setting shown. 6. Repeat Steps 4 for each Kinetix 7000 drive. Rockwell Automation Publication 2099-UM001G-EN-P - December 2022...
-
Page 108: Node Addressing Examples
You can mount the two Sercos interface modules in two separate Logix chassis (as shown above) or you can mount them in the same chassis. Utilizing two Sercos interface modules to control axes from one Kinetix 7000 drive lets you reduce cycle times. Rockwell Automation Publication 2099-UM001G-EN-P - December 2022... - Page 109 02, 04, and 06 (the rightmost slots of the double-wide modules) are not used. The Kinetix 7000 (2-axis) drive system contains two drives. The base node address of the system must be set for an address of 9. Rockwell Automation Publication 2099-UM001G-EN-P - December 2022...
-
Page 110: Configure The Logix Sercos Interface Module
From the Revision pull-down menu, choose the revision. c. Type the file Name. d. From the Chassis Type pull-down menu, choose the chassis. e. Choose the Logix processor Slot. 4. Click OK. 5. From the Edit menu, choose Controller Properties. Rockwell Automation Publication 2099-UM001G-EN-P - December 2022... - Page 111 This assigns the controller as the Grandmaster clock. The motion modules set their clocks to the module you assign as the Grandmaster. You can assign only one module in the Logix chassis as the IMPORTANT Grandmaster clock. 8. Click OK. Rockwell Automation Publication 2099-UM001G-EN-P - December 2022...
-
Page 112: Configure The Sercos Module
The New Module dialog box opens. 4. Configure the module. a. Type the module Name. b. Enter the Logix Sercos module slot (leftmost slot = 0). c. Check Open Module Properties. 5. Click OK. Rockwell Automation Publication 2099-UM001G-EN-P - December 2022... - Page 113 The Transition to Phase default setting is 4 (phase 4). The Transition to Phase setting stops the ring in the phase specified. 11. Click OK. 12. Repeat steps 1...11 for each Sercos module. Rockwell Automation Publication 2099-UM001G-EN-P - December 2022...
-
Page 114: Configure The Motion Group
2. Type the new motion group Name. 3. Click OK. The new motion group appears under the Motion Groups folder. 4. Right-click the new motion group and select Properties. The Motion Group Properties dialog box opens. Rockwell Automation Publication 2099-UM001G-EN-P - December 2022... - Page 115 Axis_Servo_Drive is the correct Data Type. 8. Click Ok. 9. Repeat steps 5 and 6 above for the Axis_1_Aux Feedback Only axis. 10. Right-click on the Motion Group name created and select Properties. Rockwell Automation Publication 2099-UM001G-EN-P - December 2022...
- Page 116 • Rockwell Automation Knowledgebase at: rok.auto/knowledgebase/ • Sercos and Analog Motion Configuration and Startup User Manual, publication MOTION-UM001 • The various Logix controller user manuals Only 1 Motion group per processor is allowed. 12. Click Ok. Rockwell Automation Publication 2099-UM001G-EN-P - December 2022...
-
Page 117: Configure The Kinetix 7000 Drive Modules
RSLogix 5000 software must be revision 15.0 or later. 3. Click OK. The New Module dialog box opens. 4. Configure the new drive module. a. Type the module Name. b. Enter the Node address. Rockwell Automation Publication 2099-UM001G-EN-P - December 2022... - Page 118 Axis_1. The Axis Properties dialog box opens on the General tab. 10. Select the Units tab. 11. Select the correct position units to be used in your application. This example uses load millimeter. Rockwell Automation Publication 2099-UM001G-EN-P - December 2022...
- Page 119 Drive/Motor tab calculate tool will be used to set the drive resolution, conversion constant, and position unwind. 13. Click Apply. 14. Select the Drive/Motor tab. 15. Click Change Catalog in order to select the appropriate motor for configuration. Rockwell Automation Publication 2099-UM001G-EN-P - December 2022...
- Page 120 23. The Drive Enable Input Checking is selected by default. When checked (default) a hard drive enable input signal on the IOD connector (pin 2) is required. Uncheck Drive Enable Input Checking if a hard drive enable input signal is not required. Rockwell Automation Publication 2099-UM001G-EN-P - December 2022...
- Page 121 Configure and Start the Kinetix 7000 Drive System Chapter 5 The Drive/Motor tab and Conversion tabs should look similar to these examples or reflect your application configuration. Rockwell Automation Publication 2099-UM001G-EN-P - December 2022...
- Page 122 Axis_1_Aux and click Apply. The base node is the servo axis utilizing the motor feedback, and the base node (plus 128) is a feedback-only axis utilizing the auxiliary feedback port (as shown below). Rockwell Automation Publication 2099-UM001G-EN-P - December 2022...
- Page 123 The Drive/Motor tab displays the amplifier being used and the Loop Configuration is Aux Feedback Only. This is the only choice if the amplifier is using the primary node for Servo (motor) configuration. Rockwell Automation Publication 2099-UM001G-EN-P - December 2022...
- Page 124 35. From the Feedback Type pull-down menu, choose the feedback type appropriate for your auxiliary feedback motor. 36. Click Apply. 37. Click OK. 38. In the Module Properties, click the Power tab. Rockwell Automation Publication 2099-UM001G-EN-P - December 2022...
-
Page 125: Download The Program
41. Repeat steps 1…27 for each additional axis. 42. Verify your Logix program and save the file. Download the Program After completing the Logix configuration, you must download your program to the Logix processor. Rockwell Automation Publication 2099-UM001G-EN-P - December 2022... -
Page 126: Apply Power To The Drive
2. Verify the status of the drive logic power status indicator. Seven-segment Fault Status Indicator Logic Power Status Indicator If the Logic Power Status Indicator is Then Go to step 1. Check your control power connections. Not ON 2. Return to main step Rockwell Automation Publication 2099-UM001G-EN-P - December 2022... - Page 127 Go to Error Codes on page 138. (1) To get diagnostic information from the module, highlight the module name in RSLogix 5000 software. A Pseudo Key Failure often indicates that the motor selection does not match the motor installed. Rockwell Automation Publication 2099-UM001G-EN-P - December 2022...
- Page 128 Go to Test and Tune the Axes on page 129. Not flashing green and red/ Go to the appropriate Logix manual for specific Sercos module is faulted not steady green instructions and troubleshooting. Rockwell Automation Publication 2099-UM001G-EN-P - December 2022...
-
Page 129: Test And Tune The Axes
2. Right-click an axis in your Motion Group folder and choose Properties. The Axis Properties dialog box opens. 3. Click the Hookup tab. Rockwell Automation Publication 2099-UM001G-EN-P - December 2022... - Page 130 7. Click OK. The Online Command - Apply Test dialog opens (Feedback and Command & Feedback tests only). When the test completes, the Command Status changes from Executing to Command Complete. 8. Click OK. Rockwell Automation Publication 2099-UM001G-EN-P - December 2022...
-
Page 131: Tune The Axes
ATTENTION: To reduce the possibility of unpredictable motor response, tune your motor with the load removed first, then reconnect the load and perform the tuning procedure again to provide an accurate operational response. 2. Click the Tune tab. Rockwell Automation Publication 2099-UM001G-EN-P - December 2022... - Page 132 The Tune Bandwidth dialog box opens. Actual bandwidth values (Hz) depend on your application and may require adjustment once motor and load are connected. 9. Record your bandwidth data for future reference. 10. Click OK. Rockwell Automation Publication 2099-UM001G-EN-P - December 2022...
- Page 133 3. See appropriate Logix motion module setup and configuration manual for more information. 4. Return to step 7 and run the test again. 13. Repeat Test and Tune the Axes for each axis. Rockwell Automation Publication 2099-UM001G-EN-P - December 2022...
-
Page 134: Configure Drive Parameters And System Variables
Figure 68 - DriveExplorer Software Example Double-click a parameter in the list to open the edit dialog box. Rockwell Automation Publication 2099-UM001G-EN-P - December 2022... - Page 135 3. Select Analog Outputs, and press a. Analog Output 1 is displayed, and press b. For Analog Output 2 use arrows to select, and press 4. Press Sel. 5. Enter parameter number, and press Rockwell Automation Publication 2099-UM001G-EN-P - December 2022...
- Page 136 Chapter 5 Configure and Start the Kinetix 7000 Drive System Notes: Rockwell Automation Publication 2099-UM001G-EN-P - December 2022...
-
Page 137: Safety Precautions
ATTENTION: Provide an earth ground for test equipment (oscilloscope) used in troubleshooting. Failure to ground the test equipment could result in personal injury. Rockwell Automation Publication 2099-UM001G-EN-P - December 2022... -
Page 138: Interpret Error Codes And Status Indicators
See these troubleshooting tables to identify faults, potential causes, and the Status Indicators appropriate actions to resolve the fault. If the fault persists after attempting to troubleshoot the system, please contact your Rockwell Automation sales representative for further assistance. Error Codes Common hardware errors that prevent a drive from completing the power sequencing and fault assessment are listed first. - Page 139 Verify 5V power supply to the encoder. Check feedback device. Verify motion profile. Axis moved beyond the software axis position in either the positive or SoftOvertravelFault negative direction. Verify overtravel settings are appropriate. Rockwell Automation Publication 2099-UM001G-EN-P - December 2022...
- Page 140 Wire control power to use main power as shown in Appendix Add isolation transformer for control power. Low AC input voltage. Check input AC voltage on all phases. Converter precharge cycle DriveUndervoltageFault failed. Internal malfunction. Call your Rockwell Automation sales representative. Rockwell Automation Publication 2099-UM001G-EN-P - December 2022...
- Page 141 Check motor power/feedback wiring. No Fault Message See displayed message for resolution. Autotune procedure failed. Motor or feedback device malfunction. (condition indicated by on-screen message) Perform Hookup in RSLogix 5000 software. Consult RSLogix 5000 help message. Rockwell Automation Publication 2099-UM001G-EN-P - December 2022...
- Page 142 EEPROM data corrupted or bus not calibrated. If fault persists, replace module. Check error displays on RPS, and troubleshoot per error message. E111 Regen_PS_OK The Regen_OK signal is missing at pins 7 and 8 of the GPIO connector. Reset system. All others RESERVED. Rockwell Automation Publication 2099-UM001G-EN-P - December 2022...
-
Page 143: Status Indicators
• MSO instruction is not commanded in RSLogix 5000 software. Steady Green Bus power is present, axis enabled. Normal when: No faults or failures. • 24V is applied to Hardware Enable Input (IOD-2). • MSO instruction is commanded in RSLogix 5000 software. Rockwell Automation Publication 2099-UM001G-EN-P - December 2022... -
Page 144: General System Anomalies
Motor Select limit is incorrectly set (servo motor is not matched to axis module). • Run Tune in RSLogix 5000 software. Notch filter or output filter may be required. Mechanical resonance. See Axis Properties dialog, Output tab in RSLogix 5000 software. Rockwell Automation Publication 2099-UM001G-EN-P - December 2022... - Page 145 Check coupling. The duty cycle is excessive. Change the command profile to reduce accel/decel or increase time. Motor overheating. The rotor is partially demagnetized, causing excessive motor current. Return the motor for repair. Rockwell Automation Publication 2099-UM001G-EN-P - December 2022...
-
Page 146: Logix/Drive Fault Behavior
Table 61 on page 147, the controlling attribute is given for programmable fault actions. Figure 69 - RSLogix 5000 Axis Properties - Fault Actions Tab Example Drive Fault Action/Attribute for Motor Overtemp fault (E04). Rockwell Automation Publication 2099-UM001G-EN-P - December 2022... - Page 147 Only applies to drives with Safe Torque Off feature. SercosFault Duplicate node address detected on Sercos ring. STOP MOTION (Sercos Same ADDR) DriveHardFault Current feedback hardware fault detected. SHUTDOWN (Ifbk HW Fault) Rockwell Automation Publication 2099-UM001G-EN-P - December 2022...
- Page 148 10% of its rated temperature. If it is set to Stop Motion or Status Only, the drive will not fold back the current. The I T calculation never generates a fault. Rockwell Automation Publication 2099-UM001G-EN-P - December 2022...
- Page 149 Kinetix® 7000 system components. Topic Page Power Specifications Power Dissipation Specifications General Specifications AC Line Filter Specifications AC Line Reactors External Shunt Modules Precharge Capacities of the Regenerative Power Supply Product Dimensions Rockwell Automation Publication 2099-UM001G-EN-P - December 2022...
-
Page 150: Power Specifications
(3) If DC input is supplied to 2099-BM09-S, 2099-BM10-S, 2099-BM11-S, or 2099-BM12-S drives, the precharge capability must be provided at the system level. Disconnect switches must not be used between the input of the drive and a common DC bus without the use of an external precharge device. Rockwell Automation Publication 2099-UM001G-EN-P - December 2022... -
Page 151: Circuit Breaker/Fuse Specifications
7400 A 2099-BM08-S 69.7 HSJ100 2700 23000 7700 A 2099-BM09-S HSJ175 8000 60000 12000 A 2099-BM10-S HSJ200 14000 92000 13000 A 2099-BM11-S HSJ400 63000 450000 21000 A 2099-BM12-S HSJ400 63000 450000 21000 A Rockwell Automation Publication 2099-UM001G-EN-P - December 2022... -
Page 152: Contactor Ratings
Use this table to size an enclosure and calculate required ventilation for your Specifications Kinetix 7000 drive system. Usage as a % of Rated Power Output Drive Cat. No. 100% 2099-BM06-S 2099-BM07-S 2099-BM08-S 2099-BM09-S 1072 2099-BM10-S 1479 2099-BM11-S 1275 2125 2099-BM12-S 1438 2437 Rockwell Automation Publication 2099-UM001G-EN-P - December 2022... -
Page 153: General Specifications
90 (295.3) RDB-B410xx-7/3 HPK-Bxxxxx-S/M or HPK-Exxxxx-S/M 90 (295.3) MMA-Bxxxxxx-S1/M1 or MMA-Bxxxxxx-S3/M3 Weight Specifications Weight, approx. Drive Cat. No. kg (lb) 2099-BM06-S 2099-BM07-S 18.55 (40.9) 2099-BM08-S 2099-BM09-S 37.2 (82.0) 2099-BM10-S 2099-BM11-S 71.4 (157.5) 2099-BM12-S Rockwell Automation Publication 2099-UM001G-EN-P - December 2022... -
Page 154: Certifications
(1) When product is marked, refer to rok.auto/certifications for Declarations of Conformity Certificates. (2) Underwriters Laboratories Inc. has not evaluated the Safe Torque Off, safe torque off, or safe speed-monitoring options in these products. Rockwell Automation Publication 2099-UM001G-EN-P - December 2022... -
Page 155: Environmental Specifications
Line filters compatible with a Kinetix 7000 drive sourcing input power from a regenerative DC bus with a 8720MC-RPS unit are listed below. 8720MC-RPS AC Line Filter Cat. No. Manufacturer and Cat. No. 8720MC-RPS065BM-HV2 Schaffner: FN3100-80-35 Soshin Electric: HF3080C-TOA 8720MC-RPS190BM 8720MC-EF190-VB Rockwell Automation Publication 2099-UM001G-EN-P - December 2022... -
Page 156: Ac Line Reactors
RPS unit and one for the slave RPS unit.) 8720MC-RPS190BM 8720MC-LR10-100B (required two units) 2099-BM12-S (1) Regenerative Power Supply (RPS) selection is for a single motor/drive combination. When combining multiple drives on the same RPS module, the selection will change. Rockwell Automation Publication 2099-UM001G-EN-P - December 2022... -
Page 157: External Shunt Modules
See the Wiring instructions in the 8720MC Regenerative Power Supply Installation Manual, publication 8720MC-RM001, for information on how to determine the appropriate precharge/discharge resistance power value (Ohms/Watt) to accommodate the capacitance of your system. Rockwell Automation Publication 2099-UM001G-EN-P - December 2022... -
Page 158: Product Dimensions
151.1 165.1 (1.37) 2X (6.50) (5.95) (6.50) 66.0 31.9 31.9 66.0 (2.60) (1.26) (1.26) (2.60) 130.0 97.0 (5.19) (3.82) 186.0 137.2 (7.32) (5.40) 187.0 (7.36) Bottom View Bottom View (2099-BM06-S and 2099-BM07-S) (2099-BM08-S) Rockwell Automation Publication 2099-UM001G-EN-P - December 2022... - Page 159 (1.25) 60.4 (2.38) (2.75) (1.38) 24.5 (0.96) 2X 159.5 153.5 (6.28) (6.04) 2X 85.1 31.9 34.1 22.4 (3.35) (1.26) (1.34) (0.88) 128.1 53.0 65.0 (5.04) (2.08) 2X (2.56) 2X 104.3 (4.10) (5.12) (6.69) Rockwell Automation Publication 2099-UM001G-EN-P - December 2022...
- Page 160 Ø 22.2 (0.87) 4X Ø 62.7 (2.47) 2X Ø 34.9 (1.37) 73.8 67.2 (2.90) 36.9 (1.45) 4X (2.64) 151.7 148.4 (5.97) (5.84) 45.0 31.69 (1.25) (1.77) 22.0 (0.86) 2X (5.04) (3.94) 150 (5.90) 2X 200 (7.87) Rockwell Automation Publication 2099-UM001G-EN-P - December 2022...
- Page 161 Kinetix MPL and MPM Motors (Circular DIN Style Connector) Figure 85 Kinetix HPK Motors Figure 87 Kinetix MMA Motors Figure 89 Kinetix RDB Motors Figure 90 Kinetix Safe Torque Off Feature Block Diagram Rockwell Automation Publication 2099-UM001G-EN-P - December 2022...
-
Page 162: Interconnect Diagram Notes
Dual 8720MC-RPSxxx units use a ribbon cable to connect the master unit to the slave unit control. The ribbon cable is included with the slave unit. Contact for use with a safety circuit or other system requirement. Rockwell Automation Publication 2099-UM001G-EN-P - December 2022... -
Page 163: Power Wiring Examples
Interconnect Diagrams Appendix B Power Wiring Examples Figure 73 - Kinetix 7000 Drive AC Power Wiring Rockwell Automation Publication 2099-UM001G-EN-P - December 2022... - Page 164 Installation Manual, publication 8720MC-RM001, and setting of the power tab in RSLogix 5000® software is set to the appropriate bus regulator catalog number. Common mode capacitors should be disconnected on DC common bus drives. Rockwell Automation Publication 2099-UM001G-EN-P - December 2022...
- Page 165 Installation Manual, publication 8720MC-RM001, and setting of the power tab in RSLogix 5000 software is set to the appropriate bus regulator catalog number. Common mode capacitors should be disconnected on DC common bus drives. Rockwell Automation Publication 2099-UM001G-EN-P - December 2022...
- Page 166 Installation Manual, publication 8720MC-RM001, and setting of the power tab in RSLogix 5000 software is set to the appropriate bus regulator catalog number. Common mode capacitors should be disconnected on DC common bus drives. Rockwell Automation Publication 2099-UM001G-EN-P - December 2022...
- Page 167 Installation Manual, publication 8720MC-RM001, and setting of the power tab in RSLogix 5000 software is set to the appropriate bus regulator catalog number. Common mode capacitors should be disconnected on DC common bus drives. Rockwell Automation Publication 2099-UM001G-EN-P - December 2022...
- Page 168 Installation Manual, publication 8720MC-RM001, and setting of the power tab in RSLogix 5000 software is set to the appropriate bus regulator catalog number. Common mode capacitors should be disconnected on DC common bus drives. Rockwell Automation Publication 2099-UM001G-EN-P - December 2022...
- Page 169 Installation Manual, publication 8720MC-RM001, and setting of the power tab in RSLogix 5000 software is set to the appropriate bus regulator catalog number. Common mode capacitors should be disconnected on DC common bus drives. Rockwell Automation Publication 2099-UM001G-EN-P - December 2022...
- Page 170 Installation Manual, publication 8720MC-RM001, and setting of the power tab in RSLogix 5000 software is set to the appropriate bus regulator catalog number. Common mode capacitors should be disconnected on DC common bus drives. Rockwell Automation Publication 2099-UM001G-EN-P - December 2022...
- Page 171 Installation Manual, publication 8720MC-RM001, and setting of the power tab in RSLogix 5000 software is set to the appropriate bus regulator catalog number. Common mode capacitors should be disconnected on DC common bus drives. Rockwell Automation Publication 2099-UM001G-EN-P - December 2022...
-
Page 172: Kinetix 7000 Drive/Rotary Motor Wiring Examples
Kinetix MPL Motor Connectors on page 82 for more information on bayonet and circular DIN connectors. (3) See Wire Low-profile Connectors on page 97 for more information on grounding feedback cables when using low-profile connectors. Rockwell Automation Publication 2099-UM001G-EN-P - December 2022... - Page 173 Figure 83 below. Figure 83 - Customer-supplied 24V DC Power Supply Wiring Example *Dashed lines Kinetix 7000 MPL Motor denote customer Drive supplied components. GPR1- GPR1+ 24VDC 24VDC Supply Rockwell Automation Publication 2099-UM001G-EN-P - December 2022...
- Page 174 Kinetix MPL Motor Connectors on page 82 for more information on bayonet and circular DIN connectors. (3) See Wire Low-profile Connectors on page 97 for more information on grounding feedback cables when using low-profile connectors. Rockwell Automation Publication 2099-UM001G-EN-P - December 2022...
- Page 175 CFBM4DF-CDAFxx (continuous-flex) (1) See Customer-supplied 24V DC Power Supply Notes (Kinetix HPK motors) on page 176 for important wiring information. (2) See Kinetix HPK Motor Blower Connections on page 176 for more information. Rockwell Automation Publication 2099-UM001G-EN-P - December 2022...
- Page 176 • The Kinetix HPK motor has a conduit box with terminals/leads for external power connections. • See the Kinetix Motion Control Selection Guide, publication KNX-SG001 for Kinetix HPK motors blower voltage and current specifications. Rockwell Automation Publication 2099-UM001G-EN-P - December 2022...
- Page 177 Shield Clamp (1) See Customer-supplied 24V DC Power Supply Notes (Kinetix MMA motors) on page 179 for important wiring information. (2) See Kinetix MMA Motor Blower Connections on page 179 for more information. Rockwell Automation Publication 2099-UM001G-EN-P - December 2022...
- Page 178 — — EPWR 9V EPWR 9V 9V DC encoder power ECOM ECOM Encoder power common Thermostat differential signal + Thermostat differential signal - — — PT1000 differential signal + PT1000 differential signal - Rockwell Automation Publication 2099-UM001G-EN-P - December 2022...
- Page 179 • The Kinetix MMA motor blower must be used to ensure proper motor performance. A separate blower terminal box is provided to connect external power to the blower. See Table 69 for additional information. Rockwell Automation Publication 2099-UM001G-EN-P - December 2022...
- Page 180 Single Speed 3-PH 400/480V AC 50/60Hz Radial Blower Single-speed 3-PH U2 V2 Terminal Connection Description Radial Blower Terminal Box Line 1 Line 2 Line 3 400…460V Earth Ground Ground Symbol 50-60Hz Input Power Connection Rockwell Automation Publication 2099-UM001G-EN-P - December 2022...
- Page 181 Motor Power Cable Thermistor BLUE Cable shield clamp must be used in order to meet CE and 2090-XXNFMF-Sxx (standard, non-flex) or UK requirements. No external 2090-CFBMxDF-CDAFxx (continuous-flex) connection to ground is Flying-lead Feedback Cable required. Rockwell Automation Publication 2099-UM001G-EN-P - December 2022...
-
Page 182: Kinetix Safe Torque Off Feature Block Diagram
9-pin Connector K1-C +24V +24V_COM FDBK1+ FDBK1- K1-A ENABLE1+ Gate Control Safety Monitor ENABLE- Circuit (CCP) ENABLE2+ K2-A FDBK2+ FDBK2- K2-C Motion Allowed Jumper Gate Control Enable Signal Wiring Header +24V DRIVE ENABLE +24V_COM Rockwell Automation Publication 2099-UM001G-EN-P - December 2022... -
Page 183: Before You Begin
1784-PM16SE 15.33 or later (1),(2) Firmware upgrade file for Kinetix 7000 (1) Contact Rockwell Automation Technical Support at (440) 646-5800 for firmware upgrade files and assistance. (2) Go to rok.auto/support for firmware upgrades. Rockwell Automation Publication 2099-UM001G-EN-P - December 2022... -
Page 184: Upgrade Firmware
DC common bus. 2. Open your ControlFLASH software or select the ControlFLASH utility from the Tools menu of RSLogix 5000 software. The Welcome to ControlFLASH dialog opens. 3. Click Next. The Catalog Number dialog opens. Rockwell Automation Publication 2099-UM001G-EN-P - December 2022... - Page 185 4. Select the catalog number of the Kinetix 7000 (2099-BMxx-S) drive to upgrade. 5. Click Next. 6. Select the Sercos interface module and Kinetix 7000 drive to flash in the RSLinx Gateway dialog. 7. Click OK. Rockwell Automation Publication 2099-UM001G-EN-P - December 2022...
- Page 186 Select the new firmware from the list, or browse for it using the Current Folder option. 9. Click Next. 10. Confirm the catalog number and serial number of the drive, and its current revision and new revision of firmware. 11. Click Finish. Rockwell Automation Publication 2099-UM001G-EN-P - December 2022...
- Page 187 13. Click OK to acknowledge the Motion Stop notice. A dialog will display the progress of the flash update. While this display is active, the Status display on the drive will display an F. Rockwell Automation Publication 2099-UM001G-EN-P - December 2022...
- Page 188 1. Update failure appears in a RED status dialog. 2. Contact Technical Support. 14. Click OK. The ControlFLASH software returns to the Welcome screen where you can flash another drive or select Cancel to exit the program. Rockwell Automation Publication 2099-UM001G-EN-P - December 2022...
- Page 189 146 Rockwell Automation Product Certification 8 error codes 138 changing parameters establishing communication 143 HIM 135 external shunt resistor circuit breaker specifications wiring 100 Kinetix 7000 151 circuit breakers 126 sizing 21 Rockwell Automation Publication 2099-UM001G-EN-P - December 2022...
- Page 190 DC common bus 14 Kinetix 7000 152 full-line regen 15 power supply, feedback 67 regen braking 13 power up 126 typical installation, with LIM 11 premolded feedback cables 95 typical installation, without LIM 12 Rockwell Automation Publication 2099-UM001G-EN-P - December 2022...
- Page 191 107 impedance grounded power system 77 system block diagrams input power safe torque off feature 182 determining type 73 system mounting requirements circuit breakers 21 fuse sizing 21 transformer sizing 20 Rockwell Automation Publication 2099-UM001G-EN-P - December 2022...
- Page 192 LIM 87 low profile connectors 97 motor brake 91 motor power 91 requirements 69 routing power and signal wiring 72 SERCOS fiber optic cables 100 unbalanced power system 77 ungrounded power system 77 Rockwell Automation Publication 2099-UM001G-EN-P - December 2022...
- Page 193 Kinetix 7000 High Power Servo Drive User Manual Rockwell Automation Publication 2099-UM001G-EN-P - December 2022...
- Page 194 At the end of life, this equipment should be collected separately from any unsorted municipal waste. Rockwell Automation maintains current product environmental compliance information on its website at rok.auto/pec. Allen-Bradley, CompactLogix, ControlFLASH, ControlLogix, DPI, DriveExecutive, DriveExplorer, Encompass, expanding human possibility, Kinetix, Logix 5000, RSLinx, RSLogix, RSLogix 5000, SoftLogix, and Rockwell Automation are trademarks of Rockwell Automation, Inc.
Need help?
Do you have a question about the Allen-Bradley Kinetix 7000 and is the answer not in the manual?
Questions and answers