Innova 2.0 Rinnova Ceiling Instructions For Installation, Use And Maintenance Manual
Hide thumbs
Also See for 2.0 Rinnova Ceiling:
- Installation manual (52 pages) ,
- Installation, use and maintenance manual (28 pages) ,
- User manual (24 pages)
Table of Contents
Advertisement
Quick Links
Advertisement
Table of Contents

Related Manuals for Innova 2.0 Rinnova Ceiling


Summary of Contents for Innova 2.0 Rinnova Ceiling
- Page 1 INSTALLATION, USE AND MAINTENANCE MANUAL ..2.0 Rinnova Ceiling Page1...
-
Page 2: Table Of Contents
INDEX GENERALITY .................................. 4 1.1.1 INTRODUCTION ..............................4 1.1.2 BASIC SAFETY RULES ............................. 4 1.1.3 SYMBOLOGY ..............................5 1.1.4 WARNINGS ................................ 5 1.1.5 COMPLIANCE ..............................6 1.1.6 RANGE ................................6 1.1.7 IDENTIFICATION ..............................6 1.1.8 CONSTRUCTION FEATURES ........................... 7 1.1.9 MAIN COMPONENTS OF THE UNIT ......................... - Page 3 MAINTENANCE ................................19 6.1.1 CLEANING OR REPLACING EPM1 FILTERS ....................19 6.1.2 REPLACING THE PREFILTER ........................19 6.1.3 LAMP MAINTENANCE ............................. 20 ALARMS ..................................21 7.1.1 GENERALITY ..............................21 7.1.2 PROBLEMS WITHOUT ERROR INDICATION ON THE DISPLAY ..............21 7.1.3 TABLE OF ALARMS INDICATED BY THE DISPLAY ..................
-
Page 4: Generality
GENERALITY INTRODUCTION This manual was conceived with the aim of making installation and management of your system as simple as possible. By reading and applying the suggestions in this manual, you will be able to obtain the best performance from the purchased product. We would like to thank you for the choice you made by purchasing our product. -
Page 5: Symbology
SYMBOLOGY The symbols shown in the following file allow you to quickly provide the information necessary for correct use of the unit. Safety related symbols ATTENTION Warns that the operations indicated are important for the safe operation of the machines Authorized personnel only DANGER Warns that failure to observe the instructions involves a risk of electric shock. -
Page 6: Compliance
RoHS2 2011/65/EU • • WEEE 2012/19/EC RANGE ..2.0 Rinnova Ceiling 1) Defines the Total flow rate and the fresh air flow rate 2) Configuration 40 - up to 460 m³/h H - horizontal 3) Type of installation 4) Electronic typology... -
Page 7: Construction Features
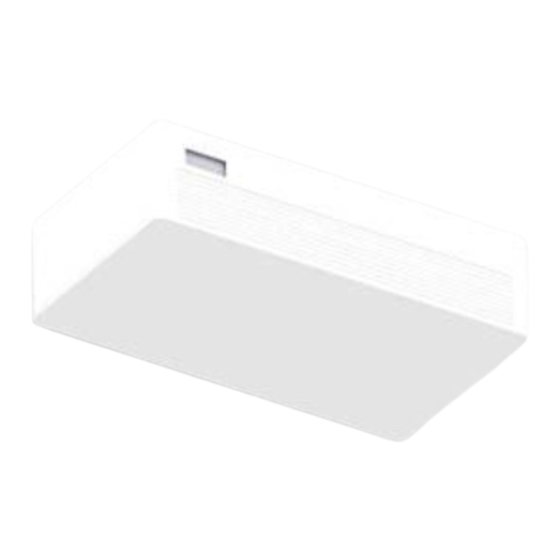
CONSTRUCTION FEATURES The ..2.0 Rinnova Ceiling units are designed for the renewal of air in rooms. The ease of installation through two 160 mm diam. holes and the high renewal air flow rate allow application in situations such as residential buildings, schools, clinics, offices and all contexts where air renewal is required; The thermodynamic recovery allows to have an integration with respect to the environmental climatic conditions, helping the air conditioning system to satisfy the internal comfort;... -
Page 8: Main Components Of The Unit
MAIN COMPONENTS OF THE UNIT 1 Compressor 6 Electrical panel 2 Supply fan 7 Displays 3 Exhaust fan 8 External air pre-filter 4 Battery entry 9 Epm filters1 5 Battery ejected 10 UV lamp PACKING AND TRANSPORT The units are supplied for transport fixed on a wooden pallet and inserted in cardboard boxes. To facilitate movement, the units are equipped with a wooden pallet and hooks on the base which allow them to be lifted and positioned on the installation site. -
Page 9: Installation
INSTALLATION INSTALLATION CONDITIONS The unit must be installed according to the national and local standards governing the use of electrical devices and according to the following indications: install the unit inside residential buildings with an ambient temperature between 0°C and 45°C; •... -
Page 10: Condensate Drain Connection
CONDENSATE DRAIN CONNECTION Due to the thermodynamic heat recovery system of the dehumidification coils, the humidity contained in the internal air condenses inside the unit. For the correct functioning of the heat recovery unit, it is therefore necessary to connect the condensate drain to the hydraulic system (drain);... -
Page 11: Area Connections
The unit is equipped with 2 circular rear connections for connection to the external air; For the correct connection of the air ducts, refer to the following diagram and the stickers placed on the unit. Table of unit aeraulic connection diameters ..2.0 Rinnova Ceiling Unit External air Ø mm Ø... -
Page 12: Installation Of External Grilles
INSTALLATION OF EXTERNAL GRILLES Once the holes have been made, inside them, they must be introduced the supplied plastic sheets. Roll up the sheet and introduce it into the hole, paying attention to the seam A which must always be positioned upwards. Cut any excess part of the tube using a normal cutter. -
Page 13: Electrical Connections
ELECTRICAL CONNECTIONS GENERALITY - Before starting any operation to make the electrical connections, make sure that the unit is not electrically powered - Make the necessary electrical connections by consulting only the electrical diagram attached to this manual. - Install a suitable cut-off and differential protection device for the exclusive service of the unit. - It is essential that the unit is connected to an earth socket. -
Page 14: Inserting The Remote Control Batteries
INSERTING THE REM OTE CONTROL BATTERIES Only a 3 V CR2025 dry lithium battery (included in delivery) may be used for the remote control. Exhausted batteries must be disposed of only through the appropriate collection points set up by the Local Authorities for waste of this type. -
Page 15: Wiring Diagram
WIRING DIAGRAM CONNECTIONS NL-PE – POWER SUPPLY The unit is supplied with a power supply socket connected to terminals N , L , PE ; HT - EXTERNAL HEATER It provides for the connection of the integrative electrical resistance (Accessory) to be inserted on the air delivery duct CP- ON OFF REMOTE Provides an external connection to enable the... -
Page 16: Commissioning And Method Of Use
COMMISSIONING AND METHOD OF USE OPERATION OF THE CONTROL PANEL ON THE MACHINEWIFI AND REMOTE CONTROL The unit is controlled both through the wi-fi panel on the machine and through the infrared remote control supplied. It is also possible to download the app and control the main functions from IOS systems or ANDROID systems;... - Page 17 5.1.1.3 MODIFY TEMPERATURE SET - On the display there are the keys for selecting the desired temperature of the unit; Every time the set temperature is modified, the display will also show the requested set point variation Modify set temperature 5.1.1.4 CHANGE FAN SPEED -By pressing this button sequentially, it is possible to set the power supplied by the appliance to 5 settings: Minimum, Medium, Maximum, Dual Power and Automatic.
- Page 18 5.1.1.8 DEHUMIDIFICATION FUNCTION Using this mode, the appliance dehumidifies the room. Activating this function is therefore particularly useful in mid- season, ie on those days (such as rainy days for example) in which the temperature is all in all pleasant, but excessive humidity makes one feel a certain sense of unease.
-
Page 19: Maintenance
MAINTENANCE To always guarantee the correct and optimal functioning of the unit, it is necessary to carry out all the maintenance interventions periodically. CLEANING OR REPLACING EPM1 FILTERS To replace the filters, or clean them, proceed as follows: • remove power to the unit; remove the front grille •... -
Page 20: Lamp Maintenance
LAMP MAINTENANCE To carry out maintenance on the UVC lamp: Cut power to the unit; • Remove the front grille • Remove the intake air filter to access the UV lamp; • • The UV lamp will be clearly visible behind the filter; •... -
Page 21: Alarms
ALARMS GENERALITY In the event of problems or failures, take note of any error code that has appeared on the display of the electronic control unit or of the remote control, take note of the model and serial number of the unit you have (present on the identification plate attached to the side of the unit) and contact the installer. -
Page 22: Table Of Alarms Indicated By The Display
TABLE OF ALARMS INDICATED BY THE DISPLAY The table below shows the unit operating anomalies indicated, in the electronic versions, by the display on the machine or by the remote controls. ALARM CAUSE OPERATION The Cooling, Dehumidification and Heating functions can be activated regularly. The RT ambient temperature probe faulty regulation only monitors the internal coil antifreeze Faulty IPT internal battery probe... -
Page 23: Notes And Maintenance Information
NOTES AND MAINTENANCE INFORMATION NOTE -------------------------------------------------- -------------------------------------------------- -------------------------------------------------- -------------------------------------------------- -------------------------------------------------- -------------- -------------------------------------------------- -------------------------------------------------- -------------------------------------------------- -------------------------------------------------- -------------------------------------------------- -------------- ------------------------------------------------------------------------------------------------------------------------------------------------------------------------------------------------------ -------------------------------------------------- ------------------ ------------------------------------------------- -------------------------------------------------------------------------------------------------------------------------------------------------------------------------------------------------------------------------- --------------------------------------------------------------------------------------------------------------------------------------------------------------------------------------------------------------------------------------------------------- ------------------ --------------------------------------------------------------------------------------------------------------------------------------------------------------------------------------------------------------------------------------------------------- ------------------ ---------------------------------------------------------------------------------------------------------------------------------------------------------------------------------------------------------------------------------------------------------------------------- --------------------------------------------------------------------------------------------------------------------------------------------------------------------------------------------------------------------------------------------------------- ------------------ ------------------------------------------------- -------------------------------------------------------------------------------------------------------------------------------------------------------------------------------------------------------------------------- ---------------------------------------------------------------------------------------------------------------------------------------------------------------------------------------------------------------------------------------------------------------------------- ---------------------------------------------------------------------------------------------------------------------------------------------------------------------------------------------------------------------------------------------------------------------------- ---------------------------------------------------------------------------------------------------------------------------------------------------------------------------------------------------------------------------------------------------------------------------- --------------------------------------------------------------------------------------------------------------------------------------------------------------------------------------------------------------------------------------------------------- ------------------ --------------------------------------------------------------------------------------------------------------------------------------------------------------------------------------------------------------------------------------------------------------------------- ---------------------------------------------------------------------------------------------------------------------------------------------------------------------------------------------------------------------------------------------------------------------------- ---------------------------------------------------------------------------------------------------------------------------------------------------------------------------------------------------------------------------------------------------------------------------- Page23... - Page 24 -------------------------------------------------- -------------------------------------------------- -------------------------------------------------- -------------------------------------------------- -------------------------------------------------- -------------- -------------------------------------------------------------------------------------------------------------------------------------------------------------------------------------------------------------------------------------------------------- ------------------ ---------------------------------------------------------------------------------------------------- -------------------------------------------------- ---------------------------------------------------------------------------------------------------- --------------- ---------------------------------------------------------------------------------------------------------------------------------------------------------------------------------------------------------------------------------------------------------- ---------------- ------------------------------------------------------------------------------------------------------------------------------------------------------------------------------------------------------------------------------------------------------- ------------------ -------------------------------------------------- -------------------------------------------------- -------------------------------------------------- -------------------------------------------------- ----------------------------------------------------------- -------------------------------------------------- -------------------------------------------------- -------------------------------------------------- -------------------------------------------------- -------------------------------------------------- -------------- -------------------------------------------------- -------------------------------------------------- -------------------------------------------------- -------------------------------------------------- -------------------------------------------------- -------------- 07- 2 0 23 N4 2 09 6 4A- 0 0 The data contained in this manual may be changed by the manufacturer without notice.
Need help?
Do you have a question about the 2.0 Rinnova Ceiling and is the answer not in the manual?
Questions and answers