Table of Contents
Advertisement
Quick Links
Advertisement
Table of Contents

Related Manuals for Leica M125 B


Summary of Contents for Leica M125 B
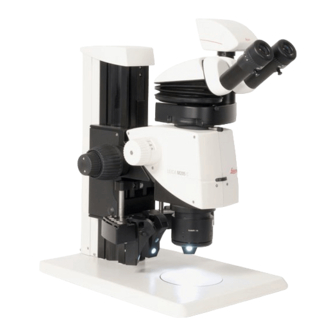
- Page 1 Living up to Life User Manual Leica M125 B Leica M165 C B...
-
Page 2: Copyright
(in whole or in part) by print, photocopy, microfilm or other method (including electronic systems) is not allowed without express written permission from Leica Microsystems CMS GmbH. The instructions contained in the following documentation reflect state-of-the-art tech- nology. -
Page 3: Function Of The Microscopes
Function of the Microscopes The Leica M125 B and Leica M165 C B micro- other purposes than those for which they are instruments in accordance with EN 60601-1. If a microscope is electrically connected to a medi- scopes, for which this User Manual has been... -
Page 4: General Notes
Use in clean rooms The cleaning of glass surfaces and objec- Servicing ★ The Leica M series can be used in clean rooms tives in particular should be carried out Repairs may only be carried out by Leica ★ without any problems. -
Page 5: Important Safety Notes
This User Manual describes the special func- ments, read the user manuals listed above. In Our guarantee covers all faults in materials tions of the individual modules of the Leica M particular, please follow all safety instructions. and manufacture. It does not, however, cover... -
Page 6: Symbols Used
Failure to comply can cause the following: MM/YYYY November 2011. Hazards to personnel (1) Numbers in parentheses within the ★ Functional disturbances or damaged descriptions relate to the figures and the ★ instruments items within those figures. Leica M series User Manual... -
Page 7: Safety Instructions
★ cal instruments for improving the visibility altered, modified or used in conjunction with of objects or specimens through magnifi- non-Leica components that are outside of the Electrical components must be placed at ★ cation. Accessories such as optical acces-... - Page 8 EC directives such as Repairs, service work and disassembled by the customer and WEEE. Repairs may only be carried out by Leica pack them separately. ★ Microsystems-trained service technicians.
- Page 9 The ergonomic design and construction of the ance with this is mandatory. Leica M stereomicroscopy series are intended to reduce the exertion of the user to a minimum. Never spill any liquids on electrical instru- ★...
- Page 10 Other power supplies must not be used. If the original power supply fails or is damaged, it must be replaced. Repair is not permitted. Original power supplies are avail- able from your Leica branch office or Leica dealer. Leica M series User Manual...
-
Page 11: Table Of Contents
Magnification Factor of the Eyepieces Health Notes Assembly Dioptric Correction Base and Focusing Column Dioptric Correction and Parfocality Optics carrier Graticules Tube Objectives Eyepieces Objective TL5000 Ergo transmitted light base Wiring: Connections (Leica M165 C B) Cables: Cable Duct Leica M series User Manual... - Page 12 Optical Accessories The Different Types of Objectives Bases Leica TL5000 Ergo Transmitted Light Base: Controls Leica TL5000 Ergo Transmitted Light Base: Operation Technical Data Leica TL5000 Ergo Transmitted Light Base Appendix Calculating the Total Magnification and Field of View Diameter...
-
Page 13: The Leica M Series
The Leica M Series Leica M series User Manual... -
Page 14: Congratulations
It contains all the information you need regarding operation, safety and maintenance. Simply observing a few guidelines will ensure The Leica M series embodies all the qualities you associate with the name that even after years of intensive use, your stereomicroscope will continue Leica Microsystems: excellent objectives, high-quality engineering, and to work as smoothly and reliably as on the very first day. -
Page 15: A Step Towards Infinity
If one increases the distance of the optical axes, the three-dimen- sional image seen by the observer becomes distorted— a sphere becomes an ellipse, a flat surface curves towards the observer. Leica M series User Manual... -
Page 16: The Electronics: Comfort, Convenience And Safety For Your Experiments
The Electronics: Comfort, Convenience and Safety for your Experiments Never before have electronics been used as Fewer cables extensively in a Leica series as in the new M A large part of the cables have been routed in series lineup. Optics carrier, tripod, base and the interior of the column. -
Page 17: Maximum Compatibility
23, while the predecessor models were only Objectives designed for field number 21, resulting in a All new objectives of the Leica M series are smaller object field. parfocal. Eyepieces If you prefer, you can continue to use the previ- The new M series eyepieces have an audible ous Leica objective series. -
Page 18: On We Go
On We Go If your new Leica microscope has already If, on the other hand, you are assembling the been assembled and commissioned by your microscope yourself, continue with the "Assem- Leica consultant, click here to skip through bly" chapter, which begins on page 19. -
Page 19: Assembly
Assembly Leica M series User Manual... -
Page 20: Base And Focusing Column
1. Securely install the column adapter on the 2. Securely screw the focusing column to the column using the four included screws. base using the six included screws. Tools used ★ Allen key, 3 mm Leica M series User Manual... -
Page 21: Optics Carrier
2. Press the optics carrier backwards to the ★ ing column so that the screw fits into the focusing column and screw it in place using thread provided and the lug fits into the your other hand. groove. Leica M series User Manual... -
Page 22: Tube
Tools used positioning screw meshes with the guide tion. No tools required. groove. ★ Preparations 1. Unscrew the positioning screw and remove the protective cover. Leica M series User Manual... -
Page 23: Eyepieces
You can extend the overall magnification range 2. Remove the plastic tube guard. using available 10×, 16×, 25× and 40× wide- field eyepieces for persons wearing glasses. 4. Securely tighten the clamping screws. Leica M series User Manual... -
Page 24: Objective
2x planapochromatic objective, 1. Remove the protective cap on the optics which is very heavy. Remove all specimens from carrier by turning it. the stage plate first. 2. Screw the objective clockwise into the optics carrier. Leica M series User Manual... -
Page 25: Tl5000 Ergo Transmitted Light Base
3. Reattach the adapter plate to its original and non-slip surface. position using the 6 Allen screws. Refer also to the separately provided User Manual for the TL5000 Ergo trans- mitted light base. Leica M series User Manual... -
Page 26: Wiring: Connections (Leica M165 C B)
Wiring: Connections (Leica M165 C B) The new Leica M series features extensive The terminals The connection to other instruments is made encoding with which various microscope data using the terminals on the rear side of the and settings can be read out and reproduced column: later. -
Page 27: Cables: Cable Duct
2. Remove the cover of the cable duct. Tip: Estimate the length of the cable ends you will need before screwing on the cover. For thick cables, it is difficult to change the length retroactively. Leica M series User Manual... -
Page 28: Quick Start Guide
Quick Start Guide Leica M series User Manual... -
Page 29: The Fastest Route To Success
The Fastest Route to Success Your Leica stereomicroscope has been delivered in completely assembled condition by your Leica partner, and naturally you want to get right to work. Therefore, your next step should be to study the Quick Start Guide, which outlines the most important steps at a glance. -
Page 30: Overview Of An M Series Microscope
Transmitted light base Interchangeable objective Built-in iris diaphragm Fastening screw for the binocular tube (or accessories) Adjustable eyepiece tubes Fastening screws for the eyepieces 10 Eyepieces for spectacle wearers with dioptric correction and eyecups 11 Trinocular tube Leica M series User Manual... -
Page 31: The Correct Interpupillary Distance
Not to worry—after a little while, it will become automatic. Reference values The distance between eye and eyepiece measures approx. 22 mm for 10/23B widefield eyepieces for persons wearing glasses. ✓ ✗ Leica M series User Manual... -
Page 32: Using The Eyepieces
2. If an eyepiece is equipped with the inte- Each eyepiece offers a certain magnification factor that has a determinative effect on the total magnification. Furthermore, all Leica eyepieces can be equipped with practical grati- cules that enable measuring and quantifying of specimens. -
Page 33: Focusing
2. The coarse/fine adjustment carries a The focusing drive can be operated either focusing. load of up to 15 kg. ★ left- or right-handed. The resolution of the coarse/fine adjust- ★ ment is 1 µm. Leica M series User Manual... -
Page 34: Adjusting The Resistance Of The Focus Drive
The resistance can be adjusted individually depending on the equipment weight and personal preferences as follows: 1. Grip the outer drive knobs with both hands and turn them towards each other until the desired resistance is reached during focus- ing. Leica M series User Manual... -
Page 35: Changing The Magnification (Zoom)
The name indicates the zoom range 1. Look into the eyepieces. covered: 2. Focus on the specimen. ★ Leica M125 B = 12.5:1 Leica M165 C B = 16.5:1 3. Rotate the magnification changer until the ★ desired magnification is configured. -
Page 36: Click Stops And Magnifications
On the other hand, when the click stops are 2. Push the bottom button upwards to enable the position of the magnification changer and enabled, photographs, measurement results the ratchet steps. the eyepiece and objective combination used. etc. can be reproduced more accurately. Leica M series User Manual... -
Page 37: Parfocality: More Comfort And Convenience For Your Work
Parfocality: More Comfort and Convenience for Your Work All Leica stereomicroscopes are parfocally Parfocality matched, meaning that you can view a focused 1. Enlarge the view to the maximum level. specimen from the lowest to the highest magnification without having to refocus. The 2. -
Page 38: Iris Diaphragm
The and the depth of field increases. brighter, but the depth of field decreases. "depth of field" (or "depth of focus") is the area of a specimen that is brought into sharp focus. Leica M series User Manual... -
Page 39: Eyepieces
Eyepieces Leica M series User Manual... -
Page 40: Magnification Factor Of The Eyepieces
Dioptric Correction Order number 10× ± 5 diopter settings 10 450 023 16× ± 5 diopter settings 10 450 024 25× ± 5 diopter settings 10 450 025 40× ± 5 diopter settings 10 450 026 Leica M series User Manual... -
Page 41: Health Notes
The risk can be kept to a minimum by using individual eyepieces or detachable eyecups. Eyecups can be ordered separately. Please contact your Leica partner. Separate eyecups are an effective way of prevent- ing infections. Leica M series User Manual... -
Page 42: Dioptric Correction
Dioptric Correction All Leica eyepieces are also available with built- Using the Dioptric Correction Note that when using dioptric correction, in dioptric correction, allowing the microscope 1. Set the dioptric correction of both the advantage of parfocality is lost - thus to be used without glasses even by those with eyepieces to the mid position ("0"... -
Page 43: Dioptric Correction And Parfocality
If not, repeat the process. 6. Rotate the eyepieces counterclockwise in the "+" direction as far as they will go (+5 diopter settings). Leica M series User Manual... -
Page 44: Graticules
Graticules 2. Clamp the graticule on the insert, applying 4. You can now align the graticule by rotating Leica graticules make counting easier, particu- moderate pressure. Ensure that the grati- the eyepiece in the tube and then tighten- larly for workstations that are not equipped cule fits tightly. -
Page 45: Objectives And
Objectives and Optical Accessories Leica M series User Manual... -
Page 46: The Different Types Of Objectives
With planapochromatic objectives, the ★ finest structures are visible with high contrast. The sophisticated apochromatic correction allows these objectives to attain the highest color brilliance and fidelity. Leica M series User Manual... - Page 47 Bases Leica M series User Manual...
-
Page 48: Leica Tl5000 Ergo Transmitted Light Base: Controls
Leica TL5000 Ergo Transmitted Light Base: Controls 3 4 5 Rear side of the TL5000 Ergo Left side of the TL5000 Ergo Right side of the TL5000 Ergo Power switch for the base LED display for opening and positioning On/Off switch for the light source / Press and Power supply connection the aperture or for balance in DF mode. -
Page 49: Leica Tl5000 Ergo Transmitted Light Base: Operation
Leica TL5000 Ergo Transmitted Light Base: Operation The transmitted light base must only be Switching the transmitted light base on connected to a grounded socket with a and off 2. Press the on/off switch on the right side faultless power cable! Failure to observe these 1. - Page 50 Leica TL5000 Ergo Transmitted Light Base: Operation (Continued) 3. Look through the eyepiece and adjust the The following assumes that the power light intensity using the control on the switch on the rear side of the device right side. The intensity of the illumination is always switched on.
-
Page 51: Technical Data
Technical Data Leica M series User Manual... -
Page 52: Leica Tl5000 Ergo Transmitted Light Base
Leica TL5000 Ergo Transmitted Light Base Light source Light source Illuminated field: Bright field ∅ 65 mm Illuminated field: Dark field ∅ 40 mm Relief Contrast System (RC™) Internal shutter/lamp control Integrated filter holder Matching of high num. aperture Remote control options AntiShock™... -
Page 53: Appendix
Appendix Leica M series User Manual... -
Page 54: Calculating The Total Magnification And Field Of View Diameter
Calculation example: field of view diameter in the specimen MTOT VIS = MO × ME × z × q × r N FOV ∅ OF: M O × z ×q ×r 1 × 25 × 4 × 1.5 × 1.25 = 187.5× Leica M series User Manual... -
Page 55: Care, Maintenance, Contact Persons
Leica microscope will continue to products/stereo-microscopes-macroscopes/ work as well as it did on the very first day. research-manual/ Plugs, optical systems and mechanical parts ★... - Page 56 Keep accessories in a dust-free place when Remove dust with a bellows and a soft ★ ★ not in use. paintbrush. Clean eyepieces and objectives with special ★ optics cleaning cloths and pure alcohol. Leica M series User Manual...
- Page 57 Copyright © Leica Microsystems CMS GmbH • Ernst-Leitz-Straße • 35578 Wetzlar Germany 2013 • Phone +49 6441-29-0 • Fax +49 6441-29-2599 LEICA and the Leica logos are registered trademarks of Leica IR GmbH. Printed on chlorine-free bleached paper. III/13/M.H. Revision 1.0, issued March 14th, 2013...
Need help?
Do you have a question about the M125 B and is the answer not in the manual?
Questions and answers