Advertisement
Quick Links
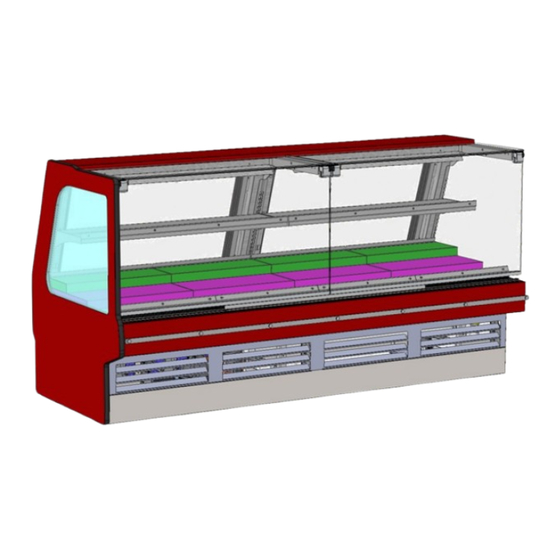
G-SERIES
G-SERIES MID-VOLUME REFRIGERATED SERVICE DELI MERCHANDISERS
> VERTICAL FRONT GLASS WITH REAR HINGES
> VERTICAL FRONT GLASS WITH FRONT HINGES
> REMOTE & SELF-CONTAINED > FULL AND OPEN END PANELS
> REFRIGERATED-TO-DRY SWITCH AT CASE REAR (OPTIONAL)
> REAR SLIDING DOORS > OPTIONAL SCALE STAND
GMDSV6R.7115C
GLDSV4R
Operating Manuals\Standard\G-Series_Mid-Volume Ref Svc Deli_Vertical Glass_Rear Hinges_21-01524.pub
READ AND SAVE THESE INSTRUCTIONS
GMDSV12R.7183
GMDSV4R.7503
Structural Concepts Corporation ∙ 888 E. Porter Road ∙ Muskegon, MI 49441 Phone: 231.798.8888 Fax: 231.798.4960 ∙ www.structuralconcepts.com
INSTALLATION AND
OPERATING MANUAL
GMDSVC3R
GMDSV4R
P/N 21-01524
CAUTION!
FRAGILE!
HOLD
GLASS
FIRMLY.
SLOWLY
OPEN &
CLOSE.
CAUTION!
FRAGILE!
DO NOT
STRIKE
DECKS
OR PANS
AGAINST
EDGE OF
GLASS.
GLDSV6R.6670C
GMDSV8R
Rev D Date: 8.22.2019
Advertisement

Related Manuals for Structural Concepts GMDSV12R.7183


Summary of Contents for Structural Concepts GMDSV12R.7183
- Page 1 AGAINST EDGE OF GLASS. GMDSVC3R GMDSV6R.7115C GMDSV4R GLDSV6R.6670C GLDSV4R GMDSV4R.7503 GMDSV8R Structural Concepts Corporation ∙ 888 E. Porter Road ∙ Muskegon, MI 49441 Phone: 231.798.8888 Fax: 231.798.4960 ∙ www.structuralconcepts.com Operating Manuals\Standard\G-Series_Mid-Volume Ref Svc Deli_Vertical Glass_Rear Hinges_21-01524.pub Rev D Date: 8.22.2019...
- Page 2 TABLE OF CONTENTS / LIST OF MODELS INCLUDED IN MANUAL TABLE OF CONTENTS / LIST OF MODELS ENCOMPASSED IN MANUAL ……….………………….….. OVERVIEW / UNIT TYPE / COMPLIANCE / WARNINGS / PRECAUTIONS / WIRING …..……….……... INSTALLATION: REMOVAL FROM SKID, REMOVING LOWER FRONT PANELS ..……...…….…….…. INSTALLATION, CONT’D: CASE ADJOINMENT INSTRUCTIONS ……………….………...……………….
- Page 3 For Type 1 Conditions (most cases): ambient conditions are to be at 55% maximum humidity and These Structural Concepts merchandisers are maximum temperatures of 75 °F (24 °C). designed to merchandise packaged products at 41 °F For Type 2 Conditions: ambient conditions are to be at (5 °C) or less product temperatures (unless custom...
- Page 4 See previous page for specifics on OVERVIEW, This disclosure statement has been reviewed and TYPE, COMPLIANCE and WARNINGS. approved by Structural Concepts and Structural Concepts attests, under penalty of perjury, that these WIRING DIAGRAM statements are true and accurate.
- Page 5 INSTALLATION: REMOVAL FROM SKID, REMOVING LOWER FRONT PANELS 2. Remove Case From Skid (Casters) 1. Remove Case From Skid Remove shipping brackets that may be securing Remove shipping brace that may be casters to skid securing case to skid. ...
- Page 6 INSTALLATION, CONT’D: CASE ADJOINMENT INSTRUCTIONS #2 - Holes are accessible through rear sliding door. 4. Case Adjoinment Instructions #3 - Holes are accessible at underside of decking. >> Warranty is void if improper sealant/urethane is used. Decking must be removed to attach bolts/nuts. >>...
- Page 7 INSTALLATION, CONT’D: FRAME SUPPORT RAIL SHIMMING 5. Position & Align Case Alongside Other 6. Frame Support Rails Must Be Shimmed Cases Illustration below shows case with frame support rails. Before adjusting levelers (or shimming frame Shims will be provided with all cases that have support rails), make certain that the case is in frame support rails.
- Page 8 INSTALLATION, CONT’D: FRONT GLASS ALIGNMENT & ADJUSTMENT (VIA RAIL SYSTEM) 7. Front Glass Alignment & Adjustment via Rail System (For Curved and Flat Front Glass) Proper alignment of the front glass is important to create and maintain a seal inside the case. ...
- Page 9 INSTALLATION, CONT’D: FIELD WIRING BOX / RACEWAY / LED DRIVER / ANTI-CONDENSATE FANS 8. Field Wiring Box / LED Driver / Raceway / LED Driver / Note: Illustration shown may not Anti-Condensate Axial Fans exactly reflect every feature or option of your particular unit. ...
- Page 10 INSTALLATION, CONT’D: REFRIGERATION LINES / STUB-UPS / DRAINS 10. Drains 9. Refrigration Line Stub-Up Connections Cases have drains at left and right hand sides. Refrigerant stub-up access is at underside of Longer cases may have drain at case center. case.
- Page 11 INSTALLATION, CONT’D: SCALE STAND WITH OUTLETS & CAT5 / FLIP-UP LEDGE 11. Scale Stand / Ethernet CAT5 / Receptacle Rear ledge step-by-step removal method is as follows: 1. Hinged Support Bracket is shown in its standard Optional scale stand location and illustration is upright position.
- Page 12 START-UP AND OPERATION Start-Up And Operation If lights do not turn on, check all raceway plugs. The lighting is wired in series so all Unit will energize when properly field wired. lights must be plugged in or receptacles ...
- Page 13 MAINTENANCE FUNDAMENTALS: LED LIGHT FIXTURES / REMOVAL & REPLACEMENT 1. LED Style Light Fixtures Removal of Faulty LED Lights: Contact Structural Concepts’ Technical Service Department for replacement LED lights. Plug Turn off LED light switch. To remove faulty LED light, follow these steps: A.
- Page 14 MAINTENANCE FUNDAMENTALS, CON’D: SHELF ASSEMBLIES 2. Shelf Assembly (Standard Style) Bracket Retainer (one for each shelf) Shelves may be removed from uprights for cleaning or service. For lighted shelving, unplug the light cord and detach from the rear shelf support prior to LED Light removing from case.
- Page 15 MAINTENANCE FUNDAMENTALS, CONT’D: DRAIN / TXV VALVE ACCESS 3. Drain and Expansion Valve Access The drain and expansion valve are both accessible from the front of the case. Unplug the fans (one plug per side) and remove the fastener from the access panel in the front right (or left) corner of the unit.
- Page 16 MAINTENANCE FUNDAMENTALS, CONT’D: REAR SLIDING DOORS 4. Removing the Rear Sliding Doors Carefully set rear sliding doors down to prevent them from falling. Note: Doors are not interchangeable. There is an Replace rear sliding doors in reverse order they inner and outer door.
- Page 17 MAINTENANCE FUNDAMENTALS, CONT’D: REAR HINGED FRONT GLASS Lift Handle Rear Hinged Front Glass (Shown In 5. Rear Hinged Front Glass Raised Position) Models have UV-glued front glass may be raised via hinge that is located near case rear (vs. front of case). ...
- Page 18 MAINTENANCE FUNDAMENTALS, CONT’D: FRONT HINGED GLASS DOORS 6. Front Hinged Glass Doors Doors with hinges at front (at left and right sides) are to be opened with handles (a center of case). Rear Hinged Front Carefully grasp handles and slowly pull outward. Glass (Shown In Raised Position) ...
- Page 19 MAINTENANCE FUNDAMENTALS, CONT’D: REFRIGERATED TO DRY SWITCH (OPTIONAL) 7. Refrigerated to Dry Switch (Optional) Only authorized store personnel are to access switch. Certain models may be able to switch from After unit has been set to desired state (either refrigerated to dry (non-refrigerated).
- Page 20 MAINTENANCE FUNDAMENTALS, CONT’D: CUTTING BOARD / REAR LEDGE REMOVAL 8. Cutting Board / Rear Ledge Removal Steps The illustrations at right and below reflect step-by-step removal method. 1. Hinged Support Bracket is shown in its standard upright position. 2 & 3. While upright, Rear Ledge must be slid away from case and then rotated downward to Shelf Hinged...
- Page 21 MAINTENANCE FUNDAMENTALS, CONT’D: CONDENSER PACKAGE LAYOUT 9. General EnergyWise Condenser Package Configuration Note: Your particular compressor may have slightly different refrigeration package layout. Fan Shroud / Condenser Coil Cover: (Optional: May Have Shroud Attached to House Clean 7 Hot Gas Condensate Evaporator Pan Sweep™...
- Page 22 CLEANING SCHEDULE - INTERIOR: TO BE PERFORMED BY STORE PERSONNEL AREA FREQ. INSTRUCTIONS Interior Daily Decks: Wipe off decks with moist cloth dipped in mild soap and water solution. Weekly Extended Manual Defrost (For Units With Misting System Only): Units with misting system can have ice buildup occur (causing case to operate outside acceptable temperatures).
- Page 23 CLEANING SCHEDULE - EXTERIOR: TO BE PERFORMED BY STORE PERSONNEL AREA FREQ. INSTRUCTIONS Exterior Daily All Glass / Mirrors: Clean side glass, front glass and mirrors with household or commercial glass cleaner. Clean out door track with moist cloth. Daily Rear Sliding Door Exterior Glass: Clean with household or commercial glass cleaner.
- Page 24 CLEANING SCHEDULE -STAINLESS STEEL: TO BE PERFORMED BY STORE PERSONNEL General Stainless Steel Surface Cleaning (To Be Performed As Often As Needed): Certain grades of stainless steel, and some are more prone to corrosion than others. Stainless steel can become exposed to a wide variety of contaminants, which if left untreated can cause stains and rust.
- Page 25 PREVENTIVE MAINTENANCE - TO BE PERFORMED BY TRAINED SERVICE PROVIDERS ONLY WARNING! TURN OFF CASE BEFORE PERFORMING PREVENTIVE MAINTENANCE! PREVENTIVE FREQ. INSTRUCTIONS MAINTENANCE Case Exterior Quarterly Condensing Coil: Remove rear grille to access area. Simply lift up and off. ...
- Page 26 TROUBLESHOOTING - TO BE PERFORMED BY STORE PERSONNEL (UNLESS NOTED OTHERWISE) CONDITION TROUBLESHOOTING Ice Is Forming on Perform extended manual defrost weekly. See CLEANING SCHEDULE - TO BE Evaporator Coils PERFORMED BY STORE PERSONNEL section in manual for additional infor- mation.
- Page 27 TROUBLESHOOTING - TO BE PERFORMED BY STORE PERSONNEL (UNLESS NOTED OTHERWISE) CONDITION TROUBLESHOOTING Not Holding Temperature If a large amount of warm product was added to the case, it will take time for the temperature to adjust. Unit needs product to be pre-chilled. Temperature changes during defrost mode but will return to normal.
- Page 28 Troubleshooting to be performed by trained service providers only is on next page. If case light still do not come on, it may need to be replaced. Contact Structural Concepts’ Technical Service Department for replacement light (see TECHNICAL SERVICE section of this manual for contact information). ...
- Page 29 TROUBLESHOOTING - CONDENSING SYSTEM (BY TRAINED SERVICE PROVIDERS ONLY) CONDITION TROUBLESHOOTING Head Pressure Too High Check that the condensing coil is not dirty or covered. Check that condensing fans are working. Check that refrigerant is not overcharged. Perform sub-cooling check and verify that no contaminates are in system. Check that liquid line filter dryer is not plugged.
- Page 30 TROUBLESHOOTING - EVAPORATOR SYSTEM (BY TRAINED SERVICE PROVIDERS ONLY) CONDITION TROUBLESHOOTING Low Suction Pressure Check if sight glass is flashing or showing low charge. Check that expansion valve (TXV) isn’t restricted. Check element charge. Check that liquid line or filter isn’t restricted. Check that refrigeration lines and/or hoses are not kinked on either high or low sides.
- Page 31 For additional technical information and service, see the TECHNICAL SERVICE page in this manual for instructions on contacting Structural Concepts’ Technical Service Department. manual for instructions on contacting Structural Concepts’ Technical Service Department. See images below for samples of both refrigerated and non-refrigerated serial labels.
- Page 32 Read And Save These Instructions - Page 1 of 3 Integrated Electronic Microprocessor Controller Programming The Instrument ▲ mute To Modify The Setpoint 1. Press and hold the “SET” key for at least 1 second. ▼ 2. Use arrow keys ▲ ▼ on temperature ▲...
- Page 33 Read And S Integrated Electronic Microprocessor Controller User Interface - Display Summary Table of Alarm and Signals: Display, Buzzer and Relay reset alarms w/manual reset / reset HACCP alarms / reset temp. monitoring...
- Page 34 Read And Save These Instructions - Page 3 of 3 Integrated Electronic Microprocessor Controller Summary Table of Operating Parameters CODE PARAMETER UOM* TYPE MINIMUM MAXIMUM DEFAULT flag Select Celsius (°C) or Fahrenheit (°F) Calibration of probe 1 °C/°F Calibration of probe 2 °C/°F For Case Specific...
- Page 35 DAMAGE, STORE’S AMBIENT CONDITIONS, ETC.) LIMITED WARRANTY Overview: All sales by Structural Concepts Corporation (hereafter referred to as “SCC”) are subject to the following limited warranty. “Goods” refers to the product or products being sold by SCC. Warranty Scope: Warranty is for equipment sold in the United States, Canada, Mexico and Puerto Rico. Equipment sold elsewhere may carry modified warranties.
Need help?
Do you have a question about the GMDSV12R.7183 and is the answer not in the manual?
Questions and answers