Table of Contents
Advertisement
Advertisement
Table of Contents

Related Manuals for Creality K1 Max


Summary of Contents for Creality K1 Max
- Page 1 K1 Max Create reality,achieve dreams K1 Max 3D Printer User Manual V1.3...
- Page 2 Users should comply with the laws and regulations of the corresponding countries and regions where the equipment is located (used), abide by professional ethics, pay attention to safety obligations, and strictly prohibit the use of our products or equipment for any illegal purposes; Creality will not be responsible for any violators' legal liability under any circumstance;...
-
Page 3: Table Of Contents
Contents ....................................................1. About the Device 01-03 ......................................................1.1 About the Printer 01-01 ....................................................1.2 Device Specifications 02-02 ........................................................1.3 Packing List 03-03 ........................................................ 2. Unboxing 04-07 ......................................................2.1 Unboxing Steps 04-04 ......................................................2.2 Install the Product 05-06 ......................................................07-07 2.3 Power-on guide ................................................... -
Page 4: About The Device
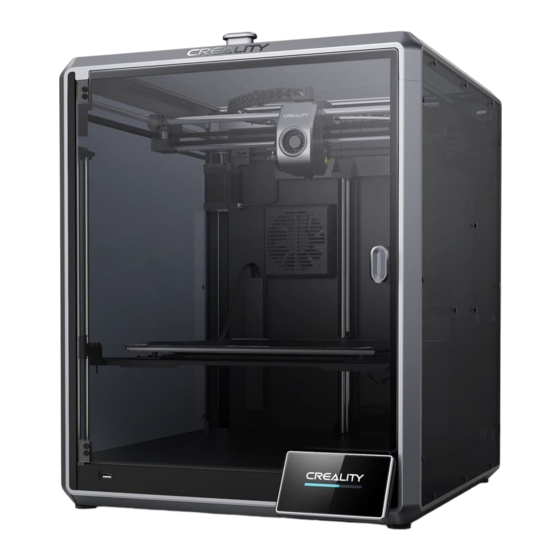
1. About the Device 1.1 About the Printer Top cover AI LiDAR Filament detection Model fan Camera Extruder kit Back Fan Air Filter Side Fan Printing platform Front door Filament Rack Switch USB flash Power outlet disk port Screen Ethernet Port 01 01... -
Page 5: Device Specifications
Ambient temperature Sprite Direct Drive Extruder Supported Filament PLA/ABS/Carbon/PETG/PET/TPU95A 300℃ Max. Nozzle Temperature Screen 4.3 inch touch screen USB Flash Disk/LAN Printing/Creality Cloud Printing Printing Method USB flash disk/WIFI/Ethernet Connection Power Loss Recovery Filament Detection Auto leveling Camera AI LiDAR... -
Page 6: Packing List
Quick Guide ×1 After-sales Services Damping Pads ×4 售后服务卡 M3x12 x2 如果您不满意请告诉我们,如果您满意请告诉您的朋友。 Card ×1 DE FR Pyc. PT-BR K1 Max 扫码了解更多 服务热线:400-613-3882 V1.0 V2.4 * Tips: the above accessories are for reference only. Please refer to the physical accessories! 01 03... -
Page 7: Unboxing
2. Unboxing 2.1 Unpacking Steps Take the packing cotton and tools in the order as shown in figure. Handle the top cover with care. (the glass is fragile) Take the touch screen and Power Cable Move the Extruder to one side in the direction indicated by the arrow and take the grey foam as shown in the figure. -
Page 8: Install The Product
2. Unboxing 2.2 Install the Product ① connect the touch screen to the flat cable extended from the base according to Figure A. Then snap the touch screen into the slot in the baseplate, as shown in Figure B. (The direction is as shown in the figure; otherwise, the screen interface may be damaged.) ●... - Page 9 2. Unboxing 2.2 Install the Product Select a language and click "Next", Remove three screws a, b and c according to position indicated by the ⑤ yellow arrow. click "OK" on the screen. Keep the blue cube in the figure clean of debris and then click "OK". ⑥...
-
Page 10: Power-On Guide
2. Unboxing 2.3 Power-on guide ③ ① Network Settings ② Time Zone Settings Creality Cloud binding ④ Self-inspection ⑤ Self-testing ⑥ Self-test completed Note: The current interface is for reference only. Due to the continuous upgrading of functions, it shall be subject to the latest firmware UI published... -
Page 11: About The User Interface
3. About the User Interface 3.1 Tune、Prepare Nozzle Temperature Temperature Main Parameters can be manually set Prepare Print interface LED switch Cooling inlet Print Time Remain Note: The current interface is for reference only. Due to the continuous upgrading of functions, it shall be subject to the latest firmware UI published on the official website. -
Page 12: Files
3. About the User Interface 3.2 Files ① ② ③ Local model Printing Press and hold on the model to multi-select and copy it to a USB flash drive Note: The current interface is for reference only. Due to the continuous upgrading of functions, it shall be subject to the latest firmware UI published on the official website. -
Page 13: Tune、Support
3. About the User Interface 3.3 Tune、Support Help System System Tune Support Error history Network Note: The current interface is for reference only. Due to the continuous upgrading of functions, it shall be subject to the latest firmware UI published on the official website. Upload Log... -
Page 14: First Printing
4. First Printing 4.1 Local Printing ① ② Select to print ③ Local model Printing Note: Keep the Extrusion switch off before printing. Note: The current interface is for reference only. Due to the continuous upgrading of functions, it shall be subject to the latest firmware UI published on the official website. 01 11... -
Page 15: Lan Printing
4. First Printing 4.2 LAN Printing Creality Print ① Download at (www.crealitycloud.com) or find the software on a USB flash drive and install it. ② ③ Choose a language and region Choose a Printer Tips: the computer must be in the same... - Page 16 4. First Printing 4.2 LAN Printing ⑥ Selection of LAN printing ⑦ Add a device: a. Add by scanning; → Select a device ⑧ Device List ⑦ Add a device: b. Add a device by manually entering the IP address ⑨...
-
Page 17: Crealitycloud Printing
4. First Printing 4.3 CrealityCloud printing Scan the QR code and download the app Creality cloud for 3D Printing Sign up for an account Download Log in 01 14... - Page 18 4. First Printing 4.3 CrealityCloud printing ① Select Settings → Bind the Creality Cloud ② Scan the QR code Select model on the homepage Add a new device Add a device K1 Max K1 Max Slicing Select a device Print...
-
Page 19: Functional Specification
5. Functional Specification 5.1 Filament Retreat Method 1: ② Unlock the extrusion switch. ③Remove the filament from the extruder. ① Input the nozzle temperature on the screen and ④ Remove the PTFE tube from the top of the extruder. wait for it to heat up to the target temperature. ②... - Page 20 5. Functional Specification 5.1 Filament Retreat Method 2: ① ② Wait for the screen to display “Retraction done”. ③ Extract the filament from outside the printer. Click on the “Retract” button. Note: The current interface is for reference only. Due to the continuous upgrading of functions, it shall be subject to the latest firmware UI published on the official website.
-
Page 21: Change Filament
5. Functional Specification 5.2 Change filament ① Trigger filament runout sensor. ② Unlock the extrusion switch. ③Remove the filament from the ⑤ Click on the screen to change the filament. ④ extruder. Remove the PTFE tube from the top of the extruder. ②... - Page 22 5. Functional Specification 5. Functional Specification 5.2 Change filament ⑨ ⑫ Load the filament from outside the printer. Reinsert the PTFE tube into the extruder. ⑩ Attach the filament feeding mechanism. ⑪ Lock the extrusion switch. ⑨ ⑩ ⑪ ⑬ ⑭...
-
Page 23: Calibration
5. Functional Specification 5.3 Calibration Selecting the calibration option will enable the machine to perform bed leveling before starting the print. Note: 1.Ensure that the calibration plate sticker is clean and undamaged. 2.Do not stare directly at the laser when it is activated. Calibration plate sticker First-layer detection of printing: Use AI Lidar and first-layer detection algorithm to check the first layer of the model to be printed, and report any first-layer quality problem found to the system,... -
Page 24: Ai Function
5. Functional Specification 5.4 AI function ① When AI detection is turned on, the chamber camera will monitor the process of printing. If any defect is found during the printing, a window will pop up to remind you. ② When you check the Push Pause Printing, the printing will pause if there is any printing defect. Motion advance: Motion advance is utilized to improve the printing quality by compensating for the delay in the mechanical system response during changes in printing direction. -
Page 25: Network Settings
5. Functional Specification 5.6 Network Settings 5.6.1 Wired connection When the printer is connected to the network cable, you can click Settings → Local Network on the screen to check whether it is connected. 5.6.2 WIFI connection Click Settings → Network → WIFI Connection on the screen, select the corresponding WIFI and enter the password to finish the WIFI connection. (only support 2.4 GHz). -
Page 26: Tips And Routine Maintenance
6. Tips and Routine Maintenance 6.1 Precautions for printing 6.1.1 Lubrication and maintenance Y-axis optic axis 1 Y-axis optic axis 2 X-axis optic axis 1 X-axis optic axis 2 Screw rod 3 Z-axis optic axis 3 Z-axis optic axis 1 Screw rod 1 Screw rod 2 Z-axis optic axis 2... - Page 27 6. Tips and Routine Maintenance 6.1 Precautions for printing 6.1.2 Use and maintenance of flexible platform ① Together with the flexible platform after the printed ② The residue of the platform filaments can ③ When the first layer of the model is not be scraped off...
-
Page 28: Maintenance Items
① Please visit https://www.crealitycloud.com/product, click “Products" and select the right model, and then click “Related" to view the tutorials on after-sales service; ② Or contact our after-sales service center at +86 755 3396 5666, or send e-mail to cs@creality.com. 6.2 Maintenance Items Maintenance instructions Clean the debris inside the machine to ensure that its operation is not affected. -
Page 29: Installation Of Damping Pads
6. Tips and Routine Maintenance 6.3 Installation of Damping Pads The Damping Pads can improve the stability of printer during the printing. The specific installation method is as shown in the figure below:... - Page 30 FCC Statement FCC Caution: Any Changes or modifications not expressly approved by the party responsible for compliance could void the user's authority to operate the equipment. This device complies with part 15 of the FCC Rules. Operation is subject to the following two conditions: (1) This device may not cause harmful interference, and (2) this device must accept any interference received, including interference that may cause undesired operation.
- Page 31 Since each model is different, the actual product may be different from the picture. Please refer to the actual product. The final interpretation right belongs to Shenzhen Creality 3D Technology Co., Ltd. SHENZHEN CREALITY 3D TECHNOLOGY CO., LTD. Add:18th Floor, JinXiuHongDu Building, Meilong Road, Xinniu Community, Minzhi Street, Longhua District, Shenzhen City, China.
Need help?
Do you have a question about the K1 Max and is the answer not in the manual?
Questions and answers
How do I change the fixed IP setting on the Creality K1 MAX