Table of Contents

Advertisement

Quick Links

Operating Manual
Translation of the original operating manual
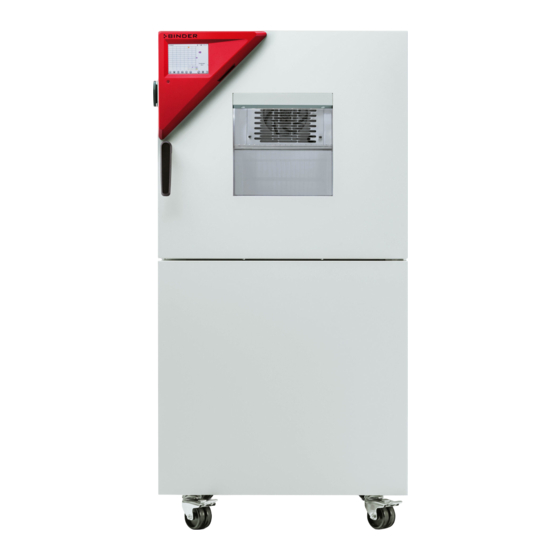
MKF (E5)
Alternating climate chambers with program control
Model
Model version
MKF 56
MKF056-230V
MKF056-240V
MKF 115
MKF115-400V
MKF115-400V-C
MKF 240
MKF240-400V
MKF240-400V-C
MKF 400
MKF400-400V
MKF400-400V-C
MKF 720
MKF720-400V
MKF720-400V-C
MKF 1020
MKF1020-400V
MKF1020-400V-C
MKFT (E5)
Alternating climate chambers with deep temperature and program control
Model
Model version
MKFT 115
MKFT115-400V
MKFT115-400V-C
MKFT 240
MKFT240-400V
MKFT240-400V-C
MKFT 720
MKFT720-400V
MKFT720-400V-C
BINDER GmbH
 Address: Post office box 102, 78502 Tuttlingen, Germany  Phone: +49 7462 2005 0
 Fax: +49 7462 2005 100  Internet: http://www.binder-world.com
 E-mail: info@binder-world.com  Service Hotline: +49 7462 2005 555
 Service Fax: +49 7462 2005 93 555  Service E-Mail: customerservice@binder-world.com
 Service Hotline USA: +1 866 885 9794 or +1 631 224 4340 x3
 Service Hotline Asia Pacific: +852 390 705 04 or +852 390 705 03
 Service Hotline Russia and CIS: +7 495 988 15 16
Issue 04/2022
Art. No.
9020-0378, 9120-0378
9020-0389, 9120-0389
9020-0379, 9120-0379
9020-0357 (with voltage and frequency changer)
9020-0380, 9120-0380
9020-0358 (with voltage and frequency changer)
9020-0408, 9120-0408
9020-0446 (with voltage and frequency changer)
9020-0381, 9120-0381
9020-0359 (with voltage and frequency changer)
9020-0409, 9120-0409
9020-0448 (with voltage and frequency changer)
Art. No.
9020-0382, 9120-0382
9020-0362 (with voltage and frequency changer)
9020-0383, 9120-0383
9020-0361 (with voltage and frequency changer)
9020-0384, 9120-0384
9020-0360 (with voltage and frequency changer)
Art. No. 7001-0365

Advertisement

Table of Contents
loading
Need help?

Need help?

Do you have a question about the MKF 400 and is the answer not in the manual?

Questions and answers

Subscribe to Our Youtube Channel

Summary of Contents for Binder MKF 400

  • Page 1  Fax: +49 7462 2005 100  Internet: http://www.binder-world.com  E-mail: info@binder-world.com  Service Hotline: +49 7462 2005 555  Service Fax: +49 7462 2005 93 555  Service E-Mail: customerservice@binder-world.com  Service Hotline USA: +1 866 885 9794 or +1 631 224 4340 x3 ...
  • Page 2: Table Of Contents

    Connection kit for connecting the chamber’s freshwater connection to a water pipe ....... 34 Safety kit: Hose burst protection device with reflux protection device for the chamber’s freshwater connection (available via BINDER INDIVIDUAL customized solutions) ........... 35 Installation of the voltage and frequency changer (chambers with voltage and frequency changer) ................................
  • Page 3 FUNCTIONAL OVERVIEW OF THE MB2 CHAMBER CONTROLLER ....40 Operating functions in normal display ....................41 Display views: Normal display, program display, chart-recorder display .......... 42 Controller icons overview ........................43 Operating modes ..........................45 Controller menu structure ........................45 5.5.1 Main menu ..........................
  • Page 4 10.4 Program editor: program management ..................... 72 10.4.1 Deleting a week program ......................73 10.5 Section editor: section management ....................74 10.5.1 Add a new program section ....................75 10.5.2 Copy and insert or replace a program section ................ 75 10.5.3 Deleting a program section .....................
  • Page 5 23.1 General information, personnel qualification................... 132 23.2 Maintenance intervals, service ......................133 23.3 Simple troubleshooting ........................134 23.4 Sending the chamber back to BINDER GmbH ................138 24. DISPOSAL......................138 24.1 Disposal of the transport packing ....................138 24.2 Decommissioning ..........................139 24.3 Disposal of the chamber in the Federal Republic of Germany ............
  • Page 6 25. TECHNICAL DESCRIPTION ................142 25.1 Factory calibration and adjustment ....................142 25.2 Over current protection ........................142 25.3 Definition of usable volume ......................142 25.4 MKF (E5) technical data ........................143 25.5 MKFT (E5) technical data ....................... 146 25.6 Equipment and options (extract) ..................... 148 25.7 Accessories and spare parts (extract) ....................
  • Page 7: Safety

    In no event shall BINDER be held liable for any damages, direct or incidental arising out of or related to the use of this manual.
  • Page 8: Intellectual Property

    All obligations on the part of BINDER derive from the respective purchase contract, which also contains the entire and exclusively valid statement of warranty administration and the general terms and conditions, as well as the legal regu- lations valid at the time the contract is concluded.
  • Page 9: Safety Alert Symbol

    1.4.2 Safety alert symbol Use of the safety alert symbol indicates a risk of injury. Observe all measures that are marked with the safety alert symbol in order to avoid death or in- jury. 1.4.3 Pictograms Warning signs Stability hazard Electrical hazard Hot surface Explosive atmosphere...
  • Page 10: Word Message Panel Structure

    1.4.4 Word message panel structure Type / cause of hazard. Possible consequences. ∅ Instruction how to avoid the hazard: prohibition  Instruction how to avoid the hazard: mandatory action Observe all other notes and information not necessarily emphasized in the same way, in order to avoid disruptions that could result in direct or indirect injury or property damage.
  • Page 11 Example: MKF 56 Example: MKF 240 Figure 1: Position of labels on the chamber Keep safety labels complete and legible. Replace safety labels that are no longer legible. Contact BINDER service for these replacements. MKF / MKFT (E5) 04/2022 page 11/176...
  • Page 12: Type Plate

    78532 Tuttlingen / Germany www.binder-world.com Figure 2: Type plate (example of MKFT 240 regular unit) Indications of the type plate (example) Indication Information BINDER Manufacturer: BINDER GmbH MKF 56 Model designation Alternating climate chamber Device name Serial No. 00000000000000 Serial no. of the chamber...
  • Page 13: General Safety Instructions On Installing And Operating The Chamber

    (for Germany: DGUV guidelines 213-850 on safe working in laborato- ries, issued by the employers’ liability insurance association). BINDER GmbH is only responsible for the safety features of the chamber provided skilled electricians or qualified personnel authorized by BINDER perform all maintenance and repair, and if components relating to chamber safety are replaced in the event of failure with original spare parts.
  • Page 14 Any solvent contained in the charging material must not be explosive or inflammable. I.e., irrespective of the solvent concentration in the steam room, NO explosive mixture with air must form. The temperature inside the chamber must lie below the flash point or below the sublimation point of the charging material. Familiarize yourself with the physical and chemical properties of the charging material, as well as the con- tained moisture constituent and its behavior with the addition of heat energy and humidity.
  • Page 15: Intended Use

    Such ingredients include in particular acids and halides. Any corrosive damage caused by such ingredients is excluded from liability by BINDER GmbH. The chamber does not dispose of any measures of explosion protection.
  • Page 16: Foreseeable Misuse

    Personnel Requirements Only trained personnel with knowledge of the Operating Manual can set up and install the chamber, start it up, operate, clean, and take it out of operation. Service and repairs call for further technical requirements (e.g. electrical know-how), as well as knowledge of the service manual. Installation site requirements The chambers are designed for setting up inside a building (indoor use).
  • Page 17: Residual Risks

    1.10 Residual Risks The unavoidable design features of a chamber, as well as its proper field of application, can also pose risks, even during correct operation. These residual risks include hazards which, despite the inherently safe de- sign, existing technical protective equipment, safety precautions and supplementary protective measures, cannot be ruled out.
  • Page 18: Operating Instructions

    • Performance of repair work by untrained/insufficiently qualified personnel • Inappropriate repairs which do not meet the quality standard specified by BINDER • Use of replacement parts other than BINDER original replacement parts • Electrical safety analysis not performed after repairs 1.11 Operating instructions...
  • Page 19: Resistance Of The Humidity Sensor Against Harmful Substances

    • Examinations The chamber has been inspected by the “Deutsche Gesetzliche Unfallversicherung e.V. (DGUV) (Ger- man Social Accident Insurance (DGUV)” (German Social Accident Insurance (DGUV), Testing and Cer- tification Body for Foodstuffs and Packaging Industry in DGUV Test) and bears the GS mark. (Not valid for MKF056-240V) 1.13 Resistance of the humidity sensor against harmful substances The following list of harmful substances refers only to the humidity sensor and does not include any other...
  • Page 20: Chamber Description

    Humidity control: A resistance humidifying system humidifies the air. For this purpose, use deionized (demineralized) water. The option BINDER Pure Aqua Service permits using the chamber with any degree of water hardness.
  • Page 21: Chamber Overview

    Chamber overview MKF 56 MKF 240 Figure 3: Alternating climate chambers MKF / MKFT Instrument panel Door Door handle Refrigeration / humidity module Window Access to fill the water can 2.2 Instrument panel 5,7" controller display with touchscreen USB interface Pilot lamp Figure 4: Instrument panel with MB2 program controller and USB interface MKF / MKFT (E5) 04/2022...
  • Page 22: Lateral Control Panel

    Lateral control panel (4a) (4a) (4b) (4b) (5a) (5a) (10) (10) MKF 56 MKF / MKFT from size 115 on Figure 5: Lateral control panel at the right side of the humidity module with options Main power switch ON/OFF (5a) RS485 interface for computer communication (option) not used...
  • Page 23: Main Power Switch (Mkf 56)

    Main power switch (MKF 56) This switch allows completely switching off the chamber (de-energized condition). Figure 6: Main power switch (1) in the lateral control panel of MKF 56 Rear power switch (MKF / MKFT from size 115 on) This switch allows completely switching off the chamber (de-energized condition). (12) Figure 7: Rear view of MKF/MKFT from size 115 on Main power switch On / Off...
  • Page 24: Rear Chamber View

    Rear chamber view (20) (14) (15) (16) (17) (18) (19) Figure 8: MKF 56 rear view with water connections and the options water cooling and compressed air connection (14) Wastewater connection “OUT” with hose olive (18) Socket for optional freshwater can (option for hose ½“...
  • Page 25 (20) (15) (16) (14) (17) (12) (19) Figure 9: Rear view of MKF/MKFT from size 115 on with water connections and the options water cooling and compressed air connection (example: MKF 720) (12) Rear power switch (17) Connection “IN” for cooling water inlet with screw thread ¾’’...
  • Page 26: Completeness Of Delivery, Transportation, Storage, And Installation

    Note on second-hand units (Ex-Demo-Units) Second-hand units are chambers that have been used for a short time for tests or exhibitions. They are thoroughly tested before resale. BINDER ensures that the chamber is technically sound and will work flaw- lessly.
  • Page 27: Guidelines For Safe Lifting And Transportation

    • If the steam humidifying system has NOT been emptied: +3 °C / 37.4 °F to +60 °C / 140 °F. • After BINDER Service has emptied the steam humidifying system: -10 °C / 14 °F to +60 °C / 140 °F.
  • Page 28: Location Of Installation And Ambient Conditions

    37.4 °F with filled steam humidifying system. Damage to the chamber.  Contact BINDER Service before any storage below +3 °C / 37.4 °F. Permissible ambient humidity: max. 70 % r.h., non-condensing After extensive operation at humidity levels > 70% r.h., condensation from excessive humidity can lead to corrosion during storage.
  • Page 29 Do not install or operate the chamber in potentially explosive areas. DANGER Danger of explosion due to combustible dusts or explosive mixtures in the vicinity of the chamber. Serious injury or death from burns and / or explosion pressure. ∅ Do NOT operate the chamber in potentially explosive areas. ...
  • Page 30: Installation And Connections

    To completely separate the chamber from the power supply, you must disconnect the power plug. Install the chamber in a way that the power plug is easily accessible and can be easily pulled in case of danger. With an increased amount of dust in the ambient air, clean the condenser fan several times a year. We recommend checking the fan grid (behind the left maintenance access flap) every week.
  • Page 31: Automatic Fresh Water Supply For Humidifying System Via Water Pipe

    1 µS/cm (ultrapure water), may cause acid corrosion due to its low pH.) • Tap water treated by the optional water treatment system BINDER Pure Aqua Service (disposable sys- tem). A reusable measuring equipment to assess the water quality is included (chap. 21.10).
  • Page 32: Water Circle: Lever For Condensate Recycling (Option For Mkf/Mkft From Size 115 On)

     Conduct the condensate to the wastewater connection in case of soiling / contamina- tion of the interior (horizontal lever position). Any problems and malfunctions that might arise due to insufficient water quality following condensate recycling are excluded from liability by BINDER GmbH. MKF / MKFT (E5) 04/2022 page 32/176...
  • Page 33: Connection Of Cooling Water Outlet For Water Cooling (Option For Mkf Sizes 56, 115, 240, 720, And Mkft 720)

    • pH value 4-7 • connection pressure: 4 to 10 bar BINDER GmbH is NOT responsible for the water quality at the user’s site. Any problems and malfunctions that might arise following use of water of deviating quality is excluded from liability by BINDER GmbH.
  • Page 34: Connection Kit For Connecting The Chamber's Freshwater Connection To A Water Pipe

    Connection kit for connecting the chamber’s freshwater connection to a wa- ter pipe A safety kit against flooding caused by burst water hoses is enclosed with the chamber. It consists of the following: • Hose burst protection device • Hose nozzle with screwing •...
  • Page 35: Safety Kit: Hose Burst Protection Device With Reflux Protection Device For The Chamber's Freshwater Connection (Available Via Binder Individual Customized Solutions)

    Safety kit: Hose burst protection device with reflux protection device for the chamber’s freshwater connection (available via BINDER INDIVIDUAL cus- tomized solutions) A safety kit with a reflux protection device is available for protection of the drinking water system and against flooding caused by burst water hoses.
  • Page 36: Installation Of The Voltage And Frequency Changer (Chambers With Voltage And Frequency Changer)

    NOTICE Danger of impairment of the valve function by calcification. Damage to the chamber.  Have a plumber inspect the valve annually.  Remove calcifications by citric acid or acetic acid solutions.  Continue by testing the function and tightness of the mounted chamber Check: Quickly open the water tap while there is no chamber connected –...
  • Page 37: Electrical Connection

     Make sure that the chamber’s power plug and the power socket match and se- curely connect the electrical protective conductors of the chamber and the house installation. • Only use original connection cables from BINDER according to the above specification. MKF / MKFT (E5) 04/2022 page 37/176...
  • Page 38: Connecting The Voltage And Frequency Changer (For Chambers Equipped With A Voltage And Frequency Changer)

    • Prior to connection and start-up, check the power supply voltage. Compare the values to the specified data located on the chamber’s type plate (left chamber side, bottom right-hand, chap. 1.6). NOTICE Danger of incorrect power supply voltage due to improper connection. Damage to the chamber.
  • Page 39 Left side of the voltage and frequency changer Right side of the voltage and frequency changer with connection socket (G) for the alternating climate with power switch (H) and power cable (I) chamber Figure 15: Voltage and frequency changer, mounted Figure 16: Power switch (H) of the voltage and frequency changer in position “ON”...
  • Page 40: Functional Overview Of The Mb2 Chamber Controller

    (MKF 56) and special controller functions for each program section. You can enter values or programs directly at the controller or use the APT-COM™ 4 Multi Management Software (option) specially developed by BINDER. Operating mode...
  • Page 41: Operating Functions In Normal Display

    Operating functions in normal display Current operating mode Text list for information icons Date, time, authorization level of the logged-in user, memory Quick setpoint entry Continue to next screen Back to Normal display Information Program start Setpoint entry Event list Display of active alarms Access to main menu Figure 18: Operating functions of the MB2 controller in normal display (sample values, MKF 56)
  • Page 42: Display Views: Normal Display, Program Display, Chart-Recorder Display

    Display views: Normal display, program display, chart-recorder display Press the Change view icon to toggle between normal display, program display and chart-re- corder display. Press the Normal display icon to return from program display and chart recorder display back to Normal display.
  • Page 43: Controller Icons Overview

    Controller icons overview Navigation icons in Normal display Icon Signification Function Main menu Access from Normal display to the main menu Alarm Access from Normal display to the list of active alarms Event list Access from Normal display to the event list Access from Normal display to the setpoint entry menu: setpoint Setpoint setting entry for Fixed value operation, turning on/off humidity control,...
  • Page 44 Functional icons in the chart recorder display Icon Signification Function Show legend Show legend Hide legend Hide legend Switch legend Switch between legend pages Show indication “Door open” (B1), “Anti-condensat.” (B2) and “Com- Show indications pressed air” (B3) Hide indication “Door open” (B1), “Anti-condensat.” (B2) and “Com- Hide indications pressed air”...
  • Page 45: Operating Modes

    Operating modes The MB2 program controller operates in the following operating modes: • Idle mode The controller is not functional, i.e., there is no heating or refrigeration and no humidification or dehu- midification. The fan is off. The chamber approximates ambient values. You can activate and deactivate this operating mode with the “Idle mode”...
  • Page 46: Main Menu

    “User” authorization level) Program entry submenu for time and week chap. 9 and 10 programs “Service” submenu chap. 5.5.3 BINDER Service contact page chap. 15.1 Calibrating the touch screen chap. 14.4.2 Back to Normal Display MKF / MKFT (E5) 04/2022...
  • Page 47: Settings" Submenu

    • Access to service data, controller reset to factory settings (chap. 5.5.3) • Available only for users with “Service” and “Admin” authorization level. Full functional range only for BINDER Service (users with “Service” authorization level). “Programs” submenu • Access to the controller’s program functions (chap. 8, 9, 10) 5.5.2 “Settings”...
  • Page 48: Service" Submenu

    5.5.3 “Service” submenu The “Service” submenu is available for users with “Service” or “Admin” authorization level. When logged-in with “Admin” authorization level the user will find information to tell the BINDER Service in service case. Path: Main menu > Service Serial number of the chamber, setup version chap.
  • Page 49: Performance During And After Power Failures

    Performance during and after power failures During a power failure, all controller functions are shut down. After the power returns, all functions return to the same status the chamber had before power failure. The controller continues to function in the original operating mode it was in previously before the power failure occurred.
  • Page 50: Start Up

    Start up Turning on the chamber After connecting the supply lines (chap. 4), you can start up the chamber. • MKF 56: Turn on the main power switch (1) in the lateral control panel at least one hour before operating the chamber.
  • Page 51: Controller Settings Upon Start Up

    Controller settings upon start up The window “Language selection” enables the language selection, in case that it’s activated in the “Start- up” menu. Afterwards occurs a request of the time zone and the temperature unit. The controller will function in the operating mode, which was active before the last shut-down. It controls temperature in fixed value operating mode to the last entered values and in the program mode to the set points achieved beforehand.
  • Page 52: Turning On/Off Humidity Control

    Turning on/off humidity control Turning off humidity control is required when operating the chamber without water connection in order to avoid humidity alarms. For further information see chap. 17. Press the Setpoint setting icon to access the “Setpoint” setting menu from Normal display. “Setpoints”...
  • Page 53: Set-Point Entry Through The "Setpoints" Menu

    • Humidity Setting range 0% r.h. up to 100 % r.h. 10 % r.h. up to 98 % r.h. Control ranges 5 % r.h. up to 98% r.h. with optional compressed air dryer • Fan speed (MKF 56) Setting range 30 % up to 100 % See temperature / humidity diagrams in chap.
  • Page 54: Direct Setpoint Entry Via Normal Display

    When entering a value outside the setting range, the message: “Value outside of limits! (Min: xxx, Max: xxx)” appears (xxx is a wildcard for the limits of the respective parameter). Press the Confirm icon and repeat the entry with a correct value. After completing the settings, press the Confirm icon to take over the entries and exit the menu, or press the Close icon to exit the menu without taking over the entries.
  • Page 55: Timer Program: Stopwatch Function

    Use the “Setpoints” menu to configure the operation lines. “Setpoints” menu. “Functions on/off” entry menu (example: MKF 56). Select the field “Functions on/off”. Mark / unmark the checkbox to activate / deacti- vate the desired function and press the Confirm icon Activated operation line: switching status “1”...
  • Page 56: Performance During Program Delay Time

    • In the field “Program type” select “Timer program”. • Select the field “Program duration” and enter the desired program duration. Press the Confirm icon. • Select the field “Program start” and enter the desired start time of the program in the “Program start” entry menu.
  • Page 57: Time Programs

    Time programs The MB2 program controller permits programming time programs with real-time reference. It offers 25 pro- gram memory positions with up to 100 program sections each. For each program section you can enter a temperature set-point, the humidity set-point, the fan speed (MKF 56), section duration, type of temperature and humidity transition (ramp or step) and the tolerance range.
  • Page 58: Performance During Program Delay Time

    9.1.1 Performance during program delay time During the configured program delay time until program start, the controller equilibrates to the current set- points of Fixed value operation mode. Modifications of these setpoints are effective. When the configured moment for program start is reached, the program delay time ends and the program starts running. Stopping a running time program 9.2.1 Pausing a running time program Press the Program pause icon to interrupt the program.
  • Page 59: Creating A New Time Program

    Creating a new time program Path: Main menu > Programs > Time program “Time program” menu: Enter the program name and, if desired, addi- overview of the existing programs. tional program information in the corresponding fields. Select an empty program place. Press the Confirm icon.
  • Page 60: Deleting A Time Program

    Program editor: “Edit program” menu Select the desired function and press the Confirm icon. The program editor offers following options: • Change the program name • Copy program • Replace program: Replacing an new or an existing program with the copied program. This menu point is visible only after a program has been copied.
  • Page 61: Section Editor: Section Management

    Section editor: section management Path: Main menu > Programs > Time program Select the desired program.    Program view. Section view (example: section 1). Select the desired program section There are the following options: (example: section 1)  Select a parameter to enter or modify the according value (chap.
  • Page 62: Add A New Program Section

    9.6.1 Add a new program section Section editor: “Edit section” menu. Select “Create new section” and press the Con- firm icon. Then select whether to insert the new section be- fore or after the current section. Press the Confirm icon. The new section opens. 9.6.2 Copy and insert or replace a program section Program view.
  • Page 63: Deleting A Program Section

    Press the Edit icon to open the section editor if you want the current section to be replaced or the copied section to be inserted before or after it Program view. Section view (example: section 1). Select the section to be replaced or before or Press the Edit icon to open the section editor after which the copied section shall be in- serted (example: section 2) and press the...
  • Page 64: Value Entry For A Program Section

    Value entry for a program section Path: Main menu > Programs > Time program Select the desired program and section. The section view gives access to all parameters of a program section. You can enter or modify the values. Program name and section number Section duration Type of setpoint transition: ramp or step Operation lines...
  • Page 65: Set-Point Ramp And Set-Point Step

    9.7.2 Set-point ramp and set-point step You can define the type of temperature and humidity transitions for each individual program section. “Ramp” mode: Gradual changes of temperature and humidity The set-point of a given program section functions as the section’s start temperature. During the section’s duration, the set-point gradually passes to the set-point of the subsequent program section.
  • Page 66: Special Controller Functions Via Operation Lines

    “Ramp” and “Step” mode example (representation of a temperature course) W/°C t/min. Corresponding program table Duration Temperature Humidity Fan (MKF 56) Section No. Ramp or Step [hh:mm:ss] [°C] [% rH] 00:10:00 40.0 xxxx xxxx Step 00:20:00 60.0 xxxx xxxx Step 00:10:00 80.0 xxxx...
  • Page 67: Setpoint Entry

    Use the Section editor to configure the operation lines. Section view. “Functions on/off” entry menu. Select the field “Functions on/off”. Mark / unmark the checkbox of the desired function to activate / deactivate it and press the Confirm icon. The controller returns to the section view. Activated operation line: switching status “1”...
  • Page 68: Tolerance Range

    9.7.5 Tolerance range You can specify a temperature and humidity program tolerance range for each program section with differ- ent values for the tolerance minimum and maximum. When the actual value exceeds the given threshold, the program is interrupted. This is indicated on the display (see below). When the actual temperature is situated again within the entered tolerance limits, the program automatically continues.
  • Page 69: Repeating One Or Several Sections Within A Time Program

    9.7.6 Repeating one or several sections within a time program You can repeat several subsequent sections together. It is not possible to define the start section the same time also as the target section, therefore you cannot repeat a single individual section. Enter the desired number of repetitions in the field „Number of repetitions“...
  • Page 70: Week Programs

    Week programs The MB2 program controller permits programming week programs with real-time reference. It offers 5 week program places in total with up to 100 shift points for each week program. Path: Main menu > Programs> Week program 10.1 Starting an existing week program In Normal display press the Program start icon to access the “Program start”...
  • Page 71: Creating A New Week Program

    10.3 Creating a new week program Path: Main menu > Programs > Week program Enter the program name and, if desired, addi- “Week program” menu: tional program information in the correspond- overview of the existing programs. ing fields. Select an empty program place. Select the set-point course “Ramp”...
  • Page 72: Program Editor: Program Management

    10.4 Program editor: program management Path: Main menu > Programs > Week program    “Week program” menu: Program view (example: program 1). overview of the existing programs. If a new program has been created, there is Select an existing program just one program section.
  • Page 73: Deleting A Week Program

    Program view. To add a new section, select “Create new section” and press the Confirm icon. With a new section no weekday is specified. There- fore, the section is first marked in red and cannot be The program view opens. saved.
  • Page 74: Section Editor: Section Management

    10.5 Section editor: section management Path: Main menu > Programs > Week program Select the desired program.    Section view (example: section 1). Program view. There are the following options: Select the desired program section (example: section 1) ...
  • Page 75: Add A New Program Section

    10.5.1 Add a new program section Section editor: “Edit section” menu. Program view. With a new section no weekday is specified. There- Select “Create new section” and press the fore, the section is first marked in red and cannot be Confirm icon.
  • Page 76: Deleting A Program Section

    Select “Replace section” to replace the selected sec- tion with the copied section Select “Insert section” to additionally add the copied section. Press the Confirm icon. If you selected “Insert section” the sections are auto- matically arranged in the correct chronological order. Section editor: “Edit section”...
  • Page 77: Weekday

    10.6.2 Weekday In the field “Weekday” select the desired weekday. With “Daily” selected, this section will run every day Section view. at the same time. 10.6.3 Start time Section view. Entry menu “Moment”. Select with the arrow keys the desired start mo- Select the field “Moment”.
  • Page 78: Setpoint Entry

    10.6.4 Setpoint entry • Select the field “Temperature” and enter the desired temperature setpoint. Setting range: MKF: -50 °C up to 180 °C, MKFT: -80 °C up to 180 °C. Confirm entry with Confirm icon. The controller returns to the section view. •...
  • Page 79: Notification And Alarm Functions

    Notification and alarm functions 11.1 Notification and alarm messages overview 11.1.1 Notifications Notifications are indicated by information icons displayed in the screen header in Normal display An information icon serves as an indication of a certain condition. If this condition persists, in some cases an alarm will be triggered after a fix or configurable interval. As long as the condition persists, the information icon therefore continues to be displayed also in state of alarm.
  • Page 80: Alarm Messages

    MKF/MKFT from size 115 on: Compressor immediately overcurrent Fault in refrigerating machine. Contact BINDER service. Alarm messages are displayed in the list of active alarms until acknowledging them. They are also shown in the event list. 11.1.3 Messages concerning the humidity system...
  • Page 81 Suck off the water (chap. 4.2.3). The chamber func- after 60 sec. overflow” tions as usual. If the message persists, contact BINDER service. The humidity module cannot empty the condensate tank. Wastewater tube obstructed. Check the length and loca- tion of the wastewater tube.
  • Page 82: State Of Alarm

    11.2 State of alarm 1. Visual indications in Normal display: alarm message, screen header flashing in red color 2. Audible alert, if the buzzer is enabled (chap. 11.4). Normal display in state of alarm (example). (a) Screen header flashing in red color and showing the alarm message (b) Alarm icon on the bottom of the screen: change to the list of active alarms and...
  • Page 83: Activating / Deactivating The Audible Alarm (Alarm Buzzer)

    The user cannot restart the device again. The protective cut-off device is located internally. Only a service specialist can replace it. Therefore, please contact an authorized service provider or BINDER service. 12.2 Safety controller (over temperature safety device class 2) The chambers are regularly equipped with an electronic overtemperature safety controller (temperature safety device class 2 according to DIN 12880:2007).
  • Page 84: Safety Controller Modes

    12.2.1 Safety controller modes You can select between “Limit (absolute)” and “Offset (relative)” safety controller mode • Limit: Absolute maximum permitted temperature value This setting offers high safety as a defined temperature limit will not be exceeded. It is important to adapt the safety controller set-point after each modification of the temperature set-point.
  • Page 85: Message And Measures In The State Of Alarm

    Regularly check the safety controller setting for set-point type “Limit” or “Offset” • in Fixed value operating mode according to the entered set-point temperature value • in program mode according to the highest temperature value of the selected temperature program Set the safety controller set-point by approx.
  • Page 86: Over/Under Temperature Safety Device Class 2 (Option)

    12.3 Over/under temperature safety device class 2 (option) The over-/under temperature safety device (4) consists of two entry modules (4a) and (4b) located in the lateral control panel. Both modules can be set from -50 °C / -58 °F (MKF) / -80 °C / -112 °F (MKFT) up to 200 °C / 392 °F and serve to define the maximum high and low temperature limits.
  • Page 87: User Management

    • All passwords can be changed in the “log out” submenu (chap. 13.3). “Service” authorization level • Authorization level only for BINDER service • Extensive authorization for controller operation and configuration, access to service data • The passwords for “Service”, “Admin” and “User” authorization levels can be changed in the “log out”...
  • Page 88 Operation after user login At user login, the authorization level is selected and confirmed by entering the respective pass- word. Following user login, controller operation is available, recognizable by the open-lock icon in the header. The available controller functions correspond to the user’s authorization level. Password protection activated for all levels: operation without user login is locked If passwords have been assigned for all author- ization levels, the controller is locked without...
  • Page 89 Information window To check the authorization level of the user currently logged-in, select in Normal display the arrow far right in the display header. The information window shows date and time, the controller’s free memory space and under “Authorization” the authorization level of the current user. If passwords have been assigned for all authorization levels, a user without login (password entry) has no authorization.
  • Page 90: Log In

    13.2 Log in Path: Main menu > User > Log in Controller with- out a user logged-in Selection of user type (example) All selection possibilities are password protected Controller with logged-in user After completing the settings, press the Confirm icon to take over the entries and exit the menu, or press the Close icon to exit the menu without taking over the entries.
  • Page 91: Log Out

    13.3 Log out Path: Main menu > User > Log out User logoff with “Admin” authorization Controller Controller with without a user logged-in user logged-in User logoff with “User” authorization Controller Controller with without a user logged-in user logged-in 13.4 User change If the password function has been deactivated (chap.13.5.2) this function is not available.
  • Page 92: Password Assignment And Password Change

    User selection (example) All selection possibilities are password protected Controller with logged- in user 13.5 Password assignment and password change This function is not available for a user logged-in with “User” authorization. 13.5.1 Password change A logged-in user can change the passwords of his current level and of the next lower level(s). Example: A user with “Admin”...
  • Page 93 Selection of the authorization level Enter desired password. If desired, press the (example: view with “Admin” authorization) Change keyboard icon to access other entry win- dows. In the “Keyboard switch” window you can select different keyboards to enter uppercase and lowercase letters, digits, and special characters.
  • Page 94: Deleting The Password For An Individual Authorization Level

    13.5.2 Deleting the password for an individual authorization level A user logged-in with “Service” or “Admin” authorization can delete the passwords of his current level and of the next lower level(s). To do this no password is entered during a password change. Path: Main menu >...
  • Page 95: New Password Assignment For "Service" Or "Admin" Authorization Level When The Password Function Was Deactivated

    13.5.3 New password assignment for “service” or “admin” authorization level when the password function was deactivated If the password protection for an authorization level has been deactivated, i.e., no password is assigned, no login for this level is possible. Therefore access to this authorization level is available without login. If the password for the “Service”...
  • Page 96: Activation Code

    13.6 Activation code Certain functions of the controller can be unlocked with a previously generated activation code. The activation code enables access to functions available only in the “Service” authorization level by users without a “Service” authorization. Such functions include e.g., adjustment or extended configurations. The activation code is available in authorization levels.
  • Page 97: General Controller Settings

    General controller settings Most of the general settings can be accessed in the “Settings” submenu, which is available for users with “Service” or “Admin” authorization level. It serves to enter date and time, select the language for the con- troller menus and the desired temperature unit and to configure the controller’s communication functions. 14.1 Selecting the controller’s menu language The MB2 program controller communicates by a menu guide using real words in German, English, French, Spanish, and Italian.
  • Page 98 Or later: Path: Main menu > Settings > Date and time “Date and time” submenu. “Date / time” entry menu. Select the field “Date / time”. Enter date and time and press the Confirm icon. “Date and time” submenu. “Date and time” submenu. In the field “Daylight saving time switch”...
  • Page 99: Selecting The Temperature Unit

    14.3 Selecting the temperature unit Following start-up of the chamber: Or later: Path: Main menu > Settings > Chamber Select the desired temperature unit and press the Confirm icon. Change of the temperature unit between °C and °F. If the unit is changed, all values are converted accordingly C = degree Celsius 0 °C = 31°F...
  • Page 100: Touchscreen Calibration

    • Select the field “Brightness”. Move the grey slide to the left or right to define the brightness of the display • left = darker (minimum value: 0) • right = brighter (maximum value: 100) Press the Confirm icon. • Select the field “Wait time for screen saver” and enter the desired waiting time for the screen saver in seconds.
  • Page 101: Network And Communication

    The waiting icon shows how much time there is left to touch the currently activated box. If the box is not touched withing this period, calibration is aborted and the display changes to Normal display. After completing the calibration, i.e., touching all four boxes, the display changes to Normal display. 14.5 Network and communication For these settings at least the “Admin”...
  • Page 102: Ethernet

    14.5.2 Ethernet 14.5.2.1 Configuration Path: Main menu > Settings > Ethernet “Ethernet” submenu. • In the field “IP address assignment” select the desired setting “Automatic (DHCP)“ or “Man- ual“. With selection “Manual” you can enter the IP- address, the subnet mask and the standard gateway manually.
  • Page 103: Web Server

    This controller menu serves to configure the web server. Then you can enter the chamber’s IP-address in the Internet. The IP address is available via Ethernet. The BINDER web server Chamber information > opens. Enter the user name and password which have been assigned for the web server in the controller menu.
  • Page 104: E-Mail

    14.5.4 E-Mail As soon as an alarm was triggered, an e-mail is sent to the configured e-mail address. Path: Main menu > Settings > Email E-mail address entry: “Email” submenu. Select the desired e-mail address field and enter the e-mail address. You can use the Keybord change icon for entry.
  • Page 105: Usb Menu: Data Transfer Via Usb Interface

    14.6 USB menu: Data transfer via USB interface The USB port is located in the instrument box. When you insert a USB-stick, the “USB menu” opens. The USB stick must be formatted with FAT32 and have at least 8GB of memory. Depending on the user’s authorization level, different functions (highlighted in black) are available for the logged-in user.
  • Page 106: Turning Off The Interior Lighting Automatically

    14.7 Turning off the interior lighting automatically Press the Interior lighting icon to turn on and off the interior lighting. Additionally. you can define in this menu the interval after which the turned-on light will turn off automati- cally. Path: Main menu >...
  • Page 107: Current Operating Parameters

    15.2 Current operating parameters Press the Information icon to access the “Info” menu from Normal display. “Info” menu. Select the desired information. • Select “Program operation” to see information on a currently running program. • Select “Setpoints“ to see information on the entered setpoints and operation lines.
  • Page 108: Event List

    (chap. 16.2) the Event list is cleared. 15.4 Technical chamber information Path: Main menu > Device info Chamber name and setup Versions of CPU, I/O module and safety for BINDER controller Service Information on digital and analog inputs for BINDER and outputs and phase angle outputs...
  • Page 109: Self-Test Function (Mk 56)

    You can export them using the controller’s USB interface and send them to BINDER Service (use function “Export service data” to USB stick, chap. 14.6). BINDER Service will evaluate the data using an analyzing tool.
  • Page 110 Alarm message “Self-test active”. “Active alarms” menu. The self-test program is running. The indicated The zero-voltage relay alarm output is not acti- set-points are non-functional. vated with the alarm message “Self-test active”. With enabled buzzer: the buzzer sounds. Press the Reset alarm icon to mute the buzzer. Press the Alarm icon to access the “Active alarms”...
  • Page 111: Chart Recorder Display

    Chart recorder display This view offers graphic representation of the measurement course. Data representation imitates a chart recorder and allows recalling any set of measured data at any point of time taken from the recorded period. 16.1 Views Press the Change view icon to access the pen recorder display. 16.1.1 Show and hide legend Show legend Hide legend...
  • Page 112: Show And Hide Specific Indications

    16.1.3 Show and hide specific indications Show indications Hide indications Press the Show indications icon to display the indications “Door open” (B1), “Anti-condensat.” (B2), “Com- pressed air” (B3) indications “Door open” (B1), “Anti-condensat.” (B2), “Compressed air” (B3) displayed. 16.1.4 History display History display Press the History display icon to change to the history display.
  • Page 113 History display: Curve selection Curve selection Press the Curve selection icon to access the “Curve selection” submenu. “Curve selection” submenu. Select the curves to be displayed by checking the checkbox of the corresponding parameter. Press the Confirm icon History display: Search the required instant Search Press the Search icon to access the “Search”...
  • Page 114 History display: Zoom function Zoom Press the Zoom icon to access the “Zoom” submenu. “Zoom” submenu. Select the zoom factor and press the Confirm icon History display: Show and hide scroll buttons to scroll to an instant Show scroll buttons Hide scroll buttons Press the Show scroll buttons icon to access the “Page selection”...
  • Page 115: Setting The Parameters

    16.2 Setting the parameters This menu allows setting the storage interval, the type of values to be shown and the scaling of the tem- perature and humidity charts. Path: Main menu > Settings > Measurement chart “Measurement chart” submenu. • Select the field “Storage interval” and enter the desired storage interval. Confirm entry with Confirm icon.
  • Page 116: Humidification / Dehumidification System

    Humidification / dehumidification system The chamber is equipped with a capacitive humidity sensor. This results in a regulatory accuracy of up to +/- 2.5 % r.h. of the set point. The temperature-humidity diagrams (Figure 19) show the possible working range for humidity. •...
  • Page 117 In climatic operation (with humidity) the preset temperature and humidity values must be situ- ated within range A in order to achieve optimum regulation. In the short-term (max. 24 hours), set points in the discontinuous range (range B) can also be targeted.
  • Page 118: Function Of The Humidifying And Dehumidifying System

    • Water intake temperature NOT below +5 °C / 41 °F and not exceeding 40 °C / 104 °F. BINDER GmbH is NOT responsible for the water quality provided by the customer. Any problems and malfunctions that might arise following use of water of deviating quality is excluded from liability by BINDER GmbH.
  • Page 119: Wastewater

    For error indications concerning water supply and humidity system, see chap.11.1.3 and 23.3 Defrosting at refrigerating operation BINDER alternating climate chambers are very diffusion-proof. To ensure high temperature precision there is no automatic cyclic defrosting device. However, at very low temperatures, the moisture in the air can condense on the evaporator plates leading to icing.
  • Page 120: Anti-Condensation Protection Via Operation Line

    When turning off the chamber following prolonged refrigerating below +5 °C / 41 °F, there is danger of overflowing due to uncontrolled defrosting of icing on the evaporator. NOTICE Danger of overflowing due to uncontrolled defrosting of icing on the evaporator. Damage to the surroundings of the chamber.
  • Page 121: Zero-Voltage Switching Outputs Via Operation Lines

    Zero-voltage switching outputs via operation lines The chambers are regularly equipped with four zero-voltage switching outputs (DIN sockets (7) and (8) located in the lateral control panel). The operation lines serve to switch any device connected to the zero-voltage relay output. They can be programmed On/Off in Fixed value and program modes.
  • Page 122: Options

    APT-COM™ 4 Basic Edition is included with the chamber. APT-COM™ 4 is available for download on the BINDER website. Upon registering the chamber, you will receive a license key with which you can activate the functionality of the Basic Edition for your downloaded version.
  • Page 123: Object Temperature Display With Flexible Pt 100 Temperature Sensor (Option)

    The object temperature data are put out together with the data of the temperature controller to the interface as second measuring channel and can be documented by the APT-COM™ 4 Multi Management Software (option, chap. 21.1) developed by BINDER. Technical data of the Pt 100 sensor: •...
  • Page 124: Compressed Air Connection (Option)

    • Quality of the air: DIN ISO 8573-1:2010 [2:2:1] • Supply pressure: 6-8 bar domestic connection If a different connection pressure is required, please contact BINDER INDIVIDUAL Customized Solu- tions. • Permissible temperature: +10 °C / 50 °F up to +50 °C / 122 °F.
  • Page 125 An exchange is also necessary when the status display on the rear panel is lit or flashes in yellow. Check the status display approx. once per month. Normal operating state Filter elements and desiccant cartridges must be replaced. Contact BINDER Service Alarm. Contact BINDER Service Status display...
  • Page 126: Water Cooling (Option For Mkf 56, 115, 240, 720, And Mkft 720)

    MKF / MKFT 720: With the water-cooling option, the chamber always cools with the water cooling. Retrofitting by the manufacturer is possible: The chamber must be returned to the BINDER factory for installation. You can supply the chamber’s humidity system with freshwater and drain the wastewater via a water pipe or manually with the internal water cans, like with the regular chamber.
  • Page 127 Freshwater supply hose to the pump Inlet opening (26) for the freshwater supply hose Hose connection (24) of the freshwater can with wastewater recycling (chap. 21.9.3) Figure 25: Freshwater can Hose between the pump and the freshwater can The freshwater supply hose is located at the bottom of the pump.
  • Page 128: Connecting The Wastewater Can

    21.8.2 Connecting the wastewater can Hose connection Plug the wastewater hose to the hose connection (23) of the wastewater can and secure it with a hose clamp. You can use a part of the standard supplied water hose. Hose connection (23) of the wastewater can Figure 26: Wastewater can Plug the free hose edge to the wastewater connection “OUT”...
  • Page 129: Binder Pure Aqua Service (Option)

    BINDER GmbH is NOT responsible for the water quality at the user’s site, especially when reusing wastewater. Any problems and malfunctions that might arise following use of wastewater are excluded from liability by BINDER GmbH. Cable connection between the pump and the climatic chamber Connect the cable plug from the cable connection (21) on the pump to the socket (18) at the rear of the chamber as described in chap.
  • Page 130: Cleaning

    NOT use a neutral cleaning agent on zinc coated surfaces. Do not use cleaning agents that may cause a hazard due to reaction with components of the device or the charging material. If there is doubt regarding the suitability of cleaning products, please contact BINDER service.
  • Page 131: Decontamination / Chemical Disinfection

    For chemical disinfection, we recommend using the disinfectant spray Art. No. 1002-0022. Any corrosive damage that may arise following use of other disinfectants is excluded from lia- bility by BINDER GmbH. With every decontamination / disinfection method, always use adequate personal safety con- trols.
  • Page 132: Maintenance And Service, Troubleshooting, Repair, Testing

    For personnel requirements please refer to the Service Manual. • Repair Repair of the chamber can be performed by BINDER Service or by BINDER qualified service partners or technicians, in accordance with the description in the Service Manual. After maintenance, the chamber must be tested prior to resuming operation.
  • Page 133: Maintenance Intervals, Service

    (behind the left maintenance access flap) every week. In case of visible dirt accumulation, disconnect the chamber and clean the fan grid by suction. We recommend taking out a maintenance agreement. Please consult BINDER Service. BINDER telephone hotline:...
  • Page 134: Simple Troubleshooting

    If there are is a technical fault or shortcoming, take the chamber out of operation and inform BINDER Service. If you are not sure whether there is a technical fault, proceed ac- cording to the following list. If you cannot clearly identify an error or there is a technical fault, please contact BINDER Service.
  • Page 135 Fault description Possible cause Required measures Heating Semiconductor relay defective. Pt 100 sensor defective Contact BINDER service. Chamber heating permanently, set-point not maintained. Controller defective. Controller not adjusted. Calibrate and adjust controller. Heating element defective. Chamber doesn’t heat up. Contact BINDER service.
  • Page 136 Humidity fluctuation, together with temperature fluctuation Select cooler place of installa- > 1 °C with a set-point approx. Place of installation too hot. tion or contact BINDER service. 3 °C above ambient tempera- ture. Capillary tube blocked. Contact BINDER service.
  • Page 137 Log in with the required higher Menu functions not available with cur- authorization or contact Menu functions not available. rent authorization level. BINDER service to obtain an activation code (chap. 13.6). No access to controller Password incorrect. Contact BINDER service.
  • Page 138: Sending The Chamber Back To Binder Gmbh

    23.4 Sending the chamber back to BINDER GmbH If you return a BINDER product to us for repair or any other reason, we will only accept the product upon presentation of an authorization number (RMA number) that has previously been issued to you. An au- thorization number will be issued after receiving your complaint either in writing or by telephone prior to your sending the BINDER product back to us.
  • Page 139: Decommissioning

    (Elektro- und Elektronikgerätegesetz, ElektroG from 20 October 2015, BGBl. I p. 1739) or contact BINDER service who will organize taking back and disposal of the cham- ber according to the German national law for electrical and electronic equipment (Elektro- und El- ektronikgerätegesetz, ElektroG from 20 October 2015, BGBl.
  • Page 140: Disposal Of The Chamber In The Member States Of The Eu Except For The Federal Republic Of Germany

    According to Annex I of Directive 2012/19/EU of the European Parliament and of the Council on waste electrical and electronic equipment (WEEE), BINDER devices are classified as “monitoring and control instruments” (category 9) only intended for professional use“. They must not be disposed of at public col- lecting points.
  • Page 141  If your distributor is not able to take back and dispose of the chamber, please contact BINDER service. Certified companies disassemble waste (used) BINDER equipment in primary substances for recycling according to Directive 2012/19/EU. The devices must be free from toxic, infectious or radioactive sub- stances in order to eliminate any health hazards to the employees of the recycling companies.
  • Page 142: Disposal Of The Chamber In Non-Member States Of The Eu

    (certified since December 1996 by TÜV CERT). All test equipment used is subject to the administration of measurement and test equipment that is also constituent part of the BINDER QM DIN EN ISO 9001sys- tems. They are controlled and calibrated to a DKD-Standard at regular intervals.
  • Page 143: Mkf (E5) Technical Data

    Width, gross (including 18 mm / 0.7 in for 1 access port (MKF 56, 115, 240), 36 mm 1000 1135 1135 1615 1615 / 1.4 in for 2 or 3 access ports (MKF 400, inch 29.33 39.37 44.69 44.69 63.58 63.58...
  • Page 144 Chamber size 1020 Weight Weight (empty) 175 / 280 / 360 / 432 / 590 / 636 / kg / lbs. 1300 1402 Weight (empty) with optional com- 295 / 375 / 605 / kg / lbs. pressed air dryer 1334 Temperature data (without humidity) -40 to...
  • Page 145 +22 °C +/- 3 °C / 71.6 °F +/- 5.4 °F and a power supply voltage fluctuation of +/-10%. Technical data is determined in accordance to BINDER Factory Standard Part 2:2015 and DIN 12880:2007. All indications are average values, typical for chambers produced in series. We reserve the right to change technical specifications at any time.
  • Page 146: Mkft (E5) Technical Data

    25.5 MKFT (E5) technical data Chamber size Exterior dimensions Width, gross (including 18 mm / 0.7 in for 1 access port (MKFT 115, 240), 36 mm / 1.4 in for 2 access mm / inch 1000 / 39.37 1135 / 44.69 1615 / 63.58 ports (MKFT 720), with plug) Height, gross (incl.
  • Page 147 All technical data is specified for unloaded chambers with standard equipment at an ambient temperature of +22 °C +/- °C / 71.6 °F +/- 5.4 °F and a power supply voltage fluctuation of +/-10%. Technical data is determined in accordance to BINDER Factory Standard Part 2:2015 and DIN 12880:2007. MKF / MKFT (E5) 04/2022...
  • Page 148: Equipment And Options (Extract)

    25.6 Equipment and options (extract) To operate the chamber, use only original BINDER accessories or accessories / components from third-party suppliers authorized by BINDER. The user is responsible for any risk arising from using unauthorized accessories. Regular equipment...
  • Page 149: Accessories And Spare Parts (Extract)

    25.7 Accessories and spare parts (extract) BINDER GmbH is responsible for the safety features of the chamber only, provided skilled electricians or qualified personnel authorized by BINDER perform all maintenance and repair, and if components relating to chamber safety are replaced in the event of failure with original spare parts.
  • Page 150 Validation service Art. no. Qualification folder IQ-OQ (printed version) 7007-0002 Qualification folder IQ-OQ (digital version) 7057-0002 Qualification folder IQ-OQ-PQ (printed version) 7007-0006 Qualification folder IQ-OQ-PQ (digital version) 7057-0006 Execution of IQ-OQ DL420300 Execution of IQ-OQ-PQ DL440500 Calibration service Art. no. Calibration of temperature and humidity including certificate DL300301 (1 measuring point)
  • Page 151: Mkf Heating-Up And Cooling-Down Graphs

    25.8 MKF heating-up and cooling-down graphs Heating-up graph MKF 56 Cooling-down graph MKF56 Temp/°C Temp/°C t/min t/min Heating-up graph MKF 115 Cooling-down graph MKF 115 Temp/°C Temp/°C t/min t / min Heating-up graph MKF 240 Cooling-down graph MKF 240 Temp. / °C Temp.
  • Page 152 Heating-up and cooling-down graph MKF 400 Heating-up graph MKF 720 Cooling-down graph MKF 720 Heating-up and cooling-down graph MKF 1020 MKF / MKFT (E5) 04/2022 page 152/176...
  • Page 153: Mkft Heating-Up And Cooling-Down Graphs

    25.9 MKFT heating-up and cooling-down graphs Heating-up graph MKFT 115 Cooling-down graph MKFT 115 Temp. / °C Temp./ °C t/min t/min Heating-up graph MKFT 240 Cooling-down graph MKFT 240 Temp. / °C t/min -100 t/min Heating-up graph MKFT 720 Cooling-down graph MKFT 720 t/min t/min MKF / MKFT (E5) 04/2022...
  • Page 154: Mkf Heat Compensation Graphs

    25.10 MKF heat compensation graphs MKF 56 heat compensation MKF 115 heat compensation MKF 240 heat compensation MKF 400 heat compensation MKF 720 heat compensation MKF 1020 heat compensation MKF / MKFT (E5) 04/2022 page 154/176...
  • Page 155: Mkft Heat Compensation Graphs

    Bringing in a heat load leads to continuous operation of refrigerating machine. In this case frequent maintenance intervals are necessary. 25.11 MKFT heat compensation graphs MKFT 115 heat compensation MKFT 240 heat compensation MKFT 720 heat compensation Bringing in a heat load leads to continuous operation of refrigerating machine. In this case frequent maintenance intervals are necessary.
  • Page 156: Dimensions

    25.12 Dimensions MKF 56 dimensions: [mm] MKF / MKFT (E5) 04/2022 page 156/176...
  • Page 157 MKF / MKFT 115 dimensions: [mm] MKF / MKFT (E5) 04/2022 page 157/176...
  • Page 158 MKF 240 dimensions: [mm] MKF / MKFT (E5) 04/2022 page 158/176...
  • Page 159 MKFT 240 dimensions: [mm] MKF / MKFT (E5) 04/2022 page 159/176...
  • Page 160 MKF 400 dimensions: [mm] MKF / MKFT (E5) 04/2022 page 160/176...
  • Page 161 MKF / MKFT 720 dimensions: [mm] MKF / MKFT (E5) 04/2022 page 161/176...
  • Page 162 MKF 1020 dimensions: [mm] MKF / MKFT (E5) 04/2022 page 162/176...
  • Page 163: Certificates And Declarations Of Conformity

    Certificates and declarations of conformity 26.1 EU Declaration of Conformity for MKF MKF / MKFT (E5) 04/2022 page 163/176...
  • Page 164 MKF / MKFT (E5) 04/2022 page 164/176...
  • Page 165 MKF / MKFT (E5) 04/2022 page 165/176...
  • Page 166: Eu Declaration Of Conformity For Mkft

    26.2 EU Declaration of Conformity for MKFT MKF / MKFT (E5) 04/2022 page 166/176...
  • Page 167 MKF / MKFT (E5) 04/2022 page 167/176...
  • Page 168 MKF / MKFT (E5) 04/2022 page 168/176...
  • Page 169: Certificate For The Gs Mark Of Conformity Of The "Deutsche Gesetzliche Unfallversicherung E.v." (German Social Accident Insurance) Dguv

    26.3 Certificate for the GS mark of conformity of the “Deutsche Gesetzliche Un- fallversicherung e.V.“ (German Social Accident Insurance) DGUV MKF / MKFT (E5) 04/2022 page 169/176...
  • Page 170 MKF / MKFT (E5) 04/2022 page 170/176...
  • Page 171: Contamination Clearance Certificate

    Contamination clearance certificate 27.1 For chambers located outside the USA and Canada Declaration regarding safety and health Erklärung zur Sicherheit und gesundheitlichen Unbedenklichkeit The German Ordinance on Hazardous Substances (GefStofV), and the regulations regarding safety at the workplace, require that this form be filled out for all products that are returned to us, so that the safety and the health of our employees can be guaranteed.
  • Page 172 Kind of transport / transporter / Transportweg/Spediteur: Transport by (means and name of transport company, etc.) Versendung durch (Name Spediteur o.ä.) ___________________________________________________________________________________ Date of dispatch to BINDER GmbH / Tag der Absendung an BINDER GmbH ___________________________________________________________________________________ MKF / MKFT (E5) 04/2022 page 172/176...
  • Page 173 We hereby commit ourselves and guarantee that we will indemnify BINDER GmbH for all damages that are a consequence of incomplete or incorrect information provided by us, and that we will exempt BINDER GmbH from eventual damage claims by third parties./ Wir versichern, dass wir gegenüber BINDER für jeden...
  • Page 174: For Chambers Located In The Usa And Canada

    Please complete this form and the Customer Decontamination Declaration (next 2 pages) and attach the required pictures. E-mail to: IDL_SalesOrderProcessing_USA@binder-world.com After we have received and reviewed the complete information we will decide on the issue of a RMA num- ber. Please be aware that size specifications, voltage specifications as well as performance specifications www.binder-world.us...
  • Page 175 Customer (End User) Decontamination Declaration Health and Hazard Safety declaration To protect the health of our employees and the safety at the workplace, we require that this form is com- pleted by the user for all products and parts that are returned to us. (Distributors or Service Organizations cannot sign this form) NO RMA number will be issued without a completed form.
  • Page 176 4.5 Shipping laws and regulations have not been violated. I hereby commit and guarantee that we will indemnify BINDER Inc. for all damages that are a con- sequence of incomplete or incorrect information provided by us, and that we will indemnify and hold harmless BINDER Inc.

Table of Contents