
Subscribe to Our Youtube Channel
Related Manuals for Oxgard CUBE C-10


Summary of Contents for Oxgard CUBE C-10
- Page 1 VOZROZHDENIE LLC OKPD 2 26.30.50.110 TU 26.30.50-007-33120038-2017 APPROVED BY VZR.249600.000LU FULL HEIGHT ROTOR TURNSTILE CUBE C-10 MODEL VZR.249600.000IM INSTALLATION MANUAL 48 sheets 2021...
-
Page 2: Table Of Contents
APPENDIX A — Brief description of CAN2.0 data bus ..............41 APPENDIX B — Assembly diagram ....................42 APPENDIX C — Position of mounting holes relative to the external dimensions of the turnstile . 44 Cube C-10 full height rotor turnstile Installation Manual... - Page 3 VZR.249600.000IM This Installation Manual (IM) applies to Oxgard Cube C-10 full height rotor turnstile and its variants (hereinafter referred to as the product). Product firmware version: FC C-10 IM defines rules and a procedure for installation and commissioning of the product.
-
Page 4: General Instructions
REMOVE THE BRACKET FROM ITS MOUNTS WITH ROTOR POSITION SENSOR. OTHERWISE, THE MANUFACTURER WILL TERMINATE PRODUCT WARRANTY. APPLY PASTES AND LIQUIDS CHEMICALLY AGGRESSIVE TO MATERIALS OF THE HOUSING WHEN CLEANING THE PRODUCT. Cube C-10 full height rotor turnstile Installation Manual... -
Page 5: Safety Precautions
FOR DEATH AND DAMAGE TO HEALTH, COMPLETE OR PARTIAL LOSS OF PERFORMANCE OF THE PRODUCT AND/OR AUXILIARY EQUIPMENT IF USER FAILS TO COMPLY WITH THE SAFETY REQUIREMENTS SPECIFIED IN THIS SECTION, AND ALSO VOIDS THE PRODUCT WARRANTY. Cube C-10 full height rotor turnstile Installation Manual... -
Page 6: Preparing The Product For Installation
(rotor gate); fixed fencing elements parts: upper module parts; actuating mechanism; CP with cable; keys for door lock (4 pcs.); shipping documentation. Cube C-10 full height rotor turnstile Installation Manual... -
Page 7: Rules For Visual Inspection Of The Product
Visually inspect the product. There should be no visible damage on the product. 3.3.3 If any damage is found, prepare a Claim Report. 3.3.4 Figure 1 – overall dimensions of the turnstile. Figure 1 – Overall dimensions of the turnstile Cube C-10 full height rotor turnstile Installation Manual... -
Page 8: Product Installation Place Requirements
Figure 2 – initial position of the product flaps. Figure 2 – Initial position of the flaps The specified option is determined by the rotor shaft orientation upon its installation during the turnstile installation. Cube C-10 full height rotor turnstile Installation Manual... -
Page 9: Procedure For Checking Compliance Of The Installation Place
When selecting the control panel installation place take into account permissible operating ambient temperatures from +1 °С to +55 °С and relative air humidity up to 80 % at the temperature of +25 °С. Cube C-10 full height rotor turnstile Installation Manual... -
Page 10: Product Installation And Dismantling
FH 12-S 18/10); wrench 19 mm; end wrench 19 mm with bar; slot head screwdriver; plumb or level; steel shims for turnstile leveling; round file; side-cutting pliers; hammer 500 g; plumb or level. Cube C-10 full height rotor turnstile Installation Manual... -
Page 11: Product Installation
BEFORE INSTALLING THE PRODUCT Figure 3 – plan the installation places of fencing panels, turnstile 4.2.1 moving and fixed elements, cable routes in advance according to the detail drawing. Figure 3 – Turnstile mounting dimensions Cube C-10 full height rotor turnstile Installation Manual... - Page 12 We recommend to use concrete or other non-flammable material for this purpose. 4.2.3 Mark holes drilling places using the template following the instructions of the installation drawing. Cube C-10 full height rotor turnstile Installation Manual...
- Page 13 VZR.249600.000IM Figure 4 – Turnstile installation template Cube C-10 full height rotor turnstile Installation Manual...
- Page 14 AWARE OF ALL THE REQUIRED INFORMATION. ATTENTION: THE EQUIPMENT MUST BE ATTACHED TO THE FOUNDATION BEFORE OPERATION! THE MANUFACTURING PLANT SHALL NOT BEAR RESPONSIBILITY FOR ACCIDENTS OR FAILURES CAUSED BY INCORRECT EQUIPMENT FIXING. Cube C-10 full height rotor turnstile Installation Manual...
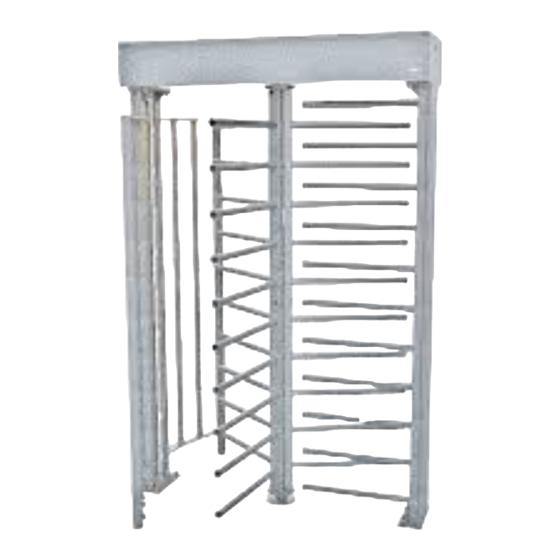
- Page 15 ACS and SFAS connection point. Cable grooming to the upper module is made via the holes in racks of fixed fencing panel (Figure 5 – 6,7). Figure 5 – General view of the turnstile Cube C-10 full height rotor turnstile Installation Manual...
- Page 16 Figure 6 – assemble the turnstile fixed fencing panel. Install it on 4.2.7 the prepared site, previously passing CR cables, power cable, ACS and SFAS cables via its rack to the upper module. Figure 6 – Assembly of fixed fencing panel Cube C-10 full height rotor turnstile Installation Manual...
- Page 17 (1) 2 pcs, М12 anchor bolts (2), screwing them into appropriate anchors using the 19 mm wrench (two fastening options). Figure 7 – Fastening of fixed fencing panel Figure 8 – Fastening of fixed panel (option 2) Cube C-10 full height rotor turnstile Installation Manual...
- Page 18 Figure 9 – install and fasten the turnstile fencing fixed elements 4.2.9 using the anchors, screwing them into appropriate holes using the 19 mm wrench. Install plastic caps on the heads of fastening bolts. Figure 9 – Installation of fixed fencing elements Cube C-10 full height rotor turnstile Installation Manual...
- Page 19 VZR.249600.000IM 4.2.10 Assemble the moving turnstile elements (rotor gate) as per figures 9-11. Figure 10 – Assembly of turnstile rotor gate. Cube C-10 full height rotor turnstile Installation Manual...
- Page 20 VZR.249600.000IM Figure 11 – Assembly of rotor gate (bottom) Cube C-10 full height rotor turnstile Installation Manual...
- Page 21 Figure 12 – Assembly of rotor gate (top) Unfold the rotor gate sections so that: h top > h bottom Place the rotor sections on the upper flange so that the passage is closed (figure 2). Cube C-10 full height rotor turnstile Installation Manual...
- Page 22 11-12. UPPER MODULE HAS A HEAVY WEIGHT, SO ATTENTION: AT LEAST TWO WORKERS SHOULD LIFT IT. Figure 13 – Fastening of the turnstile upper module Cube C-10 full height rotor turnstile Installation Manual...
-
Page 23: Dismantling The Product
4.3.2 Before packing, clean the product from dust and dirt. 4.3.3 Put the product in the packing box. Cube C-10 full height rotor turnstile Installation Manual... -
Page 24: Connecting And Setting The Product
TO DO THIS: PRESS THE BUT BUTTON, AND HOLD IT UNTIL THE FIRST SOUND SIGNAL FROM THE PIEZOELECTRIC EMITTER, THEN RELEASE THE BUTTON AFTER WHICH TWO SOUND SIGNALS WILL SOUND INDICATING THAT THE FACTORY SETTINGS HAVE BEEN APPLIED. Cube C-10 full height rotor turnstile Installation Manual... - Page 25 VZR.249600.000IM Figure 14 – Turnstile power connection diagram Cube C-10 full height rotor turnstile Installation Manual...
- Page 26 To select the required turnstile mode: - turn on the turnstile, one beep will sound after turning on The turnstile operation mode is selected using the BUT button on the control board. Cube C-10 full height rotor turnstile Installation Manual...
- Page 27 When the power is off, the selected mode is not reset. Table 1 shows the turnstile operating modes with different number of signals after pressing the BUT button. Cube C-10 full height rotor turnstile Installation Manual...
- Page 28 - switching the anti-panic relay functionality (permanent operation or calculation of passages) - testing turnstile peripherals *upon restart, the settings are not changed. ** upon reset, the firmware is not changed. Cube C-10 full height rotor turnstile Installation Manual...
-
Page 29: Power Connection
BCP 01 cannot: 1. Provide illumination of the set mode switch buttons. 2. Provide reusable easy access to one side. Cube C-10 full height rotor turnstile Installation Manual... - Page 30 Its connection is also different from UCP 02. Wiring diagram of BCP 01, according to the colors of the wire coming out of its body. For turnstiles Т-10. Cube C-10 full height rotor turnstile Installation Manual...
- Page 31 Figure 16 – Connection diagram for the simplified control panel UCP 02 is connected through the TJ6P6C telephone socket to the X24 socket with the PULT inscription using the RJ 02 (TP-6P6C) telephone socket. Cube C-10 full height rotor turnstile Installation Manual...
- Page 32 VZR.249600.000IM ТJ6P6C RJ 12(ТР-6P6C) The turnstile CP should be connected based on the terminal identifications in accordance with the figure. Figure 17 – Arrangement of the control panel cable wires. Cube C-10 full height rotor turnstile Installation Manual...
-
Page 33: Access Control And Management System Connection (Optional)
If both inputs are closed, passing is allowed in the side whose input closed first. If pass is not completed, the turnstile will automatically switch to STOP mode after 5 seconds. Cube C-10 full height rotor turnstile Installation Manual... - Page 34 “dry contact” is closed/open upon turn of the rotor gate to an angle of 60 degrees. D11 and D10 LEDs signal on the relay condition PassOk1 – to the right and PassOk2 – to the left. Cube C-10 full height rotor turnstile Installation Manual...
-
Page 35: Control Panel Connection To The Acs Controller
In this mode the turnstile does not respond to PC commands, but only transmits their status to terminal block contacts, ACCESS OUT (Figure 15 – RIGHT, LEFT, AP ,STOP) groups of contacts, which are open collector outputs. Cube C-10 full height rotor turnstile Installation Manual... - Page 36 SCUD OUT (RIGHT, LEFT, AP ,STOP) outputs represent current status of the CP buttons – the transistor opens when corresponding button is pressed. AP output changes its state to the opposite every time when Anti-panic button is pressed. Cube C-10 full height rotor turnstile Installation Manual...
- Page 37 (except for free passing of potential control mode, Section 5.3 of this Manual). In this case, ACS is responsible for these modes. Cube C-10 full height rotor turnstile Installation Manual...
- Page 38 VZR.249600.000IM Figure 20 – The turnstile control board connection diagram to the ACS controller Cube C-10 full height rotor turnstile Installation Manual...
-
Page 39: Comprehensive Inspection
The disk should not touch the sensors, and each LED installed on the sensors should sequentially light on upon the rotor rotation to one side. Cube C-10 full height rotor turnstile Installation Manual... -
Page 40: Acceptance Of The Installed Product
Product Service Record Section of the Logbook VZR.228800.000 LB; the Installation Information Section of the product Logbook VZR.228800.000 LB is filled the Certificate of Acceptance for Operation is issued. Cube C-10 full height rotor turnstile Installation Manual... -
Page 41: Appendix A - Brief Description Of Can2.0 Data Bus
CP place (minimum operating voltage of PSU is 7.5 V). At the same time, 3 wires from the turnstile (CL, CH, GND) are enough for correct operation. Two control panels can be connected to one turnstile. Cube C-10 full height rotor turnstile Installation Manual... -
Page 42: Appendix B - Assembly Diagram
VZR.249600.000IM APPENDIX B — Assembly diagram POS. DESIGNATION Cube C-10 full height rotor turnstile Installation Manual... - Page 43 Screw М5х10 DIN 7985 Rotor blade Screw M10x25 DIN7991 Bracket Ball bearing Rotor bottom flange Bolt М10x35 DIN933 Washer 10 DIN 125 Lock washer 10 DIN 127 Nut M10 DIN934 Plug 40x40 Cube C-10 full height rotor turnstile Installation Manual...
-
Page 44: Appendix C - Position Of Mounting Holes Relative To The External Dimensions Of The Turnstile
VZR.249600.000IM APPENDIX C — Position of mounting holes relative to the external dimensions of the turnstile Figure 21 – Position of mounting holes relative to the external dimensions of the turnstile Cube C-10 full height rotor turnstile Installation Manual... - Page 45 VZR.249600.000IM Cube C-10 full height rotor turnstile Installation Manual...
- Page 46 VZR.249600.000IM Cube C-10 full height rotor turnstile Installation Manual...
- Page 47 VZR.249600.000IM Cube C-10 full height rotor turnstile Installation Manual...
- Page 48 Vozrozhdenie LLC 192289, 66, Sofiiskaya str., Saint-Petersburg, Russia Telephone/Fax +7 (812) 366 15 94 www.oxgard.com info@oxgard.com...
Need help?
Do you have a question about the CUBE C-10 and is the answer not in the manual?
Questions and answers