Table of Contents

Related Manuals for Oxgard CUBE ?-04 Series


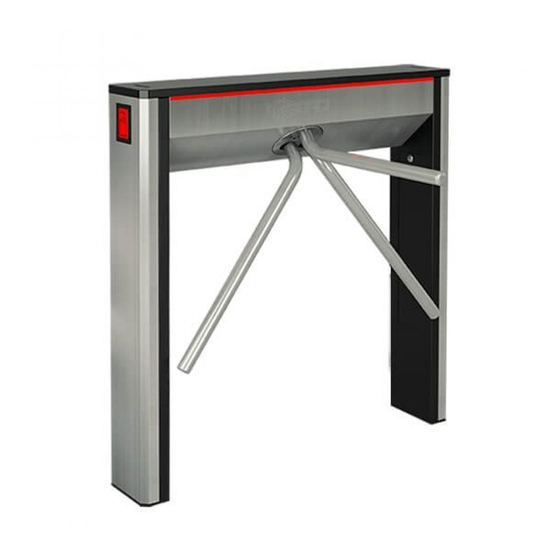
Summary of Contents for Oxgard CUBE ?-04 Series
- Page 1 VOZROZHDENIE, LLC OKPD 2 26.30.50.110 TU 26.30.50-007-33120038-2017 APPROVED VZR.235900.000 LU TURNSTILE MODEL CUBE С-04 С-04-c, С-04-К, С-04-Кc, С-04-H, С-04-Hc, С-04-НК, С-04-НКc VZR.235900.000 IG INSTALLATION GUIDELINES Sheets 40 2019...
-
Page 2: Table Of Contents
VZR.235900.000 IG CONTENTS General Guidelines ......................... 4 Safety Precautions .......................... 5 PreparING THE PRODUCT for Installation ..................6 3.1 Procedure for transporting the product to installation site ............6 3.2 Product unpacking rules ......................6 3.3 Product inspection rules ......................6 3.4 Requirements for the product’s installation site ............... - Page 3 VZR.235900.000 IG These Installation Guidelines (IG) apply to Turnstile Oxgard Cube С-04 and its modifications (hereinafter referred to as “the product”). The firmware version of the product: FW v2.2 These Installation Guidelines specify rules and procedure for installation and startup of the product.
-
Page 4: General Guidelines
VZR.235900.000 IG GENERAL GUIDELINES When assembling and installing the product, please consider all the recommendations and guidelines detailed herein for overall safety reasons. Prior to starting the installation works, fully de-energize the product. DO NOT: INSTALL THE POWER SUPPLY UNIT INSIDE THE TURNSTILE CASING, BECAUSE THIS MAY CAUSE ELECTROCUTION. -
Page 5: Safety Precautions
VZR.235900.000 IG SAFETY PRECAUTIONS When carrying out the installation, “Rules for Technical Operation of Consumers' Electrical Installations” and “Safety Rules for Operating Consumers' Electrical Installations” shall be respected. Qualified personnel duly trained for operating electrical appliances and instructed on the safety rules to follow when working with electrical installations of up to 1000V, shall be permitted to install the product. -
Page 6: Preparing The Product For Installation
VZR.235900.000 IG PREPARING THE PRODUCT FOR INSTALLATION Procedure for transporting the product to installation site The product in factory packaging can be transported by air, closed motor and railroad transport means when fitted with protection against direct exposure to precipitation and dust without distance limitation. After shipment under subzero temperature, the product shall be kept in a room under normal climatic conditions during 12 hours to avoid moisture condensation. - Page 7 VZR.235900.000 IG 3.3.2 Inspect the product externally. The product shall have no visible damages. 3.3.3 Should any damages be revealed, prepare a Damage Claim. 3.3.4 Figure 1 – Turnstile’s overall dimensions. Figure 1 – Turnstile’s overall dimensions Cube С-04 Turnstile Installation Guidelines...
-
Page 8: Requirements For The Product's Installation Site
VZR.235900.000 IG Requirements for the product’s installation site ATTENTION: TO PREVENT THE TURNSTILE SWINGING AND (OR) TILTING IN THE COURSE OF OPERATION, INSTALL IT SECURELY. IN CASE TURNSTILE INSTALLATION LOW-STRENGTH FLOOR, TAKE MEASURES TO FLOOR STRENGTHENING ON INSTALLATION SITE. Figure 2 – During the installation of the turnstile, possible free travel of the arm should be considered. -
Page 9: Procedure For Checking Installation Site For Compliance
VZR.235900.000 IG Procedure for checking installation site for compliance ATTENTION: PASSAGE ZONES SHALL BE PROVIDED TO ALLOW RECORDING OF PASSAGES DURING TURNSTILE OPERATION UNDER AMCS CONTROL AND TO AVOID UNAUTHORIZED PASSAGES. 3.5.1 Figure 3 – Arrangement of turnstile’s passage zone and instructions for orienting the product. -
Page 10: Mounting And Dismounting Of The Product
VZR.235900.000 IG MOUNTING AND DISMOUNTING OF THE PRODUCT Required Equipment The equipment used during turnstile installation: electric puncher; 10mm dia solid-carbide drill for drilling holes in the floor for anchors (recommended anchor with screw type FH 10/10 SK); Allen key S5; straight-blade screwdriver;... -
Page 11: Mounting The Product
VZR.235900.000 IG Mounting the Product ATTENTION: PLEASE READ THIS SECTION THOROUGHLY PRIOR TO MOUNTING THE PRODUCT. 1 – card collector container; 2 – side cover; 3 – top cover; 4 – barrier arm assembly Figure 4 – Turnstile’s main panels Figure 4 –... - Page 12 VZR.235900.000 IG 4.2.1 Prepare a horizontal platform on the turnstile installation site. 4.2.2 Provide a cable conduit or a cable channel from the platform to where the PSU and RC panel will be installed and, where necessary, to AMCS and SAFAS connection location.
- Page 13 VZR.235900.000 IG 6 holes 1 – cable input holes Figure 6 – Turnstile’s installation dimensions 4.2.4 Figure 6 – wire the cable through the hole (1) in the bottom plate of the turnstile stands. 4.2.5 Route the RC panel’s cable, PSU’s cable, and, where provided, AMCS and SAFAS’...
- Page 14 VZR.235900.000 IG Figure 7 - routing of cables (1) is indicated with dashed lines, the cable input hole under the top cover (2). 1 - cable routing locations; 2 – cable input hole Figure 7 – Routing of control and power supply cables Cube С-04 Turnstile Installation Guidelines...
-
Page 15: Dismounting The Product
VZR.235900.000 IG 4.2.8 Match the holes in the turnstile stands with anchors in the floor. Check the verticality of the installation in 2 planes; where necessary, use steel pads of the required thickness for correct installation of the turnstile. Fix the turnstile stands using 6 screws, turning them into corresponding anchors and using the wrench or spanner key with a nut width across flats of 10 mm. -
Page 16: Connecting And Adjusting The Product
VZR.235900.000 IG 5 CONNECTING AND ADJUSTING THE PRODUCT APPENDIX C - Turnstile Connection Diagram. PSU, RC panel and AMCS shall be connected using the motherboard. Figure 8 - Layout of boards under top cover on turnstile stand. 1 - Display Control Board; 2 - Card Collector Control Board;... - Page 17 VZR.235900.000 IG For turnstile connection and access to all required contacts, the top cover shall be removed. To do that, use the key to open an remove the both containers located inside the turnstile stand, then release 4 mounting studs of the top cover (Figure 9 - 1) and remove the cover in the shown direction.
- Page 18 VZR.235900.000 IG Figure 10 - The appearance of the motherboard and the layout of connectors for PSU, RC panel, AMCS and SAFAS connection are depicted. Motherboard location (Figure 8 - 5). Figure 10 - Motherboard appearance The turnstile’s modes of operation with different positions of jumpers on the mainboard are detailed in Table 1.
-
Page 19: Power Supply Connection
VZR.235900.000 IG Power supply connection DO NOT: USE POWER SUPPLY UNITS WITH AN OUTPUT CURRENT OF LESS THAN 3.0 A. ENERGIZE THE TURNSTILE USING A POWER SUPPLY CABLE WITH A CROSS SECTION OF LESS THAN 1.5 MM WITH THE FEEDER CABLE BEING MORE THAN 10M LONG –... -
Page 20: Connecting Access Monitoring And Control System (Optionally)
VZR.235900.000 IG The RC panel shall be connected using the labeling of contacts in Table 2. Table 2 - Labeling of contacts for RC panel connection Labeling of contacts Wire color Yellow Green Blue Connecting Access Monitoring and Control System (optionally) Connect AMCS controller to the group of contacts Control on the motherboard. - Page 21 VZR.235900.000 IG ATTENTION: IN CASE OF CLOSING ONE OF INPUTS, THE STOP- COMMANDS FROM THE PANEL ARE NOT ACCEPTED, BECAUSE AMCS IS OF THE HIGHER PRIORITY. The STOP input is potential, i.e. as long as the the input is closed to GND contact, the turnstile operates in the corresponding mode.
- Page 22 VZR.235900.000 IG Figure 11 - Mainboard appearance Figure 11 - The mainboard appearance is shown. Mainboard location (Figure 8 - 6). Two relay outputs for AMCS operating according to “dry contact” principle – Okl and Ok2 - are implemented in the motherboard. NO and COMM – normally open connection, NC and COMM –...
-
Page 23: Connecting Control Panel To Amcs Controller
VZR.235900.000 IG Figure 11 - LEDs are installed in the mainboard to check its operation. D5 indicates the command issued to “LEFT” input. D6 indicates the command issued to “RIGHT” input. D7 indicates the command issued to “STOP” input. D10 indicates the right passage performed and the relay actuation (Ok1 – right). D16 indicates the left passage performed and the relay actuation (Ok2 –... - Page 24 VZR.235900.000 IG 1, 2, 3, 4 – control buttons Figure 12 - Numbering of RC panel’s buttons Table 4 - Purpose of OUT group of contacts Labeling of contacts Purpose of contacts OUT1 “Left” button status (1) OUT2 “Right” button status (3) OUT3 “Stop”...
- Page 25 VZR.235900.000 IG Outputs OUT1...OUT3 can be connected both to AMCS controller directly, and via the relay. Figure 13 - when using the relay, the diode connection in parallel to winding IS OBLIGATORY (!). Motherboard Figure 13 - Wiring diagram for connecting the diode in parallel to the relay winding Cube С-04 Turnstile Installation Guidelines...
- Page 26 VZR.235900.000 IG Figure 14 - Wiring Diagram of connecting the RC panel to AMCS controller. In this option, the controller operates the turnstile by means of “LEFT”, “RIGHT” and “STOP” contacts. The essential feature of RC panel connection via AMCS controller is the impossibility for using the turnstile modes that are set by means of the panel’s button combinations (except the free passage mode in the potential mode of operation, Section 5.3 hereof).
-
Page 27: Card Collector Connection
VZR.235900.000 IG Card Collector Connection The inner side of the stands of the card collector houses two containers with locks for fast access to withdrawn cards, as well as for access to the top cover fixing screws. The card collector board is located under the turnstile’s top cover. Remove the top cover to connect the card collector. - Page 28 VZR.235900.000 IG 5.5.1 Cardcollector power supply connection. The card collector operates from 12 VDC power supply. Maximum consumption is observed in the card withdrawal mode – 1.5А. If the card collector is installed on the turnstile, it is necessary to increase PSU capacity by the card collector consumption value.
- Page 29 VZR.235900.000 IG Upon presentation of the authorized card, the card collector transmits the signal and unlocks AD for 5 seconds. During this time interval the other cards are not accepted. In case of receiving the signal (closing of PassOk and GND to each other), confirming the passage, the card collector switches to suspended mode and may accept the next card.
- Page 30 VZR.235900.000 IG In case of confirming the card withdrawal evidence by the internal sensors, the card collector generates the signal for AD by means of the group of contacts Let Go and by means of the group of contacts Card Inside for AMCS. At that, the side display panel illuminates green light.
- Page 31 VZR.235900.000 IG NC, NO and COMM contacts. The relay output operating by “dry contact” principle, which closes/opens for 1 second transmitting the card withdrawal confirmation signal to AMCS controller. NC and COMM – normally closed connection, NO and COMM – normally open connection. Cube С-04 Turnstile Installation Guidelines...
-
Page 32: Integrated Inspection
VZR.235900.000 IG 6 INTEGRATED INSPECTION Inspecting and checking the product’s readiness for use 6.1.1 Check that the turnstile’s parts and assemblies are tightly fastened 6.1.2 Make sure all cables are secure. 6.1.3 Switch on the turnstile’s power supply and check for serviceability by making some test passages. -
Page 33: Commissioning The Mounted Product
VZR.235900.000 IG 7 COMMISSIONING THE MOUNTED PRODUCT The mounted product shall be commissioned as follows: the representative of the installing organization demonstrates that the product is secure; records on the product installation are made into Datasheet VZR.235900.000 DS in the Section “Product Historical Record”;... -
Page 34: Appendix A - Short Description Of Data Transfer Bus Can2.0
VZR.235900.000 IG APPENDIX A SHORT DESCRIPTION OF DATA TRANSFER BUS — CAN2.0 For the operation of the RC panel, an advanced CAN2.0 standard interference-free bus is used. According to CAN2.0 standard, the signal cable length may reach the above one kilometer values. However, the correct operation at such distances depends on many factors. -
Page 35: Appendix B - Layout Of Mounting Holes In Relation To Turnstile External Dimensions
VZR.235900.000 IG APPENDIX B LAYOUT OF MOUNTING HOLES IN RELATION TO — TURNSTILE EXTERNAL DIMENSIONS Figure 16 - Layout of mounting holes in relation to turnstile external dimensions. 6 holes Figure 16 - Layout of mounting holes in relation to turnstile external dimensions Cube С-04 Turnstile Installation Guidelines... -
Page 36: Appendix C - Turnstile Connection Diagram
VZR.235900.000 IG APPENDIX C TURNSTILE CONNECTION DIAGRAM — Figure 17 - Turnstile Connection Diagram Cube С-04 Turnstile Installation Guidelines... -
Page 37: Appendix D - Structural Flowcharts For Amcs Using Card Collector
VZR.235900.000 IG APPENDIX D STRUCTURAL FLOWCHARTS FOR AMCS USING — CARD COLLECTOR Access Card Reader No. 2 AMCS Card Collector Access Card Reader No. 1 Actuating Device Card Collector Control Board Figure 18 - Structural Flowchart No.1 Figure 18 - The most widely used Cardcollector Wiring Diagram is depicted. Both AMCS controller and the card collector properly can control the actuating device, therefore, 1* and 2* links are drawn as dashed lines. - Page 38 VZR.235900.000 IG AMCS No. 2 Card Collector Access Card Reader No. 1 AMCS No. 1 Card Collector Control Board Actuating Device Figure 19 - Structural Flowchart No.2 Figure 19 - The more promising but higher according to value iring Diagram is given.
- Page 39 VZR.235900.000 IG Card Collector AMCS Controller Access Card Reader Card Collector Control Board Actuating Device Figure 20 – Structural Flowchart No.3 Figure 20 - Structural Flowchart No. 3 (Diagram No. 3 logical progressing) reduces the cost of the system being installed. A controller with two output signals to one reader input is used for that purpose (the controller can differentiate the visitor and the permanent cards issuing the signal to the corresponding output).
- Page 40 Vozrozhdenie, LLC 66, Sofijskaya Str., Saint Petersburg, 192289 Telephone/Fax +7 (812) 366 15 94 www.oxgard.com info@oxgard.com Import and Service: VZR System OU Tulika tn 19, Tallinn +372 5844 4957; +7 921 996 2746 info@vzrsystem.ee...
Need help?
Do you have a question about the CUBE ?-04 Series and is the answer not in the manual?
Questions and answers