Oxgard CUBE C-03 Installation Manual
Hide thumbs
Also See for CUBE C-03:
- Operation manual (40 pages) ,
- Operation and installation manual (40 pages)

Related Manuals for Oxgard CUBE C-03


Summary of Contents for Oxgard CUBE C-03
- Page 1 VOZROZHDENIE LLC OKPD 2 26.30.50.110 ТU 26.30.50-007-33120038-2017 APPROVED BY VZR.247800.001 LU TURNSTILE MODELCUBE C-03 VZR.247800.001IM INSTALLATION MANUAL 36 sheets 2020...
-
Page 2: Table Of Contents
APPENDIX A — Brief description of CAN2.0 data bus ..............31 APPENDIX B — Position of mounting holes relative to the external dimensions of the turnstile . 32 APPENDIX C — Turnstile connection diagram .................. 33 Turnstile CUBE C-03 Installation Manual... - Page 3 VZR.247800.001 IM This Installation Manual (IM) applies to Turnstile Oxgard CUBE C-03 and its variants (hereinafter referred to as the product). Product firmware version: FW v.d 4 IM defines rules and a procedure for installation and commissioning of the product.
-
Page 4: General Provisions
DUE TO AN ELECTRIC SHOCK. INSTALL THE TURNSTILE OUTSIDE DRY AND HEATED ROOMS. PREVENT OR ACCELERATE MOVEMENT OF THE TURNSTILE ARMS. APPLY PASTES AND LIQUIDS CHEMICALLY AGGRESSIVE TO MATERIALS OF THE HOUSING WHEN CLEANING THE PRODUCT. Turnstile CUBE C-03 Installation Manual... -
Page 5: Safety Precautions
FOR DEATH AND DAMAGE TO HEALTH, COMPLETE OR PARTIAL LOSS OF PERFORMANCE OF THE PRODUCT AND/OR AUXILIARY EQUIPMENT IF USER FAILS TO COMPLY WITH THE SAFETY REQUIREMENTS SPECIFIED IN THIS SECTION, AND ALSO VOIDS THE PRODUCT WARRANTY. Turnstile CUBE C-03 Installation Manual... -
Page 6: Preparing The Product For Installation
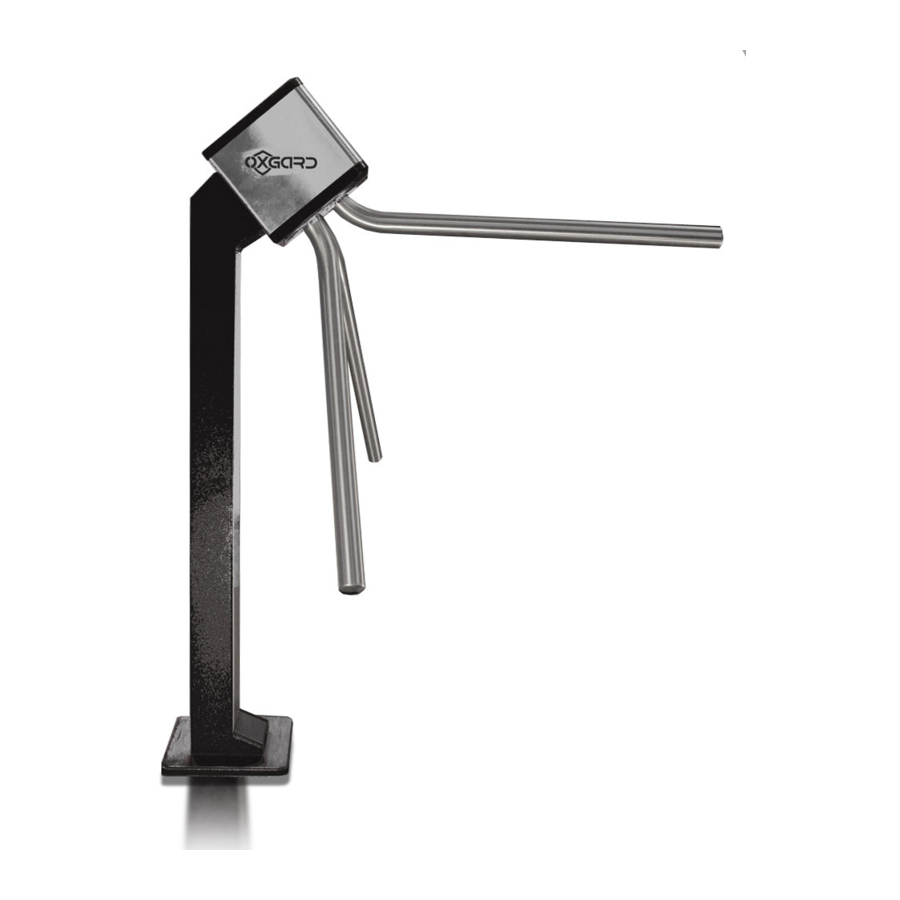
Open the transportation box, unpack and check completeness of the product: turnstile post; CP with cable; base cover. Rules for visual inspection of the product 3.3.1 Check completeness of the product. Completeness should checked according VZR.247800.001Logbook (LB). Turnstile CUBE C-03 Installation Manual... - Page 7 Visually inspect the product. There should not be visible damage on the product. 3.3.3 If a damage is found, prepare a Claim Report. Figure 1 –overall dimensions of the turnstile. 3.3.4 Figure 1 – Overall dimensions of the turnstile Turnstile CUBE C-03 Installation Manual...
-
Page 8: Product Installation Site Requirements
Figure 2 –when installing the turnstile, it is necessary to consider the possible free travel of the arm (it makes 6 degrees on each side in "STOP" mode). 6 deg Figure 2 – Possible free travel of the arm in "STOP" mode Turnstile CUBE C-03 Installation Manual... -
Page 9: Procedure For Checking Compliance Of The Installation Place
UNDER ACS CONTROL AND TO AVOID UNAUTHORIZED PASSAGES. Figure 3 –turnstile passage zone arrangement and guidelines on 3.5.1 product orientation. NMT 50 mm 1- protection Recommended diagram Not recommended diagram Figure 3 – Turnstile passage zone arrangement Turnstile CUBE C-03 Installation Manual... -
Page 10: Installation And Dismantling Of The Product
Prepare a horizontal area at the product installation site. 4.2.2 Prepare a chase or cable conduit going from the site to the place of installation of the PSU, CP and, where necessary, to the ACS and SFAS connection point. Turnstile CUBE C-03 Installation Manual... - Page 11 The depth of the hole – 120 mm, should exceed the anchor length by 5 mm. Insert anchors into the holes. SECTION F-F SCALE 1:2 3 hole Figure 4 – Installation dimensions of the turnstile site Turnstile CUBE C-03 Installation Manual...
- Page 12 To remove the plate, undo screw (1) and slide the plate up. 1 - screw; 2 - removable plate Figure 5 – Dismounting of the removable plate of the turnstile stand Turnstile CUBE C-03 Installation Manual...
- Page 13 Figure 6 – Preparation to install the turnstile Fix the turnstile stand with three screws (Figure 6 – 2) by screwing them into the appropriate anchors using S5 key for the screws with an internal hexagon. Turnstile CUBE C-03 Installation Manual...
-
Page 14: Dismantling The Product
4.3.2 Before packing, clean the product from dust and dirt. 4.3.3 Put the product in a packing box. Turnstile CUBE C-03 Installation Manual... -
Page 15: Connecting And Setting The Product
Slide the cover till the end and free access to the rotation mechanism. Figure 8 – the appearance of the control board and layout of the connectors for connecting the PSU, CP, ACS and SFAS is shown. Turnstile CUBE C-03 Installation Manual... - Page 16 - it is necessary to release the BUT button after the required number of signals, a long beep, which indicates that the desired mode has been written into the controller memory, will sound. - when the power is off, the selected mode is not reset. Turnstile CUBE C-03 Installation Manual...
- Page 17 VZR.247800.001 IM Table 1 shows the turnstile operation modes with different number of signals after pressing the BUT button. Turnstile CUBE C-03 Installation Manual...
-
Page 18: Power Connection
"ANTIPANIC" mode - test mode for checking the turnstile performance Power connection IT IS FORBIDDEN: TO USE THE POWER SUPPLY UNITS WITH AN OUTPUT CURRENT OF 1,5 А. LESS THAN Turnstile CUBE C-03 Installation Manual... - Page 19 Connect the PSU cable to +12U and GND POWER contact group on the control board. Make sure that the cable is securely connected. The POWER block has additional power supply terminals for connecting an external controller. Turnstile CUBE C-03 Installation Manual...
-
Page 20: Connecting The Control Panel
PULT inscription using RJ12\6P4C telephone socket. RJ12\6P4C RJ 11(G)\6P4C Figure 9 – The turnstile CP should be connected based on the contact identifications in accordance with the figure. Control panel Figure 9 – Arrangement of the control panel cable wires. Turnstile CUBE C-03 Installation Manual... -
Page 21: Connecting The Access Control System (Optional)
STOP mode after 5 seconds. Free access in both directions can be enabled only in potential control mode by simultaneous feeding of signals to the LEFT and RIGHT inputs or by sequential feeding of the LEFT and RIGHT signals. Turnstile CUBE C-03 Installation Manual... - Page 22 (PassOk1 - to the right, PassOk2 - to the left). The "dry contact" closes/opens when the arm is rotated at an angle of 60 degrees and returns to its original position after complete passage. Turnstile CUBE C-03 Installation Manual...
- Page 23 D9 is either constantly on and indicative of the "AP" command activation (in its hold mode) or it is a signal of each pass (in the pass counting mode). It can be selected by mode 7 (according to Table 1). Turnstile CUBE C-03 Installation Manual...
- Page 24 VZR.247800.001 IM Control LEDs Button Figure 10 – Location of control LEDs on the motherboard Turnstile CUBE C-03 Installation Manual...
- Page 25 Figure 11 – To connect the controller, it is necessary to remove the safety cover from the turnstile, fold the board on swinging brackets, make connections with the ACS and fix the wires to the protective cover. Figure 11 – Connecting the controller Turnstile CUBE C-03 Installation Manual...
-
Page 26: Connecting The Control Panel To The Acs Controller
150 mA and permissible voltage is not more than 12 V. 1, 2, 3, 4 - control buttons Figure 12 – Numbering of the CP buttons 1, 2, 3, 4 - control buttons Turnstile CUBE C-03 Installation Manual... - Page 27 ACS controller or via a relay. Figure 13 – When using the relay, it is MANDATORY(!) to connect a diode in parallel to the winding. Motherboard Figure 13 – Diagram for connecting a diode in parallel to the relay winding motherboard Turnstile CUBE C-03 Installation Manual...
- Page 28 Figure 14 – diagram for connecting the CP to the ACS controller. The controller controls the turnstile in this variant using the "LEFT", "RIGHT", "STOP" and "AP" contacts. Control Access Board control Figure 14 – Diagram for connecting the CP to the ACS controller Turnstile CUBE C-03 Installation Manual...
-
Page 29: Comprehensive Inspection
Check that all cables are securely attached. 6.1.3 Turn on the turnstile and perform health check by carrying out several test passes. 6.1.4 If extraneous noise and any violations of operating modes are absent, the turnstile is ready for operation. Turnstile CUBE C-03 Installation Manual... -
Page 30: Acceptance Of The Installed Product
"Product Service Record" Section VZR.247800.001 of the Logbook (LB); the "Installation Information” Section of the productVZR.247800.001 LB is filled in; the Certificate of acceptance for operation is issued. Turnstile CUBE C-03 Installation Manual... -
Page 31: Appendix A - Brief Description Of Can2.0 Data Bus
Two control panels can be connected to one turnstile. An important feature of the CAN2.0 bus is the presence of 120 Ohm resistors at the ends of the bus. In a standard CP, such a resistor is already installed. Turnstile CUBE C-03 Installation Manual... -
Page 32: Appendix B - Position Of Mounting Holes Relative To The External Dimensions Of The Turnstile
Position of mounting holes relative to the external dimensions of the turnstile Figure 15 – position of mounting holes relative to the external dimensions of the turnstile. Figure 15 – Position of mounting holes relative to the external dimensions of the turnstile Turnstile CUBE C-03 Installation Manual... -
Page 33: Appendix C - Turnstile Connection Diagram
VZR.247800.001 IM APPENDIX C — Turnstile connection diagram Figure 16 –turnstile diagram and diagram of its connections. Figure 16 – Turnstile diagram Turnstile CUBE C-03 Installation Manual... - Page 34 VZR.247800.001 IM Turnstile CUBE C-03 Installation Manual...
- Page 35 VZR.247800.001 IM Turnstile CUBE C-03 Installation Manual...
- Page 36 VOZROZHDENIE LLC 192289 Saint-Petersburg 66, Sofiiskaya str. Telephone/Fax +7 (812) 366 15 94 www.oxgard.com info@oxgard.com...
Need help?
Do you have a question about the CUBE C-03 and is the answer not in the manual?
Questions and answers