Table of Contents
Advertisement
Quick Links
Advertisement
Table of Contents

Subscribe to Our Youtube Channel
Related Manuals for Lux Power Technology LXP8K SPEC


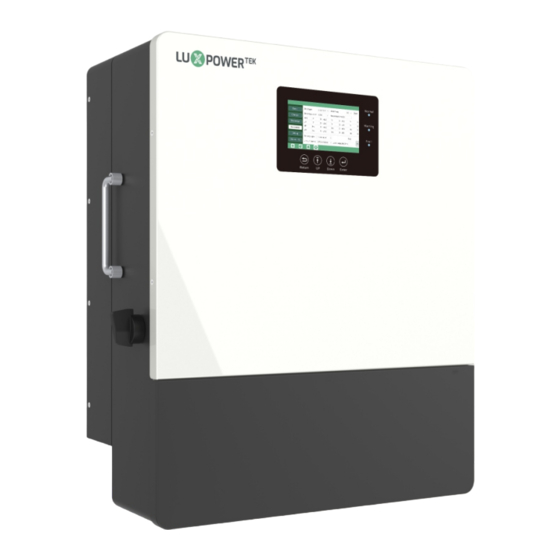
Summary of Contents for Lux Power Technology LXP8K SPEC
- Page 1 HYBRID INVERTER 8-10K EU Version: EN-UM-1.0-00 SN: 092.0010600 Tel:+86 0755 8520 9056 5th floor, Building 11, Hengchangrong High-Tech Industrial Park, Web:www.luxpowertek.com Hangcheng Street, Bao'an District, Shenzhen, China, 518100. Email:info@luxpowertek.com...
-
Page 2: Table Of Contents
CONTENTS About This Manual Monitor System Setup 3.10 Safety Wifi/GPRS/4G/WLAN dongle connection 3.10.1 Safety Instruction Setup the Monitor system 3.10.2 Brief Introduction Set homewifi password to dongle 3.10.3 System Solution Third party RS485 communication 3.10.4 Operation Guide Installation Packaging List Operation Mode Location Selection and Installation 4.1.1... -
Page 3: Safety
Safety 1.1 Safety Instruction Avoid misoperation and Inappropriate Usage General Safety Instructions All the work of this product (system design, installation, operation, setting , configuration The inverter has been designed and tested strictly according to international safety regulations. Read all safety and maintenance must be carried out by qualified personnel as required. -
Page 4: Brief Introduction
Installation Brief Introduction System Solution Packaging List & Storing Packaging List This product and relevant system is suitable for following system applications (system diagram): When the packaging is unpacked, the inner components should be the same as described in below packaging list. -
Page 5: Installing The Inverter
c. Never install the inverter in a place with direct sunlight, rain or snow. Please refer to below figure and select a well Step1. Mark the positions of drill holes with the mounting bracket, then drill 4 holes of 8mm(5/16inch) diameter shaded place or install a shed to protect the inverter from direct sunlight, rain and snow etc. -
Page 6: Connection Overview
Connection Overview Overview of the cable box 3.3.1 System Connection The system connection diagram is as below( for US version): Geneartor breaker PV Breakers a). DRM port(Applied only in AU) b). Battery communication port(CAN&RS485) please check Chapter 3.5.2 for Pin definition Battery Breaker c). -
Page 7: Battery Connection
Battery Connection 3.5.1 Battery power cable connection 1. The inverters has two MPPTs. Both MPPT1 and MPPT2, users can connect two strings. Cable Requirement: 2. When users connect 2 strings to MPPT, make sure the two strings has same quantity of Model Cable Size Minimum Voltage... -
Page 8: Grid&Eps Load Connection
3.6.2 Grid and EPS load connection After battery power cable and communication cable connection, users need to enter Advanced setting and choose Battery type and brand on the inverter LCD The inverter can be connected to the load side of the service disconnecting means if the busbar rating in the main panel can meet the NEC705.12(B)(3) requirements. -
Page 9: Ac Cable Connection
3.6.3 AC cable connection Cable Requirement: Cable Size M i n i m u m V o l t a g e TO PCS 9-7 AWG(6-10 mm) 600V TO Grid a. Strip off 5/16-3/8inch(8~10mm) insulation sleeve on the cables. b. Use wire ferrules if the cables are made of find stranded wires. c. -
Page 10: Working With Generator
Generator Connection-Whole Home Backup PV input Meter or CT Basic Utility Meter MODBUS addr Meter type Charge Kw. h Vpv start (V) CT ratio GRID 7 9 8 6 6 Discharge EPS output 480r/kw. h 10A Offgrid output Micro-grid without Battery Advanced Seamless switch Charge last... -
Page 11: Generator Startup And Stop Settings
3.7.2 Generator Startup and Stop settings Connection for AC coupled solar system Utility Meter Basic Bat charge control Use SOC % Use Bat V Kw. h GRID 7 9 8 6 6 Bat charge current limit(A) Charge 480r/kw. h 10A Discharge AC charge Time 1... - Page 12 Please put the CAN communication PIN to on status for the first and the end inverter Parallel line(n to 1) The max parallel quantity is 10, so 2<n<10 Parallel line1 Parallel line2 Parallel line(n-1 to n) No.1 No.2 No.n-1 No.n If the parallel cable is not enough or long enough, please make a straight pin to pin cable Settings for paralleling function in monitor system 1.
-
Page 13: Monitor System Setup
3.10 Monitor System Setup 3.10.3 Set homewifi password to dongle 1. Connect your mobile phone to the “BAxxxxxxxx” wireless network where “BAxxxxxxxx” is the serial number of the WiFi dongle. 3.10.1 Wifi/GPRS/4G/WLAN dongle connection 2. Click the "WiFi MODULE CONNECT" button on the APP Users can use WiFi/ WLAN /4G /2G dongle to monitor their inverter, and view the monitoring data on computer or 3. -
Page 14: Third Party Rs485 Communication
Please download the following guides for setting up WiFi dongle and monitoring account at 4. Operation Guide Document Reference: 4.1 Operation Mode and Function 1. Wifi Quick Guidance The inverter has different working mode to meet customers' various demands, the working modes are as below: Quick guidance for setting connection of WiFi module to home WiFi, you can also find a printed version in the packaging of the WiFi module. -
Page 15: Charge First Mode
4.1.2 Charge First Mode The priority order of solar power usage will be Battery >Load >Grid. During Charge Priority time period, load is first supplied with Basic Bat charge control Use SOC % Use Bat V grid power. If there is excess solar power after battery charging, the excess solar power will take load together with grid power. Bat charge current limit(A) Charge Application Scenarios... -
Page 16: Lcd Display
4.2 LCD Display Fault/Alarm Information Touching the bell icon at the bottom of the screen, you'll see all current and historical fault & warning information on this page. Users can view inverter running status, real time power, daily and accumulated energy information conveniently on inverter LCD. - Page 17 d. Advanced setting b. Charge setting Advanced setting is mainly by installer after installation. Bat charge control: Users can decide to use SOC or BatV to Grid type: You can choose by yourself,230V control charge and discharge logic depends on battery type. Basic Bat charge control Use SOC %...
-
Page 18: Start-Up And Shut Down The Inverter
4.3 Start-up and shut down the inverter Fault Meaning Troubleshooting 4.3.1 Start up the inverter M3 microprocessor fails to receive M3 Rx failure Restart inverter, if the error still exists, contact Step1. Turn on the battery system firstly,then turn on the DC breaker between battery and inverter. data from DSP Luxpower service or your inverter supplier. -
Page 19: Fan Replacement
2. Alarm on the LCD Restart inverter. If fault still exists, contact GFCI module is abnormal GFCI module fault If the dot on the left of fault item is yellow, it means the fault is active. When it is grey, it means the fault Luxpower service or your inverter supplier. - Page 20 PV Input data LXP8K SPEC LXP10K SPEC Max. usable input current(A) 25/25 25/25 Max. short circuit input current(A) 34/34 34/34 Start input voltage(V) Startup voltage(V) c. Loosen the screws and remove them Full power MPPT voltage range(V) 170-480 200-480 DC nominal voltage(V) MPPT tracker...
Need help?
Do you have a question about the LXP8K SPEC and is the answer not in the manual?
Questions and answers