Table of Contents
Advertisement
Quick Links
Advertisement
Table of Contents

Related Manuals for Lux Power Technology Single Phase All-in-one RESS Smarty Inspiration-S


Summary of Contents for Lux Power Technology Single Phase All-in-one RESS Smarty Inspiration-S
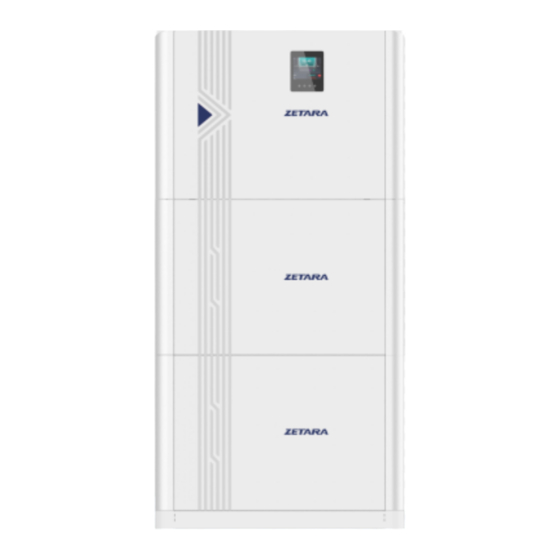
- Page 1 Single Phase All-in-one RESS Smarty Inspiration-S User Manual User Manual...
-
Page 2: Revision Table
Revision Table Version Revised by Content Revision Date Rev1.0 Hunter.LI First release 2023.04.19 Rev1.1 Hunter.Li Add note at page14 2023-9-06... -
Page 3: Table Of Contents
Content 1 Overview ................................- 1 - 1.1 Application Scope ............................- 1 - 1.2 Applicable People ............................- 1 - 1.3 User Manual .............................. - 1 - 1.4 Disclaimers ..............................- 1 - 2 Product description ............................... - 2 - 3 Safety Instructions .............................. -
Page 4: Overview
1 Overview 1.1 Application Scope This manual introduces Single Phase All-in-one RESS products, including product specifications, operation specifications, product maintenance and other related information. For details on the operation, installation and use of the product, please refer to this user manual. 1.2 Applicable People This manual is used for professional and technical staff who install, operate and maintain the batteries, as well as for the end-users who may need to view the relevant technical parameters. -
Page 5: Product Description
2 Product description Lithium-ion batteries are a new generation of green energy batteries. In recent years, with the rapid development of lithium-ion battery technology, the pace of lithium-ion batteries to replace traditional lead-acid batteries is also gradually accelerating in various power fields. Single Phase All-in-one RESS product incorporates an integrated design, integrated installation and boasts a protection level of up to IP65, which is mainly used for household photovoltaic systems. - Page 6 Maximum grid input current Rated output power 5000W Maximum output power 5000VA Rated output current 21.7A Rated output voltage 230V AC voltage range 180 - 270VAC Total current harmonics (THDI) <3% (rated power) Emergency output (battery) UPS maximum power output 3600W CAN2.0 UPS nominal output power...
-
Page 7: Safety Instructions
3 Safety Instructions 3.1 Label Description In order to ensure the user's personal safety when using this product, this manual provides relevant identification information and uses appropriate symbols to alert the user, who should carefully read the following list of symbols used in this manual. Table 3-1 Label Description Potentially low risk: may result in mild or moderate impairment if not avoided High Risk: May result in serious injury or death if not avoided... -
Page 8: Attention Items
Table 3-2 Installation Tools Sheet Multi-meter Protective gloves Insulated anti-smashing shoes Tools Protective suit Safety glasses ESD wrist strap Electric screwdriver Cross screwdriver Socket spanner Installation Slotted screwdriver Wire stripper Tools 3.3 Attention Items 3.3.1 Manual Custody This manual contains important information about the Single Phase All-in-one RESS products. A careful reading of this manual will help you become familiar with this product, and this manual should be kept in a safe place so that it can be easily accessed by maintenance personnel at any time when needed. -
Page 9: Measuring Instrument
All-in-one RESS products, the following conventions should be observed in order to prevent the accidental operation, proximity or occurrence of accidents by unrelated personnel: the front and rear switches of the products should be clearly marked to prevent accidents caused by wrong switches; warning signs or safety warning belts should be set near the operation area to prevent the proximity of unrelated personnel. -
Page 10: Main Components
4 Main Components The core components of the Single Phase All-in-one RESS products are shown in Table 4-1 below: Table 4-1 Main Components Sheet Item Picture Hybrid Inverter LXP-5K hybrid Battery Module (51.2V100Ah) Mounting Base - 7 -... - Page 11 Power Cable Communication Cable - 8 -...
-
Page 12: Product Description
5 Product Description 5.1 Product Introduction Single Phase All-in-one RESS products are modular products designed for energy storage applications, which are widely used in small and medium-sized energy storage systems. Each product consists of a hybrid inverter and battery modules, with single modules comprising cells, BMS, and shell. The BMS within each module has independent voltage, current, temperature detection and protection functions. -
Page 13: Module Description
Figure 5-2 Low-volt Stacked Module Figure 5-3 Mounting Base 6 Module Description 6.1 Module Specification A newly designed solar and energy storage hybrid inverter, installed in on-grid solar, off-grid solar and back-up systems. The hybrid inverter enables a programmable and schedule smart solar energy storage system to help increase your solar energy self-consumption rate, protect your home appliances from grid outage, and balance your energy usage strategy to save energy bill. -
Page 14: Illustration And Front Panel Description
Table 6-1 Hybrid Inverter Module Specification Type Voltage Capacity Battery Width Depth Height Weight 20±2kg 230V 51.2V 570mm 180mm 420mm LXP-5K hybrid VLES stacked vertical batteries are made of lithium iron phosphate battery modules with the highest safety performance. The battery modules are available in 51.2V100Ah. The following table describes related parameters. - Page 15 6.2.2 VLES5000VS Appearance & Dimension Schematic Figure 6-2 VLES5000VS Appearance & Dimension Drawing 6.2.3 Hybrid Inverter Side View Figure 6-3 Hybrid Inverter Side Panel Diagram...
- Page 16 6.2.4 VLES5000VS Side View Figure 6-4 VLES5000VS Side Panel Diagram Table 6-3 VLES5000VS Side Interface Description Item Function Description Remarks Batt+ Battery positive Batt- Battery negative Batt Power Power output switch Ground point Comm port 1 Communication port Comm port 2 Communication port SOC Led display DC Switch...
-
Page 17: Vles5000Vs Id Setting Description
6.3 VLES5000VS ID Setting Description Figure 6-3 ID Dialing Code Address Assignment Instructions ID code bits corresponds to binary digits, down represents "ON", up represents "OFF", the right side of the code bit is the low bit, the left side is the high bit, the code range is 1~16. NOTE: The battery pack ID connected to the hybrid inverter must be set to ID1, indicating that it is the host, the other battery packs need be in sequence set to ID2.ID3.ID4.ID5... -
Page 18: System Installation
7 System Installation 7.1 Handling, Transportation, Storage 7.1.1 Handling Rough handling practices may cause short circuit or damage to the battery pack, resulting in battery leakage or fire. Forklifts or carts should be used for handling, and materials transported should not exceed the width and height of aisles and doors, and should be transported at a moderate speed. -
Page 19: Open-Box Inspection
7.2 Open-box Inspection Table 7-1 Unpacking Tools Sheet Item Tools Slotted screwdriver Protective gloves Stripper Tools Hammer Single Phase All-in-one RESS products have been strictly tested and tested before leaving the factory. Please sign for them after inspection. If the product is damaged, please contact the local distributor.Please open the box to check: whether the outer packaging is intact or damaged;... - Page 20 Figure 7-2 Installation Diagram 7.3.2 Mounting Base Installation Remove the mounting base from the box and place it on flat ground. Our special construction design eliminates the need for screws to secure the base to the floor. Figure 7-3 Mounting Base Installation...
-
Page 21: Battery Module Installation
7.3.3 Battery Module Installation According to the actual situation of the installation site, use manual or machine to carry the module; it is recommended that at least two people lift it together and wear anti-smashing shoes and non-slip gloves during installation. Figure 7-4 Battery Module Installation diagram 7.3.4 Combiner box Installation While the low-volt battery module installation is finished, the final step is to install the Hybrid inverter. - Page 22 Figure 7-5 Single Phase All-in-one Installation 7.3.5 System Fixed Installation Considering that our mounting base adopts non-traditional screw fixing method, so we need to install a fixed mounting ear on the wall to ensure the stability of the battery system after the combiner or high-volt box installation is done.The battery system is at risk of tipping if not handled properly.
-
Page 23: Electrical Installation
7.4 Electrical Installation 7.4.1 Tools Introduction The following tools are required for electrical connection, as shown in Table 7-2: Table 7-2 Electrical Installation Tools Diagram Item Tools Multi-meter Protective gloves Screwdriver Tools Electric batch Cross screwdriver Socket wrench 7.4.2 System Cable Connection Figure 7-7 Single Phase All-in-one System Connection Schematic (1) Grounding. -
Page 24: Side Panel Installation
battery to the inverter via communication cable. (3) Power cable installation. Use the power cable to connect each battery in parallel as the above picture shows. Avoid short circuit and reverse connection of positive and negative terminal. (4) Connect the equipment. Make sure the battery and device are powered off before connecting. Clearly identify the location of the positive and negative terminals of the system, red to the positive terminal, black to the negative terminal, to ensure no connection errors. -
Page 25: System Turn Off
All electrical connections must be made in accordance with the electrical diagrams in the manual; the DC combiner box must be open; the cables are properly distributed, without mechanical damage, and connected and fastened correctly; the internal protection devices in the combiner box must be firmly installed;... -
Page 26: Maintenance
8 Maintenance 8.1 Common Faults(Phenomenon)and Solutions Common faults and solutions are shown in table 8-1. Table 8-1 Common Faults (Phenomenon) and Solutions Fault phenomenon Analysis Solution Communication failure with Communication port connect error Check communication connection or ID settings inverter or battery ID setting error No DC output Not close breaker or low voltage... -
Page 27: Daily Maintenance
8.2 Daily Maintenance Routine maintenance items are shown in Table 8-2 below. Table 8-2 Routine Maintenance Items Item Maintenance Method Maintenance intervals 1. check whether there is mechanical damage to the power cable and whether the terminal insulation sleeve has fallen off; if there is such a phenomenon, please turn off the machine and carry out maintenance or replacement. -
Page 28: Cautions And Warranty
9 Cautions and Warranty 9.1 Cautions Please read and comply with the following conditions of installation and use of the battery, incorrect installation using the battery may cause personal injury or damage to the product. (1) DO NOT throw the battery into water. Store batteries in a cool and dry environment. (2) DO NOT put the battery into fire or heat the battery, so as to avoid explosion. - Page 29 Smarty Solar System Company The Netherlands - 26 -...
Need help?
Do you have a question about the Single Phase All-in-one RESS Smarty Inspiration-S and is the answer not in the manual?
Questions and answers