Table of Contents
Advertisement
Quick Links
Advertisement
Table of Contents

Related Manuals for Lux Power Technology LXP 3-6K


Summary of Contents for Lux Power Technology LXP 3-6K
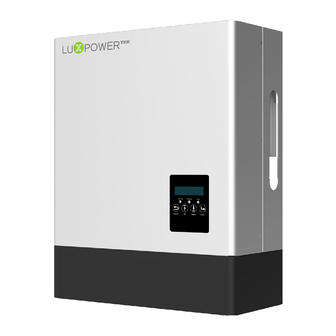
- Page 1 Hybrid Inverter User Manual LXP 3-6K Version: UM-LXP01001E...
- Page 2 User Manual Copyright© 2024 Lux Power Technology Co., Ltd. All Rights Reserved. This manual, protected by the copyright and intellectual property rights of Lux Power Technology, may not be modified, copied, or reproduced without prior written permission. Brands and trademarks mentioned belong to their respective owners.
-
Page 3: Table Of Contents
User Manual CONTENT About This Manual 1. Safety 1.1 Symbol Explanation 1.2 Safety Instruction 2. Brief Introduction 2.1 System Solution 3. Installation 3.1 Packaging List & Storing 3.2 Select Location 3.3 Install the Inverter 3.4 Connection 3.4.1 Connection Overview 3.4.2 PV Connection 3.4.3 Battery Connection 3.4.4 Grid Connection 3.4.5 UPS/Back-up Connection... -
Page 4: Revision History
User Manual 4.2.1 LCD Menu Structure Overview 4.2.2 Status and Parameter show in LCD 4.2.3 LCD Settings 4.2.3.1 Information Searching 4.2.3.2 Settings Guidance 4.3 Monitor System 4.4 Work with Gen set 4.5 Parallel System Setup Guidance 5. Start-up and shut down the inverter 5.1 Start up the inverter 5.2 Shut down the inverter 6. -
Page 5: About This Manual
User Manual 1. Safety 1.1 Symbol Explanation Symbols in This Manual The general information and safety instruction is highlighted with following symbols in this manual: “Danger” indicates a hazardous situation which, if not avoided, DANGER will result in death or serious injury. “Warning”... - Page 6 User Manual DANGER Dangers of High Voltages and Large Current Beware of high PV voltage. Please turn-off the DC switch of PV Panel output before and during the installation to avoid electric shock. Beware of high grid voltage. Please turn-off the AC switch of grid connection before and during the installation to avoid electric shock.
- Page 7 User Manual CAUTION Only qualified personnel can change the inverter settings. There might be possible damage to health as a result of the effects of radiation, do not stay closer than 20cm to the inverter for long time. NOTICE Please carefully read this manual before any work carried out on this inverter, after the installation, please keep this manual carefully stored and easy to access at any time.
-
Page 8: Brief Introduction
User Manual 2. Brief Introduction 2.1 System Solution This product and relevant system is suitable for following system applications (system diagram): A. Solar and energy storage hybrid system B. Energy storage system without solar C. On-grid solar system without battery D. -
Page 9: Installation
User Manual 3. Installation 3.1 Packaging List & Storage Instructions Packaging List When the packaging is unpacked, the inner components should be the same as described in below packaging list. Wall-mounted Bracket X1 Rj45 Extension Terminal X4 Hybrid Inverter X1 User Manual X1 Communication Wi-Fi Module X1... -
Page 10: Select Location
User Manual Storing the Inverter The inverter must be stored appropriately if not installed immediately, refer to below figure. CAUTION a) The inverter and its components must be stored in its original packaging. b) The storage temperature should be within -25°C ~ 60°C and humidity within 0~85%. c) The packing should be upright and maximum stacked layers is 6 . - Page 11 User Manual 300mm 300mm 300mm 300mm d) The structure of the wall where inverter mounted should not be flammable, or make sure the inverter is not surrounded by flammable or corrosion materials and is away from the gas. e) Never install the inverter exposed to directly sunshine, rain and snow. Please refer to below figure and select a well shaded place or install a shell to protect the inverter from directly sunshine, rain and snow etc.
-
Page 12: Install The Inverter
User Manual 3.3 Install the Inverter The inverter is wall-mounted installed , steps shows below: Step 1. Use the wall-mounting bracket as the template to mark the position of the 4 holes, then drill 8 mm holes and make sure the depth of the holes is deeper than 50mm. Step 2. -
Page 13: Connection
User Manual 3.4 Connection 3.4.1 Connection Overview LXP Meter PE N DC Switch DC Switch AC Breaker UPS Load Load Please prepare the breakers before connetion, breakers selection recommendation for both DC and AC DC Breaker AC Breaker selection(2 poles) UPS Breaker Hybrid selection(2 poles) -
Page 14: Pv Connection
User Manual Connection Terminals and Interfaces Overview Battery Wi-Fi Terminals Terminals Moudule Terminal Terminal GRID Communication Switch Interfaces 3.4.2 PV Connection The PV connection of LXP hybrid inverter is the same to traditional on-grid solar inverter (string inverter) NOTICE Before connection the PV, please use the multi-meter to measure the PV array voltage to verify if PV array is working normally, if not, please fix the PV array to normally working states before connection When your PV panel ambient temperature could possibly be lower than 0℃, then please check... - Page 15 User Manual a) Strip 6~8mm insulation from the cable end. 6-8 mm b) Assemble the cable ends to crimp contacts. c) Lead the cable through the cable gland, then insert into the corresponding insulator until it snaps into place, then tighten the cable gland. When verified the PV connector is tightly, align the 2 half connector and mate them together by hands until ‘click’...
-
Page 16: Battery Connection
User Manual 3.4.3 Battery Connection This part in this manual only describe the battery connection on inverter side, should you need more detailed information regarding the battery connection on battery side please refer to the manual of the battery you are using. Step 1. - Page 17 User Manual Suggestions and Requirements If the battery type is lithium-ion or ternary battery which need communication between the inverter and battery management system (BMS), the communication connection must be installed. RJ45 Terminal Configuration of Battery Communication Red Color S witch Bule Color S witch Function Description Function Description...
-
Page 18: Grid Connection
User Manual Connection between inverter and battery 3.4.4 Grid Connection Cable Requirements: Cross-section Diameter 4 - 6 mm2 2 mm - 2.6 mm Step 1. Assemble the AC connector. a) Lead the AC cable though cable gland, AC Connector Structure Overview. seal ring and threaded sleeve, and fully insert the conductors to corresponding terminals on connection terminal and tighten... -
Page 19: Ups/Back-Up Connection
User Manual Step 2. Install the AC connector Align the GRID connector and AC terminal and mate them together by hand until a ‘click’ is heard or felt . An AC breaker (AC switch) should be installed between inverter and the grid, confirm the AC breaker is working normally before connect the AC cable from inverter to AC breaker. -
Page 20: Meter And Ct Connection
User Manual NOTICE Backup loads neutral and grid neutral are connected internally inside the inverter, so the installer do not need to connect them outside. The power of backup load should be lower than 5kW. Mode B: Neutral line of alternative supply can be isolated or switched. The connection diagram of UPS Connection Mode B is shown in below figure. -
Page 21: Connect The Meter
User Manual The communication port for communicate with meter or CT clamp is as below: RJ45 Terminal Configuration of Meter/CT Communication Red Color S witch Bule Color S witch Function Description Function Description Meter RS485-B Meter RS485-B Meter RS485-A Meter RS485-A Debugging RS485-B Debugging RS485-A CT1 N... -
Page 22: Connect The Ct
User Manual 3.4.6.2 Connect the CT For the CT clamp connection, we need to put the CT clamp in the L cable and the arrow printed on the CT should point to inverter. Now Luxpower support two ratio 1000�1 and 3000�1 CT clamps . For default, the ratio is 1000�1, if you install another CT clamp, please set it in the monitor system or LCD. -
Page 23: Drms Connection
User Manual 3.4.7.1 DRMs Connection RJ45 Terminal Configuration of DRM DRMs is short for ‘inverter demand response Function Description modes’, and it is a mandatary requirements DRM15 for inverters in Australia DRM26 DRM37 DRM48 DRM Communication Interface Overview RefGen DRM0 +12V GND-S 3.4.7.2 Safety Standard Configuration - SW2... - Page 24 User Manual Safety Standard Configuration Guidance Country Country Configuration Configuration Standard Standard Default En50549 VDE0126 Germany United Kingdom VDE0126 Australia United Kingdom AS4777 New Zealand Germany N4105 Italy Europe CEI0-21 EN50438 South Africa Finland NRS 097-2-1 EN 50438 Thailand Thailand Ireland Czech EN 50438...
-
Page 25: Balancing Resistor Configuration - Sw1
User Manual 3.4.7.3 Balancing Resistor Configuration - SW1 By configuring the SW1 balancing resistor configuration switch, you could configure the balancing resistors of parallel CAN communication. This Function is used for multiple inverter paralleling operation. Please turn on the DIP in the first and last inverter in the inverter loop. -
Page 26: Grounding
User Manual 3.4.8 Grounding A second protective earth (PE) terminal is equipped at the side of the inverter. Be sure to connect this PE terminal to the PE bar for reliable grounding. Cable Requirements 3-6mm² copper cable or 10-16mm² aluminum cable. NOTICE Install the Protective Shell When you finish all of above chapters of connections,... -
Page 27: Operation Mode
User Manual 4. Operation Guide 4.1 Operation Mode Users can have different settings to satisfy their demands, the working modes is as below: Operation Explanation Related Settings Application Notes mode The priority of the PV energy will be Load > Increase the self battery >... -
Page 28: Lcd Operation And Settings
User Manual 4.2 LCD operation and settings 4.2.1 LCD Menu Structure Overview Display Menu Setting Product Info Status Measured Info History Info Standby PV Info Set COM Address Energy Record Model Fault Battery Info Set Time Error Record Ser No. Flash Grid Info Set Language... - Page 29 User Manual d) PV Grid On The inverter is working normally on-grid, and the all the power generated by PV will export or feed-in via the AC grid connection to your general loads and the grid. e) PV Charge The inverter is working normally, the power generated by PV is within a range that all the PV power is used to charge the battery, while there are no excessive power rested to output from neither the AC Grid connection nor UPS connection.
-
Page 30: Lcd Settings
User Manual Parameter Explanation of LCD Displays Parameters of Power: Ppv: PV input power Pac: active power of AC output Sac: apparent power of AC output Po: active power of UPS So: Apparent power of UPS Pc: Charging power Pd: discharging power PtoGrid: active power of exporting / feed-in to grid Parameters of Voltage and Frequency etc.: Vb: battery voltage... - Page 31 User Manual b) Search History Information In Display Menu interface, select History menu and touch Enter button to enter in the History menu interface and use Up and Down button to select relevant display menu and touch Enter button to view detailed history information.
- Page 32 User Manual d) Search Measured information In Display Menu interface, select Measured Info. menu and touch Enter button to enter in the Measured Info. menu interface to view detailed running information of the system, such as PV, battery, grid and UPS data.
-
Page 33: Settings Guidance
User Manual 4.2.3.2 Settings Guidance a) Enter Into Setting Interface Touch Return button to enter into Display Menu interface, search and select the Setting menu using UP and Down button, and then touch Enter button to confirm and enter into inverter setting interface. Display Menu Setting Enter... -
Page 34: Communication Address Settings
User Manual c) Communication Address Settings Notice that the setting range of the RS485 communication address is from 000 to 255, and it’s set to be 001 by default when manufactured. Operating Guidance: by touching Enter button to select the numerical digits of the COM address - hundreds, tens and units, and use UP and Down button to set the number of selected numerical digits. - Page 35 User Manual e) Time Settings In Setting interface, search and select Set Time menu then enter into time setting interface. Follow the direction in below flow chart to set the time parameters. Operating Guidance: by touching Enter button to select the numerical digits of the time - year, month, date, hour and minute, and use UP and Down button to set the number of selected numerical digits.
- Page 36 User Manual f) PV Input Settings Operating Guidance: by touching UP and Down button to select the parameter of the PV input. Notice that the PV input parameters must be set in accordance to actually configuration of PV system. The parameter is set to Two PV separate by default. Setting Set PV Input Enter...
- Page 37 User Manual h) AC Charge Settings In Setting interface, search and select the Set AC Charge menu and enter into AC charge setting interface. Follow the directions in below flow charge to enable or disable AC charge function, if enabled then configure relevant parameters.
- Page 38 User Manual i) Feed-in grid Settings Since in some countries, users can not feed energy into grid, so they are able to disable energy export function in the LCD, or set power percent which can feed into grid. Setting Set Feed-in grid Enter Down Set Feed-in grid...
- Page 39 User Manual k) CT or Meter Setting Since the inverter support the connection of both CT clamp and meter, users can select if the system is connecting a meter or a CT clamp and then choose the CT clamp ratio when connects a CT clamp. Setting CT or meter? Enter...
- Page 40 User Manual m) Choose master or slave for parallel system For parallel system, users need to set one inverter to master and others to slave. If the system is single phase, then users need to choose 1 phase master, if the system is three phase, then users need to choose 3 phase master.
-
Page 41: Monitor System
User Manual 4.3 Monitor System Users can use wifi donlge/WLAN dongle/4G dongle(Avaiblable from 2021 March for some countries) to monitor the energy storage system, The monitor website is: server.luxpowertek.com The APP is also available in the google play and apple APP store(Scan two code bar to download the APP). - Page 42 User Manual Inverter 1 Grid Bus-Bar(L,N) AC Input CAN 1 CAN 2 AC Output Parallel line 1 EPS Bus-Bar(L,N) AC Input Inverter 2 Grid Bus-Bar(L,N) AC Input Grid CAN 1 CAN 2 AC Output Parallel line 2 Inverter 3 AC Input AC Output CAN 1 Grid Bus-Bar(L,N)
- Page 43 User Manual Please put the CAN communication PIN to on status for the first and the end inverter No. 1 No. 2 No. n-1 No. n Parallel line (n-1 to n) Parallel line1 Parallel line1 Parallel line (n to 1) The max parallel quantity is 10, so 2 ≤...
-
Page 44: Start-Up And Shut Down The Inverter
User Manual Step 5. Set the system as a parallel group in the monitor system Asia English 文 Configuration Monitor Data Overview Maintenance Station Name Stations Overview Search by inverter SN Device Overview Charge Power Discharge Power Battery Dischar Feed Energy ConsumptionEr Serial number Status... -
Page 45: Troubleshooting & Maintenance
User Manual 6. Troubleshooting & Maintenance 6.1 Troubleshooting When faults and errors occurred, please deal with these problems following below procedures and requirements. 6.1.1 Introduction to LED Displays Suggestion L ED D isplay D escription Long light Working normally Green LED Flashing Firmware upgrading Wait till upgrading complete... -
Page 46: Troubleshooting Based On Lcd Displays
User Manual 6.1.3 Troubleshooting Based On LCD Displays Once there are any warning or fault occurred, the LED and LCD will displays information to remind the operator, the LCD will display relevant error code and short description. Code Description Trouble shooting Display Internal communication fault1 Restart inverter, if the error still exist, contact us... - Page 47 User Manual Code Description Trouble shooting Display Over current Restart inverter, if the error still exist, please contact us E022 E022 E023 Neutral fault E023 Check neutral connection Disconnect both PV connection, if the error still E024 Both PV short circuit E024 exist, contact us E025...
- Page 48 User Manual Code Description LCD Display Trouble shooting Check if communication cable is Communication failure right and have choose the right W000 Bat Com Fault battery brand, if the warning still with battery exist, contact us Communication failure Fix communication cable, if the W003 Meter Com Fault warning still exist, contact us...
- Page 49 User Manual...
- Page 50 User Manual...
- Page 51 User Manual...
- Page 52 User Manual...
- Page 53 User Manual Note...
- Page 54 User Manual...
- Page 55 User Manual...
- Page 56 Lux Power Technology Co., Ltd Headquarter: +86 755 8520 9056 www.luxpowertek.com 092.20021AA Contact us: info@luxpowertek.com...
Need help?
Do you have a question about the LXP 3-6K and is the answer not in the manual?
Questions and answers