
Related Manuals for Lux Power Technology TriP Series


Summary of Contents for Lux Power Technology TriP Series
- Page 1 Hybrid Three Phase Inverter TriP 6-20K User Manual Version: EN-UM-1.0-01 SN: 092.20007AA...
-
Page 2: Table Of Contents
CONTENTS 1. Introduction 6.9.3 Parallel Communication Cable Connection ................................................................. 6.10 Dry Contact Connection Overview ..................................................................................6.11 Installing the Communication Module Symbol Conventions ..............................................................7. Operation Instructions 2. Safety ................................................................................7.1 Indicator Lights and Button Introduction Safety Statements ........................ -
Page 3: Introduction
"the inverter," crafted by Shenzhen High Voltage and High Current Warning LUX Power Technology Co., Ltd., hereinafter denoted as "LUX." We kindly urge you to meticulously peruse this manual before engaging with the product and ensure its secure storage in a readily accessible location. -
Page 4: Function Overview
• xercise caution for potential burns, as specific parts of the inverter and system may generate heat during C. On-grid solar system without battery D. Off-grid and back-up applications operation. Avoid touching the inverter's surface or most components while it is operational. When the (Support EPS Load even without battery) device is functioning, only interact with the LCD and buttons. -
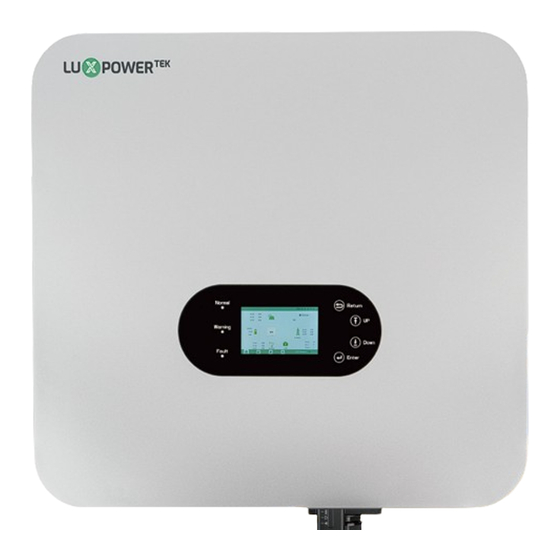
Page 5: Exterior Description
3.3 Exterior Description 3.4 Dimensions and Weight Dimensions (W*H*D) Weight Model 605*563*256.5mm 38KG TriP 6/8/10K TriP 12/15/20K 43KG 605*563*256.5mm 4. Storage and Disassembly 4.1 Storage Handle on the side If the inverter is not to be immediately put into use, it should be stored in its original packaging box in a wel-venti ated and dry area. -
Page 6: Disassembly
5.2 Selecting Installation Location The packaging box must not be tilted or inverted. Regular inspections during storage, recommended every three months, are necessary. lf any signs of insect infestation, rodent damage, or packaging deterioration are detected .The inverters are designed for indoor and outdoor installation (IP65), to increase the safety, performance and lifespan the packaging materials should be promptly replaced. -
Page 7: Environmental Requirements
5.5 Environmental Requirements Step 3. Lift the inverter with two people and carefully place it onto the wall bracket. Minimum ambient Maximum relative Maximum ambient temparature: -25℃ humidity: 100% temparature: +60℃ -25℃ Ensure proper ventilation in the inverter's installation environment. Do not obstruct the air vents or heat dissipation system during operation to prevent overheating and the risk of fire. -
Page 8: Electrical System Connection Diagram
6.2 Electrical System Connection Diagram 6.3 Preparing the Switches and Cables 6.2.1 System Connection Overview Users should independently prepare corresponding breakers based on the actual application scenario. Mppt1 string1: 1000V/20A Generator Mppt1 string2: 1000V/20A PV Array Mppt2 string1: 1000V/20A PV Breakers(2P*6) Mppt2 string2: 1000V/20A Mppt3 string1: 1000V/20A Generator... -
Page 9: Terminal Introduction
6.5 Grounding Connection 6.4 Terminal Introduction The wiring terminals are located at the bottom of the inverter, please refer to the following diagram: • This inverter is of the transformerless type. When the system is connected to the grid without an isolation transformer, it is essential that the positive and negative terminals of the photovoltaic strings are not connected to the grid's grounding (PE) to ensure the normal operation of the system •... - Page 10 5-9mm2 10-18AWG 1000V • Before wirino, ensure that the inverter is powered off and there is no residual voltage at the battery interface. 1. Remove the insulation layer from the cable and 2. Utilize a crimping tool to crimp the terminal If the battery-side wires are already connected, ensure that the battery is in the closed state.
-
Page 11: Ac Output Line Connection
6.8 AC Output Line Connection Precautions • Install an AC switch on the external side of the inverter's AC output to ensure a safe disconnection between the inverter and the grid. Tighting sleeve, torque: 3~4 NM • Tighting locknut, torque: 4~5 NM Allow for sufficient margin in the length of the protective ground wire. -
Page 12: Battery Communication Cable Connection
6.9.1 Battery Communication Cable Connection The communication interface of the meter is The configuration of the meter communication illustrated in the following diagram. interface is as follows: • The battery typically includes an Ethernet cable, so it is recommended to use the provided Ethernet cable for the connection. -
Page 13: Parallel Communication Cable Connection
The connection direction for the meter is as shown in the diagram below: the input side of the meter connects to the grid, while the output side connects to the inverter and load. For definitions of the input and output terminals of the meter, please refer to the meter's instruction manual. -
Page 14: Installing The Communication Module
6.11 Installing the Communication Module 7.2 Monitoring Connection Users have the capability to monitor the inverter through WiFi/WLAN/4G/2G encryption devices, allowing the Install the communication module at the designated interface as shown in the diagram and secure it with the viewing of monitoring data on a computer or remotely on a smartphone. -
Page 15: Station And Wifi Dongle Creation
7.2.2 Station and WiFi Dongle Creation Upon registration, the station and WiFi dongle will be automatically generated. If you require additional stations to be created, follow the steps below. 5. Disconnect your mobile phone from the "BAxxxxxxxx" wireless network. Log in to the app with your account 7.2.3.Set homewifi password to dongle and vou wil find the inverter information already visible. -
Page 16: Lcd Interface Settings Introduction
7.3 LCD Interface Settings Introduction By touching the operation information icon on the LCD, users can view rea-time operational data for various components, including Solar, Battery, Grid, UPS, etc. This feature allows for a detailed and up-to-the-minute understanding of the system's performance and individual component metrics. Solar Home Battery... -
Page 17: Operating Mode Settings
7.4 Operating Mode Settings To export power to the grid, enable the "export to grid" option, ensuring compliance with local grid requlations 7.4.1 Self-consumption Mode In this mode, the priority order of load supply sources is Solar>Battery>Grid. The priority order of solar power usage Basic Standby: Restart inverter... -
Page 18: Charge First Mode
Normal 0.1V 0.1V 0.1V Normal 0.1V 0.1V 0.1V R : 230V R : 230V S : 230V S : 230V T : 230V T : 230V 49.99Hz 49.99Hz 400V 400V R : 230V R : 230V S : 230V S : 230V T : 230V T : 230V 49.99Hz... -
Page 19: Forced Charge Mode & Forced Discharge Mode
Example: Example: AC Charge Mode Users have the flexibility to configure the inverter for either a direct charge or a charge based on the battery State of Charge (SOC) and voltage over a specified duration. Normal 0.1V 0.1V 0.1V Basic Operating Mode Use SOC % Use Bat V... -
Page 20: Off-Grid Mode
Discharge current limit(A): The Max. discharge current from Battery Normal Discharge start power(W): The default value is 0 0.1V 0.1V When the inverter detects the import power is higher than this value, battery start discharging, otherwise 0.1V battery will keep standby R : 230V S : 230V On-grid Cut-off(%) and Off-grid Cut-off(%) -
Page 21: Gen Port Function
7.5 GEN Port Function Generator Start Conditions: 7.5.1 Working with a Generator When utility grid fails and -When the battery discharges to the set discharge cutoff point • This inverter is designed to work seamlessly with a generator. It comes equipped with a generator port specifically There is a force charge request from battery designed for connecting a three-phase generator with an input voltage of 230/400V. -
Page 22: Ac Coupling
7.5.2 AC Coupling This device supports AC coupling connection with existing on-gird solar system. The existing solar energy system needs to be connected to the GEN port of the inverter, however, due to this port being occupied, the generator function will be unavailable. -
Page 23: Smart Load
7.5.3 Smart Load 7.6.1 Setting Parameters This function transforms the Gen input connection point into a load connection point. When this function is By clicking on the gear icon at the bottom of the screen, you'll access the inverter's parameter setting page (1). -
Page 24: Discharge Setting
7.6.3 Discharge setting Operating Mode Charge first(PV) Basic You can choose “Use SOC %” or Use Bat V” to control the battery discharge state Time 1 Charge first power(kW) Charge Discharge current limit(A): The Max. discharge current from battery Time 2 Stop charge first SOC(%) Discharge start power(W): The Min. -
Page 25: System Maintenance
8. System Maintenance 8.1 Start and Shutdown the Inverter PV input Vpv start (V) Basic Meter brand Start the inverter MODBUS addr Charge Offgrid output CT direction reversed Discharge Step 1. Make sure the inverter is properly connected to the batteries, panels, grid, etc(see system wiring diagram) Seamless switch Charge last RSD disable... -
Page 26: Troubleshooting
8.3.2 Fault Message & Troubleshooting are given below: Fault Meaning Troubleshooting During maintenance tasks such as system cleaning, electrical connections check, and ensuring ground reliability, it is necessary to shut down the system. M3 microprocessor fails to M3 Rx failure Restart inverter, if the error still receive data from DSP exists, contact your supplier. -
Page 27: Alarm On The Lcd
Please confirm that the wiring of the Hardware level overcurrent Restart inverter, if the error still parallel system iscorrect first. Hard over current protection triggered exists, contact your supplier. In this case, then connect each inverter to Incorrcet setting of phase Para Phase set error the grid, the system will automatically in parallel... -
Page 28: Alarm Message & Troubleshooting Are Given Below
8.3.4 Alarm Message 8 Troubleshooting are given below: Alarm Meaning Troubleshooting Check if communication cable is correct, and Restart inverter. If the fault remains, Inverter detected high DC Trip by dci high if you have chosen the correct battery brand Bat com failure contact your supplier. -
Page 29: Replacement Of The Fan
9. Annex 8.4 Replacement of the Fan 9.1 Technical Data • Before replacing the fan, ensure that the inverter is powered off. • Use insulated tools and wear personal protective equipment when replacing the fan. Model number 10KW 12KW 15KW 20KW Operational steps: Step 1 Remove the fan cover, disconnect the fan cable connections and remove the faulty fan. - Page 30 50HZ AC grid frequency(Hz) AC/DC surge protection Nominal output current(A) 12.2 15.2 18.2 22.8 30.3 Anti-islanding protection Max. output current(A) 11.4 15.3 22.8 28.5 37.9 AC over current protection Adjustable power factor 0.8leading...0.8lagging AC over voltage protection THDI ≤3% General Data Off-grid output Data Operating temperature range(C) –25 °C ...
Need help?
Do you have a question about the TriP Series and is the answer not in the manual?
Questions and answers