
Subscribe to Our Youtube Channel
Related Manuals for Lux Power Technology GEN-LB-EU 7-10K


Summary of Contents for Lux Power Technology GEN-LB-EU 7-10K
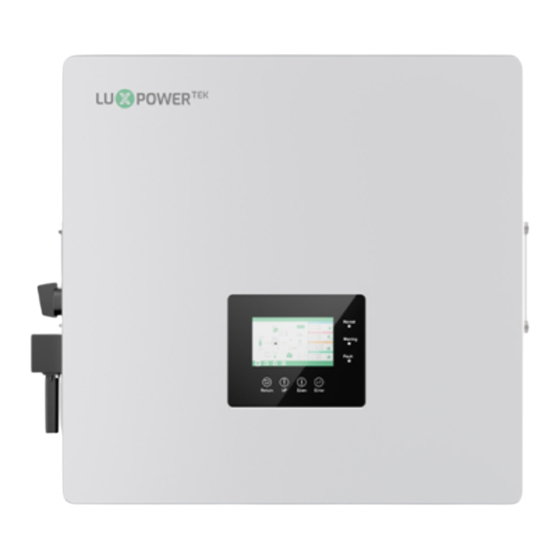
- Page 1 Hybrid inverter User Manual GEN-LB-EU 7-10K Version: UM-SNAUS02001 Version: UM-GEN02002...
- Page 2 User Manual Copyright© 2024 Lux Power Technology Co., Ltd. All Rights Reserved. This manual, protected by the copyright and intellectual property rights of Lux Power Technology, may not be modified, copied, or reproduced without prior written permission. Brands and trademarks mentioned belong to their respective owners.
-
Page 3: Table Of Contents
User Manual Table Of Contents About This Manual 1. Safety 1.1 Safety Instruction 2. Brief Introduction 2.1 System Solution 3. Installation 3.1 Packaging List 3.2 Location Selection and Installation 3.2.1 Requirements for installation location 3.2.2 Installing the inverter 3.3 Connection Overview 3.3.1 System connection 3.4 PV Connection 3.5 Battery Connection... - Page 4 User Manual 3.10.1 Wifi/2G/4G/WLAN dongle connection 3.10.2 Setup the Monitor system 3.10.3 Set homewifi password to dongle 3.10.4 Third party RS485 communication 4. Operation Guide 4.1 Operation Mode 4.1.1 Self-usage mode (Default) 4.1.2 Charge first mode 4.1.3 AC charge mode 4.1.4 Grid peak-shaving Function 4.1.5 Smart load Function 4.2 LCD Display...
-
Page 5: About This Manual
User Manual Revision History Version Date Description UM-GEN02002 2024.07.04 First official release. 1. Safety 1.1 Safety Instruction General Safety Instructions The inverter has been designed and tested strictly according to international safety regulations. Read all safety instructions carefully prior to any work and observe them at all times when working on or with the inverter. - Page 6 User Manual Important Safety Notifications There are many safety issues need to be carefully notified before, during and after the installation, and also in future operation and maintenance, following is important safety notifications to operator, owner and user of this product in appropriate usage. DANGER Dangers of High Voltages and Large Current Beware of high PV voltage.
- Page 7 User Manual WARNING Avoid Misoperation and Inappropriate Usage All the work of this product (system design, installation, operation, setting, configuration and maintenance must be carried out by qualified personnel as required. All connections must be in accordance with local and national regulations and standards. Only when permitted by utility grid, the inverter and system can interconnected with the utility grid.
-
Page 8: Brief Introduction
User Manual 2. Brief Introduction 2.1 System Solution This product and relevant system is suitable for following system applications (system diagram): A. Solar and battery storage system B. AC Coupling with existed solar system LOAD LOAD LOAD Existing On-grid Solar System C. -
Page 9: Installation
3.1 Packing List Before installation, please inspect the unit. Be sure that nothing inside the package is damaged. You should have received the following items in the package: Hybrid inverter User Manual GEN-LB-EU 7-10K Version: UM-SNAUS02001 Version: UM-GEN02002 RJ45 Terminal Communication... -
Page 10: Location Selection And Installation
User Manual 3.2 Location Selection and Installation 3.2.1 Requirements for installation location a. The wall for mounting should be strong enough to bear the weight of inverter. b. Please maintain the minimum clearances below for adequate heat dissipation. 400mm 400mm 400mm 400mm c. -
Page 11: Installing The Inverter
User Manual d. The inverter should be installed upright on a vertical surface. >75 >90 3.2.2 Install the inverter The inverter is wall-mounted type, should be installed on a vertical, solid mounting surface, such as wood studs, brick or concrete wall. Two or more persons may be needed to install the inverter due to its weight. - Page 12 User Manual Step 2. Install the expansion bolts into the holes and tighten them, then use the corresponding nuts and washers (packaged together with the expansion bolts) to install and fix the wall-mounting bracket on the wall Step 3. Hang the inverter onto the wall-mounting bracket and lock the inverter on the wall using 2 self-tapping screws on the top of the inverter.
-
Page 13: Connection Overview
User Manual 3.3 Connection Overview 3.3.1 System Connection The system connection diagram is as below: Generator breaker PV Breakers Battery Breaker Load Breaker UPS Load Load Please prepare the breakers before connetion, breakers selection recommendation for both DC and AC Inverter model MPPT1 string 1: 600V/20A MPPT1 string 1: 600V/20A... - Page 14 User Manual BAT COM CT INV485 BAT+ BAT- PARALLEL INTERFACE LOAD GRID BAT COM INV485 Battery communication port(CAN&RS485) please check Chapter 3.5.2 for Pin definition CT port: please check Chapter 3.6.4 for CT connection INV 485: Debugging port Parallel communication port please check Chapter 3.9 for Parallel connection GEN(NO, NC): Connection for generator auto-start function DRY(NO,NC): reserved...
-
Page 15: Pv Connection
User Manual 3.4 PV Connection PV connection of this hybrid inverter is same as traditional on-grid solar inverter (string inverter). WARNING * Please check the lowest ambient temperature of the location of the installation. The rated Voc on solar panel nameplate is obtained at 25℃. Solar panel Voc will increase with the decreasing of ambient temperature. - Page 16 User Manual Cable Conductor Cable Voltage Withstand Cable model Cross-Sectional Area Requirements 5-9mms 10-8AWG 600V 1. Strip the cable insulation and install 2. Use a crimping tool to connect the terminals, cold-pressed terminals ensuring that the cable cannot be pulled out after crimping.
-
Page 17: Battery Connection
User Manual 3.5 Battery Connection 3.5.1 Battery power cable connection Cable Requirement: This part in this manual only describe the battery connection on Converter side, should you need more 35mm² ×2 or Cross-section detailed information regarding the battery connection 50mm² ×1 on battery side please refer to the manual of the battery. - Page 18 User Manual 1. Unscrew the terminal head of the waterproof 2. Strip the insulation of the cable, Install heat cover and pass the battery cable through the shrink tubing and OT/DT terminal. waterproof head and waterproof cover. 3. Press the DT terminal sleeve wire barrel with 4.
-
Page 19: Battery Communication Cable Connection
User Manual Battery CAN&RS485 BAT COM INV485 Pin12345678 Description BAT CAN H BAT CAN L BAT RS485 A BAT RS485 B After connecting the battery power cable and communication cable, users are required to access the Advanced settings menu on the inverter LCD screen to select the battery type and brand. Grid Freq Charge first(PV) Grid type... -
Page 20: Grid&Eps Load Connection
User Manual 3.6 Grid & EPS load Connection 3.6.1 Grid regulation selection Our inverters are compliant with on-grid regulations in several areas, including standards such as NRS097, G98, G99, and more. When making the selection, please ensure alignment with the specific regulations in your area. -
Page 21: Ac Cable Connection
User Manual 3.6.3 AC cable connection Cable Requirement: Cable Size Minimum Voltage 600V 9-7 AWG(6-10mm) Step 1: Installation of Grid Connector Component Overview Socket Cable Seal Terminal Block a) Thread the AC cable through the cable seal and socket. Insert the conductorsfully into the corresponding terminals of the terminal block and tighten the screws. - Page 22 User Manual b) Refer to the image to ensure correct AC cable connection. Grid terminal is black, LOAD terminal is black, without foolproof design with foolproof design GEN terminal is blue, with foolproof design Assemble the Grid connector, ensuring that the ribs of the terminal block andthe grooves on the housing are fully engaged until you feel or hear a distinct “click”.
-
Page 23: Ct/Meter Connection
User Manual Step2: Installation of LOAD Connector Align the LOAD connector with the AC terminals, and manually engage them until you hear or feel a distinct “click”. Install an AC circuit breaker (AC switch) between the inverter and the grid. Before connecting the AC cable from the inverter to the AC circuit breaker, ensure the AC circuit breaker is functioning properly. - Page 24 User Manual BAT COM CT INV485 BAT+ BAT- PARALLEL INTERFACE LOAD GRID GRID Please refer to the above connection diagram for the correct positions of CTs. The arrows on the CTs must point to inverter side. CT Clamp Ratio The Luxpower inverters support two ratios of CT clamp-1000:1 and 3000:1. The CT ratio of the CTs in the accessory bag is 1000:1.
-
Page 25: Working With Generator
User Manual Meter Connection BAT COM INV485 Currently only EASTRON SDM630-Modbus meters can be used. If you need to use meter for import/export detection instead of CTs, you need to connect it to the Meter 485A and 485B terminals on the inverter, please contact Luxpowertek for detailed guideline. - Page 26 User Manual Generator Connection-Power Cut Backup Utility Meter BAT COM INV485 7 9 8 6 6 480r/ kWh 10A GRID LOAD Parllel Service Disconnect Inverter Disconnect Generator 2-wire start Backup Panel Generator Disconnect When generator is started, all the loads connected to LOAD will be supplied by the generator. Meanwhile battery will be charged.
-
Page 27: Generator Startup And Stop Settings
User Manual 3.7.2 Generator Startup and Stop settings Operating Mode Basic Use SOC % Use Bat V Bat charge current limit(A) Charge AC charge According to SOC/Volt Discharge AC charge power(kW) Start AC charge SOC(%) Advanced Start AC charge Volt (V) Time 1 Stop AC charge SOC(%) Debug... - Page 28 User Manual Grid CT Connection for AC coupled solar system Utility Meter BAT COM INV485 7 9 8 6 6 480r/ kWh GRID LOAD Parllel Inverter Disconnect Main Panel Existing Solar Backup Panel System After AC couple function enabled: When the Grid is on, the GEN terminal is connected to the grid terminal inside the inverter. In this case the hybrid inverter will bypass the interactive inverter AC to the grid and LOAD.
-
Page 29: Parallel System Connection
User Manual 3.9 Parallel System Connection 3.9.1 Connection for paralleling system The hybrid inverter supports parallel connection to expand power and energy capacity to suit different using scenarios. The system connection for single-phase paralleling is as below:... - Page 30 User Manual The system connection for three-phase paralleling is as below:...
- Page 31 User Manual Please put the 2-bit CAN balancing resistor switch to ON status for the first and end inverter of the daisy chain loop. Please put the CAN communication PIN to ON status for the first and the end inverter Parallel line BAT COM INV485...
-
Page 32: Monitor System Setup
User Manual 3. Set the system as a parallel group in the monitor system Asia English 文 Monitor Data Configuration Overview Maintenance Stations Overview Station Name Search by inverter SN Device Overview Serial number Status Solar Power Charge Power Discharge Power Load Solar Yield Battery Dischar... -
Page 33: Setup The Monitor System
User Manual 3.10.2 Setup the monitor system 1. Sign up an account on the mobile phone APP or Website The "customer code" is a code we assigned to your distributor or installer. You can contact your supplier for their code. 2. -
Page 34: Set Homewifi Password To Dongle
User Manual 3.10.3 Set homewifi password to dongle 1. Connect your mobile phone to the “BAxxxxxxxx” wireless network where “BAxxxxxxxx” is the serial number of the WiFi dongle. 2. Click the "WiFi MODULE CONNECT" button on the APP 3. Select the home WiFi that the WiFi dongle is to be connected to, enter the WiFi's password. And then click "HomeWifi Connect". -
Page 35: Third Party Rs485 Communication
User Manual Please download the following guides for setting up WiFi dongle and monitoring account at Document Reference: 1. Wifi Quick Guidance Quick guidance for setting connection of WiFi module to home WiFi, you can also find a printed version in the packaging of the WiFi module. -
Page 36: Operation Guide
User Manual 4. Operation Guide 4.1 Operation Mode and Function The inverter has different working modes to meet customers' various demands, the working modes are as below: 4.1.1 Self-consumption Mode (Default) In this mode, the priority order of load supply source is Solar >Battery >Grid. The priority order of solar power usage is Load >Battery >Grid. -
Page 37: Charge First Mode
User Manual 4.1.2 Charge First Mode The priority order of solar power usage will be Battery >Load >Grid. During the Charge Priority time period, load is first supplied with grid power. If there is excess solar power after battery charging, the excess solar power will take load together with grid power. -
Page 38: Ac Charge Mode
User Manual 4.1.3 AC Charge Function (Notes: During the AC charging time period, the battery does not discharge.) Users can charge battery with grid power when electricity price is cheap, and discharge battery power to supply load or export to the grid when electricity price is high. Application Scenarios When users have a Time of Use(TOU) rate plan. -
Page 39: Smart Load Function
User Manual 4.1.5 Smart load Function Smart Load: This function is to make the Gen input connection point as Grid peak-shaving Basic Peak-shaving power(kW) an load connection point, if you enable it, inverter will Time 1 Start SOC1 Start Volt1 Charge supply power to this load when the battery SOC and PV Time 2... - Page 40 User Manual Detailed System Information Click on the pie icon at the bottom of the Vpv1 Ppv1 Solar screen and, you'll be able to view the Vpv2 Ppv2 Battery detailed real time solar information, battery information, grid information and EPS output Grid information.
-
Page 41: Setting Parameters
User Manual Error code Error time Alarm code Alarm time Fault status Fault status Alarm status Alarm status Fault record Fault record Alarm record Alarm record 4.2.2 Setting Parameters Clicking on the gear icon at the bottom of the screen, you'll get into the parameter setting page of the inverter. - Page 42 User Manual Charge first: PV charge configuration. When using enable Charge first, Charge first(PV) Basic PV will charge the battery as a priority, set time periods Time 1 Charge first power(kW) Charge when PV charge can happen, charge first power(kW) to Time 2 Stop charge first SOC(%) Time 3...
- Page 43 User Manual d. Advanced setting Grid type: You can choose by yourself, 240/120V, 208/120V, Grid Freq Grid type Basic 230 V Grid regulation Reconnect time(S) 3:SouthAfrica Battery type: Charge No battery, lead-acid or lithium-ion. Discharge If lead-acid battery is selected, please input correct Advanced battery capacity Debug...
-
Page 44: Start-Up And Shut Down The Inverter
User Manual 4.3 Start-up and shut down the inverter 4.3.1 Start up the inverter Step 1. Turn on the battery system firstly, then turn on the DC breaker between battery and inverter. Step 2. Make sure the PV voltage of the strings are higher than 120V, and check if the inverter works in PV charge or PV charge back-up mode. -
Page 45: Led Displays
User Manual 5.2 LED Displays Display Suggestion Description Solid lit Working normally Green LED Flashing Wait till upgrading complete Firmware upgrading Solid lit Need troubleshooting Yellow LED Warning, inverter working Solid lit Fault, inverter stop work Red LED Need troubleshooting 5.3 Troubleshooting Based On LCD Displays Once there is any warning or fault occurring, users can troubleshoot according to the LED status and the warning/fault information on the LCD. - Page 46 User Manual Fault Meaning Troubleshooting M3 microprocessor fails to receive M3 Rx failure Restart inverter, if the error still exists, contact data from DSP Luxpower service or your inverter supplier. Incorrect model value Model fault 1. Check if the L1, L2 and N wires are connected correctly at inverter LOAD output port;...
- Page 47 User Manual 2. Alarm on the LCD If the dot on the left of fault item is yellow, it means the fault is active. When it is grey, it means the fault is deactive Fault status Bat Com failure AFCI Com failure AFCI high Meter Com failure Bat fault...
- Page 48 User Manual Restart inverter. If fault still exists, contact GFCI module fault GFCI module is abnormal Luxpower service or your inverter supplier. Restart inverter. If fault still exists, contact Bat volt high Battery voltage is too high Luxpower service or your inverter supplier. Restart inverter.
- Page 49 User Manual PV Input data GEN-LB-EU 7K GEN-LB-EU 8K GEN-LB-EU 10K Max. usable input current(A) 25/25 25/25 25/25 Max. short circuit input current(A) 34/34 34/34 34/34 Start input voltage(V) Startup voltage(V) Full power MPPT voltage range(V) 170-480 170-480 200-480 DC nominal voltage(V) MPPT tracker DC voltage range(V) 100-600 100-600...
- Page 50 User Manual Note...
- Page 51 User Manual...
- Page 52 Lux Power Technology Co., Ltd Headquarter: +86 755 8520 9056 www.luxpowertek.com Contact us: info@luxpowerttek.com 092.20039AA...
Need help?
Do you have a question about the GEN-LB-EU 7-10K and is the answer not in the manual?
Questions and answers