Table of Contents
Advertisement
Quick Links
Advertisement
Table of Contents

Subscribe to Our Youtube Channel
Related Manuals for motogadget mo.hub


Summary of Contents for motogadget mo.hub
- Page 1 Instruction Manual mo.hub V1.2...
- Page 2 Thank you very much for purchasing a high quality motogadget product - Made in Germany. Please read the following information and recommendations thoroughly and follow these in- structions during installation and use of the instrument. No liability shall be assumed by mo-...
-
Page 3: Exclusion Of Liability
In this regard, we refer to our General Terms of Business and Delivery, which are published at www.motogadget.com. Should a return of the received delivery be agreed, please note that we only take back goods in their original packaging. The mo.unit and its accessories must be returned within the legal period of time and without any traces of use. -
Page 4: Safety Instructions
TIVE TERMINAL AND THEN THE POSITIVE TERMINAL. FOR RECONNECTION PROCEED IN THE REVERSE ORDER. • USING THE MO.HUB WITH PLUS POLE CONNECTED TO VEHICLE FRAME (OLDER ENGLISH MOTORCYCLES) IS NOT POSSIBLE. • INSTALLATION AND ELECTRICAL CONNECTION OF THE MO.HUB MAY ONLY BE CARRIED OUT BY A CERTIFIED MOTORCYCLE TECHNICIAN. -
Page 5: Intended Use
4.1.1 Smartphone and vehicle via OBD (On Board Diagnostics) interface For compatible vehicles, we provide suitable OBD plugs, which cables are need to be connected to the mo.hub terminals. The instructions for this are given in the coupling process within the „mo.ride“ app. - Page 6 4.2 Device cold and warm start During a cold start, the battery plus is connected to mo.hub Terminal 1 in addition to the vehic- le earth (mo.hub Terminal 3). The device is initializing during a cold start. This process takes approx.
- Page 7 If a mo.unit blue and a mo.hub are used in a vehicle at the same time, the Bluetooth connection is only possible with one device. All other devices are connected to each other by cable via the motogadget LIN bus.
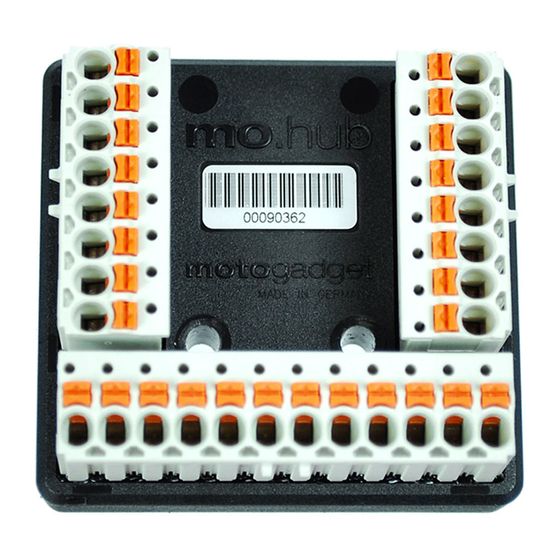
- Page 8 5 Overview area of Bluetooth Antenna- serial no. do not cover with metal (important for support requests) terminal mouning holes for Status LED plug-in / relase connecting cabel by phusing marking cable cover orange inserts with a screw driver blade...
- Page 9 6 Mounting the cable cover & cable guide M3x16 countersunk cable ties...
-
Page 10: Mounting Options
7 Mounting options cable ties M4 screws... - Page 11 8. Connecting motogadget instruments to the mo.hub 8.1 motoscope mini and combi-frame or handle bar clamp mo.hub motoscope mini combi-frame HD handlebar clamp terminal no. wire color wire color wire color orange | yellow | purple black orange | blue...
- Page 12 8.2 motoscope tiny und motoscope classic mo.hub motoscope tiny motoscope classic terminal no. wire color wire color black black and white-green brown purple yellow orange white green green white grey yellow white-orange blue blue white-yellow...
- Page 13 (+12V) neutral switch (switching to GND) ABS indicator light (+12V) oil temperature sensor (motogadget article 9001005 / 9001007 / 9001002) oil pressure switch (switching to GND) air temperature sensor (motogadget article 1005090) water temperature sensor (motogadget article 9001005 / 9001007 / 9001002)
- Page 14 7) motogadget battery connection cable, OEM instruments connector plug and motogadget Instuments Lay the cable free of kinking and abrasion to the mo.hub and cable with cable ties attach to the frame. Allow enough play for steering movements.
- Page 15 8) Insert the plug of the OEM speedometer (not tachometer!) In the with motogadget Insert vehicle plug. The second OEM instrument plug (if available) with Protect heat shrink tubing from splash water. 9) The eyelet of the motogadget battery connection cable with the battery-plus connection terminal connect 10) Connect the battery (fi...
- Page 16 7) OEM instrument connector and motogadget instrument cable kink and scuff -free Lay to the mo.hub and secure the cables to the frame with cable ties. Suffi cient Allow game for steering movements.
-
Page 17: Declaration Of Conformity
Before returning your mo.hub for technical inspection, contact our technical support. Therefore, visit our website and follow the instructions in area “support”. Please provide the following informations completely: mo.hub serial no. (serial label on top of mo.hub). For returning an item follow the instruction in chapter “service” on our website. - Page 18 Regulations PRODUCT INFORMATION: Manufacturer: motogadget GmbH Model: mo.hub FCC ID: 2AIF8-4005000 21495-4005000 FCC COMPLIANCE STATEMENT: This device complies with part 15 of the FCC Rules. Operation is subject to the following two conditions: (1)This device may not cause harmful interference, and (2) this device must accept any interference received, including interference that may cause undesired operation.
- Page 19 If not installed and used in accordance with the instructions, it may cause harmful interference to radio communications. However, there is no guarantee that interference will not occur in a particular installation. If this equipment does cause harmful interference to radio or television reception, which can be determined by turning the equipment off...
Need help?
Do you have a question about the mo.hub and is the answer not in the manual?
Questions and answers