Table of Contents
Advertisement
Quick Links
User manual
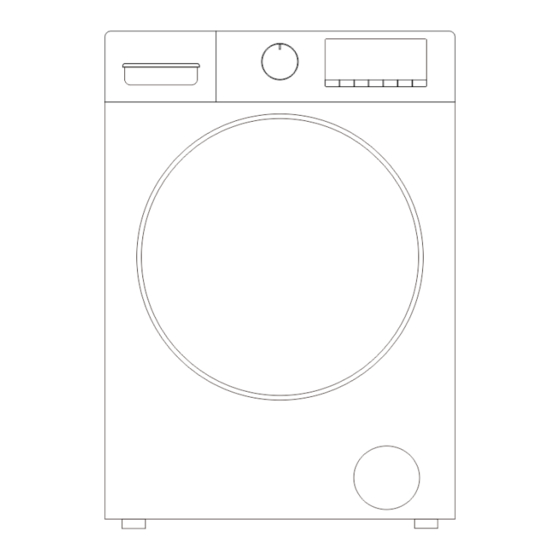
Front loading washing machine
Welcome to Your New washing machine!
Congratulations on your selection of a new New World brand washing machine for your
laundry needs. We are confident you will enjoy the superior performance and reliability.
Please do not hesitate to contact our Customer Service department if you have any questions
or comments with your new washing machine.
Thank you for choosing New World brand washing machine.
Model:
NWWM814W
Advertisement
Table of Contents

Subscribe to Our Youtube Channel
Related Manuals for New World NWWM814W

Summary of Contents for New World NWWM814W
- Page 1 NWWM814W Welcome to Your New washing machine! Congratulations on your selection of a new New World brand washing machine for your laundry needs. We are confident you will enjoy the superior performance and reliability. Please do not hesitate to contact our Customer Service department if you have any questions or comments with your new washing machine.
-
Page 2: Table Of Contents
Contents Safety instruction. 2-3-4-5 Safety instruction Disposal Installation. 6-7-8-9-10-11-12 Unpacking, Carrying the appliance What’s included Removing the transport bolts Choosing the Right Location Levelling the appliance Connecting the electricity and water supplies Technical date Description of the washing machine. 13-14 Control panel Display Preparing and sorting laundry. -
Page 3: Safety Instruction
Safety instruction Do not machine wash fiberglass materials (such Before using the washer, read these safety as curtains and windows coverings that use instructions. Keep them nearby for future reference. fiberglass materials). Small particles may remain in These instructions and the washer itself provide the washer and stick to fabrics in subsequent wash important safety warnings, to be observed at all loads causing skin irritation. -
Page 4: Safety Instruction Disposal
Safety instruction After installation of the washer, wait a few hours INSTALLATION before starting it so that acclimates to the environmental conditions of the room. The washer must be handled and installed by two Make sure that the ventilation openings in the or more persons –... - Page 5 Safety instruction ELECTRICAL WARNING CLEANING AND MAINTENANCE It must be possible to disconnect the washer from WARNING! Ensure that the washer is switched off the power supply by unplugging it if plug is and disconnected from the power supply and turn accessible, or by a multi-pole switch installed water before...
- Page 6 Safety instruction DISPOSAL OF PACKAGE MATERIALS The packaging material is 100% recyclable and is marked with the recycle symbol The various parts of packaging must therefore be disposed of responsibly and in full compliance with local authority regulations governing waste disposal.
-
Page 7: Installation
Installation Carrying the washer This instruction manual should be kept in a safe place for future reference. If the washer is sold, Don’t do it by yourself alone. transferred or moved, make sure that the instruction manual remains with the machine so Tilt the washer backward. -
Page 8: What's Included
Installation What’s included ⚫ Description of the parts ⚫ Accessories... -
Page 9: Removing The Transport Bolts
Installation Choosing the right location Removing the transport bolts Locations the appliance is not to be CAUTION ● installed DAMAGE TO THE APPLIANCE OR INJURY POSSIBLE - In a damp place or where the washer may be ⚫ The washer is secured for transport with exposed to rain, etc.(As this could cause electric transport bolts. - Page 10 Installation Leveling the washer 2. Turn the washer foot to extend it downward as Importance of leveling the washer far as necessary to raise the corner of the washer The washer uses high spin speeds to remove water the correct amount to level the washer. at the end of the wash cycle.
-
Page 11: Connecting The Electricity And Water Supplies
Installation Connecting the drain hose Connection the electricity and water Height of drain point supplies Height difference between the floor and drainage point: min. 60cm(24 in.) and max. 100cm(39 in.). Connecting the water inlet hose 1. Connect one end of the water inlet hose to a cold water tap and tighten by hand (see figure). - Page 12 Installation Before connecting the drain hose ensure that · When heating, the maximum current of the any blanks or removable ends have been taken washer is 10A, so please make sure that the off the spigot. power supply system (voltage, current and the cable) is applicable to the load of the applied ■...
-
Page 13: Technical Date
WARNING! The company denies all liability if and when these norms are not respected. Technical date Model NWWM814W Rated washing capacity (kg) Rated voltage 220~240V Rated frequency 50Hz... -
Page 14: Control Panel
Description of the appliance Control panel A---WASH CYCLE SELECTOR knob: Used to set the D---STEAM button: Press to set the STEAM wash desired wash cycle (see “Table of wash cycles”). cycle. ⚫ OFF position : Turn the Linear mark on the For a detailed description, see→... - Page 15 Description of the appliance M---Display The display is useful when programming the machine and provides a great deal of information. 1---Temperature indicator 5---DELAY END indicator When a program selected, default The lit symbol indicates the DELAY END temperature value of this program will appears on function is activated.
-
Page 16: Preparing And Sorting Laundry
Preparing and sorting the laundry Preparing the laundry Sorting the laundry according to colour and degree of soiling Notice: Damage to the washer/fabric Sort laundry items according to color, degree of Foreign objects (e.g. coins, paper-clips, needles, nails) may damage the laundry or components in soiling and recommended wash temperature range. -
Page 17: Sorting Laundry According To Their Care Label Specifications
Preparing and sorting the laundry Sorting laundry according to their care label specifications The symbols on labels of your garments will help you in choosing the suitable wash program, the right temperature, wash cycles, and ironing methods. Don’t forget to give a glance to these useful indications! -
Page 18: Various Cycles And Functions
Various cycles and functions Table of wash cycle Temp Kind of detergent Description Max.Lo Wash cycle Detergents softener ℃ ad (kg) Universal Special (Max) For blended fabrics, e.g. cotton, linen L / P and synthetic fibres. For daily items of cotton, linen and Cotton L / P cotton blends. -
Page 19: Various Cycles
Various cycles and functions Various cycles Special wash cycles ONE TOUCH wash cycle Baby care : a cycle designed for dirt typical of children’s garments in that it effectively removes ONE TOUCH wash cycle can intelligently detect the any traces of residual detergent. weight of laundry and match different washing time and temperature to realize intelligent washing. -
Page 20: Various Functions
Various cycles and functions Various functions 4. After the child lock function is set. When the Delay end machine is turned on again, the machine directly run the program before turning off the machine. Press DELAY END button to set the program end (Delay end) time in one hour increments to a Cancelling the buzzer maximum of 24 h (hours). - Page 21 Various cycles and functions Load balancing system The washer has an automatic detection system for eccentric load. In the process of spinning, if the clothes are unevenly distributed, the washer will level and adjust the clothes until the clothes are evenly distributed before spinning.
-
Page 22: How To Use The Appliance
How to use the appliance Before loading your first load of How to use the washer laundry 1. Load laundry Open the door and load the laundry. Load the Your new washer was tested before leaving the articles one at a time loosely into the drum, factory. - Page 23 How to use the appliance ! Use powder detergent for white cotton garments, !If the selected option is incompatible with the for pre-washing, and for washing at temperatures program set, the incompatibility will be signaled by over 60℃. a buzzer and the corresponding indicator light will flash.
- Page 24 How to use the appliance Pause a running program and open the door, if needed Press START/PAUSE button to pause a running program. Provided water level or temperature is not too high, the DOOR LOCK indicator light turns off. You can open the door, for example to add more laundry, or to remove laundry which was loaded by mistake.
-
Page 25: Care And Maintenance
Care and maintenance Cleaning the drum Your washer is designed to give you years of service. Observe the following instructions to maintain and protect your washer and keep it in top operating Metallic debris left in the drum can product rust condition. -
Page 26: Checking The Water Inlet Hose
Care and maintenance Checking the water inlet hose Cleaning the mesh filter in the water supply hose Check the water inlet hose at least once a year. If 1. Close water tap and unscrew the water inlet there are any cracks, it should be replaced hose. -
Page 27: Cleaning The Drain Pump
Care and maintenance Cleaning the drain pump 4. Use the pull-out drain hose located in the pump access opening to drain the remaining water into WARNING a suitable container (up to 5.3U.S.gallon/20 liters RISK OF SCALDING of water may be drained). Pull the sealing cap Risk of hot water injury to skin! from the hose and lay the hose over the side of Allow the water to cool down prior to actuating the... -
Page 28: Troubleshooting
Troubleshooting Your washer could occasionally fail to work. Before contacting the service center, make sure that the problem cannot be solved easily using the following list Problem Possible cause / solutions · The appliance is not plugged into the socket fully, or not enough to make The machine does not contact. - Page 29 Troubleshooting Problem Possible cause / solutions · Out of Balance detected when attempting to go into a spin cycle – If this happens the washer will continue to try to repeat the distribution of the load The machine wont spin required before the machine will go into higher spin speeds –...
- Page 30 Troubleshooting In case of the following faults, the fault state will be detected by the microcomputer system, with the buzzer sounds issued and the following fault codes display: Fault codes Fault type Possible cause / solutions · Check whether the faucet is turned on? Whether the water supply is cut off? Whether the water inlet hose and the filter of No inlet water the water inlet valve are blocked? and whether the water inlet...
-
Page 31: Product Fiche
Product fiche Suppliers name or trade mark: New World Suppliers mode identifier: NWWM814W Parameter Value Parameter Value Height Rated capacity ( ) (kg) Dimensions in cm ( Width Depth ) Energy efficiency index ( )(EEI 60,0 Energy efficiency class (... - Page 32 Product fiche Entry method for new standard energy efficiency (EN60456:2016 + FprAA:2020) Eco 40-60, (Parameters are not adjusted by default) 20 ℃ 8kg BLDC Cotton Wool Quick wash Rated capacity / kg Program duration 0:39 0:57 0:50 0:15 ( h:min ) Energy consumption 0.24 1.25...
- Page 33 Product fiche ⚫ That the Eco 40-60 program is able to clean normally soiled cotton laundry declared to be washable at 40℃ or 60℃, together in the same cycle, and that this program is used to assess the compliance with the EU eco-design legislation; ⚫...
- Page 34 • Specifications ore subject to change without notice. • New World disclaim any liability for loss or damage arising from the breakdown of the product. • This guarantee is in addition lo and does not diminish your statutory or legal rights.
Need help?
Do you have a question about the NWWM814W and is the answer not in the manual?
Questions and answers