Ambu aBox 2 Instructions For Use Manual
Hide thumbs
Also See for aBox 2:
- Replacement manual (16 pages) ,
- Instructions for use manual (59 pages)

Related Manuals for Ambu aBox 2


Summary of Contents for Ambu aBox 2
- Page 1 INSTRUCTIONS FOR USE Ambu aBox ® ™ For use by trained healthcare professionals only. For use with compatible Ambu visualization devices. ®...
- Page 2 QUICK GUIDE...
-
Page 3: Table Of Contents
Content Page 1. Important Information – Read Before Use ..................5 1.1. Intended use/ Indications for use ............................5 1.2. Intended patient population ............................5 1.3. Intended user profile ................................5 1.4. Clinical benefits ..................................5 1.5. Potential adverse events ..............................5 1.6. General notes ...................................5 1.7. - Page 4 10.6. Using the stopwatch ............................... 26 10.7. Using dual view .................................. 26 10.8. Taking photos and recording videos ........................27 10.9. Current procedure folder ............................. 27 10.10. After use of the displaying unit ..........................28 11. File Handling in The Archive ......................28 11.1.
-
Page 5: Important Information - Read Before Use
They describe only the basic operation and precautions related to the operation of the Ambu® aBox™ 2. In these Instructions for Use, the term displaying unit refers to Ambu® aBox™ 2. The terms visualization device and endoscope are used interchangeably throughout the document and refer to compatible Ambu endoscopes and other visualization devices that can be connected to and used with the displaying unit. - Page 6 WARNINGS 1. To avoid patient injury during procedure, be careful to check whether the image on the screen is a live image or a recorded image and verify that the orientation of the image is as expected. 2. To minimize risk of contamination, always wear gloves during handling of the displaying unit and ensure that the displaying unit is cleaned and disinfected before and after each use in accordance with the chapter 14.
-
Page 7: Device Description
Item number 505001000 2.2. Product compatibility aBox 2 includes two connector ports on the front marked in colours. Ambu visualization devices are compatible with aBox 2 at the colour-coded connection mechanism and connector geometry. A full list of compatible visualization devices is displayed in the user interface of the displaying unit. -
Page 8: Endoscope Activation
The activation codes are found on Ambu's website via the URL shown on the displaying unit's screen next to the input field where the activation code is to be entered. -
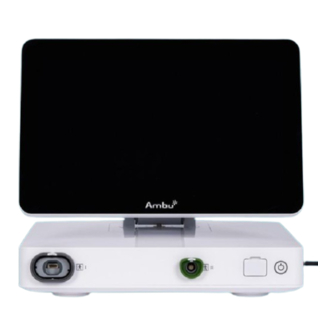
Page 9: Description Of Components
13 14 Component Function Displays the graphical user interface and shows Touch screen the live image from the Ambu visualization device. VDI port (connector port Connector port geometry and colour for specific Ambu ensures correct connection with compatible visualization devices) visualization devices. -
Page 10: Spare Parts
Power cables – J (CH), K (DK), I (AUS) 505000520 Power cable – G (UK), E/F (EU, not DK, CH) 505000522 2.6. System overview A complete Ambu Imaging System is configured as illustrated in the figure below. The various connections are described in more detail in chapter 12. -
Page 11: Explanation Of Symbols Used
• Management of the displaying unit user profiles • Maintenance of user passwords • Monitoring and audit of the Ambu imaging system • Complete data erasure before disposal of the displaying unit 3. Explanation of Symbols Used Symbols for the... -
Page 12: Getting Started
Pressure Limitation UK Conformity Catalogue Number Assessed A full list of symbol explanations can be found on ambu.com/symbol-explanation. 4. Getting Started 4.1. First-time setup Follow the steps below before using the displaying unit for the first time. Letters in grey circles refer to the illustrations in the Quick Guide on page 2. - Page 13 If selection of a new country is necessary, please contact your local Ambu representative. The displaying unit’s language can be changed by the Administrator at any time. Change system language: •...
-
Page 14: User Profiles
• Select the required setting below Time format • Scroll the hours and minutes below Set time to set the time. • Select the required date in the calendar. 4.2. User profiles User profiles are created as different user types according to their purpose (see table below). Only the Administrator has full access to the displaying unit's settings and functions, including the creation of new users. -
Page 15: General Settings
Create an Advanced user: • Press the Settings tab. • Press User Profiles, then press Add user 5 . • Enter username, password, and repeated password in the respective input fields 6 , and press the Save icon 7 . To delete a user profile, press the user name, then press the delete icon. -
Page 16: Network Setup
Be aware that if a function is disabled (not green), the symbol is not visible in the menu where it is normally located. 6. Network Setup Importing a worklist or transferring imagery requires that the displaying unit is connected to the network via Wi-Fi or LAN/Ethernet cable. -
Page 17: Wi-Fi Network With Wpa2 Enterprise Authentication (Username And Password Required)
6.1.3. Wi-Fi network with WPA2 Enterprise authentication (username and password required) 1) Enter username in the Identity field. 2) Enter password in the Password field. 3) Select the required certificate 4) Press Connect 5) When the connection has been established, a Wi-Fi symbol appears in the Toolbar. -
Page 18: Lan Connection Via Ethernet Cable
6.2. LAN connection via Ethernet cable 1) Connect a LAN cable to the Ethernet connection port on the back of the displaying unit and to a router or LAN wall socket. 2) In the Network menu, check the LAN connection status shown below Ethernet. 6.3. -
Page 19: Set Up Connection To Worklist Server
• Press the input fields next to PACS AE title, Host name and Port number and enter the required information in each field. • Press the required setting next to TLS Note: If you enable TLS, you need to import the required TLS certificate from a server or USB flash drive (see instructions further below). - Page 20 Import TLS certificate from server or USB flash drive: You can use TLS for enhanced security when setting up PACS and Worklist server connections. Enabling TLS requires a TLS certificate to be imported to the displaying unit from a server or from a USB flash drive.
-
Page 21: Output Setup
Information needed Explanation This is the name of the PACS. Used in the export menu to PACS name select the PACS when transferring photos and videos. PACS Application Entity Title. PACS AE Title The maximum length of the AE Title is 16 characters. Host name IP-address, MAC address or full web address for the PACS. -
Page 22: Endoscope Buttons Configuration
Note: For preparing and operating the Ambu visualization device, please refer to the Instructions for Use for the specific visualization device. 8. Verify that a live video image appears on the screen by pointing the distal end of the Ambu visualization device towards an object, e.g. the palm of your hand. -
Page 23: Starting And Stopping A Procedure
10.2. Starting and stopping a procedure 10.2.1. Starting a procedure When an Ambu visualization device is connected to the displaying unit, a new procedure starts when one of the following actions is performed: 1) a patient is selected from Worklist, 2) a photo or video is captured, or 3) the stopwatch is activated. -
Page 24: Overview Of Live View Functions
10.4. Overview of Live View functions When an Ambu visualization device has been connected to the displaying unit, the Live View functions are available via the Live View tab. Overview of Live View functions Icon Name Function Showing the live image when an Ambu visualization Live View tab device is connected. -
Page 25: Adjust Colour, Contrast, Sharpness And Brightness
10.5.5. Adjust ARC (Advanced Red Contrast) setting ARC is Ambu's proprietary red-colour contrast enhancement algorithm, which amplifies the red colour relative to other colour components at the same location. ARC is intended to improve the visibility of red colour tones in the image. An adjustment of the strength of ARC for each individual type of visualization device will be stored after the displaying unit has been turned off. -
Page 26: Using The Stopwatch
Use Dual View: • Connect two Ambu visualization devices to connector ports on the displaying unit. • The Live View screen shows two images, one larger and one smaller. The number shown in each image corresponds to the number on the connector port of the displaying unit. -
Page 27: Taking Photos And Recording Videos
10.8. Taking photos and recording videos Take a photo: • Press the photo icon to take a photo and save it in the current procedure folder. Record a video: • Press the video icon to start a video recording. • Press the video icon again to stop the video recording and save the video in the current procedure folder. -
Page 28: After Use Of The Displaying Unit
Follow the steps below after use of the displaying unit. Letters in grey circles refer to the illustrations in the Quick Guide on page 2. 1. Disconnect the Ambu visualization device from the displaying unit H . For disposal of the visualization device, please refer to the Instructions for Use for the specific visualization device. -
Page 29: Exporting Files To Pacs Server Or Usb Flash Drive
11.2. Exporting files to PACS server or USB flash drive Before you export files, ensure that connection to the PACS server has been set up or USB connection has been enabled for file export and a USB flash drive connected to the displaying unit. - Page 30 • Wait until the file export has been confirmed by a pop-up on the screen before you disconnect the displaying unit from the Wi-Fi network or remove the USB flash drive. When files are exported to a USB flash drive, they are placed in a folder with a name composed by the procedure name and the note (if any).
-
Page 31: Deleting Files From The Archive
Explanations of functions in export menu Icon Name Function Press the Bin button to permanently delete photos and videos and any patient data from the displaying unit. To indicate if an export of a photo or video was successful, Export a green export indicator will appear next to the photo or video. -
Page 32: Connecting To An External Monitor
12.1. Connecting to an External Monitor If needed, connect an external monitor to one of the video out ports (3G-SDI or DVI-D) located on the back of the displaying unit (see section 2.4. for video out port locations). Use a medical grade monitor with resolution of at least 1920 x 1080, 60 frames per second (fps) and a monitor size of at least 27”... -
Page 33: Connect External Audio Devices
Select settings for printing: • Press the Settings tab, then press Setup. • Press Printer settings. • Press the required page size Print images via medical printer: • Press the Archive tab, then press Recent. • Press the required procedure folder. •... -
Page 34: Software Updates/Upgrades
If you are experiencing problems with the displaying unit, please follow the Troubleshooting guide in chapter 13 to find a solution. If this does not solve the problem, please contact your local Ambu representative. To solve the problem, Ambu may need a log file providing information about the displaying unit system. -
Page 35: Data Reset
Export a log file: • Press the Settings tab, then press About. • Press Export log files. • Press the USB flash drive name, then press the Export icon • Wait while the log files are exported, then press OK. 13.4. - Page 36 Procedure 1 – Cleaning and disinfection with hypochlorite Hypochlorite-based wipes approved for disinfection of medical devices, e.g., Sani-Cloth® Bleach from PDI, should be used in accordance with the wipe manufacturer’s instructions. Cleaning: Use a wipe to remove heavy soil. All blood and other body fluids must be thoroughly cleaned from surfaces and objects.
-
Page 37: Maintenance
Disinfecting: Wipe the surfaces of the displaying unit for approximately 15 minutes using a piece of sterile gauze moistened with the alcohol mixture indicated below (approximately once every 2 minutes). Follow safety procedures for the handling of isopropyl. The gauze should be moist and not dripping since liquid can affect the electronics inside the displaying unit. - Page 38 Connections USB connections Front: 1 x USB 3.0 type A Back: 3 x USB 3.0 type A and 2 x USB 2.0 type A Video output DVI-D (1920 x 1080 p, 60 fps) and 3G-SDI (1920 x 1080 p, 60 fps) Wi-Fi Supports IEEE Standards 802.11ac/a/b/g/n Ethernet RJ45 connector, 10/100/1000 Mbps...
-
Page 39: Troubleshooting
Swiss: Type J, AC grounded power plug Length of power cables – US, AUS, DK 1800 mm (71") including connector Contact your local Ambu representative for further information 18. Troubleshooting If a problem occurs with the displaying unit, please use this troubleshooting guide to identify the cause and correct the error. - Page 40 Connect/reconnect visualization device connection. visualization device. device. Perform a Power OFF Cycle The displaying unit and the Ambu visualization device have (follow the procedure above communication problems. this table). Failure on visualization Connect a new device or VDI-port on visualization device.
- Page 41 Problem Possible cause Recommended action Perform a Power OFF Cycle Touch interface The displaying unit has internal does not respond. communication problems. (follow the procedure above this table). Low picture Dirty/damp screen. Wipe the screen with a clean quality. cloth as described in chapter 9. Image adjustment settings are Open the Image adjustment not optimal.
-
Page 42: Warranty And Replacement
The warranty applies only to the original customer of Ambu and cannot be assigned or otherwise transferred. In order to avail itself of this limited warranty, if requested by Ambu, the customer must return the displaying unit to Ambu (at its own expense and risk of shipment). In compliance with... - Page 43 Guidance and manufacturer’s declaration – electromagnetic emission The system is intended for use in the electromagnetic environment specified below. The customer or the user of the system should assure that it is used in such an environment. Emissions Test Compliance Electromagnetic Environment Guidance RF emission CISPR 11 Class A...
- Page 44 Guidance and manufacturer’s declaration – electromagnetic immunity The system is intended for use in the electromagnetic environment specified below. The customer or the user of the system should assure that it is used in such an environment. Immunity test IEC 60601-1-2 Compliance Electromagnetic test level...
-
Page 45: Appendix 2. Radio Frequency Compliance
Note 1: At 80 MHz, the higher frequency range applies. Note 2: These guidelines may not apply in all situations. Electromagnetic propagation is affected by absorption and reflection from structures, objects and people. Field strengths from fixed transmitters, such as base stations for radio (cellular/cordless) telephones and land mobile radios, amateur radio, AM and FM radio broadcast, and TV broadcast, cannot be predicted theoretically with accuracy. - Page 46 Guidance and manufacturer’s declaration – Radio frequencies This device complies with Directive 2014/53/EU issued by the Commission of the European Community. Operations in the 5.15 – 5.35 GHz band are restricted to indoor usage only: Check RF regulations in the individual countries Belgium (BE), Bulgaria (BG), Czech Republic (CZ), Denmark (DK), Germany (DE), Estonia (EE), Ireland (IE), Greece (EL), Spain (ES), France (FR), Croatia (HR), Italy (IT), Cyprus (CY), Latvia (LV), Lithuania (LT), Luxembourg (LU), Hungary (HU), Malta (MT), Netherlands (NL), Austria...
- Page 47 Federal Communication Commission Interference Statement (FCC) This device complies with Part 15 of the FCC Rules. Operation is subject to the following two conditions: (1) This device may not cause harmful interference, and (2) this device must accept any interference received, including interference that may cause undesired operation. This equipment has been tested and found to comply with the limits for a Class B digital device, pursuant to Part 15 of the FCC Rules.
-
Page 48: Appendix 3. Cybersecurity
The displaying unit is of medium security risk (according to NIST) as: • The displaying unit does not allow any input from external devices (except from Ambu visualization devices and secured software updates). •... -
Page 49: Appendix 3.1. Network Setup
Appendix 3.1. Network Setup When preparing the network for connection to the displaying unit, the following should be considered: Overview of the existing ports and their communication protocols Item Standards used Comments Wireless IEEE 802.11 The device uses a WPA_Supplicant to support communication WPA2 Wireless communication as TKIP and CCMP. -
Page 50: Appendix 3.3. Software Bill Of Materials (Sbom)
Main known vulnerabilities of each component including explanations of why they are acceptable for this application are continuously updated by Ambu. Contact your local Ambu representative for an up to date list with this information. Vulnerabilities with a low CVSS score are omitted as a consequence of the medium security risk rating of the displaying unit. - Page 51 Title Version Used for The following plugins are used: • v4l2src • glupload • glcolorconvert • vaapipostproc • GStreamer 1.18.6 vaapih264enc • matroskamux • tcpserversink • tcpclientsrc • filesink • qmlglsink Used to generate the private key and OpenSSL 1.1.1i authenticate the public key used to sign the upgrade package.
- Page 52 Ambu A/S Baltorpbakken 13 2750 Ballerup Denmark T +45 72 25 20 00 ambu.com Ambu is a registered trademark and aScope and aBox are trademarks of Ambu A/S.
Need help?
Do you have a question about the aBox 2 and is the answer not in the manual?
Questions and answers