Table of Contents
Advertisement
WaveLinx Lite
User and Programming Manual
This document is intended for installers of the WaveLinx Lite
System
ATTENTION
DISCLAIMER OF LIABILITY: Cooper Lighting Solutions assumes no liability for damages or losses of any kind that may arise from the
improper, careless, or negligent installation, handling or use of the products.
IMPORTANT: This manual provides information on the installation and operation of WaveLinx Lite System. For proper operation it is
important to follow the installation instructions for each product/component.
NOTE: WaveLinx Lite devices operate with other WaveLinx Lite devices and do not require the use of a WaveLinx Pro Wireless Area
Controller. Out-of-the box, WaveLinx Lite devices are not compatible with a WaveLinx Pro Wireless Area Controller. Some WaveLinx Lite
devices may allow firmware conversion to allow them to operate with a WaveLinx Pro Wireless Area Controller.
Advertisement
Table of Contents

Subscribe to Our Youtube Channel
Related Manuals for Cooper WaveLinx Lite


Summary of Contents for Cooper WaveLinx Lite
- Page 1 NOTE: WaveLinx Lite devices operate with other WaveLinx Lite devices and do not require the use of a WaveLinx Pro Wireless Area Controller. Out-of-the box, WaveLinx Lite devices are not compatible with a WaveLinx Pro Wireless Area Controller. Some WaveLinx Lite...
-
Page 2: Table Of Contents
Use the Training Demo ..................................29 Log in to the WaveLinx Lite Mobile Application ............................30 Step 1: Download and install the WaveLinx Lite Mobile Application ....................30 Step 2: Register for WaveLinx Lite Mobile Application Access ......................31 Step 3: Log in to the Mobile Application ............................... 32 Mobile Application Logout .................................. - Page 3 User Manual: WaveLinx Lite (4.0) Delete a Template ..................................... 46 Share Templates with other Registered Users ............................. 47 Share a Template from the Template Page ............................. 48 Share a Template when Inviting Co-Commissioners ........................48 Open a Shared Template .................................. 49 Basic Site Setup Using the Mobile Application ............................
- Page 4 User Manual: WaveLinx Lite (4.0) Move Devices to Different Zones ..............................83 Delete a Zone ....................................84 Modify Devices in Networked Areas ..............................85 Rename Devices ....................................85 Add/Provision a New Device ................................86 Delete Devices (Return to Unprovisioned State)..........................86 Modify Occupancy Sets in Networked Areas ............................
- Page 5 User Manual: WaveLinx Lite (4.0) Enable or Disable Daylighting for a Closed Loop Sensor ........................ 129 Enable or Disable Auto Calibration for a Closed Loop Daylight Sensor ..................130 Manually Calibrate a Closed Loop Daylight Sensor ......................... 132 Test Daylight Sensor Operation in a Standalone Area ........................134 Use Screen Controls to Issue Commands and View Details ........................
- Page 6 User Manual: WaveLinx Lite (4.0) Advanced Daylight Calibration: Calculate the Daylighting Factor Sensitivity Value ................169 www.cooperlighting.com...
-
Page 7: Wavelinx Lite Architecture And General Rules
User Manual: WaveLinx Lite (4.0) Welcome and Introduction WaveLinx Lite (4.0) offers wireless control without the need for a centralized controller for outdoor and indoor applications. Outdoor applications including parking garages, decks, and surrounding areas while indoor applications include office, education, healthcare, hospitality, retail, industrial, and manufacturing. - Page 8 60 feet. For best results, get as close to the device as possible. • After the devices are provisioned, the mobile device running the WaveLinx Lite application can be within 60 feet of any line powered device that belongs to the area.
-
Page 9: Wavelinx Lite Device Reference Sheets
WaveLinx Lite Device Reference Sheets This section contains information about each device used in the WaveLinx Lite System. Each device will have a reference sheet describing the device and its general functionality. Additional details include specific information that will be used for reference throughout the manual. Once familiar with the general programming steps, the reference sheet can act as a quick reference guide for specific device behavior or programming details. -
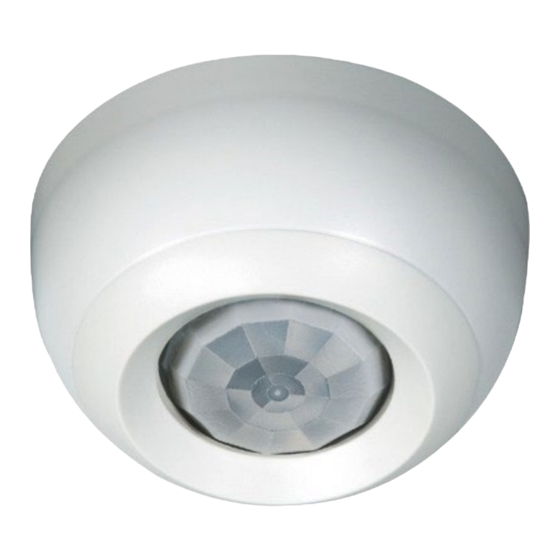
Page 10: Ambient Integrated Sensor Reference Sheet
If a custom template is used, behavior will follow the programming used in the template, not the default behavior shown. Do not use vacancy mode unless WaveLinx Lite Wallstations are installed in the system to allow for manual override. The LED will stop flashing if the light level drops but stays between 50% and 100% of the calibrated light level for 10 minutes OR if the light level falls below 50% of the calibrated light level for 30 seconds. - Page 11 User Manual: WaveLinx Lite (4.0) Ambient Integrated Sensor (continued) Identification Mode Behavior When placed in ‘Blink to Identify’ mode: • The fixture will turn ON for 1 second and then turn OFF for 1 second. • The LED in the sensor window will flash magenta for 1 second, and then turn OFF for 1 second.
-
Page 12: Industrial Fixture High Bay/Low Bay Sensor
Industrial Fixture High Bay/Low Bay Sensor The WaveLinx Lite Industrial Fixture High Bay/Low Bay Sensor uses a simple tool-less twist lock method to connect to a Cooper Lighting fixture with WaveLinx Lite compatible 4-pin Zhaga Book 18 socket. The sensor has an IP66 rating for warehouse and manufacturing environments and provides both occupancy and daylight control that can be easily configured using the WaveLinx Lite Mobile App. - Page 13 User Manual: WaveLinx Lite (4.0) Industrial Fixture High Bay/Low Bay Sensor (continued) Identification Mode Behavior When placed in ‘Blink to Identify’ mode: • The fixture will turn ON for 1 second and then turn OFF for 1 second. • The LED in the sensor window will flash magenta for 1 second, and then turn OFF for 1 second.
-
Page 14: Outdoor Fixture High/Low Mount Sensor Reference Sheet
Outdoor Fixture High/Low Mount Sensor The WaveLinx Lite Outdoor Fixture High/Low Mount Sensor uses a simple tool-less twist lock method to connect to a Cooper Lighting fixture with WaveLinx compatible 4-pin Zhaga Book 18 socket. The sensor has an IP66 rating for outdoor site and indoor environments. - Page 15 User Manual: WaveLinx Lite (4.0) Outdoor Fixture High/Low Mount Sensor (continued) Identification Mode Behavior When placed in ‘Blink to Identify’ mode: • The fixture will turn ON for 1 second and then turn OFF for 1 second. • The LED in the sensor window will flash magenta for 1 second, and then turn OFF for 1 second.
-
Page 16: Tilemount Sensor Kit
The WaveLinx Lite Wireless Tilemount Sensor Kit provides both occupancy and daylight control for 0-10v luminaires that do not support the WaveLinx Lite integrated sensor. A control module connects to the Tilemount sensor and to the 0-10V luminaires for an easy control solution. - Page 17 User Manual: WaveLinx Lite (4.0) Tilemount Sensor Kit (continued) Identification Mode Behavior When placed in ‘Blink to Identify’ mode: • The fixture will turn ON for 1 second and then turn OFF for 1 second. • The LED in the sensor window will flash magenta for 1 second, and then turn OFF for 1 second.
-
Page 18: Line Voltage Wallstation Reference Sheet
Provisioned Device Default Behavior Once provisioned in a networked area using the WaveLinx Lite Mobile App, the Line Voltage Wallstation operates lighting assigned to the same area per the default programming. When a button is pressed, the wallstation LED will blink white for 300ms, blue for 500ms, and then OFF for 1.2 seconds, repeating the cycle for 10 seconds. - Page 19 User Manual: WaveLinx Lite (4.0) Line Voltage Wallstation (continued) Identification Mode Behavior When placed in ‘Blink to Identify’ mode: • The wallstation LED will turn ON for 1 second, turn OFF for 1 second • This cycle repeats for 10 seconds.
-
Page 20: Battery Powered Wallstation Reference Sheet
Provisioned Device Default Behavior Once provisioned in a networked area using the WaveLinx Lite Mobile App, the Line Voltage Wallstation operates lighting assigned to the same area per the default programming. When a button is pressed, the wallstation LED will blink white for 300ms, blue for 500ms, and then OFF for 1.2 seconds, repeating the cycle for 10 seconds. - Page 21 This device does not currently support identification mode. Battery Charge Indicator The wallstation LED as well as the WaveLinx Lite Mobile App will give indication of the current charge of the wallstation’s batteries: Wallstation LED Battery Indicator WaveLinx Mobile App Battery Indicator When a button on the wallstation is pressed, the The Mobile App’s wallstation page will show the...
-
Page 22: Wavelinx Pro Ir Remote
WaveLinx Pro IR Remote ACC-P-RT WaveLinx Pro IR Remote WaveLinx Lite 4.0 supports the use of the WaveLinx Pro IR Remote to place integrated, fixture mounted and tilemount sensors into identification mode. This can aid in streamlining system setup when provisioning devices. -
Page 23: Understand Wavelinx Lite Mobile Application Organization
Understand WaveLinx Lite Mobile Application Organization Before setting up a site, it is important to understand the basic site organization and terminology in the WaveLinx Lite Mobile App as well as the typical application layout. This section walks through these concepts. - Page 24 WaveLinx Lite application must be within 60 feet of the desired device. Note that wallstations have no use case in a standalone area and cannot be assigned to this area type.
-
Page 25: Zone
User Manual: WaveLinx Lite (4.0) Zone Select an area to view the area’s zones. Zone: A zone is a group of lighting loads that should operate together in a networked area. For instance, fixtures in the same row may be grouped into a zone to allow for uniform operation. -
Page 26: Bluetooth Communications
Devices in the standalone area Bluetooth Communications To make programming changes or view settings, a Bluetooth connection must be made between the WaveLinx Lite App mobile device and the WaveLinx Lite device(s). Networked Area When opening a networked area, the mobile application will automatically try to connect to the area’s Bluetooth mesh network. -
Page 27: Standalone Area
Connected reconnect If the icon shows a disconnected status, try moving closer to any line- voltage powered WaveLinx Lite device (within 60 feet) that belongs to the area, and then tap the icon to restart the communications connection search. The connection will automatically close when exiting the networked area. -
Page 28: Programming
User Manual: WaveLinx Lite (4.0) When opening a standalone area, the mobile device will wait until a device is selected to establish a connection. At this point, the mobile app will open a direct Bluetooth connection to that device to allow the device settings to be changed. -
Page 29: Main Menu Options
Use the Training Demo Enter the training demo to learn how to set up a basic WaveLinx Lite site. The demo site does not require any connection to WaveLinx Lite equipment. It allows offline exploration of the basics of navigation, device provisioning and programming. Exit demo mode to reset the demo database and return to normal operation. -
Page 30: Log In To The Wavelinx Lite Mobile Application
The site must also be created. These processes require an internet connection. The WaveLinx Lite Mobile Application is used to provision and organize WaveLinx Lite devices. The mobile application requires user account registration. During registration, a cloud portal will be established for the user account where the site programming will be stored for backup ad sync purposes. -
Page 31: Step 2: Register For Wavelinx Lite Mobile Application Access
User Manual: WaveLinx Lite (4.0) Step 2: Register for WaveLinx Lite Mobile Application Access Registration for an account is required before using the WaveLinx Lite Mobile Application. Once registered, the user will login to the mobile application using the registered email address. -
Page 32: Step 3: Log In To The Mobile Application
2: When prompted for login, enter the registered email address and password, and then tap ‘Login’. 3: The WaveLinx Lite Mobile Application will open and display the option to add a site or will display configured sites if the application has been used previously. -
Page 33: Mobile Application Logout
User Manual: WaveLinx Lite (4.0) Mobile Application Logout Once logged in to the mobile application, it is not necessary to log out. If needed, the logout function can be accessed from the main menu. WARNING: If an app logout is processed, an internet connection will be required to log back in. -
Page 34: Create Templates For Initial Site Setup
• Custom templates are stored to a registered user’s cloud account so that they can be recalled for future projects. The template is not stored in the site file. • Custom templates can be shared with other registered users of the WaveLinx Lite Mobile App. For details on sharing templates, see “Share Templates with other Registered Users” on page 47. -
Page 35: Create A Network Area Custom Template
User Manual: WaveLinx Lite (4.0) Templates can be created from the WaveLinx Lite Mobile App’s menu (recommended method) or through the process of completing the ‘Add Site’ wizard. Menu Add Site The steps in this section describe using the menu option to create templates although the steps for either option will be similar. The user does not need a Bluetooth connection to WaveLinx devices or to the internet to create a custom template, although an internet connection will be necessary to sync the template to the cloud. - Page 36 User Manual: WaveLinx Lite (4.0) 5: Next to ‘Zones’, tap ‘+ Add’ and when prompted, enter the desired zone name for the first zone along with the zone settings: • Zone type: The zone type determines the options and behavior for the zone. For dimmable devices, select ‘Dimmable’ control. For relays or lighting loads without dimming capability, select ‘Non Dimmable’...
- Page 37 User Manual: WaveLinx Lite (4.0) 9: In the ‘Occupied State’ section , tap the edit icon ‘ ’ and set the desired level for each zone for when the occupied action occurs. The level set cannot be lower than the defined level for energy saver. Tap ‘Save’.
-
Page 38: Create A Standalone Area Custom Template
• Trim Settings: Adjust the low-end and high-end trim levels. To create a custom template for a standalone area: 1: Launch the WaveLinx Lite Mobile Application from the app icon. 2: Tap the menu ‘ ’, and then select ‘Templates’. - Page 39 User Manual: WaveLinx Lite (4.0) 5: Next, set the default device occupancy settings. Select the desired hold time and then enable/disable and configure energy saver mode. Define the light level commands for when the occupied, energy saver (dimmable load only), and unoccupied events occur. The occupied level cannot be lower than the defined level for energy saver mode.
-
Page 40: Create A Template From An Existing Area
Before performing the steps below, make certain that the area is configured with the desired settings. To create a template from an existing area: 1: Launch the WaveLinx Lite Mobile Application from the app icon. 2: In the site list, select the site, and then select the desired area. -
Page 41: Copy An Existing Template
User Manual: WaveLinx Lite (4.0) Copy an Existing Template The mobile application allows copying of an existing template to create a new template. To copy a template: 1: From the menu, select ‘Templates’, and then locate the template to copy. Tap the copy icon ‘ ’. -
Page 42: Sync Templates
If the user needs to login to their pre-existing WaveLinx Lite Mobile App using a new mobile device, previously created templates should appear automatically when the templates screen is opened. -
Page 43: Template Maintenance
User Manual: WaveLinx Lite (4.0) Template Maintenance Revert an Area to the Default Template If no devices have been provisioned in an area that has been created from a custom template, the area can be changed back to the default template settings using the ‘Revert Template’... - Page 44 User Manual: WaveLinx Lite (4.0) To modify an existing template: 1: From the menu, select ‘Templates’, and then locate and open the template to modify. Locate and open the template Select ‘Templates’ 2: Tap on the edit icon ‘ ’. In the template details screen, make the desired changes: •...
- Page 45 1: In the site list, select a site. 2: In the area list, select the desired area. The area does not need to be connected to the WaveLinx Lite device or network in the area. Select the site Select the area 3: In the ‘Template’...
-
Page 46: Delete A Template
User Manual: WaveLinx Lite (4.0) 6: At the prompt, select the option to ‘Save Changes to Existing Template’ and then tap ‘Save’. A series of messages may show at the bottom of the screen: • Success Message: An area that has no devices provisioned has been updated with the updated settings. -
Page 47: Share Templates With Other Registered Users
Share Templates with other Registered Users Templates may be shared to other WaveLinx Lite registered user accounts. This process may be helpful if a site has multiple commissioners to ensure that areas with the same layout are consistent through the site’s programming. Sharing templates can also be helpful if a new site has a similar setup to an existing template created by a user. -
Page 48: Share A Template From The Template Page
Share a Template from the Template Page A template can be shared from the ‘Template’ page with anyone that has a WaveLinx Lite registered user account. To share a template: 1: Ensure that the mobile device being used has an internet connection. -
Page 49: Open A Shared Template
User Manual: WaveLinx Lite (4.0) Open a Shared Template When a template is shared, an email is sent to the template recipient alerting them that a template has been shared with them. To load the shared template: 1: Ensure that the mobile device being used has an internet connection and that the registered user account that the template has been shared to is logged in. -
Page 50: Basic Site Setup Using The Mobile Application
Step 1: Create a Site Using the Setup Wizard To start a new setup, first create a site. Each facility administered by the WaveLinx Lite App is created as a unique site. One site can contain up to 28 areas. There is no limit on the number of sites that one user can create. -
Page 51: Step 2: Create Or Load Templates In The Site Setup Wizard
User Manual: WaveLinx Lite (4.0) Step 2: Create or Load Templates in the Site Setup Wizard Templates can be custom created matching common configurations for the site being programmed or the area can be created with the default template. If using the default template, all areas will be created with the following settings:... -
Page 52: Step 3: Create Areas Using The Site Setup Wizard
User Manual: WaveLinx Lite (4.0) 3: To load previously created templates, select ‘Select from User Templates’. Select the templates to add from both the ‘Networked’ and ‘Standalone’ tabs until all the desired templates are selected. Tap ‘Add’. 4: The newly created or loaded templates will show along with the default and previously loaded templates. Tap ‘Next’. -
Page 53: Step 4: Assign/Provision Devices Using The Site Setup Wizard
“WaveLinx Lite Device Reference Sheets” section beginning on page 9. 3: In the setup wizard, locate the area and tap on ‘Assign’. 4: With the mobile device, stand as close as possible to one of the WaveLinx Lite devices to be provisioned within the selected area (within 60 feet). - Page 54 User Manual: WaveLinx Lite (4.0) 8. The next step may vary slightly depending on the type of device being provisioned. For line voltage powered WaveLinx Lite devices: Staying near the device, tap ‘ ’ on the identified device to begin the provisioning process.
- Page 55 User Manual: WaveLinx Lite (4.0) If the provisioning fails, the screen will show exclamation points. Close the screen. If able, move closer to the device, and then tap ‘ ’ to start the provisioning again until the process is successful. If the error continues, try closing the mobile application and then turn off and then on the mobile device Bluetooth.
-
Page 56: Step 5: Recommended Final Steps
User Manual: WaveLinx Lite (4.0) Step 5: Recommended Final Steps Once the initial setup is complete, open the site to review any configured areas. Open the area to view or change device assignments and perform any remaining programming. Refer to “Modify Programming in Networked Areas” on page 80 or “Modify Programming in Standalone Areas”... -
Page 57: Add A Site Manually
Step 1: Create a Site To start a new location’s setup, first create a site for the facility. Each facility administered by the WaveLinx Lite App is created as a unique site. One site can contain up to 28 areas. There is no limit on the number of sites that one user can create. -
Page 58: Step 2: Create Areas
User Manual: WaveLinx Lite (4.0) 5: At the bottom of the screen tap ‘Cancel’ to exit out of the setup wizard. The site list will show the created site. Tap ‘Cancel’ Created site 6: For large projects containing more than 28 areas, repeat these steps to create the additional sites needed for the project. For easy identification, use naming conventions for large multi-site projects, i.e., “ABC Parking 1st Floor”, ABC Parking 2nd Floor, etc. -
Page 59: Step 3: Add Zones (Networked Areas Only)
Select the area If the area has devices provisioned, modification of a previously created area parameters will require a Bluetooth connection to the WaveLinx Lite network in the area. Stand within range (within 60 feet) of any line voltage WaveLinx Lite device that is provisioned to this area. -
Page 60: Step 4: Manage The Area Occupancy Sets (Networked Areas Only)
User Manual: WaveLinx Lite (4.0) 4: Locate the ‘Zones in Area’ section and tap the option to ‘+ Add Zone’. 5: Tap on the fields to name the zone and enter parameters: • Zone name: Enter a unique name for the zone. Zone names must be unique within the area. - Page 61 Devices with older firmware may not observe the 30 second grace period. If the area has devices provisioned, modification of a previously created area parameters will require a Bluetooth connection to the WaveLinx Lite network in the area. Stand within range (within 60 feet) of any line voltage WaveLinx Lite device that is provisioned to this area.
- Page 62 ‘ to assign If the area has devices provisioned, modification of a previously created area parameters will require a Bluetooth connection to the WaveLinx Lite network in the area. Stand within range (within 60 feet) of any line voltage WaveLinx Lite device that is provisioned to this area.
-
Page 63: Step 5: Provision Area Devices
Ensure that the mobile device’s Bluetooth is turned on. 1: With the mobile device, stand in the selected area, standing within range of the WaveLinx Lite devices to be provisioned (within 60 feet). 2: Verify that all the area’s WaveLinx Lite devices are displaying the correct out-of-the box and LED behavior for an unprovisioned device as described on the device’s reference sheet in the “WaveLinx Lite Device Reference Sheets”... - Page 64 User Manual: WaveLinx Lite (4.0) Identify and Provision Fixture Mounted or Tilemount Sensors: First, visually determine what fixtures/sensors need to be assigned to each zone in the area. 5: In the area details, scroll down to the ‘Unassigned Devices’ list, and then tap ‘Identify’ and review the tips on using the identify feature. Tap ‘Identify Devices’...
- Page 65 User Manual: WaveLinx Lite (4.0) 8: From the drop down, select the zone that the devices should be assigned to and then checkmark the devices that should be assigned to the zone. If any devices were mistakenly identified, deselect the checkbox to skip those devices. Tap ‘Add Devices’ to begin the provisioning process.
- Page 66 Identify and Provision Line Voltage Powered Wallstations (skip to the next section for Battery Powered Wallstations): 11: With the mobile device, stand as close as possible to the first WaveLinx Lite Line Voltage Wallstation to be provisioned in the area.
- Page 67 User Manual: WaveLinx Lite (4.0) Identify and Provision Battery Powered Wallstations: 15: If the device is a battery powered wallstation, press any button on the wallstation to wake the station. The station will stay in a ready state for 30 seconds, waiting for communication from the mobile app.
- Page 68 Once a standalone area is created, provision the devices that need to operate independently. Internet connection is not necessary but connection to the WaveLinx Lite device is required. The mobile device will need to be in range and as close as possible (within 60 feet) to the WaveLinx Lite device being provisioned. Wallstations have no use in a standalone area and will not appear as an available device.
- Page 69 User Manual: WaveLinx Lite (4.0) 3: With the mobile device, stand as close as possible to one of the WaveLinx Lite devices to be provisioned within the selected area (within 60 feet). 4: Verify that the device is displaying the correct out-of-the box and LED behavior for an unprovisioned device as described on the device’s reference sheet in the “WaveLinx Lite Device Reference Sheets”...
-
Page 70: Step 6: Repeat The Process For Additional Areas
User Manual: WaveLinx Lite (4.0) If the provisioning fails, the ‘Processing Request’ screen will show exclamation points ‘ ’ instead of checkmarks. Tap ‘Close’, move closer to the device, and then tap ‘ ’ to start the provisioning again until the process is successful. If the error continues, try closing the mobile application and then turn off and then on the mobile device Bluetooth. -
Page 71: Advanced Site Setup: Sites With Multiple Commissioners
This section is written specifically for site commissioning agents who are performing the initial WaveLinx Lite 4.0 equipment setup. For facility owners/other personnel that are using the WaveLinx Lite Mobile App to administer a site that has already been programmed, skip to “Modify Programming in Networked Areas”... -
Page 72: Step 2: Site Administrator: Invite Co-Commissioner(S)
Lite users. In addition to sharing the site, the site administrator can also share preconfigured templates to the co-commissioning team. Before performing the steps below, ensure that each co-commissioner has a registered WaveLinx Lite user account and that the desired templates have been created. - Page 73 User Manual: WaveLinx Lite (4.0) The user receiving the template receives a copy of the template. Neither the sender nor receiver will receive updates to the template when changes are made unless the template is manually shared again. The site administrator can tap the ‘ ’ next to their main site workspace to display the co-commissioner workspaces. The main workspace will be used by the Site Administrator to provision and program the areas they are responsible for.
-
Page 74: Step 3: Co-Commissioner(S): Review Invitation And Restore Site Workspace
To open their site workspace, co-commissioners should: 1: Open the WaveLinx Lite Mobile Application. 2: In the ‘Sites’ list, the co-commissioner should see the assigned site workspace. Tap the site’s download button ‘ ’ to load the site from the cloud to the co-commissioner’s mobile device. -
Page 75: Step 4: Co-Commissioner(S): Commission Site Workspaces
User Manual: WaveLinx Lite (4.0) 3: If templates have been shared, from the menu, select ‘Templates’. The user templates will load along with the shared templates from the site administrator. See “Share Templates with other Registered Users” on page 47 for further information. -
Page 76: Step 5: Co-Commissioner(S): Transfer Completed Site Workspaces To Site Administrator
To transfer a co-commissioner’s site workspace back to the administrator: 1: Open the WaveLinx Lite Mobile Application on the co-commissioner’s mobile device. 2: In the ‘Sites’ list, locate the co-commissioner’s finished site workspace and then tap the ‘ ’ icon. From the popup, select ‘Site Transfer’. -
Page 77: Step 6: Site Administrator: View Co-Commissioner(S) And Site Status
When the site administrator logs into their WaveLinx Lite Mobile App and expands the site, transferred sites will have a restore option. -
Page 78: Step 7: Site Administrator: Perform The Site Merge
To perform the site merge: 1: Open the WaveLinx Lite Mobile Application on the co-commissioner’s mobile device. 2: In the ‘Sites’ list, locate the co-commissioner’s finished site workspace and then tap the ‘ ’ icon. From the popup, select ‘Site Merge’. -
Page 79: Additional Considerations: Transferring Site Workspace Ownership Before The Site Merge
Additional Considerations: Transferring Site Workspace Ownership before the Site Merge If the site administrator or a co-commissioner is unable to finish working on their site workspace, the WaveLinx Lite Mobile App allows the team member to transfer their workspace to another team member to complete. This is done by transferring the site ownership. For step-by-step instructions, see “Transfer Site Ownership”... -
Page 80: Modify Programming In Networked Areas
Once created, areas can be renamed or deleted. This section discusses how to perform these functions. Rename an Area An area can be renamed at any time. This process does not require connection to the internet or a connection to the WaveLinx Lite device/network. -
Page 81: Add An Area
Delete an Area Internet connection or connection to the WaveLinx Lite device/network is not required to delete an empty area. An area can be deleted ONLY if there are no provisioned devices in the area. The mobile application will block the deletion if the area still contains provisioned devices. -
Page 82: Add Zones
To change the parameters, 1: Bring the mobile device within range (within 60 feet) of any line voltage powered provisioned WaveLinx Lite device in the desired area. 2: Ensure that the mobile device Bluetooth is turned on, and then open the WaveLinx Lite Mobile Application. -
Page 83: Move Devices To Different Zones
To move a device to a different zone: 1: Bring the mobile device within range (within 60 feet) of any line voltage powered provisioned WaveLinx Lite device in the desired area. 2: Ensure that the mobile device Bluetooth is turned on, and then open the WaveLinx Lite Mobile Application. -
Page 84: Delete A Zone
1: Bring the mobile device within range (within 60 feet) of any line voltage powered provisioned WaveLinx Lite device in the desired area. 2: Ensure that the mobile device Bluetooth is turned on, and then open the WaveLinx Lite Mobile Application. -
Page 85: Modify Devices In Networked Areas
To change a device name: 1: Bring the mobile device within range (within 60 feet) of any line voltage powered provisioned WaveLinx Lite device in the desired area. 2: Ensure that the mobile device Bluetooth is turned on, and then open the WaveLinx Lite Mobile Application. -
Page 86: Add/Provision A New Device
To delete a device: 1: Bring the mobile device within range (within 60 feet) of any line voltage powered provisioned WaveLinx Lite device in the desired area. 2: Ensure that the mobile device Bluetooth is turned on, and then open the WaveLinx Lite Mobile Application. -
Page 87: Modify Occupancy Sets In Networked Areas
To rename an occupancy set: 1: Bring the mobile device within range (within 60 feet) of any line voltage powered provisioned WaveLinx Lite device in the desired area. 2: Ensure that the mobile device Bluetooth is turned on, and then open the WaveLinx Lite Mobile Application. -
Page 88: Adjust Individual Occupancy Sensor Settings
To access the device’s occupancy sensor details page: 1: Bring the mobile device within range (within 60 feet) of any line voltage powered provisioned WaveLinx Lite device in the desired area. 2: Ensure that the mobile device Bluetooth is turned on, and then open the WaveLinx Lite Mobile Application. - Page 89 User Manual: WaveLinx Lite (4.0) 7: Tap on the device to open the ‘Device Details’, and then tap ‘Occupancy Sensor’. Refer to the chart for information on the items shown. Setting Default Description Current Status Displays the status of the sensor, either occupied or unoccupied.
-
Page 90: Adjust Occupancy Set Settings
To modify the occupancy sensor set behavior: 1: Bring the mobile device within range (within 60 feet) of any line voltage powered provisioned WaveLinx Lite device in the desired area. 2: Ensure that the mobile device Bluetooth is turned on, and then open the WaveLinx Lite Mobile Application. - Page 91 The occupant must turn ON loads manually using controls in the space. WARNING: Do not use vacancy mode unless WaveLinx Lite Wallstations are installed in the system to allow for manual override. For both modes, the lighting will transition to the unoccupied level when motion is not detected by all sensors in the occupancy set after the defined hold time expires.
-
Page 92: Adjust Controlled Zones
To adjust the controlled zones: 1: Bring the mobile device within range (within 60 feet) of any line voltage powered provisioned WaveLinx Lite device in the desired area. 2: Ensure that the mobile device Bluetooth is turned on, and then open the WaveLinx Lite Mobile Application. - Page 93 User Manual: WaveLinx Lite (4.0) Not connected Select the site Connected Verify network connection Select the occupancy set to modify Select the area Tap ‘Occupancy’ 7. Tap on ‘Zones’, and then in the ‘Assigned Zones’ section, tap the ‘ ‘ in the row of the zone to unassign. Once complete, tap on the back button.
-
Page 94: Review Assigned Sensors
To review the individual sensors in the occupancy set: 1: Bring the mobile device within range (within 60 feet) of any line voltage powered provisioned WaveLinx Lite device in the desired area. 2: Ensure that the mobile device Bluetooth is turned on, and then open the WaveLinx Lite Mobile Application. -
Page 95: Use Occupancy Sensor Set Test Mode
To delete an occupancy set once there are no zones assigned: 1: Bring the mobile device within range (within 60 feet) of any line voltage powered provisioned WaveLinx Lite device in the desired area. - Page 96 User Manual: WaveLinx Lite (4.0) 6. Tap on the desired occupancy set to open the occupancy set details, and then tap on ‘Zones’. 7. If any zones are in the ‘Assigned Zones’ section, tap ‘ ‘ next to each zone to remove zone assignment. Informational messages will scroll across the screen as the zone is removed.
-
Page 97: Modify Wallstations In Networked Areas
’ at the top of the screen and type a unique name for the wallstation. Tap ‘Save’. Tap ‘save’ Select edit Enter desired name To make a change to a battery powered wallstation, there must be a Bluetooth communication connection through a line voltage powered WaveLinx Lite device. www.cooperlighting.com... -
Page 98: Modify Wallstation Actions
Note: Each wallstation model will be shown with buttons that correspond to that model’s button configuration. To make a change to a battery powered wallstation, there must be a Bluetooth communication connection through a line voltage powered WaveLinx Lite device. -
Page 99: Modify Scene Light Levels In Networked Areas
Internet connection is not needed to modify scenes but connection to the WaveLinx Lite device/network is required. The mobile device will need to be in range and as close as possible (within 60 feet) to one of the line voltage powered WaveLinx Lite devices that belongs to the same area. - Page 100 To modify scene levels: 1: Bring the mobile device within range (within 60 feet) of any provisioned line voltage powered WaveLinx Lite device in the desired area. 2: Ensure that the mobile device Bluetooth is turned on, and then open the WaveLinx Lite Mobile Application.
-
Page 101: Work With Daylight Sets In Networked Areas
Internet connection is not needed but connection to the WaveLinx Lite device/network is required. The mobile device will need to be in range and as close as possible (within 60 feet) to one of the line voltage powered WaveLinx Lite devices that belongs to the same area. - Page 102 To identify the daylight set: 1: Bring the mobile device within range (within 60 feet) of any line voltage powered provisioned WaveLinx Lite device in the desired area. 2: Ensure that the mobile device Bluetooth is turned on, and then open the WaveLinx Lite Mobile Application.
- Page 103 1: If necessary, identify the correct daylight set using the instructions starting on page 102. 2: Bring the mobile device within range (within 60 feet) of any line voltage powered provisioned WaveLinx Lite device in the desired area. 3: Ensure that the mobile device Bluetooth is turned on, and then open the WaveLinx Lite Mobile Application.
- Page 104 1: Ensure that the fixtures have been powered and operational (either out-of-the-box or provisioned operation) for at least 24 hours. 2: Bring the mobile device within range (within 60 feet) of any line voltage powered provisioned WaveLinx Lite device in the desired area.
- Page 105 2: Ensure that the fixtures have been powered and operational from either out-of-the-box or provisioned area behavior for at least 24 hours. 3: Bring the mobile device within range (within 60 feet) of any line voltage powered provisioned WaveLinx Lite device in the desired area.
- Page 106 For many applications, no calibration is necessary. In addition, with WaveLinx Lite 4.0, the auto calibration feature may be used to allow the sensor to dynamically adjust to the optimal light level. Manual calibration of sensors is recommended where the performance of factory set parameters or auto calibration is unacceptable including: •...
- Page 107 See “WaveLinx Lite Device Reference Sheets” beginning on page 9 to find the suggestions for that device. 1: Bring the mobile device within range (within 60 feet) of any line voltage powered provisioned WaveLinx Lite device in the desired area.
- Page 108 User Manual: WaveLinx Lite (4.0) 7: Next, tap the ‘Manual Calibration’ tab and then tap ‘Select All’ or individually select the checkbox next to each sensor that needs to be manually calibrated. 8: Next, optionally, enter the surface light reading using a light meter for reference. This allows current reading fields to approximate more closely what the light level is at the desired surface.
- Page 109 1: If necessary, identify the correct daylight set using the instructions starting on page 102. 2: Bring the mobile device within range (within 60 feet) of any line voltage powered provisioned WaveLinx Lite device in the desired area. 3: Ensure that the mobile device Bluetooth is turned on, and then open the WaveLinx Lite Mobile Application.
- Page 110 To use test mode: 1: Bring the mobile device within range (within 60 feet) of any line voltage powered provisioned WaveLinx Lite device in the desired area. 2: Ensure that the mobile device Bluetooth is turned on, and then open the WaveLinx Lite Mobile Application.
-
Page 111: Modify Open Loop Daylight Control
Internet connection is not needed when modifying open loop daylight control but connection to the WaveLinx Lite device/network is required. The mobile device will need to be in range and as close as possible (within 60 feet) to one of the line voltage powered WaveLinx Lite devices... - Page 112 To disable or enable daylighting for an open loop daylight set: 1: Bring the mobile device within range (within 60 feet) of any line voltage powered provisioned WaveLinx Lite device in the desired area. 2: Ensure that the mobile device Bluetooth is turned on, and then open the WaveLinx Lite Mobile Application.
- Page 113 To assign or remove a controlled lighting load: 1: Bring the mobile device within range (within 60 feet) of any line voltage powered provisioned WaveLinx Lite device in the desired area. 2: Ensure that the mobile device Bluetooth is turned on, and then open the WaveLinx Lite Mobile Application.
- Page 114 To assign or remove the controlling daylight sensor. 1: Bring the mobile device within range (within 60 feet) of any line voltage powered provisioned WaveLinx Lite device in the desired area. 2: Ensure that the mobile device Bluetooth is turned on, and then open the WaveLinx Lite Mobile Application.
- Page 115 Step 5: Adjust the Amount of Lighting Response Daylight sensors that have updated firmware provided with WaveLinx Lite 4.0 will have the ability to automatically calibrate. Dynamic auto calibration assumes that the space has been designed such that the fixture light level at 100% with no contributed daylight is the desired light level for the space.
- Page 116 1: Ensure that the fixtures have been powered and operational (either out-of-the-box or provisioned operation) for at least 24 hours. 2: Bring the mobile device within range (within 60 feet) of any line voltage powered provisioned WaveLinx Lite device in the desired area.
- Page 117 The daylight set will automatically exit test mode after 10 minutes or test mode can be manually disabled once testing is complete. 1: Bring the mobile device within range (within 60 feet) of any line voltage powered provisioned WaveLinx Lite device in the desired area.
- Page 118 User Manual: WaveLinx Lite (4.0) Control Lighting at Different Light Levels from the Same Daylight Sensor One area can have up to six open loop daylight sets. A different sensor can be assigned to each open loop daylight set, or one sensor can be assigned to multiple daylight sets.
-
Page 119: Modify Programming In Standalone Areas
Once created, areas can be renamed or deleted. This section discusses how to perform these functions. Rename an Area An area can be renamed at any time. This process does not require connection to the internet or a connection to the WaveLinx Lite device/network. -
Page 120: Add An Area
Delete an Area Internet connection or connection to the WaveLinx Lite device/network is not required to delete an area. An area can be deleted ONLY if there are no provisioned devices in the area. The mobile application will block the deletion if the area still contains provisioned devices. -
Page 121: Modify Devices In Standalone Areas
After devices are provisioned, it is possible to change the device name. Devices may also be deleted, returning them to an unprovisioned state. Internet connection is not needed to modify a device but connection to the WaveLinx Lite device is required. The mobile device will need to be in range and as close as possible (within 60 feet) to the device being modified. -
Page 122: Delete Devices (Return To Unprovisioned State)
1: Bring the mobile device within range (within 60 feet) of the desired device. 2: Ensure that the mobile device Bluetooth is turned on, and then open the WaveLinx Lite Mobile Application. 3: In the site list, select a site. -
Page 123: Modify Dimmable Device Trims In Standalone Areas
If a device is no longer communicating, refer to “Replace Devices” on page 167 for details on deleting the device from the mobile application. Provisioning can also be manually removed. Refer to “WaveLinx Lite Device Reference Sheets” beginning on page 9 for device specific instructions on how to perform a device factory reset. -
Page 124: Modify Occupancy Sensor Settings In Standalone Areas
• Use test mode Internet connection is not needed to modify occupancy sensor settings but connection to the WaveLinx Lite device is required. If occupancy is sensed in the 30 seconds after an unoccupied command is issued (grace period), the device will resume the previous light level. If outside of the grace period, the light level issued when occupied will be as defined for the occupied command. -
Page 125: Adjust Occupancy Sensor Command Settings In A Standalone Area
To change the hold time, occupied level, unoccupied level, and/or energy saver settings for a sensor in a standalone area: 1: Ensure that the mobile device Bluetooth is turned on, and then open the WaveLinx Lite Mobile Application. 2: In the site list, select a site and then in the area list, select the standalone area. -
Page 126: Review/Adjust Individual Occupancy Sensor Settings In A Standalone Area
To access the device’s occupancy sensor details page: 1: Ensure that the mobile device Bluetooth is turned on, and then open the WaveLinx Lite Mobile Application. 2: In the site list, select a site and then in the area list, select the standalone area. - Page 127 User Manual: WaveLinx Lite (4.0) 3: Bring the mobile device within range (within 60 feet) of the desired device and then select the device from the ‘Devices in this Area’ section. 4: Once the device connects and opens, tap the ‘Occupancy…’ tab.
-
Page 128: Use Occupancy Sensor Test Mode In A Standalone Area
User Manual: WaveLinx Lite (4.0) Use Occupancy Sensor Test Mode in a Standalone Area An occupancy sensor may be placed into a temporary test mode to verify sensor response. If test ‘Occupancy…’ tab mode is activated, this sensor will be placed in test mode for 10 minutes. The sensor operates with a 10 second hold time. -
Page 129: Modify Closed Loop Daylight Settings In Standalone Areas
Modify Closed Loop Daylight Settings in Standalone Areas Daylight sensor control is achieved in WaveLinx Lite through fixture mount, tilemount and integrated sensors for both interior and exterior applications. The WaveLinx Lite (4.0) system supports a closed loop daylighting approach in standalone areas for fixtures connected to these devices. -
Page 130: Enable Or Disable Auto Calibration For A Closed Loop Daylight Sensor
Enable or Disable Auto Calibration for a Closed Loop Daylight Sensor Closed loop sensors that have updated firmware provided with WaveLinx Lite 4.0 will have the ability to automatically calibrate. The dynamic auto calibration assumes that the space has been designed such that the fixture light level at 100% with no contributed daylight is the desired light level for the space. - Page 131 1: Ensure that the fixture has been powered and operational (either out-of-the-box or provisioned operation) for at least 24 hours. 2: Ensure that the mobile device Bluetooth is turned on, and then open the WaveLinx Lite Mobile Application. 3: In the site list, select a site and then in the area list, select the standalone area.
-
Page 132: Manually Calibrate A Closed Loop Daylight Sensor
For many applications, no calibration is necessary. In addition, with WaveLinx Lite 4.0, the auto calibration feature may be used to allow the sensor to dynamically adjust to the optimal light level. Manual calibration of sensors is recommended where the performance of factory set parameters or auto calibration is unacceptable including: •... - Page 133 User Manual: WaveLinx Lite (4.0) 4: Make certain that the ‘Daylight Stage’ is set to enabled and then tap ‘ ’ next to ‘Daylight Calibration’. 5: In the calibration screen, first make sure that ‘Auto Calibration’ is turned off and then use the screen controls to adjust the light level: •...
-
Page 134: Test Daylight Sensor Operation In A Standalone Area
If left on, test mode will automatically time out after 10 minutes. 1: Ensure that the mobile device Bluetooth is turned on, and then open the WaveLinx Lite Mobile Application. 2: In the site list, select a site and then in the area list, select the standalone area. -
Page 135: Use Screen Controls To Issue Commands And View Details
To raise and lower the light level of all devices in an area: 1: Bring the mobile device within range (within 60 feet) of any line voltage powered provisioned WaveLinx Lite device in the desired area. 2: Ensure that the mobile device Bluetooth is turned on, and then open the WaveLinx Lite Mobile Application. -
Page 136: Raise And Lower The Light Level Of A Zone In A Networked Area
To raise and lower the light level of a specific zone: 1: Bring the mobile device within range (within 60 feet) of any line voltage powered provisioned WaveLinx Lite device in the desired area. 2: Ensure that the mobile device Bluetooth is turned on, and then open the WaveLinx Lite Mobile Application. -
Page 137: Issue Scene Commands In A Networked Area
To send a scene command: 1: Bring the mobile device within range (within 60 feet) of any line voltage powered provisioned WaveLinx Lite device in the desired area. 2: Ensure that the mobile device Bluetooth is turned on, and then open the WaveLinx Lite Mobile Application. -
Page 138: Raise And Lower The Light Level Of A Single Device In A Networked Area
To temporarily raise and lower the light level of a specific device in a networked area: 1: Bring the mobile device within range (within 60 feet) of any line voltage powered provisioned WaveLinx Lite device in the desired area. 2: Ensure that the mobile device Bluetooth is turned on, and then open the WaveLinx Lite Mobile Application. -
Page 139: Raise And Lower The Light Level Of A Single Device In A Standalone Area
To temporarily raise and lower the light level of a specific device in a networked area: 1: Ensure that the mobile device Bluetooth is turned on, and then open the WaveLinx Lite Mobile Application. 2: In the site list, select a site and then in the area list, select the standalone area. -
Page 140: View Status And Device Details In A Networked Area
To access the device details pages: 1: Bring the mobile device within range (within 60 feet) of any line voltage powered provisioned WaveLinx Lite device in the desired area. 2: Ensure that the mobile device Bluetooth is turned on, and then open the WaveLinx Lite Mobile Application. - Page 141 User Manual: WaveLinx Lite (4.0) Device Details Occupancy Sensor Page Setting Default Description Current Status Displays the status of the sensor, either occupied or unoccupied. Note: Status reflected does not include the hold time delay. It reflects if actual motion activity was occurring at the time the status last loaded.
- Page 142 User Manual: WaveLinx Lite (4.0) Device Details Daylight Sensor Page Setting Default Description Reading Displays sensor’s light level reading in lux. Note: If the reading does not dynamically update, exit the screen, and then re-enter to verify current reading. Daylight Set Shows the zone’s currently assigned daylight set.
-
Page 143: View Status And Device Details In A Standalone Area
To access the device details pages: 1: Ensure that the mobile device Bluetooth is turned on, and then open the WaveLinx Lite Mobile Application. 2: In the site list, select a site and then in the area list, select the standalone area. - Page 144 User Manual: WaveLinx Lite (4.0) Device Details Occupancy Sensor Page Setting Default Description Current Status Displays the status of the sensor, either occupied or unoccupied. Note: Status reflected does not include the hold time delay. It reflects if actual motion activity was occurring at the time the status last loaded.
- Page 145 User Manual: WaveLinx Lite (4.0) Device Details Daylight Sensor Page Setting Default Description Reading Displays sensor’s light level reading in lux. Note: If the reading does not dynamically update, exit the screen, and then re-enter to verify current reading. Daylight Stage...
-
Page 146: Viewing Battery Status Of Battery Powered Wallstations
To view the battery status through the mobile app: 1: Bring the mobile device within range (within 60 feet) of any line voltage powered provisioned WaveLinx Lite device in the desired area. 2: Ensure that the mobile device Bluetooth is turned on, and then open the WaveLinx Lite Mobile Application. -
Page 147: Perform Administrative Functions
The WaveLinx Lite Mobile Application can be used to reset the password of a user account. To reset a password: 1: Ensure that the mobile device has internet access and then launch the WaveLinx Lite Mobile Application from the app icon. 2: When prompted for login, tap ‘Forgot Password’. -
Page 148: Edit Site Details
• Merge Conflict In WaveLinx Lite (4.0), it is not possible to delete a site from the cloud portal. If a site is no longer being used, give the site a name that indicates that it is not an active site. - Page 149 Internet must be available to display this status. from the cloud. Once the update completes, the status should read ‘Ready’. Proceed with any necessary changes. Logging in to multiple mobile devices using the same WaveLinx Lite App user account is not recommended. www.cooperlighting.com...
- Page 150 4: Open the site and repeat any lost change(s) to ensure that the device(s) and database are in sync. Logging in to multiple mobile devices using the same WaveLinx Lite App user account is not recommended. www.cooperlighting.com...
-
Page 151: Automatic Sync
Automatic Sync The mobile app is automatically set to allow a background sync to occur. If the there is an internet connection and the WaveLinx Lite App is running (ensure the app is minimized NOT forced closed), the background sync can occur. The frequency of the background sync will depend on the mobile device used. -
Page 152: Manual Sync
User Manual: WaveLinx Lite (4.0) Manual Sync To push database changes without relying on the automatic sync, manually sync the site programming once the mobile device is in a location that allows internet connection.95 The manual sync can be processed in one of two ways. -
Page 153: Restore A Site
1: Ensure that the mobile device has internet access and then launch the WaveLinx Lite Mobile Application from the app icon. 2: When prompted for login, enter the registered email address and password, and then tap ‘Login’. -
Page 154: Transfer Site Ownership
WaveLinx Lite user account. Make note of the registered email address for the new owner’s account. 1: Ensure that the mobile device has internet access and then launch the WaveLinx Lite Mobile Application from the app icon. 2: Tap on ‘... -
Page 155: Delete The Local Site Database
Delete the Local Site Database WaveLinx Lite 4.0 allows the administrator to delete the local site database copy from the mobile device. This can be useful to assist with resolving sync ‘Merge Conflict’ issues and to clean up the site list view for users who administer multiple site databases from the same account. -
Page 156: Update Device Firmware
At times, it may be necessary to update devices with new firmware. It is important that firmware is up to date to ensure functionality and security. A direct Bluetooth connection from the mobile device to the WaveLinx Lite device is required for firmware updates. The update will not be processed through the Bluetooth mesh network. -
Page 157: Update Devices Using Firmware Files Obtained From The Cloud
Downloading the Firmware Files from the Cloud The WaveLinx Lite Mobile App allows registered users to download the most recently released firmware directly into the mobile device from the Mobile App’s ‘System’ page. This requires an internet connection to access the cloud. - Page 158 ’Download Firmware’ screen from the previous section. 1. Determine which WaveLinx Lite device to update. Ensure that the mobile device Bluetooth is turned on. Stand as close as possible to the chosen WaveLinx Lite device (within 60 feet). 2: If the device is a Battery Powered Wallstation, press any button on the wallstation to wake the station up.
- Page 159 User Manual: WaveLinx Lite (4.0) 6: To update a single device, tap the device’s ‘Update’ button. (For Battery Powered Wallstations only, when prompted to confirm that the ‘battery wallstation is awake’, press any button on the wallstation and then tap ‘confirm’ to proceed.) To update multiple devices within range, tap the desired device rows to highlight them and then select the ‘Update’...
-
Page 160: Update Devices Using A Separately Provided Firmware File
Loading a Provided Firmware File into the Mobile App The WaveLinx Lite Mobile App allows users to load a specific device firmware file for device upgrade. In this instance, the file is not downloaded through the cloud and will be specific to one device type. - Page 161 ’Select Local File’ screen with a file already loaded. 1. Determine which WaveLinx Lite device to update. Ensure that the mobile device Bluetooth is turned on. Stand as close as possible to the chosen WaveLinx Lite device (within 60 feet).
- Page 162 User Manual: WaveLinx Lite (4.0) 5: To update a single device, tap the device’s ‘Update’ button. (For Battery Powered Wallstations only, when prompted to confirm that the ‘battery wallstation is awake’, press any button on the wallstation and then tap ‘confirm’ to proceed.) To update multiple devices within range, tap the desired device rows to highlight them and then select the ‘Update’...
-
Page 163: Update The Mobile Application
Delete a User Account The WaveLinx Lite 4.0 Mobile App allows deletion of a user account. If a user account is deleted, the user will no longer be able to login to the mobile application. Site ownership must be transferred before the user account can be deleted. See “Transfer Site Ownership” on page 154 for more details. -
Page 164: Basic Troubleshooting
This is caused when programmed settings Make sure that the mobile device is well within range of fail to completely transmit to some of the the nearest WaveLinx Lite device and the network shows devices. a connection. There are alert icons on the zone and/or devices. - Page 165 If LEDs are visible on the device, try to see if the LED shows normal reaction to motion activity. Bring the mobile device close to the WaveLinx Lite device. In the mobile application, try to process a ‘blink to identify’ command. If the device responds, attempt to communicate again.
-
Page 166: Use Device Scan
Use Device Scan The WaveLinx Lite Mobile Application allows devices that are still in the out-of-the-box mode to be scanned from various locations in the mobile application. This can be helpful to see what unprovisioned WaveLinx Lite devices are in range of the mobile device. -
Page 167: Replace Devices
First delete, the device from the site by following the steps below: 1: Bring the mobile device within range (within 60 feet) of any line voltage powered provisioned WaveLinx Lite device in the desired area. 2: Ensure that the mobile device Bluetooth is turned on, and then open the WaveLinx Lite Mobile Application. -
Page 168: Replace A Device In A Standalone Area
When replacing a device in a standalone area simply provision the new device, assigning it to the standalone area as instructed in “Standalone Area Provisioning” on page 68. In WaveLinx Lite 4.0 (as a precaution to prevent inadvertent device deletion) it is not possible to delete a device that is not communicating from a standalone area. - Page 169 User Manual: WaveLinx Lite (4.0) Advanced Daylight Calibration: Calculate the Daylighting Factor Sensitivity Value Outdoor applications may have specific challenges that arise when calibrating closed loop daylighting. In parking garages or other outdoor situations, the lighting may turn OFF correctly, but there may be enough light from adjacent fixtures that prevents specific fixtures from turning back ON at night.
- Page 170 User Manual: WaveLinx Lite (4.0) 7: Exit the device details page to cancel the override command to the fixture under test (light may turn OFF). Use the mobile application to issue zone commands to turn the zones back ON to 100%.
- Page 171 User Manual: WaveLinx Lite (4.0) 9: In the mobile application, navigate to the device details, ‘Daylight Sensor’ page and enter the ‘Daylight Factor Sensitivity’ value from the calculations. Tap ‘Save’ and then ‘Confirm’ in the warning message popup. 10: In the same screen, place the daylight sensor back into test mode.
- Page 172 Visite www.cooperlighting.com para conocer nuestros términos y condiciones. Cooper Lighting Solutions 1121 Highway 74 South Peachtree City, GA 30269 P: 770-486-4800 Cooper Lighting Solutions is a www.cooperlighting.com For service or technical assistance: registered trademark. 1-800-553-3879 All other trademarks are property of Canada Sales ©...
Need help?
Do you have a question about the WaveLinx Lite and is the answer not in the manual?
Questions and answers