Table of Contents
Advertisement
Quick Links
MN-47239-EN
REV.03
05/23
EN
alto-shaam.com
Structured Air Technology™
For the most current manual, visit alto-shaam.com
Die neueste Fassung des Handbuchs finden Sie auf alto-shaam.com
Pour la dernière version du manuel, visiter alto-shaam.com
Para obtener el manual más actual, visite alto-shaam.com
Ga voor de meest recente handleiding naar alto-shaam.com
За самой последней версией руководства обращайтесь на сайт alto-shaam.com
要查看当前最新⼿册,请访问 alto-shaam.com
Operator's Manual
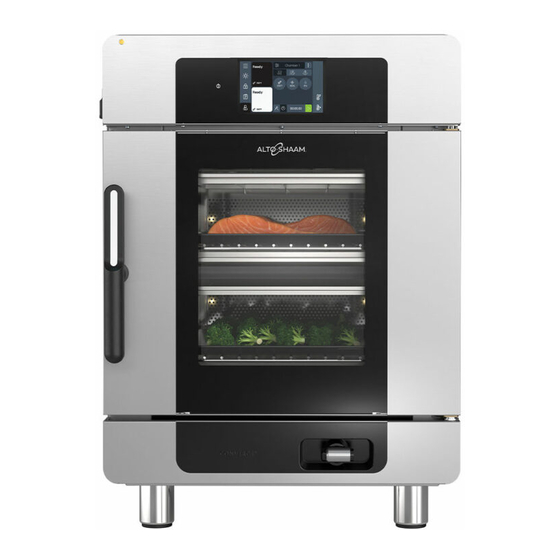
Converge
®
Deluxe Control
CMC-H2H
CMC-H3H
Advertisement
Table of Contents

Subscribe to Our Youtube Channel
Related Manuals for Alto-Shaam Converge CMC-H2H


Summary of Contents for Alto-Shaam Converge CMC-H2H
- Page 1 CMC-H2H CMC-H3H Structured Air Technology™ MN-47239-EN For the most current manual, visit alto-shaam.com Die neueste Fassung des Handbuchs finden Sie auf alto-shaam.com REV.03 Pour la dernière version du manuel, visiter alto-shaam.com 05/23 Para obtener el manual más actual, visite alto-shaam.com Ga voor de meest recente handleiding naar alto-shaam.com...
-
Page 2: Manufacturer's Information
© Copyright 5/23 by Alto-Shaam, Inc. All rights reserved. This manual or any portion thereof may not be reproduced or used in any manner whatsoever without the express written permission of Alto-Shaam, Inc. Trademarks All trademarks referenced in this documentation are the property of their respective owners. -
Page 3: Foreword
OREWORD Enjoy your Alto-Shaam Converge Oven! Structured Air The Alto-Shaam Converge Oven features Structured Air Technology, giving you Technology™ two or three ovens in one. It combines the flexibility of a multi-cook oven and the versatility of combi cooking in each oven chamber. Two or three independent ovens in one give you the freedom to steam, air fry, bake, grill, and more at the same time without flavor transfer—all in a ventless, self-cleaning design. - Page 4 OREWORD This page is intentionally left blank. Converg e® O per ator ’s Manu al MN-4723 9 Rev 3 5 /23 ▪ ▪ ▪ ▪...
-
Page 5: Table Of Contents
Foreword Enjoy your Alto-Shaam Converge Oven! ....3 Extend Your Manufacturer’s Warranty ....3 Alto-Shaam 24/7 Emergency Repair Service . - Page 6 ABLE OF ONTENTS How to Enable/Disable Automatic Preheat ....84 How to Enable and Use the Replay Function ....85 How to Lock Recipe Editing, Manual Cooking, or the Settings Screen 87 How to View Oven Information .
-
Page 7: Safety
AFETY The Meaning of Signal Words This manual contains signal words where needed. These signal words must be obeyed to reduce the risk of death, personal injury, or equipment damage. The meaning of these signal words is explained below. DANGER Danger indicates a hazardous situation which, if not avoided, will result in serious injury or death. -
Page 8: Appliance Description And Intended Use
AFETY Appliance Description and Intended Use Structured Air Alto-Shaam Structured Air Technology system allows for multiple, unique ® Technology cooking chambers within the same oven. Air is delivered by a blower located in the rear of each cooking chamber. Air travels vertically through the jet plates into each chamber. -
Page 9: Safety Precautions
AFETY Safety Precautions Before you begin Read and understand all instructions in this manual. Electrical precautions Obey these electrical precautions when using the appliance: Connect the appliance to a properly grounded outlet. Do not use the appliance if ▪ it is not properly grounded. Consult an electrician if there is any doubt that the outlet used is properly grounded. - Page 10 Alto-Shaam of all liability. Original manufacturer’s replacement parts may be substituted; however, these parts must be of equal quality and specifications as those provided by Alto-Shaam.
- Page 11 AFETY Personal Protective Wear the following Personal Protective Equipment (PPE) while cleaning the Equipment (PPE) appliance: Protective gloves ▪ Protective clothing ▪ Eye protection ▪ Face protection ▪ Conver ge® O pe ra t o r ’ s M a n ua l MN-472 39 Re v 3 5/23...
- Page 12 AFETY This page is intentionally left blank. Converg e® O per ator ’s Manu al MN-4723 9 Rev 3 5 /23 ▪ ▪ ▪ ▪...
-
Page 13: Labels
ABELS Label Locations CT-PHD-013963 Conver ge® O pe rat or ’ s Ma nual MN-472 39 Re v 3 5/23 ▪ ▪ ▪ ▪... - Page 14 Made in U.S.A. WARNING Steam. Open door carefully. LA-39126 WARNING Hot surface LA-46331 Every Alto-Shaam product is precision calibrated prior to release from the factory to ensure accurate temperature control. Converg e® O per ator ’s Manu al MN-4723 9 Rev 3 5 /23 ▪...
- Page 15 Si no se siguen las instrucciones de limpieza, puede sufrir lesiones o daños en el equipo. Limpie el horno solo con las pastillas de limpieza de Alto-Shaam. Evite el contacto con la piel o los ojos. Use equipo de protección personal (Personal Protective Equipment, PPE). Lea...
- Page 16 ABELS WARNING Electric shock hazard Appliances with permanent electrical connections that are mounted on casters must be secured to building structure. Read installation instructions. LA-39148 WARNING WARNING/ADVERTENCIA/AVERTISSEMENT Fire hazard Fire Hazard This appliance is only for use with factory-supplied legs, casters, or base.
- Page 17 ABELS WARNING WARNING/ADVERTENCIA/AVERTISSEMENT Electric shock hazard Electric Shock Hazard To reduce the risk of electric shock, do not remove or open cover. No user-serviceable parts inside. Refer servicing to qualified personnel. To reduce the risk of electric shock, do not remove Qualified personnel: Disconnect power before servicing.
- Page 18 ∑ GN 1/1 CMC-2 10.88 CMC-3 16.32 LA-47321 For use on individual branch circuit only. Alto-Shaam technical service QR code Converg e® O per ator ’s Manu al MN-4723 9 Rev 3 5 /23 ▪ ▪ ▪ ▪...
- Page 19 ABELS Press and release the high limit temperature reset button(s). VMC-F3, VMC-F4 VMC-H2, VMC-H3, VMC-H4 VMC-H2H, VMC-H3H, VMC-H4H — CMC-H2H CMC-H3H LA-39715 Equipotential terminal — LA-36443-E Consult instructions for operation and use. — Conver ge® O pe ra t o r ’ s M a n ua l MN-472 39 Re v 3 5/23...
- Page 20 ABELS This page is intentionally left blank. Converg e® O per ator ’s Manu al MN-4723 9 Rev 3 5 /23 ▪ ▪ ▪ ▪...
-
Page 21: Installation
NSTALLATION Dimension Drawings MANUAL DRAIN OVEN DRAIN Y2 CONDENSATE/ Y1 STEAM INJECTION RINSE/WASH WATER Y5 HOSE REEL 3-3/4" 95mm 2-9/16" 66mm 2-1/4" 57mm 2-11/16" 68mm 4-3/16" (106mm) 4-3/4" (121mm) 7-15/16" 201mm DETAIL A 11-1/2" 292mm 14-5/16" 364mm Chamber width 16-1/4" 412mm Chamber depth Chamber height Chamber height with wire shelf... - Page 22 NSTALLATION OVEN DRAIN MANUAL DRAIN Y2 CONDENSATE/ RINSE/WASH WATER Y1 STEAM INJECTION Y5 HOSE REEL 2-9/16" 66mm 3-3/4" 95mm 2-11/16" 68mm 2-1/4" 57mm 4-3/16" (106mm) 4-3/4" (121mm) 7-15/16" 201mm 11-1/2" 292mm DETAIL A 14-5/16" 364mm Chamber width 16-1/4" 412mm Chamber depth Chamber height Chamber height with wire shelf 24-7/16"...
-
Page 23: How To Unpack The Oven
Examine the appliance for damage. If the appliance has been damaged, do not use the appliance until it has been inspected by an authorized service provider. Contact your carrier or Alto-Shaam customer service. Remove the shrink wrap. the restraining straps. -
Page 24: Cheflinc Installation Checklist
Unable to answer you connect to the Wi-Fi system with your phone? Using your phones Wi-Fi connection, are you able to connect to alto-shaam.com? You are testing for any additional security on the network to block access to Unable to answer external sites. - Page 25 What is the Back End (BE) software version number? What is the Control Board (CB) software version number? Is this the latest software version? Validate via: https://www.alto-shaam.com/en/customer- support/software-downloads Conver ge® O pe ra t o r ’ s M a n ua l...
-
Page 26: How To Install The Water Supply And Drain
NSTALLATION How to Install the Water Supply and Drain Before you begin NOTE: Refer to the detailed instructions that come with the installation kit. Significant damage to the appliance cavity, elements, or heat NOTICE exchanger could result from improper water quality. Failure to meet the water quality requirements will void the warranty. - Page 27 It is the responsibility of the operator to make sure the incoming water supply is tested and meets the compliance requirements with the published water quality standards listed below. Non-compliance could damage the oven and void the warranty. Alto-Shaam recommends using OptiPure products to treat the water. Contaminant Treated Water...
- Page 28 NSTALLATION Continued from previous page Apply thread sealant to the threads of the adapter fittings. Install the elbow from the kit onto the adapter fitting. CT-TS-012 Install the adapter fittings and elbows onto the water inlets with slip joint pliers. Tighten the fittings until the elbows have a slight downward angle.
- Page 29 NSTALLATION Continued from previous page Installing the water Install a 1-1/2” (40mm) diameter connection, drain line and clamp into place. The drain drain line must always slope downward away from the oven. An end-of-drain air gap may be required by local code. Vertical air vent required. NOTICE In the U.S.A., this equipment must be installed to comply with the Basic Plumbing Code of the Building Officials and Code...
- Page 30 NSTALLATION Continued from previous page To install the water drain, do the following. Drill a hole for the mounting bracket using the dimensions in the image. Install a screw into the drilled hole. Drill a hole for the second mounting screw.
- Page 31 NSTALLATION Continued from previous page Install the remaining drain pipe. Secure the drain with the clamps from the kit. CT-TS-012086 Result The water supply and drain are now installed. Conver ge® O pe ra t o r ’ s M a n ua l MN-472 39 Re v 3 5/23...
-
Page 32: How To Install The Oven (60 Hz Cord And Plug Models)
NSTALLATION How to Install the Oven (60 Hz Cord and Plug Models) Before you begin Make sure you have: An appropriate lifting device, and enough personnel, to safely move and position ▪ the weight of the oven. CMC-H2H: 304 lb (138 kg) □... - Page 33 NSTALLATION Continued from previous page Position the oven To position the oven, do the following. Step Action Make sure that: The location where the oven is being installed is rated to support the ▪ weight of the oven; The oven is within five feet (1.5m) of the appropriate electrical outlet; ▪...
- Page 34 NSTALLATION Continued from previous page Connect power To connect electric power to the oven, do the following. the main disconnect switch to the OFF position. CT-TS-012032 Connect the plug to the electrical outlet. Press reset button(s) Press and release the high limit temperature reset button(s) CT-TS-012035 Result The oven is now installed and ready to be used.
-
Page 35: How To Install The Oven (50 Hz Models Without Cord Or Plug)
NSTALLATION How to Install the Oven (50 Hz Models Without Cord or Plug) Before you begin Make sure you have: An appropriate lifting device, and enough personnel, to safely move and position ▪ the weight of the oven. CMC-H2H: 304 lb (138 kg) □... - Page 36 NSTALLATION Continued from previous page Wire sizes 60335-1 IEC:2010 Rated current of appliance Nominal cross-sectional area >0.2 – ≤3 >3 – ≤0 0.75 >6 – ≤10 >10 – ≤16 >16 – ≤25 >25 – ≤32 >32 – ≤40 >40 – ≤63 Position the oven To position the oven, do the following.
- Page 37 NSTALLATION Continued from previous page Level the oven To level the oven, do the following. Check the level of the oven using a spirit (bubble) level. Check front to back and side to side. CT-TS-012029 Adjust the legs, if necessary, to achieve levelness. The oven is now correctly positioned.
- Page 38 NSTALLATION Continued from previous page Remove the bottom 3 screws from the mounting bracket. Remove the main disconnect switch from the mounting bracket. CT-TS-012044 Install the cord through the cord grip and install in the oven. Install the lock nut onto the cord grip. VMC-TS-007946 Continued on next page Converg e®...
- Page 39 NSTALLATION Continued from previous page Connect the supply cord to the appropriate terminals (L1, L2, L3, etc.) in accordance with local codes and regulations. Install the ground wire Leave an extra loop so that current-carrying conductors become taut before the ground wire if the cord is accidentally pulled. Follow applicable regulations.
-
Page 40: How To Install The Oven On A Stand
NSTALLATION How to Install the Oven on a Stand Before you begin Make sure you have: The appropriate stand for your oven ▪ Regulation UL 197, 91.8 ▪ A pop rivet gun and rivets ▪ An appropriate lifting device, and enough personnel, to safely move and position ▪... - Page 41 NSTALLATION Continued from previous page Install the leg assembly into the top panel. Attach the leg assembly to the top panel with bolts and lock washers. VMC-TS-012923 Install the second leg assembly into the top panel. Attach the leg assembly to the top panel with bolts and lock washers. VMC-TS-012926 Install the casters or the feet assemblies into the legs.
- Page 42 NSTALLATION Continued from previous page Installing the shelf Determine which way the slots are to be oriented. (optional) VMC-TS-012932 Install the shelf onto the leg assemblies. Attach the shelf to the leg assemblies with bolts and lock washers. VMC-TS-012935 Installing the racks Install the rack into the slots on the underside of the top.
- Page 43 NSTALLATION Continued from previous page Rotate the rack and lower it into the slots on the shelf. Attach the rack to the shelf with cotter pins. NOTE: Expand the cotter pin after inserting it through the hole. VMC-TS-012941 Repeat the process for the other rack.
- Page 44 NSTALLATION Continued from previous page Place the support channels onto the top of the stand. Line up the holes in the channels with the holes in the top of the stand. CT-TS-014037 Rivet the channels to the top of the stand. CT-TS-014040 Install the pins through the channels and the top of the stand.
- Page 45 NSTALLATION Continued from previous page Installing the oven Lift the oven using an appropriate lifting device. on a stand CT-TS-014046 Place the oven on the stand. Position legs on the outside of the pins. CT-TS-014049 Result The oven is now installed to the stand. Conver ge®...
-
Page 46: How To View And Set Up Wifi Connection
NSTALLATION How to View and Set up WiFi Connection Before you begin The facility must have WiFi. ▪ Do not connect to a guest network. ▪ Procedure To set up WiFi, do the following. Step Action Touch the menu icon . - Page 47 NSTALLATION Continued from previous page Touch the “WiFi” icon CT-TS-013918 The available networks will show on the screen. The color of the network icon indicates the strength of the signal for each network. Green = strong Yellow = medium Red = weak Kitchen 1 Kitchen 2 XXXXX...
-
Page 48: How To Set Up An Ethernet Connection
NSTALLATION How to Set up an Ethernet Connection Before you begin The facility must have an Ethernet port. ▪ You will need an Ethernet cable. ▪ Procedure To set up an Ethernet connection, do the following. Step Action Plug the Ethernet cord into the Ethernet port on the oven and the wall outlet. CT-TS-013930 Touch the menu icon... - Page 49 NSTALLATION Continued from previous page Scroll to “Connection Settings”. Touch the “Setup Network” setting CT-TS-013915 Touch the “Ethernet” setting . Follow any prompts. CT-TS-013927 Result The Ethernet connection is now set up. Conver ge® O pe ra t o r ’ s M a n ua l MN-472 39 Re v 3 5/23...
- Page 50 NSTALLATION This page is intentionally left blank. Converg e® O per ator ’s Manu al MN-4723 9 Rev 3 5 /23 ▪ ▪ ▪ ▪...
-
Page 51: Operation
PERATION How to Turn On and Turn Off the Oven Before you begin The oven must be connected to electric power. Turning on the oven To turn on the oven, do the following. Step Action the main disconnect switch to the ON position. Touch the ON/OFF button ... -
Page 52: How To Preheat The Oven
PERATION How to Preheat the Oven Before you begin Make sure: The oven is turned on. ▪ The oven door is closed. ▪ Procedure To preheat the oven, do the following. Step Action Touch the menu icon . The menu screen displays. CT-TS-013849 Touch the “Settings”... - Page 53 PERATION Continued from previous page Touch the manual cook icon to return to the manual cook screen. CT-TS-012014 Touch the preheat icon . The preheat confirmation screen displays. Touch “Preheat” . All chambers start to preheat to their preset temperatures. CT-TS-012017 Screen loading bars Loading bars indicate each chamber’s progress towards reaching its set...
-
Page 54: How To Cook With Programmed Recipes
PERATION How to Cook with Programmed Recipes Before you begin Make sure: The oven is preheated. ▪ Your food is prepared and ready to cook. ▪ Procedure To cook using a programmed recipe, do the following. Step Action Touch the recipes icon . - Page 55 PERATION Continued from previous page During the cooking The cooking status screen displays the details on the current cook setting. process CT-TS-013988 During the cooking process: Action Result Touch the hand icon when to continue the cooking process. action is required... Touch the chamber...
-
Page 56: How To Cook In Manual Mode
PERATION How to Cook in Manual Mode Before you begin Make sure: The oven is preheated. ▪ Your food is prepared and ready to cook. ▪ Background This procedure consists of: setting the food loading action; ▪ and setting the cooking stage parameters (temperature, time, humidity, and fan ▪... - Page 57 PERATION Continued from previous page The “Professional Cook” screen displays. The upcoming steps set the parameters for this screen. CT-TS-013997 Cooking by time If cooking by time, touch the cook by time icon . Then, touch the cooking time Enter the cooking time using the key pad.
- Page 58 PERATION Continued from previous page Touch the cooking temperature icon Enter the cooking temperature using the key pad. Touch the humidity percentage icon Enter the humidity percentage using the key pad. Touch the fan speed icon Enter the fan speed using the key pad. The fan speed can be set in increments of five percent.
- Page 59 PERATION Continued from previous page At the end of the cooking process, the oven sounds an alert, and the chamber light and door handle light flash. Open the door and remove the hot food. NOTE: Be sure to remove the cooked food after the cooking process is complete.
-
Page 60: How To Lock And Unlock The Screen
PERATION How to Lock and Unlock the Screen Before you begin The oven is turned on. Background The screen can be locked to prevent changes being made during the cooking process. Procedure To lock and unlock the screen, do the following. Step Action Touch... -
Page 61: How To Cool Down The Oven
PERATION How to Cool Down the Oven Procedure To cool down the oven, do the following. Step Action Touch the manual cook icon CT-TS-013970 Touch the cooldown icon . The cooldown confirmation screen displays. Touch “Cooldown” Open the door. NOTE: The oven activates the blowers for the cooldown process. -
Page 62: How To Create A Recipe
PERATION How to Create a Recipe Background Creating a recipe consists of: Setting the cooking stage(s) parameters (temperature, time, humidity ▪ percentage, and fan speed); setting an action step if desired such as adding an ingredient ▪ naming the recipe; ▪... - Page 63 PERATION Continued from previous page Touch a cooking mode or an action step icon to choose the step type. CT-TS-014055 NOTE: Touching “Action” adds an action step to the recipe. An action adds manual tasks to be completed during the recipe such as loading the food or adding an ingredient.
- Page 64 PERATION Continued from previous page Touch “Recipe Description” . The recipe description screen displays. Enter the recipe description. Touch the check mark icon to return to the create recipe screen. CT-TS-014085 Touch the cook by time icon or cook by probe icon Touch the cooking time or probe set-point temperature Enter...
- Page 65 PERATION Continued from previous page Touch the chamber temperature set-point icon Enter the chamber temperature set-point using the key pad. Touch the check mark. CT-TS-014074 Touch the fan speed icon to set the fan speed. Enter the fan speed using the key pad.
- Page 66 PERATION Continued from previous page Touch the save icon when finished to save the recipe. CT-TS-014088 Result A new recipe has been created. Converg e® O per ator ’s Manu al MN-4723 9 Rev 3 5 /23 ▪ ▪ ▪ ▪...
-
Page 67: How To Modify, Duplicate, Or Delete A Recipe
PERATION How to Modify, Duplicate, or Delete a Recipe Procedure To modify, duplicate, or delete a recipe, do the following. Step Action Touch the recipes icon . The “Browse Recipes” screen displays. CT-TS-013979 Modifying To modify a recipe, touch the recipe edit icon of the desired recipe. - Page 68 PERATION Continued from previous page Duplicating To duplicate a recipe, touch the duplicate recipe icon of the desired recipe. Touch the recipe to copy The recipe copy will display at the bottom of the recipe list. Edit the copied recipe as desired. CT-TS-014095 Deleting To delete a recipe,...
-
Page 69: How To Create A Category
PERATION How to Create a Category Background A category allows the user to label and group recipes together. When viewing a recipe, the user can add a recipe to a category by touching the check mark next to the desired category. The categories can be viewed at the bottom of an existing recipe screen. - Page 70 PERATION Continued from previous page Scroll to “Categories”. Touch the plus icon to add a category. The “Create a new category” screen displays. CT-TS-014112 Enter the category name. Touch the check mark CT-TS-014115 Touch the check box on a category to select the category. This saves the current recipe to the category.
-
Page 71: How To Backup Or Restore Settings With A Usb Drive
PERATION How to Backup or Restore Settings with a USB Drive Before you begin Make sure: The oven is on, but not in a cooking mode. ▪ You will need a USB drive. ▪ Procedure To backup or restore settings with a USB drive, do the following. Step Action Touch... - Page 72 PERATION Continued from previous page Scroll to “System Backup & Update.” Touch “Backup settings to USB” or “Restore settings from USB” CT-TS-013855 Loading the recipes The oven downloads or restores the settings. When the process is complete, touch the check mark to return to the general settings screen. Remove the USB drive.
-
Page 73: How To Load Recipes From A Usb Drive
PERATION How to Load Recipes from a USB Drive Before you begin Make sure: The oven is on, but not in a cooking mode. ▪ You will need a USB drive loaded with recipes. ▪ Procedure To load recipes from the USB drive to the oven, do the following. Step Action Touch... - Page 74 PERATION Continued from previous page Scroll to “System Backup & Update.” Touch the “Upload recipes from USB” setting. CT-TS-013861 Loading the recipes The oven loads the recipe file. When the process is complete, the “Recipes uploaded” screen displays. Touch the check mark to return to the general settings screen.
-
Page 75: How To Save Recipes To A Usb Drive
PERATION How to Save Recipes to a USB Drive Before you begin Make sure: The oven is on, but not in a cooking mode. ▪ You will need a USB drive. ▪ Procedure To download recipes from the oven to a USB drive, do the following. Step Action Touch... - Page 76 PERATION Continued from previous page Scroll to “System Backup & Update.” Touch the “Download recipes to USB” setting. CT-TS-013867 Loading the recipes The oven downloads the recipes onto the USB drive. When the process is complete, the “Download successful” screen displays. Touch the check mark to return to the general settings screen.
-
Page 77: How To Update Software With A Usb Drive
You will need a USB drive with the updated software. To download the most up to ▪ date oven software and register for email notifications when new software versions are released, please visit https://www.alto-shaam.com/en/customer- support/software-downloads. Do not remove the USB drive during the update process. - Page 78 PERATION Continued from previous page Scroll to “System Backup & Update.” Touch the “Update system software” setting. CT-TS-013885 NOTICE Do not remove the USB drive during the update process. Touch “Update Back End Software” to update the supporting software between the control board (CB) and interface board (IB). The oven loads the selected software.
-
Page 79: How To Change The Home Screen
PERATION How to Change the Home Screen Procedure To change the home screen, do the following. Step Action Touch the menu icon . The menu screen displays. CT-TS-013849 Touch the “Settings” icon . The “General Settings” screen displays. CT-TS-013852 Touch the “Home Screen”... - Page 80 PERATION Continued from previous page Select your desired home screen from the list. Touch the check mark to save the home screen setting. CT-TS-013876 Restart the oven to reboot the home screen. Result The home screen has now been changed. Converg e®...
-
Page 81: How To Change The Temperature Scale
PERATION How to Change the Temperature Scale Procedure To change the temperature scale from °F to °C and vice versa, do the following. Step Action Touch the menu icon . The menu screen displays. CT-TS-013849 Touch the “Settings” icon . The “General Settings” screen displays. CT-TS-013852 Touch the “Temperature Units”... - Page 82 PERATION Continued from previous page Select your desired temperature scale. Touch the check mark to save the temperature scale setting. CT-TS-013882 Result The temperature scale has now been changed. Converg e® O per ator ’s Manu al MN-4723 9 Rev 3 5 /23 ▪...
-
Page 83: How To Enable/Disable The Handle Light
PERATION How to Enable/Disable the Handle Light Procedure To enable the handle light, do the following. Step Action Touch the menu icon . The menu screen displays. CT-TS-013849 Touch the “Settings” icon . The “General Settings” screen displays. CT-TS-013852 Scroll to the “Handle Light”... -
Page 84: How To Enable/Disable Automatic Preheat
PERATION How to Enable/Disable Automatic Preheat Background Enabling the automatic preheat function preheats the oven upon start up to the set preheat temperature. Make sure to set your preheat temperatures. See topic How to Preheat the Oven. Procedure To enable/disable automatic preheat, do the following. Step Action Touch... -
Page 85: How To Enable And Use The Replay Function
PERATION How to Enable and Use the Replay Function Background When a cooking process is complete, the replay function repeats the same cooking process when you touch the replay icon. The replay function can be used for a programmed recipe or manual cook. Procedure To enable the replay function, do the following. - Page 86 PERATION Continued from previous page Using the replay If the replay function is enabled, when the cooking process is complete, touch the replay icon to repeat the previous cooking process. function (if enabled) CT-TS-013939 Result The procedure is now complete. Converg e®...
-
Page 87: How To Lock Recipe Editing, Manual Cooking, Or The Settings Screen
PERATION How to Lock Recipe Editing, Manual Cooking, or the Settings Screen Procedure To lock recipe editing, manual cooking, or the settings screen, do the following. Step Action Touch the menu icon . The menu screen displays. CT-TS-013849 Touch the “Settings” icon . - Page 88 PERATION Continued from previous page Create a passcode using the keypad. Touch the check mark Touch the check mark to lock recipe editing. CT-TS-013945 Repeat the process to lock manual cooking or lock the settings screen. Result The lock recipe editing, manual cooking, or the settings screen are now locked. Converg e®...
-
Page 89: How To View Oven Information
PERATION How to View Oven Information Background This procedure is to be done through the touchscreen on the Deluxe control, not through the ChefLinc™ oven management system. The oven information screen shows the system info, serial number, network status, and connection settings. Procedure To view oven information, do the following. -
Page 90: How To Download Haccp Data
PERATION How to Download HACCP Data Before you begin Make sure: The oven is on, but not in a cooking mode. ▪ You will need a USB drive. ▪ Background HACCP data provides automated record keeping, set-point validation, recipes used, dates and times. The data is stored until the information is downloaded. Once downloaded, the information is removed from the oven’s memory. - Page 91 PERATION Continued from previous page Plug the USB drive into the port. VMC-TS-007852 Touch the download icon CT-TS-013900 Loading the data The oven downloads the data onto the USB drive. When the process is complete, the “Download Successful” screen displays. Touch the check mark to return to the menu screen.
-
Page 92: How To Calibrate The Temperature Probe
PERATION How to Calibrate the Temperature Probe Before you begin Make sure: The oven is on, but not in cooking mode. ▪ You have a thermometer. ▪ You have a container filled with ice and water. ▪ Procedure To calibrate the probe, do the following. Step Action Insert... - Page 93 PERATION Continued from previous page Touch the calibrate probes icon CT-TS-013906 Compare the probe temperature reading against 32°F (0°C). Touch the “+” or “–” symbols until the temperature displayed is 32°F (0°C). XX° XX° CT-TS-013909 Remove the probe from the ice water. If the oven has multiple probes, repeat this procedure until all probes are calibrated.
- Page 94 PERATION This page is intentionally left blank. Converg e® O per ator ’s Manu al MN-4723 9 Rev 3 5 /23 ▪ ▪ ▪ ▪...
-
Page 95: Maintenance
AINTENANCE Maintenance Schedule Requirements See topic How to Clean the Oven. ▪ Make sure the oven is cooled down and off—inside of chamber 140°F (60°C) or ▪ less. Daily For daily maintenance, do the following. Remove any spills with disposable paper wipes or a damp cloth. ▪... - Page 96 AINTENANCE Continued from previous page Inspect all drain hoses and clamps. ▪ Inspect all steam water injection lines and clamps for leaks or potential issues. ▪ Inspect wiring to heating elements. Re-tighten or secure as needed. Record the ▪ amp draw. Inspect wiring to the steam element.
-
Page 97: How To Clean The Oven
Background The oven has five different cleaning modes. The four cleaning cycles identified with blue icons require Alto-Shaam cleaner CE-47853. The catalyst wash cycle is identified with a green icon and requires catalyst wash descaler CE-47859. The rinse cycle is a mid-day rinse to reduce the ▪... - Page 98 AINTENANCE Continued from previous page Touch the “Cleaning” icon . The “Cleaning” screen displays. CT-TS-011223 Select the desired cleaning level, for example “Light Clean” Distribute the cleaning tablets equally between the chambers. Place tablets on the jet plates. Touch the start icon CT-TS-011228 The oven heats to the required temperature for the cleaning cycle, then the cleaning cycle starts.
- Page 99 AINTENANCE Continued from previous page Touch “Ok” when the cleaning cycle is complete. WARNING: Burn hazard. Open the door carefully when the cleaning cycle is complete. Escaping hot vapors or steam can cause injury. CT-TS-014015 Clean the door glass with Windex® or equivalent glass cleaner. Clean the door gasket with soap and water.
-
Page 100: How To Clean The Oven With The Catalyst Wash
NOTICE Using improper cleaning procedures will damage the catalyst and void the warranty. Use only Alto-Shaam cleaner CE-47853 when running a cleaning cycle. For a catalyst cleaning cycle, use only catalyst wash descaler CE-47859. The use of any other cleaning chemical may damage the catalyst and void the warranty. - Page 101 AINTENANCE Continued from previous page Touch the “Cleaning” icon . The “Cleaning” screen displays. CT-TS-011223 Touch “Catalyst Wash” Distribute the catalyst wash descaler tablets equally between the chambers. Place tablets on the jet plates. Touch “Ok” to start the catalyst wash cycle. Catalyst Wash requires 3 tablets.
- Page 102 AINTENANCE Continued from previous page Touch “Ok” when the catalyst wash cycle is complete. WARNING: Burn hazard. Open the door carefully when the catalyst wash cycle is complete. Escaping hot vapors or steam can cause injury. 03:44:15 Catalyst Wash program finished.
-
Page 103: How To View The Cleaning Log
AINTENANCE How to View the Cleaning Log Background The cleaning log allows the user to view details about the previously completed cleaning cycles on the unit. Procedure To view the cleaning log, do the following. Step Action Touch the menu icon . -
Page 104: How To Set The Cleaning Time
AINTENANCE How to Set the Cleaning Time Background The user can set a cleaning frequency to schedule when the unit will go through a cleaning cycle. The cleaning frequency can be set by hours or day and time. Procedure To set the cleaning time, do the following. Step Action Touch... - Page 105 AINTENANCE Continued from previous page Setting the cleaning Touch the “Hours” setting to set the cleaning frequency hours. Enter frequency hours desired hours using the key pad. Touch the check mark. XXXXX CT-TS-014724 Setting the cleaning Touch the “Date & Time” setting to set the day and time for cleaning.
- Page 106 AINTENANCE This page is intentionally left blank. Converg e® O per ator ’s Manu al MN-4723 9 Rev 3 5 /23 ▪ ▪ ▪ ▪...
-
Page 107: Troubleshooting
ROUBLESHOOTING Error Codes Code Description Parameters that trigger the error Possible Cause(s) Motor error No chamber motor rotation detected for 1. Power down the control using the ON/OFF greater than 30 seconds. button. 2. Cycle power to the oven either by unplugging the oven or setting the main disconnect switch OFF and ON. - Page 108 ROUBLESHOOTING Code Description Parameters that trigger the error Possible Cause(s) E-31 Electronics over Interface board temperature exceeds 1. Power down the control using the ON/OFF temperature 184°F (84°C). button. 2. Cycle power to the oven either by unplugging the oven or setting the main disconnect switch OFF and ON.
- Page 109 Note: Contact an down for a minimum of 30 minutes. authorized 2. Press the high limit reset buttons. Alto-Shaam service 3. Continue operation of the oven. If the error partner. reoccurs, contact Technical Service. E-606 Oven cleaning system Convection fan error, high limit error, 1.
-
Page 110: What To Do If The Fan Indicator Light Illuminates
ROUBLESHOOTING What to do if the Fan Indicator Light Illuminates Procedure If the fan indicator light illuminates, do the following. Step Action Turn off the oven and allow it to cool. CT-TS-011206 Resume operation of the oven. NOTE: If the fan indicator light remains on, the appliance is malfunctioning. -
Page 111: What To Do If The High Limit Screen Displays
ROUBLESHOOTING What to do if the High Limit Screen Displays Procedure If the high limit screen displays, do the following. Step Action Press and release the high limit temperature reset button(s). NOTE: The high limit temperature reset buttons are located under the fan cover. - Page 112 ROUBLESHOOTING This page is intentionally left blank. Converg e® O per ator ’s Manu al MN-4723 9 Rev 3 5 /23 ▪ ▪ ▪ ▪...
-
Page 113: Notifications
OTIFICATIONS Notifications FCC ID: N6C-SDPAC IC ID: 4908A-SDPAC NOTICE Federal Communication Interference Statement (United States only) This equipment has been tested and found to comply with the limits for a class B digital device, pursuant to Part 15 of the FCC rules. These limits are designed to provide reasonable protection against harmful interference in a residential installation. - Page 114 OTIFICATIONS Canadian Department of Communications Industry Canada Notice (Canada only) This Class B digital apparatus complies with Canadian ICES-003. FCC Rules, Part 15 / Industry Canada This device complies with Part 15 of FCC Rules and Industry Canada license- exempt RSS standard(s). Operation is subject to the following two conditions: (1) This device may not cause harmful interference, and (2) This device must accept any interference, including interference that may cause undesired operation of this device.
- Page 115 OTIFICATIONS General Specifications Chipset: QCA9377-3, (Qualcomm Atheros) Host Interface: Wifi: SDIO v3.0; BT: High Speed UART Operating Voltage: 3.30 VDC +/- 5% Operating -20 to +70 degrees C Temperature: Dimensions: 18.0 x 13.0 x 2.2 mm (L x W x D) Connector Type: 52-pin proprietary Radio Specifications:...
-
Page 116: Conditions For Ovens Installed In New York City
OTIFICATIONS Conditions for Ovens Installed in New York City Operating instructions in the manual must be read and understood by all ▪ persons using the appliance. The person responsible for training of the operators is responsible for the safekeeping of the manual. Prior to installation, plans specifying the exact product name/model number and ▪... -
Page 117: Warranty
ARRANTY Warranty Introduction Alto-Shaam, Inc. warrants to the original purchaser only, that any original part found to be defective in material or workmanship will be replaced with a new or rebuilt part at Alto-Shaam's option, subject to provisions hereinafter stated. - Page 118 No person except an officer of Alto-Shaam, Inc. is authorized to modify this warranty or to incur on behalf of Alto-Shaam any other obligation or liability in connection with Alto-Shaam equipment.
-
Page 119: Declaration Of Conformity
ECLARATION OF ONFORMITY Conver ge® O pe rat or ’ s Ma nual MN-472 39 Re v 3 5/23 ▪ ▪ ▪ ▪... - Page 120 ECLARATION OF ONFORMITY Converg e® O per ator ’s Manu al MN-4723 9 Rev 3 5 /23 ▪ ▪ ▪ ▪...
- Page 124 Miami, FL US A INDIA MEXICO Pune, India Leon, Mexic o AUSTRALIA Brisbane, Queenslan d Menomonee Falls, WI U.S.A. Phone 800 -558-8 744 | +1-262-251-3800 | alto-shaam.co m ASIA FRANCE MEXICO Shanghai, China Aix en Provence, France Phone +52 1 477-717-3108 Phone +86-21-6173-0336 Phone +33(0)4-88-78-21-73 MIDDLE EAST &...
Need help?
Do you have a question about the Converge CMC-H2H and is the answer not in the manual?
Questions and answers