Table of Contents
Advertisement
Quick Links
Introducing the 3-Port DVI Splitter
The 3-Port DVI Splitter provides an easy solution for
distributing one DVI video signal to three displays.
Features and Benefits
•
Connects a DVI video source to 3 DVI compatible
displays
•
Perfect as a repeater by regenerating the DVI signal
•
Stackable; up to 8 devices to support up to 17
outputs
•
Reads and remembers EDID of displays
Technical Specifications
•
Input connector: 1 x DVI-I
•
Output connector: 2 x DVI-I
•
Maximum resolution: 1600 x 1200
•
LEDs: 1 x Green (ID), 1 x Red (power)
•
DIP switch: 2
•
Dimensions: 12mm (L) x 88mm (W) x 25mm (H)
•
Weight: 300g
Package Contents
•
3-Port DVI Splitter
•
DVI Y-cable (DVI to DVI x2, 100/180 cm)
•
Power Adapter (5V, 2A)
•
Quick Installation Guide
04-0493A
3-Port DVI Splitter
Quick Installation Guide
1
Advertisement
Table of Contents

Subscribe to Our Youtube Channel
Related Manuals for SIIG CE-DV0031-S1


Summary of Contents for SIIG CE-DV0031-S1
-
Page 1: Quick Installation Guide
3-Port DVI Splitter Quick Installation Guide Introducing the 3-Port DVI Splitter The 3-Port DVI Splitter provides an easy solution for distributing one DVI video signal to three displays. Features and Benefits • Connects a DVI video source to 3 DVI compatible displays •... -
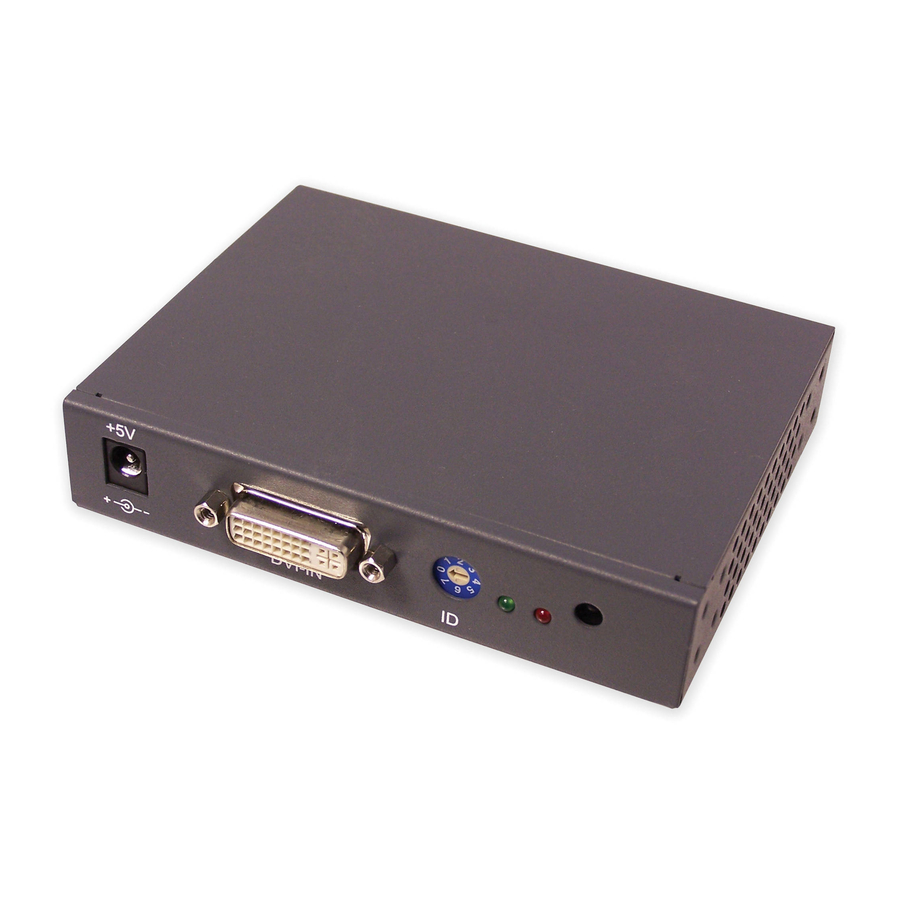
Page 2: Front Panel
Front Panel Connect to DVI Display Note: When cascading, use the short cable of the DVI Y-cable to connect to the next splitter's DVI-IN. Rear Panel Power Jack Connect to DVI output (PC) • Power Jack: connect to the power supply •... - Page 3 DIP Switch • 1 ON: open EQ. Less noise but more power consumption • 1 OFF: Close EQ • 2 ON: Writing Default EDID. Set switch to ON, plug in the power adapter. The green light will turn on after the writing process in completed. •...
-
Page 4: Hardware Installation
DVI Y-cable female connector and plug the short cable to the DVI-In of the second 3-Port DVI Splitter. Connect the third display to the DVI-Out 1 of the second 3-Port DVI Splitter Repeat steps 2-4 for the remaining cascaded splitters. -
Page 5: Safety Precautions
For each splitter, plug the power adapter into the Power Jack, then plug the power adapter into a reliable power outlet. Connect a PC or other device with DVI output to the DVI-In of the first 3-Port DVI Splitter. Safety Precautions Like all electronic equipment the 3-Port DVI Splitter should be used with care. - Page 6 Blank Page...
-
Page 7: Technical Support And Warranty
Step 1: Submit your RMA request. Go to www.siig.com, click Support, then RMA to submit a request to SIIG RMA. If the product is determined to be defective, an RMA number will be issued. Step 2: After obtaining an RMA number, ship the product. - Page 8 Fremont, CA 94538-3152, USA Ph: 510-657-8688 3-Port DVI Splitter is a trademark of SIIG, Inc. SIIG and the SIIG logo are registered trademarks of SIIG, Inc. Other names used in this publication are for identification only and may be trademarks of their respective companies.
Need help?
Do you have a question about the CE-DV0031-S1 and is the answer not in the manual?
Questions and answers