Table of Contents
Advertisement
Quick Links
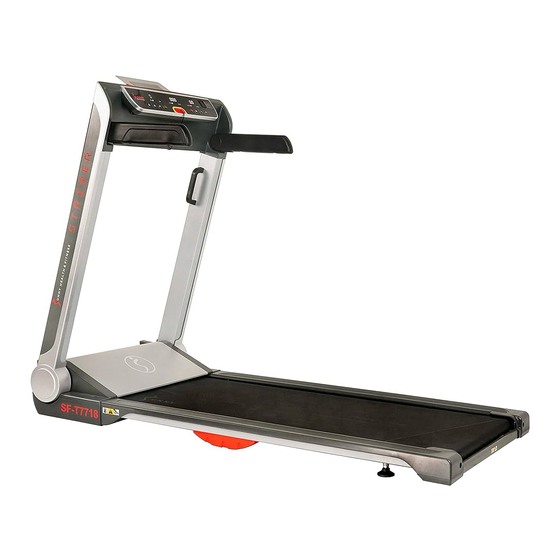
SMART STRIDER TREADMILL WITH
20" WIDE LOPRO DECK
SF-T7718 SMART
USER MANUAL
IMPORTANT! Please retain owner's manual for maintenance and adjustment instructions. Your
satisfaction is very important to us, PLEASE DO NOT RETURN UNTIL YOU HAVE CONTACTED US:
support@sunnyhealthfitness.com or 1-877-90SUNNY (877-907-8669).
Advertisement
Table of Contents

Related Manuals for Sunny Health & Fitness SF-T7718 SMART


Summary of Contents for Sunny Health & Fitness SF-T7718 SMART
- Page 1 SMART STRIDER TREADMILL WITH 20" WIDE LOPRO DECK SF-T7718 SMART USER MANUAL IMPORTANT! Please retain owner’s manual for maintenance and adjustment instructions. Your satisfaction is very important to us, PLEASE DO NOT RETURN UNTIL YOU HAVE CONTACTED US: support@sunnyhealthfitness.com or 1-877-90SUNNY (877-907-8669).
-
Page 2: Important Safety Instruction
IMPORTANT SAFETY INSTRUCTION When using an electrical appliance, basic precautions should always be followed, including the following: Read all instructions before using (this appliance). DANGER –To reduce the risk of electric shock: Always unplug this appliance from the electrical outlet immediately after using and before cleaning. -
Page 3: Important Safety Information
IC Radiation Exposure Statement: This equipment complies with Canada radiation exposure limits set forth for an uncontrolled environment. This equipment should be installed and operated with a minimum distance of 20cm between the radiator and your body. This transmitter must not be co-located or operating in conjunction with any other antenna or transmitter. -
Page 4: Important Note
12. Your product is intended for use in cool and dry conditions. You should avoid storage in extreme cold, hot or damp areas as this may lead to corrosion and other related problems. 13. This treadmill is designed for indoor and home use only; it is not intended for commercial use! IMPORTANT OPERATING INSTRUCTION 1. -
Page 5: Pre-Assembly Check List
PRE-ASSEMBLY CHECK LIST Before you start to assemble, please make sure all parts are included. Description Spec. Qty. Description Spec. Qty. Treadmill Power Wire Spanner W/ Screw Driver S=13,14,15 Lubricant Oil Allen Wrench Manual Safety Key Thank You Card Ordering Replacement Parts (U.S. and Canadian Customers only) Please provide the following information in order for us to accurately identify the part(s) needed ... - Page 6 ASSEMBLY INSTRUCTIONS We value your experience using Sunny Health and Fitness products. For assistance with parts or troubleshooting, please contact us at support@sunnyhealthfitness.com or 1-877-90SUNNY (877-907-8669). STEP 1: Open carton remove contents. Place the Treadmill (No. A) on leveled ground. Ensure that you have a work area that is clean and has adequate space.
- Page 7 We value your experience using Sunny Health and Fitness products. For assistance with parts or troubleshooting, please contact us at support@sunnyhealthfitness.com or 1-877-90SUNNY (877- 907-8669). STEP 3: Turn the Left & Right Handlebars (No. C10 & No. C11) down to the fixed position.
-
Page 8: Maintenance And Care
MAINTENANCE & CARE General cleaning will help prolong the life and performance of your treadmill. Keep the unit clean and maintained by dusting the components on a regular basis. Clean both sides of the Running Belt (No. C31) to prevent dust from accumulating underneath. Keep your running shoes clean so that dirt from your shoes do not wear out the Running Board (No. -
Page 9: Lubricating The Treadmill
LUBRICATING THE TREADMILL IMPORTANT NOTE: You will need to lubricate your treadmill before the first use. RUNNING BELTS & TREADMILL LUBRICANT: Lubricating the Running Board (No. D18) and Running Belt (No. C31) is essential as the friction affects the life span and operations of the treadmill. Inspect the Running Board (No. D18) and Running Belt (No. -
Page 10: Folding Instructions
FOLDING INSTRUCTIONS STEP 1: NOTE: Always unplug the treadmill from the electrical outlet before folding. Pull out the Plastic Nut (No. C09) with your left hand and turn the Holder (No. C08) down with your right hand. Once the holder reaches a suitable angle, let go of the Plastic Nut (No. - Page 11 STEP 3: Pull out the Rotating Plate (No. A12) with your right hand and place your left Handle (No. C42) hand [Position B]. Then push down the Left & Right Upright Tubes (No. A06 & No. A07) at the same time. When pushing down the Left &...
- Page 12 STEP 5: Place your hand on Position E, and using your foot, turn the Folding Fixed Board (No. A13) to horizontal position. STEP 6: Hold the treadmill at Position E with your hand. Next, using your foot, firmly push against treadmill at position J. Carefully tilt the treadmill forward.
- Page 13 STORAGE OF TREADMILL This treadmill is designed for saving space. You can choose to store treadmill vertically or horizontally. A. Vertical Storage After folding, place the treadmill near the wall to avoid falling. Keep out of reach of children. B. Horizontal Storage After folding, you can store the treadmill under table or any other available space.
-
Page 14: How To Move The Treadmill
HOW TO MOVE THE TREADMILL Place your hands at Position E. Put the Folding Frame (No. A05) inside the bottom of the treadmill and turn the Folding Fixed Board (No. A13) vertically with your foot to fix the Folding Frame (No. A05). To transport, hold the treadmill at Position E and tilt until the transportation wheels can move smoothly. -
Page 15: Important Electrical Information
IMPORTANT ELECTRICAL INFORMATION WARNING: This treadmill requires a power source of 10 amps (100-120V) in order to properly operate. For your safety, as well as the safety of others, please verify that the power source is correct before plugging in the equipment. Any power source above or below this level could cause significant damage to the equipment and/or user. -
Page 16: Quick Start
OPERATING INSTRUCTIONS QUICK START: 1. Insert the magnetic end of the Safety Key (No. D07) into the console. Turn on the power switch. 2. Press the START button, and the system will automatically display a 3 seconds countdown. Once the countdown reaches zero, the Running Belt (No. C31) will start at the initial default speed of 0.6 MPH. -
Page 17: Function Keys
PROGRAMS Initial Default Value Set Range Display Range TIME(MIN:SECOND) 0:00 15:00 5:00-99:00 0:00-99:00 SPEED(MPH) 0.6-9.0 0.6-9.0 DISTANCE(MILE) 0.00 1.00 0.50-99.9 0.00-99.9 PULSE(BPM) 50-200 CALORIE(KCAL) 10-999 0-999 FUNCTION KEYS: START: To start the treadmill, insert the magnet end of the safety key into the console and press the START button. - Page 18 4. To connect the equipment to the SunnyFit app: a. From the “Workout” tab, press on the “Search” button to search for your equipment. b. Once your equipment appears on the list, tap the “Select” button to confirm. c. Note: If your equipment does not appear on the "Searching for Equipment" list, check the CONSOLE on your equipment to ensure that it is not in sleep mode and your phone's Bluetooth function is on, then tap "Retry"...
-
Page 19: Exercise Instructions
TREADMILL FUNCTIONS SAFETY LOCK FUNCTION: Removing the Safety Key (No. D07) from the console while the treadmill is running will cause it to stop immediately. Once the treadmill reaches a full stop, the window display of the console will show “- - -” and the buzzer will beep 3 times. -
Page 20: Heart Rate Measurement
HEART RATE MEASUREMENT It is dangerous to measure heart rate while you are running. Only measure heart rate when you stop running. Softly press Infrared Heart Rate Sensor (No. G01) to measure your heart rate. Do not move your finger until the pulse value stops flashing. - Page 21 Incoming voltage is lower Check that the incoming power E02: Burst clash protection than 50% of the required supply is the correct voltage. voltage. Restart the treadmill. Check the The incoming voltage is incoming voltage to ensure it is too low or too high. The correct.
-
Page 22: Exploded Diagram
EXPLODED DIAGRAM 1... - Page 23 EXPLODED DIAGRAM 2...
-
Page 24: Parts List
PARTS LIST Description Specification Description Specification Base Frame Left Handlebar Guide Rod Connecting Right Handlebar Frame 1 Guide Rod Connecting Left Handle Bar Front Cover Frame 2 Main Frame Right Handle Bar Front Cover Folding Frame Handle Bar Side Cover Left Upright Tube Motor Top Cover Right Upright Tube... - Page 25 Description Specification Description Specification AC Single Line Brown 200 Screw ST4.2*20 AC Single Line Blue 200 Screw ST4.2*12 AC Single Line Brown 350 Screw ST4.2*15 ST4.2*12with AC Single Line Blue 350 Screw washer DC Motor Screw ST2.9*8 Running Board Big Flat Washer Φ8*Φ22*2.0 Power Wire Flat Washer...
Need help?
Do you have a question about the SF-T7718 SMART and is the answer not in the manual?
Questions and answers