
Related Manuals for Kogan SMARTERHOME G30


Summary of Contents for Kogan SMARTERHOME G30
- Page 1 KOGAN SMARTERHOME™ G30 SMART ROBOT VACUUM CLEANER WITH MOPPING FUNCTION KAVACRBG30A...
-
Page 3: Safety And Warnings
SAFETY AND WARNINGS Before using this product, please read the following safety instructions and follow all routine safety precautions! • Please read these instructions carefully. • Please keep this book for future reference. • Any operation not in compliance with these instructions is likely to cause damage to the product. - Page 4 • Never let the device vacuum up water or other liquids, this will cause damage to the vacuum. • Do not use the vacuum cleaner in confined spaces (small table, chair) which may lead to product damage. • Outdoor use is prohibited. •...
- Page 5 COMPONENTS Cleaner Remote control Charging dock station Power adapter Water tank Dustbin HEPA Side brush (x2)
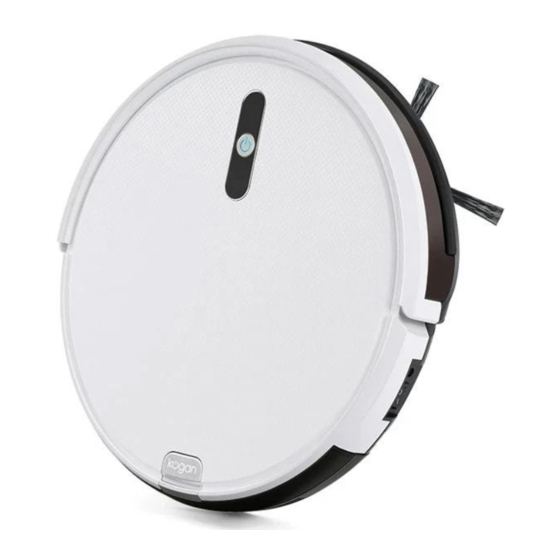
- Page 6 OVERVIEW Top: Bottom: Dustbin:...
- Page 7 Water Tank: Charging Dock: Remote Controller:...
- Page 8 ASSEMBLY Installation of the Water Tank Fill the tank with water or any desired plastic-safe cleaning solution by removing the plastic stopper, marked with a nozzle symbol located on the top of the tank, and filling until it is full. Reinsert the plastic stopper. Completely dry off the water tank before inserting into the robot.
- Page 9 Taking the sweeping bracket with the rubber extension facing up, insert the two front prongs into the corresponding holes in the same compartment containing the roller brush. Lower the left and right clips located on the sides of the sweeping bracket into their corresponding holes until a click is heard.
-
Page 10: Installation
INSTALLATION Charging Your Vacuum Connect the power adapter to the power adapter jack on the charging dock. Locate an electrical outlet on the wall close to the ground and plug in the power adapter. Place the charging dock in a flat position on the ground with the back pushed up against a wall. - Page 11 When the robot is cleaning or on the standby mode, press the “Return Home” button on the remote controller, the robot will return to the charging dock. Turn on the power of the robot by flipping the power switch, “-” is turn on, “0” is turn off. When the robot is on, it will emit a blue light.
- Page 12 Note: Do not charge the robot while the water tank and mop is installed and filled with solution. Charging Status When the red/blue light on the button is blinking, the robot is charging. The charge level is below 15% when the red light blinks, and the charge is above 15% when the blue light blinks.
- Page 13 Install App Download the “Kogan SmarterHome” app from the Play Store (Android) or App Store (iOS). Register If you do not have a Kogan SmarterHome™ account, register or sign in with a verification code sent by SMS. To register: Tap to enter registration page.
- Page 14 Set device in pairing mode When the device is first turned on, it may automatically enter pairing mode (the indicator light will be continuously flashing). If not automatically in pairing mode when powered on, you can manually set the device in pairing mode by holding down the Home button while pressing the anti-collision strip simultaneously until the light begins flashing.
- Page 15 Select “AP Mode” for the set-up type. Ensure that the device is in pairing mode, with the light flashing, and tap “Confirm light is slowly flashing”. Enter your Wi-Fi details. It is important that your SmarterHome™ device and the app are connected to the same Wi-Fi network during setup.
- Page 16 10. Follow the in-app prompts to continue AP Mode connection, which will pair your mobile phone to the device’s Wi-Fi hotspot to ensure a connection. Note: If the Wi-Fi hotspot does not appear on your phone in the list of available networks, your device may not be set in AP Pairing Mode correctly.
- Page 17 Having trouble connecting? The prior steps detail the process for “AP Mode” connection. If that does not work for your connection, we suggest trying it again, and if still no success, attempting the following method for Standard (non-AP Mode) connection. Add device through network Once registered, tap “+”...
- Page 18 Notes: The device and the app have to use the same Wi-Fi network. • • The device is only compatible with 2.4Ghz networks. If neither Standard or AP Mode methods are successful, please contact kogan.com for assistance.
-
Page 19: Operation
OPERATION To start your robot, turn on the power switch on the side of the robot. The blue light on the button will illuminate. The robot will enter standby mode. Press the button on the panel, the robot will begin the planned clean. If you press the button on the panel whilst the robot is cleaning, the robot will enter into standby mode and wait for the next instruction. - Page 20 Wi-Fi mode: Use your thumb to press and hold the power button, while the index finger presses against the anti-collision strip of the machine. When you hear the voice of “Di”, release the button and the blue light on the panel will begin blinking. The robot will enter into Wi-Fi mode. Note •...
- Page 21 Button Functions of the Remote Control Press this button to set the current time. Press and hold this button for 5 seconds to enter schedule mode. This button will stop the robot cleaning and force it to return to the charging dock.
- Page 22 Press this button and the robot will enter complete cleaning mode. The robot will clean, and once it finishes cleaning, it will return to the charging dock. When it is charger, it will start the planned clean for the second time. Use this button to confirm settings when using schedule mode.
-
Page 23: Cleaning And Care
CLEANING & CARE Removal and Cleaning of the Dustbin Press the dustbin button on the panel to take out the dustbin. Open the upper cover of the dustbin and pour out the dirt and debris. Removal and Cleaning of the Water Tank Press the water tank button on the panel, to take out the water tank. - Page 24 Removal and Cleaning of the Roller Brush Press the clip at each end of the sweeping bracket simultaneously with both index fingers to remove the sweeping bracket. Pull up on the left end of the roller brush to remove it. Clean the hair off the brush or wash it with water (do not reinsert it until it is completely dry after washing).
- Page 25 13. From the home page of the Google Home app, select the “+” icon to access the ‘Add and manage’ page. 14. Select ‘Set up device’, then under the Works with Google banner, select ‘Have something already set up?’ 15. Select the search bar and type ‘Smarter Home’ to locate the Kogan SmarterHome™ service.
- Page 26 16. Tap ‘Authorise’ to grant Google permission to access the SmarterHome™ app and your devices. 17. From here, you will be prompted to sign into your SmarterHome™ account using either your email or mobile phone number, depending on which method you used to register your account.
- Page 27 19. Tap on any of the devices to view a list of available commands. Note: Please note that Google Home can only control the base/core functions of any compatible SmarterHome™ devices. To make full use of this product’s smart functionality, please use the Kogan SmarterHome™ app.
- Page 28 AMAZON ALEXA CONTROL Note: You will need to have set up an Alexa account prior to linking your Kogan SmarterHome™ device. Adding “SmarterHome” to the Alexa app From the home page of the Alexa app, select the “ ” icon in the top-right and select Skills &...
- Page 29 Tap ‘Enable to Use’ to add the Kogan SmarterHome™ skill to Alexa. From here, you will be prompted to sign into your SmarterHome™ account using either your email or mobile phone number, depending on which method you used to register your account.
- Page 30 SmarterHome™ account. When your devices have successfully connected to the Alexa app, you will be able to control your Kogan SmarterHome™ devices via Alexa’s voice commands. Note: Please note that Alexa can only control the base/core functions of any compatible SmarterHome™...
-
Page 31: Specifications
SPECIFICATIONS Vacuum Specifications Specification Value Rated Voltage DC 14.8V Rated Power Operating temperature range -10˚C-45˚C Input voltage/current DC 19V/0.6A Infrared remote control 38kHz Dimensions 310x68mm Weight 2.9kg Battery Lithium-ion 2200mAh Dustbin capacity 350ml Water tank capacity 550ml Charging Dock Specifications Specification Value Dimensions... - Page 32 Remote Controller Specifications Specification Value Dimensions LxWxH: 120x55x13mm Battery DC 3V (AAA) Remote control type Infrared Emitting and receiving ≤5m distance Operating temperature range -10˚C-45˚C Operating humidity range ≤ 85RH...
-
Page 33: Troubleshooting
TROUBLESHOOTING Issue Warning Signs Cause of Issue Troubleshooting The left and right Solid red light, one The left and right Clean the hair or debris on wheels fail to sound three times. drive wheels are the left and right wheels. work. - Page 34 Need more information? We hope that this user guide has given you the assistance needed for a simple set-up. For the most up-to-date guide for your product, as well as any additional assistance you may require, head online to help.kogan.com...
Need help?
Do you have a question about the SMARTERHOME G30 and is the answer not in the manual?
Questions and answers
Are the side brushes and HEPA filter available as spares for Model KAVACRGB30A? If they are, how can I order them?