Advertisement
- 1 IMPORTANT SAFEGUARDS
- 2 DESCRIPTION
- 3 AUTHENTIC ESPRESSO
- 4 BEFORE FIRST USE
- 5 MAKING ESPRESSO
- 6 MAKING CAPPUCCINOS
- 7 MAKING CAFFE LATTES
- 8 STEAMING WITHOUT MAKING ESPRESSO
- 9 CLEANING AND SERVICING
- 10 CLEANING THE CAPPUCCINO NOZZLE
- 11 DECALCIFYING THE ESPRESSO SIDE
- 12 TROUBLESHOOTING
- 13 Documents / Resources
IMPORTANT SAFEGUARDS
When using electrical appliances, basic safety precautions should always be followed to reduce the risk of fire, electric shock, and/or injury to persons including the following:
- Read all instructions prior to first use.
- Do not touch hot surfaces. Always use handles orknobs.
- To protect against fire, electric shock and injury topersons, do not immerse cord, plugs or machine in water or other liquid.
- Not intented for use by children.
- Close supervision is necessary when any machine isused near children. Keep machine out of reach of children.
- This appliance is not designed to be used by childrenor people without knowledge or experience with the machine.
- Children must be supervised to ensure that they donot play with the appliance.
- Burns can occur from touching the hot plate, hot wateror steam. Exercise caution.
- Exercise caution when using the steam nozzle assteam can cause scalding.
- Unplug machine from outlet when not in use and whencleaning. Allow to cool before putting on or taking off parts, before cleaning the machine, and before storing.
- All machines are subject to stringent quality control. Practical tests using machines taken at random are conducted and this may explain any slight marks or coffee residue prior to use.
- Do not operate any machine with a damaged cord orplug or after the machine malfunctions, or has been damaged in any manner. Return machine to the nearest Krups Service Center for examination, repair or adjustment or your respective countries Consumer Service Department.
- To reduce the risk of injury do not drape cord over thecounter top or table top where it can be pulled on by children or tripped over accidentally.
- Do not let cord hang over edge of table or counter, ortouch hot surfaces.
- The use of accessory attachments not recommendedby Krups may result in fire, electric shock or injury to persons.
- Do not use outdoors.
- Do not place on or near a hot gas or electric burner, orin a heated oven.
- To disconnect the machine, turn the control to "off"then remove plug from wall outlet. Do not yank cord, instead grasp plug and pull to disconnect.
- Do not use the machine for anything other than itsintended use.
- Do not pour liquids other than water and descalingsolutions specified in this manual into the water tank.
- Protect the machine against humidity and freezing.
- Scalding may occur if the lid is removed during thebrewing cycles.
- This machine is for household use only.

This machine is intended for household use only. Any servicing other than cleaning and user maintenance should be performed by the nearest authorized Krups Service Center.
Visit our website at www.krupsusa.com in the USA or www.krups.ca in Canada or contact your respective country's Consumer Service department for the service center nearest to you.
To reduce the risk of fire or electric shock, do not attempt to disassemble the machine. Repair should be done by an authorized Krups Service Center only.
A short power-supply cord is to be provided to reduce risks resulting from becoming entangled in or tripping over a longer cord.
- We do not recommend using an extension cord with this device.
- If an extension cord is absolutely necessary,
- the marked electrical rating of the extension cordshould be at least as great as the electrical rating of the machine,
- the longer cord should be arranged so that it will notdrape over the counter top or table top where it can be pulled on by children or tripped over.
- This machine has a polarized plug (one blade is wider than the other). To reduce the risk of electric shock, this plug is intended to fit into a polarized outlet only one way. If the plug does not fit fully into the outlet, reverse the plug. If it still does not fit, contact a qualified electrician. Do not attempt to modify the plug in any way.
In the interest of improving products, Krups reserves the right to change specifications without prior notice.
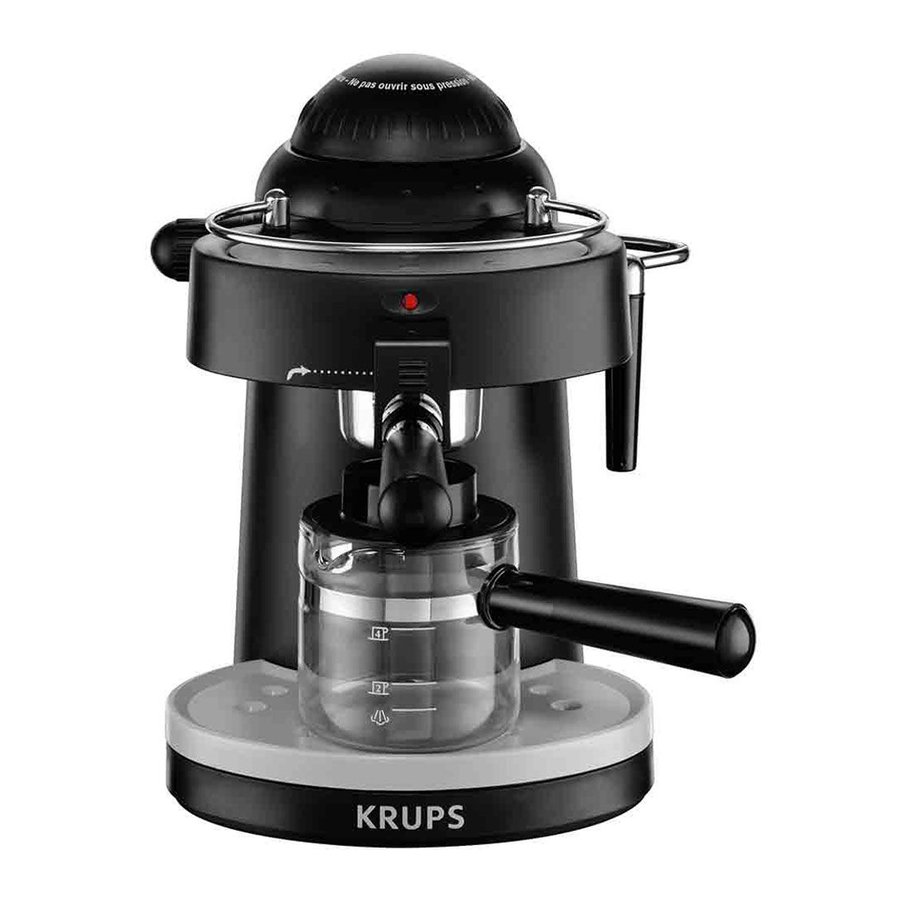
DESCRIPTION

- ON/OFF Pilot light
- Selector knob
b1 Off position
b2 Espresso-coffee making position
b3 Hot steam position - Filter-holder
c1 Removable filter for 1 to 4 cups
c2 Filter locker - Measuring spoon
- Carafe
- Removable drip tray grid
- Cappuccino accessory
- Steam nozzle
- Boiler cap for water tank
AUTHENTIC ESPRESSO
Espresso is a richer and more aromatic brew than regular coffee. It is typically enjoyed in smaller quantities because of its richness, and for that reason, espresso is usually served in small (1.5 - 2 oz) cups.
Your appliance when properly used will produce espresso that is deep in flavor and dark in color. Just follow the instructions and use fresh roasted coffee that has been pre-ground to an espresso grind.
Preparing an espresso or cappuccino is different from brewing regular drip coffee. One main difference is that the water will come to a boil and will then be forced through the ground coffee. This means that an espresso machine works under pressure and needs special attention.
PRESSURE
Never open boiler cap (i) or remove filter holder (c) while your appliance is turned "on" or while there is still pressure in the boiler container.
To check for pressure:
Turn the selector knob (b) to the "Off" position. Fig. 1.

Turn the selector knob to the steam position (b3) Fig. 10. If steam comes out of the nozzle, then the boiler chamber is still under pressure. Close steam knob and proceed with instructions listed below.

Take a pitcher filled with cold water and hold it underneath the steam nozzle with nozzle inserted into the pitcher. Then turn the selector knob to the steam position (b3). Leave steam release knob open until no more steam comes out of nozzle. When finished turn the selector knob (b) to the "Off" position. Now you can remove the boiler cap and the filter holder.
HOT
Do not touch boiler cap (i) during operation. Before removing boiler cap turn off machine, let it cool down for at least 2 or 3 minutes. Relieve pressure. (See CAUTION-PRESSURE).
BEFORE FIRST USE

Before using your machine for the first time, or after not having used it for a considerable amont of time, rinse the appliance as indicated below. Check that the appliance is unplugged.
Check that the appliance is unplugged.
Unscrew the boiler cap. Fig. 2.

Pour 8 oz (240 ml) of cold water into the water tank. Do not pour warm or hot water into the water tank. Fig. 3.

Screw the boiler cap on tightly. Fig. 4.

Fit the filter (without any coffee) into the filter-holder and rotate filter inside filter-holder to secure it. Fig. 5.

Insert the filter holder in the appliance. Turn it firmly from left to right to put it into the "locked" position. Fig. 6.

Place the carafe or a cup under the filter holder. Plug in the appliance. Fig. 7.

Turn the selector knob to the "Espresso" position (b2). Fig. 8.

The ON/OFF pilot light will light up.
After a few minutes, the water will boil and hot water will start to drip. When the container/cup is full, turn the selector knob to the "Off" position (b1).
Place a cup under the steam nozzle and turn the selector knob to the steam setting (b3). When there is no more steam, turn to the "Off" position (b1).
Never remove filter holder or open boiler cap without having released remaining pressure in appliance. (See CAUTIONPRESSURE).
MAKING ESPRESSO
Check that the appliance is unplugged and that there is no pressure. (See CAUTION-PRESSURE).
Unscrew the boiler cap Fig. 2. Measure out the right amount of water for your needs and pour it into the water tank. For instance: an espresso-sized cup (small cup for strong espresso) = 1 to 2 oz (25 to 50 ml). A standard-sized cup (for milder espresso) = 3 to 4 oz (75 to 100 ml). Up to 4 espressos or 2 standard cups can be made at one time, without adding additional water to the tank.
Pour the water into the tank. Fig. 3.
Screw the boiler cap on tightly. Fig. 4. Plug in the appliance.
Fit the filter into the filter-holder and rotate filter inside filter-holder to secure it. Fig. 5.
Put the ground coffee into the filter holder using the measuring spoon. 1 full measuring spoon is the amount needed for 1 espresso. Using a tamper or the back of the measuring spoon tamp down the coffee.
Remove any excess coffee on the edge of the filter-holder.
ATTENTION! Do not over fill or pack coffee too tightly. Fit the filter-holder into the appliance turning it from left to right and locking it firmly into place. Fig. 6.
Place a cup or the carafe under the filter-holder. Fig. 7.
Turn the selector knob to "espresso" (b2). Fig. 8.
The ON/OFF pilot light will light up. After 3 to 4 minutes, the espresso will start to drip. Wait until the espresso has stopped dripping before removing the cup or carafe and then turn the selector knob to the "Off" position (b1). Fig. 9.

ATTENTION! We advise you to not switch off the appliance before the cycle is completely finished. At the end of the cycle, steam will dry out the coffee grounds thus producing a puck that is drier and easier to remove. Never remove filter holder or open the water tank without having released remaining pressure in appliance. (See CAUTION-PRESSURE). Once you have removed the pressure from the machine the filter holder can be removed. To throw away the coffee grounds, turn over the filter holder and shake it to make the coffee grounds fall out.
MAKING CAPPUCCINOS
Follow the instructions for "Making Espresso" but add 2 oz (50 ml) of water to the volumes indicated.
An authentic cappuccino is made using 1/3 espresso, 1/3 hot steamed milk and 1/3 frothed milk. We recommend frothing the milk before making the coffee.
Pour 4 to 6 oz (100 to 150 ml) of fresh, cold milk into a small pitcher. Do not use a pitcher cleaned with hot water or one that is still warm.
The milk will froth better in a cold pitcher. The pitcher should fit underneath the cappuccino nozzle. We recommend using 1 or 2% milk for a stiff, dense froth. Use whole milk if you prefer a creamy froth.
Turn the knob to the "Steam" position (b3). Fig. 10.
When the steam starts coming out of the nozzle, immerse the nozzle in the pitcher of milk and make circular movements going up and down to froth the milk. It is important not to have the nozzle touch the bottom of your pitcher. Fig. 11.
Once the milk is frothed, put a cup underneath the filter holder. Turn the knob to the "Espresso" position (b2). Fig. 8.
Once the espresso has finished dripping, spoon the frothy milk over the espresso to finish the cappuccino. Never remove filter holder or open boiler cap without having released remaining pressure. (See CAUTION-PRESSURE).
ATTENTION! Clogged Steam nozzle:
Milk residue will build up in the tip of the steam nozzle after frothing milk. To avoid clogging, remove the plastic housing of the cappuccino nozzle once the appliance has cooled, for easy cleaning. Then follow "cleaning the steam nozzle" as described in the section "Cleaning the Cappuccino Nozzle". Don't forget to replace the tip of the nozzle and screw it on tightly.
MAKING CAFFE LATTES
Follow the instructions for "Making Cappuccinos" with the following proportions: 2/3 frothy milk, 1/3 espresso, and if desired you may spoon some milk foam on top.
STEAMING WITHOUT MAKING ESPRESSO
Steam is used to froth milk and also to reheat water (tea, hot drinks).
Check that the appliance is unplugged and that there is no contained pressure. (See CAUTION-PRESSURE).
Measure out a small amount of water and pour into tank. For example: 2 oz (50 ml) of water to heat 4 oz (100 ml) of liquid.
Important: for maximum efficiency, avoid putting more than 4 oz (100 ml) of water into the tank.
Tightly screw on the boiler cap. Fig. 4.Plug in the appliance.
Immerse the steam nozzle in the liquid to be heated.
Turn the knob to "steam" (b3). Fig. 10.
The ON/OFF pilot light will light up.
Steam is produced after 2 to 3 minutes of preheating.
Once the liquid is hot, turn selector knob back to "Off" (b1) and unplug the appliance.
If you do not need all the water for steaming, proceed as follows:
Turn off the machine.
Release the remaining steam pressure into another container.
Before turning the knob again, turn the knob to "steam" (b3) to remove any steam, take care to put a cup underneath the steam nozzle.
Do not turn the selector knob back to "Off" (b1) before all steam is released! (See CAUTION - PRESSURE).
ATTENTION! The plastic housing of the cappuccino nozzle (g) has 2 fine holes at the top which draw air into the milk.
If those holes get clogged, the milk will not be frothed properly. Therefore, do not dip the cappuccino nozzle in milk or froth up to those holes.
ATTENTION! Immediately after use, wash the steam nozzle with a damp sponge.
CLEANING AND SERVICING
Unplug the appliance and let it cool down completely before you clean it.
Occasionally wipe the outside of the appliance with a damp cloth. Regularly wash and dry the drip tray and its grid.
Do not use alcohol-based or abrasive cleaning products or solvents. Regularly clean the grid through which the hot water passes with a damp sponge.
Important: Never use soap or other cleaning agents as it will impact the taste of your beverages.
CLEANING THE CAPPUCCINO NOZZLE
Clean the steam nozzle each time after you have immersed it in the milk, otherwise the inside of the nozzle can become clogged and the milk deposits on the outside will harden and become difficult to remove.
If clogging does occur, remove the plastic housing of the cappuccino nozzle (g) once the appliance has cooled and then unscrew the tip of the steam nozzle.
Remove all milk particles by using a clean sewing needle and rinse under the faucet. Replace nozzle tip making sure to screw it on tightly. Wipe off the outside of the nozzle with a wet cloth.
The plastic housing of the cappuccino nozzle should be rinsed in warm water. If the small suction openings are clogged up, they can be opened with a small needle.
Do not try to open or disassemble the main body of the machine.
DECALCIFYING THE ESPRESSO SIDE
The warranty does not cover a faulty or broken espresso machine due to not being descaled.
Due to the acidity of the cleaning solution, we recommend protecting your worktop and sink during the descaling process, especially if it is made of marble or stone. Isolate your appliance with an old towel, tablecloth or tray.
The espresso machine must be decalcified regularly. The frequency depends on the hardness of your water and how often you use the espresso machine.
Before descaling, the brewing sieve on the brewing head must first be screwed off.
- Remove all lime and coffee residues from the brewing sieveand the brewing head.
- Remove the plastic housing of the cappuccino nozzle (g).
As a descaling agent we recommend the use of Krups descaling solution F054 available at authorized Krups retailers and Service Centres or by contacting your respective countries Customer Service Department.
- Dissolve a packet of KRUPS descaling solution in 10 oz/300ml of lukewarm water and pour into the boiler container and screw back the cap. Put a container under the brewing head and another under the steam nozzle.
(Note: Do not secure the filter holder (c) during decalcification). - Open the steam valve and turn on the appliance. Allow thedescaling solution to run out of the espresso outlet and the steam nozzle.
- After each brewing cycle, switch off the appliance and allowthe appliance to cool down.
- Repeat this operation once more.
Following this, allow 2 containers of clear water to run through the system. Switch off the appliance. Allow the appliance to cool down. Insert the brewing sieve into the brewing head again and push the plastic housing of the cappuccino nozzle onto the steam nozzle.
TROUBLESHOOTING
| Problems | Probable Causes | Solutions |
| Espresso The coffee drips | The coffee is ground too slowly. too fine. | Use more coarsely ground coffee. |
| Filter blocked. | Clean it with a brush. | |
| Water passage grid is clogged. | Clean the appliance when cold. | |
| Presence of scale. | De-Scale the appliance. | |
| The coffee drips too slowly. | Dirty filter-holder or dirty filter. | Clean them with hot water. |
| The coffee is ground too fine. | Use more coarsely ground coffee. | |
| The coffee doesn't drip. | The knob is in the "Steam" position (b3). | Turn the knob to the "Espresso" position (b2). |
| The espresso leaks onto the filter holder sides. | Filter holder is clogged up. | Remove any excess ground coffee. |
| The filter holder is not properly positioned. | Put it back into place and lock it into position. | |
| Bad taste. | Insufficient rinsing. | Follow the rinsing instructions. |
| Steam Water runs out of the filter holder. | The knob is in the "Espresso" position (b2). | Turn the knob to the "Steam" position (b3). |
| Little or no steam in the "steam" position. | The knob opened too early. | Close the "Steam" knob for 2 minutes. |
| The steam nozzle doesn't froth the milk. | Blocked steam nozzle. | Rinse out the steam nozzle. |
| Whole milk used. | Use 1 or 2% milk. | |
| Milk not fresh or cold enough. | Always use very fresh, cold milk. | |
| Container doesn't have the right shape. | Use a small diameter container (small jug). |
GROUPE SEB
CANADA 345 Passmore Avenue Toronto, ON M1V 3N8
1-800-418-3325
Groupe SEB MEXICO
S.A. de C.V. Goldsmith 38 Desp. 401 Col. Polanco Delegacion Miguel Hildalgo 11 560 Mexico D.F. MEXICO
01800 1128325
GROUPE SEB USA
2121 Eden Road Millville, NJ 08332
800-526-5377

Documents / Resources
References
Download manual
Here you can download full pdf version of manual, it may contain additional safety instructions, warranty information, FCC rules, etc.
Download KRUPS XP1000 - Espresso and Cappuccino Maker Manual
Advertisement


Need help?
Do you have a question about the XP1000 and is the answer not in the manual?
Questions and answers