
Related Manuals for bemodern 2983


Summary of Contents for bemodern 2983
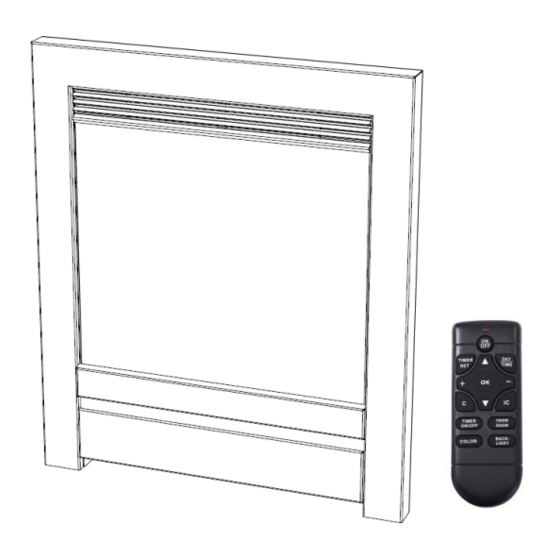
- Page 1 Model 2983 / 2921 16” and 22” 75mm Electric Fire Complete with Remote Control Instructions for use Patent pending UK Registered Design R1 Jan 2020 200797_1...
-
Page 2: Table Of Contents
Contents Tech Specs Safety Info 4 – 5 Fixing the appliance 6 – 7 Attaching the Trim User Instructions 8 - 13 Maintenance General information Guarantee 200797_1... -
Page 3: Tech Specs
Technical Specification Model No.: 2893 / 2921 Supply Voltage: AC 230-240V 50Hz Maximum power consumption: 2KW Power for flame effect: 13W (LED 5W + Motor for flame 8W) Heat Output: Nominal heat output (Pnom): 2KW Minimum heat output (indicative) (Pmin): 1KW Maximum continuous heat output (Pmax): 2KW Auxiliary Electricity Consumption: At nominal heat output (elmax): 14W... -
Page 4: Safety Info
Safety Information Read all of the instructions carefully before using the appliance. For indoor use only This appliance is not suitable for use outside the house and only suitable for well insulated spaces or occasional use. Do not use this appliance in the immediate surroundings of a bath, a shower or a swimming pool or any wet area This fire must not be located immediately below a socket-outlet. - Page 5 Safety Information (continued) Children and vulnerable people must be supervised at all times when using this appliance, as some parts can become very hot and cause burns. Do not use this appliance in small rooms when they are occupied by persons not capable of leaving the room on their own, unless constant supervision is provided.
-
Page 6: Fixing The Appliance
Securing the Appliance Back panel / cavity opening size Model Model 2893 – 16” Version 75 min Model 2921 - 22” Version 75 min Prior to installation / securing the fire select the preferred fixing method. A. Securing the fire into position using the fixing holes in the rebate stops. B. -
Page 7: Attaching The Trim
Securing the Appliance Fixing method B. Loosely attach the back panel clamp to the top of the fire as shown below in Figure 1. Hook the clamp under the back panel so it site behind the panel and centralise the fire in position. -
Page 8: User Instructions
User Instructions WARNING! Do not operate the appliance if it is damaged or has malfunctioned. If you suspect the appliance is damaged or has malfunctioned call a qualified service engineer to inspect the appliance, and replace any part of the electrical system if necessary, before reuse. - Page 9 User Instructions Continued Manual control panel Use the ON / OFF switch to power on the heater (set it to standby mode). In standby mode, the heater can be operated either manually by the switches located behind the fret or by the supplied remote control. Heater powered off Main Power...
- Page 10 User Instructions Continued Remote control operation Switches the appliance on Menu up (Change day Switches the appliance into standby mode Timer set Set day / time Decrease temperature Increase temperature Decrease hour / minute Increase hour / minute Menu down (Change day) Confirm selection Set automatic heating mode Cancel...
- Page 11 User Instructions Continued Display (Shown on the appliance screen) Standby mode Timer Day of the week Temperature / timer Timer off Timer on Time / temperature display Automatic heating mode Heating level Low heat High heat Note:- The display will stay illuminated for approximately 8 – 10 seconds Setting the day of the week and time Press the DAY / TIME key.
- Page 12 User Instructions Continued Setting the timer Up to 10 different timer settings can be programmed. Each timer setting has a day, power-on time and power-off time. The maximum duration of each timer setting is 23 hours 50 minutes. If the power-off time of the timer setting falls on the following day, it is unnecessary to set the day-just set the power-off time.
- Page 13 User Instructions Continued Resetting the Thermal Cut Out The appliance is fitted with an Electronic Safety Control (E.S.). This is a safety device, which switches off the fire if, for any reason, the appliance overheats, e.g. if covered. If the heater stops operating while the flame effect continues working normally, this indicates that the E.S.
-
Page 14: Maintenance
Maintenance WARNING: Before any maintenance or whilst cleaning the exterior of the fireplace, the unit should be disconnected from the power supply until it has cooled down. Cleaning the Fire Cleaning or polishing products are not recommended. Fingerprints or other marks on the front glass panel can be removed by a piece of soft, damp, lint-free cloth with a good quality household glass cleaner. -
Page 15: General Information
General Information Environment Meaning of crossed –out wheeled dustbin: Electrical appliances should not be disposed as unsorted municipal waste. Separate collection facilities should be used in the disposal of electrical appliances. Contact your local government for the information about the available collection systems. If electrical appliances are disposed of in landfills or dumps, hazardous substances can leak into the groundwater and get into the food chain, damaging your health and well-being. -
Page 16: Guarantee
On requiring service the purchaser should contact the retailer who supplied your product who will assist and advise you as necessary. Be Modern Ltd. 19/34 Bedesway Bede Industrial Estate Jarrow Tyne and Wear NE32 3BE Tel: (0191) 430 0901 Fax: (0191) 430 9522 http://www.bemodern.com 200797_1...
Need help?
Do you have a question about the 2983 and is the answer not in the manual?
Questions and answers