
Related Manuals for bemodern 2668


Summary of Contents for bemodern 2668
- Page 1 INSTALLATION AND USER INSTRUCTION GUIDE Electric Wall Fire with Remote Control Model No: 2668 Read these instructions thoroughly before use and keep for future reference.
- Page 2 Important Safety Instructions When using this appliance, basic precautions should be followed to reduce the risk of fire, electric shock, and injury to person, including the following: • This heater must be used on an AC supply only and the voltage marked on the heater must correspond to the supply voltage.
- Page 3 Getting Started • Remove the appliance from the box. • Remove any packaging from the appliance. • Place the packaging inside the box and either store or dispose of safely. Helpful Advice before Fitting • Please retain all packaging until you have checked and counted all the parts and the contents of the fixing pack against the parts list.
- Page 4 Installation Instructions with baffle fitted • Do not connect the appliance until properly fixed to the wall and the instructions have read carefully. • The minimum distances must be observed. • For installation of the appliance, care must be taken not to damage concealed cables. •...
- Page 5 Fig. 2 Fig. 3 Fig. 4...
- Page 6 Installation Instructions no baffle fitted • Do not connect the appliance until properly fixed to the wall and the instructions have read carefully. • The minimum distances must be observed. • For installation of the appliance, care must be taken not to damage concealed cables. •...
- Page 7 Fig. 6 Fig. 7 Fig. 8...
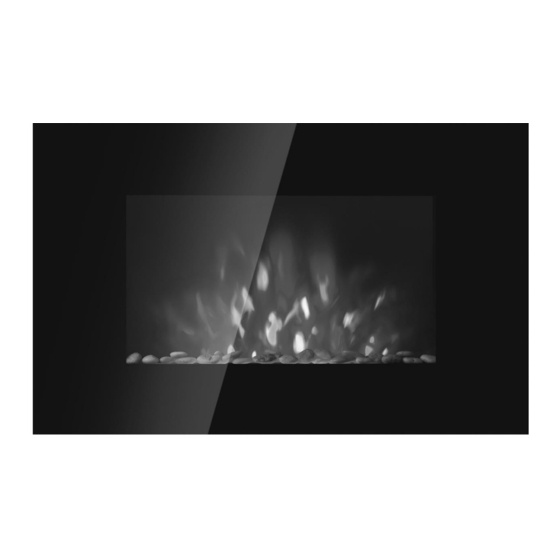
- Page 8 Operation Instructions ➢ The Controls ▪ Switching ON / OFF • Use the ON / OFF switch to power on the heater (set it to standby mode). • In standby mode, the heater can be operated either manually by the switches located at the top and right hand side of heater or by the supplied remote control.
- Page 9 Remote Operation • NOTE: The heater should be powered on using the ON / OFF switch before it can be operated using remote control. • • The remote control requires 2xAAA size batteries. • Open the battery compartment by sliding the cover down and insert the batteries noting the polarity indicated in the battery compartment.
- Page 10 ➢ Display ➢ Settings ▪ Setting weekday and time • key. When the day is flashing press the ▲ or ▼ key to select the day. Press the DAY / TIME • key again, then press the + or – key to set the hour. Press the DAY / TIME •...
- Page 11 Setting timer • Up to 10 different timer settings can be programmed. • Each timer setting has its day, power-on time and power-off time. • The maximum duration of each timer setting is 23 hours 50 minutes. • If the power-off time of the timer setting falls on the following day, it is unnecessary to set the day-just set the power-off time.
- Page 12 Maintenance • WARNING: Before any maintenance and / or cleaning the exterior of the heater, disconnect the heater form the power supply and leave heater cooled off. The heater uses an electronically controlled LED system to create the flame effect therefore no parts need to be replaced. Under no circumstances should the heater be serviced by anyone other than a qualified electrician.
-
Page 13: General Information
General Information Model 2668 Item Symbol Value Unit Item Unit Heat output Type of heat input, for electric storage local space heaters only (select one) Nominal heat output manual heat charge control, Not applicable with integrated thermostat Minimum heat output... - Page 14 Electrical Connections - UK Plug Wiring Instruction · If the plug has to be changed because it is not suitable for your socket, or due to damage, please follow the wiring instructions shown below. · The wires in the mains lead are coloured in accordance with the following code: BROWN LIVE (L) BLUE...
- Page 15 Electric Fire Guarantee Be Modern Ltd. (the ‘Company’) provides a Twelve month guarantee in respect of electric fire (the ‘Product’) ranges. 1. The Twelve month Guarantee applies to: a. All products in the ranges manufactured by the ‘Company’ (but subject to the exceptions below): where b.
- Page 16 Environment Meaning of crossed –out wheeled dustbin: Electrical appliances should not be disposed as unsorted municipal waste. Separate collection facilities should be used in the disposal of electrical appliances. Contact your local government for the information about the available collection systems. If electrical appliances are disposed of in landfills or dumps, hazardous substances can leak into the groundwater and get into the food chain, damaging your health and well-being.
- Page 17 Serviceable / Replacement Parts 01 – Glass 31 – Flame effect motor 32 – Fire display 39 – Remote control 44 – PCB 58 – Side LED strips...
Need help?
Do you have a question about the 2668 and is the answer not in the manual?
Questions and answers