
Related Manuals for bemodern 2603 HE900E


Summary of Contents for bemodern 2603 HE900E
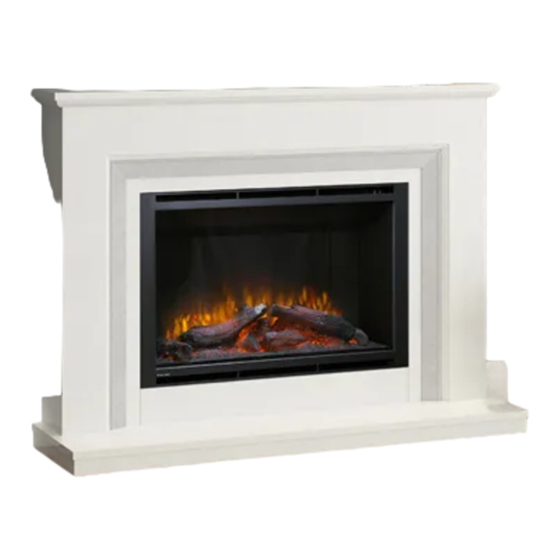
- Page 1 INSET LED Electric Fire Model No.2603 HE900E / 2604 HE950LE INSTALLATION AND OPERATION INSTRUCTIONS Please read the instructions carefully before installation or use and keep for future reference...
-
Page 2: Table Of Contents
CONTENTS 1. Important Safety Information ····································································· 1 - 2 2. Technical Specifications ·················································································· 3 3. Parts and Hardware ························································································ 4 4. Appliance Dimensions ····················································································· 5 5. Installation Instructions ············································································· 6 - 8 6. Operating Instructions ···················································································· 9 6a. Manual Control Panel ················································································· 10 6b. -
Page 3: Important Safety Information
1. IMPORTANT SAFETY INFORMATION 1.1 Read all of the instructions carefully before using the appliance. 1.2 For indoor use only. This appliance is not suitable for use outside the house and only suitable for well insulated spaces or occasional use. 1.3 Do not use this appliance in the immediate surroundings of a bath, a shower or a swimming pool. - Page 4 1.15 Children and vulnerable people must be supervised at all times when using this appliance, as some parts can become very hot and cause burns. 1.16 Do not use this appliance in small rooms when they are occupied by persons not capable of leaving the room on their own, unless constant supervision is provided.
-
Page 5: Technical Specifications
2. TECHNICAL SPECIFICATIONS Model No.: 2603 (900) / 2604 (950) Supply Voltage: AC 230-240V 50Hz Maximum power consumption: 2KW Power for flame effect: 2603 (900): 20.5W (LED 12.5W + Motor for flame 8W) 2604 (950): 25W (LED 17W + Motor for flame 8W) Heat Output: Nominal heat output (Pnom): 2KW Minimum heat output (indicative) (Pmin): 1KW... -
Page 6: Parts And Hardware
3. PARTS AND HARDWARE 3.1 Unpacking the fire carefully, make sure that the appliance is intact with no signs of damage caused by transport and no part has been exposed to water. If in doubt, do not use the appliance and contact an authorised service centre. 3.2 Keep plastic wrapping away from children. -
Page 7: Appliance Dimensions
4. APPLIANCE DIMENSIONS Unit: mm MODEL 2603 – BM900Elec 2604 – BM950Elec... -
Page 8: Installation Instructions
5. INSTALLATION INSTRUCTIONS Tools Required A screw driver will be needed. Locating the Appliance Your new electric fireplace may be installed virtually anywhere in your home. However, when choosing a location please ensure that the general instructions are followed. 5.1 For best results, install out of direct sunlight. 5.2 The appliance should be connected to an earthed electrical outlet and it must be easily accessible to allow disconnection. - Page 9 Installation into a fireplace opening / insert: 5.4a Find a safe and proper location and put the mantle firmly against the wall. Fully recess the appliance from the front into the mantle making sure the back of the appliance is firmly against the wall. 5.4b Carefully remove the front trim from the appliance and put it in a safe place to prevent damage.
- Page 10 Affix the metal strip to the rear of the marble plinth by following the below steps 1-4 Apply the double sided tape to the rear of the rear face of the metal plate, then affix to the rear of the marble plinth. Take care to ensure it is fitted centrally with the bottom edges aligned.
-
Page 11: Operating Instructions
6. OPERATING INSTRUCTIONS WARNING! Do not operate the appliance if it is damaged or has malfunctioned. If you suspect the appliance is damaged or has malfunctioned call a qualified service engineer to inspect the appliance, and replace any part of the electrical system if necessary, before reuse. -
Page 12: 6A. Manual Control Panel
6a. MANUAL CONTROL PANEL NOTE: The manual buttons control basic functions, not a full range of controls. Use the remote hand set to carry out all functions. 6a.1 The manual buttons are located at the upper right hand-side of the appliance. 6a.2 Press “LIGHTS ON / OFF”... -
Page 13: 6B. Remote Controls
REMOTE CONTROLS NOTE: This is thermostatic remote control. The remote should be in the same room as fireplace and placed on a flat surface. It must be placed away from the fire so the hot air will not blow on it and affect thermostatic reading. The communication frequency between the fire and remote has already been set up. - Page 14 Normal Mode 6b.7 Normal control mode is factory set. If it is not, then press the button until the logo shows up at the upper right corner of the screen. 6b.8 Press the ‘+’ and ‘-’ button to adjust the temperature from 17℃...
- Page 15 Daily Timer Heating 6b.14 The following are pre-set heating periods, which can be altered if desired 06:00 until 08:30 17:00 until 22:00 6b.15 Press until shows at the upper right corner of the screen, then enter the daily timer heating mode. 6b.16 Hold the arrow symbol button for 6 seconds to enter The daily timer setting.
- Page 16 • Press the ‘→’ button to move the cursor to the time period setting area. • Press‘←’or ‘→’ to choose hour or minute, press ‘+’ or ‘-’ to set the number. • Max 3 heating periods for a day. • Minute will increase / decrease by 15 minutes per press. •...
- Page 17 Set up the communication between the remote and appliance 6b.31 The below operations should be carried out before programming, when changing to a new remote or in the event the appliance cannot be controlled by the remote: • Hold the reset button on the appliance for 3 seconds (a pen point may be needed) until you hear 3 short beeps from the unit, release the button.
-
Page 18: Maintenance
7. MAINTENANCE WARNING: Before any maintenance or cleaning of the exterior of the fireplace, the unit should be disconnected from the power supply until it has cooled down. Remote Handset Battery Replacement 7.1 When the batteries are at full power, the battery symbol will show 7.2 When the batteries are half full, the battery symbol will show 7.3 When the batteries are out of power and need replacing immediately, the battery symbol will show... -
Page 19: Guarantee
8. GUARANTEE ELECTRIC FIRE GUARANTEE Be Modern Ltd. (the ‘Company’) provides a twelve month guarantee in respect of this electric fire appliance. 1. The twelve month Guarantee applies to: a. All products in the ranges manufactured by the ‘Company’ (but subject to the exceptions below): where b. -
Page 20: Others
Frequency: ASK/OOK 433.92MHZ Maximum transmit power: 10mW Hardware: Hardware: RF29 Hardware:RF290A-TX-V1.3 RC01-041B01 0B V1.2 Software: RF290A_C_V0.6.0.hex Software: VI Be Modern Ltd. 19/34 Bedesway, Bede Industrial Estate, Jarrow, Tyne and Wear NE32 3BE Tel: (0191) 430 0901 Fax: (0191) 430 9522 http://www.bemodern.com 3.EF.204.05.011...
Need help?
Do you have a question about the 2603 HE900E and is the answer not in the manual?
Questions and answers