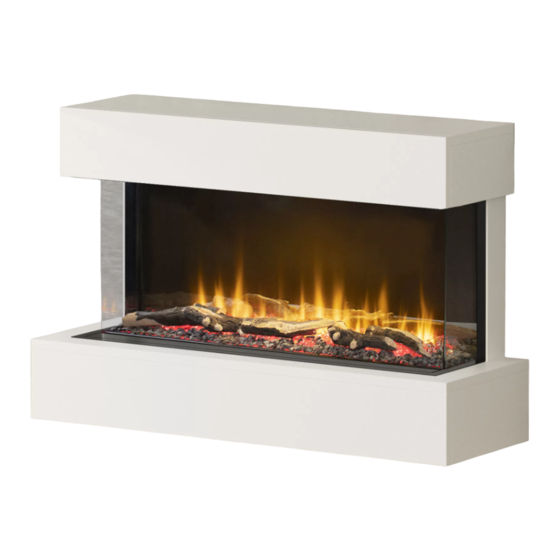
bemodern 1000 3SL FIRE Instructions For Installation Manual
Hide thumbs
Also See for 1000 3SL FIRE:
- Manual (50 pages) ,
- Instructions for installation & operation (15 pages) ,
- Instructions for installation manual (15 pages)

Related Manuals for bemodern 1000 3SL FIRE


Summary of Contents for bemodern 1000 3SL FIRE
- Page 1 Wall Hung and Floor-Standing Suite Instructions for installation R1 SEPT 2021 200817...
-
Page 2: Table Of Contents
Contents Technical Specification What’s in the Boxes Installation – Introduction/ Preparation Installation –Preparation Continued….. Installation- Floor Standing Suite Installation- Wall Mounted Suite 10-14 Fuel Bed Layout & Log Positioning Replacing the Glass Maintenance 200817... -
Page 3: Technical Specification
Technical Specification Unboxed Dimensions (mm) Weight Fire/ Surround Description Logs (Kg) 1000 3SL FIRE/ 46” 5 SML + 2 Timber Suite 1098 1162 Floor-Standing 1000 3SL FIRE/ 46” 5 SML + 2 Timber Suite 1098 1162 42.5 Wall Hung 750 3SL FIRE/ 36”... -
Page 4: What's In The Boxes
AAA Batteries Fire Operating Instruction Foam Strip Supplied Fixed to Fire Rear Wall Hanging Bracket Please ensure that everything is present before commencing the installation. If anything is missing please call Customer Services on 01914300901 or email us at customerservices@bemodern.co.uk 200817... -
Page 5: Installation - Introduction/ Preparation
Installation- Introduction Note: The Suite is a two adult person lift. A second person will be required to lift and support the pre-assembled parts during installation. Before the suite can be installed, consideration will need to be given to routing the power supply to the fire. This will affect the stages of the installation process. -
Page 6: Installation -Preparation Continued
Installation- Preparation Continued …………….. Once the 2 x Screws and 2 x Glass Brackets are removed the Glass can be angled forward (1) from the top of the fire and lifted out of the channel at the base of the glass. (2) See diagram 4. Diagram 4 Note: Place the Glass, 2 x Glass Brackets and 2 x Screws in a safe place, as these will be required later. -
Page 7: Installation- Floor Standing Suite
Installation- Floor-Standing – Suite If the Plinth is not required, please proceed to P10. To begin the Floor-Standing Suite installation, lightly mark a vertical line in the centre of the installation location- approximately 680mm up from the floor. See Diagram 5. Diagram 5 Locate the box with the Plinth components inside and follow the separate assembly instructions, boxed with the Plinth. - Page 8 Installation- Floor-Standing – Suite Continued…….. Ensuring the Plinth is level and centrally positioned in the installation location, measure up 380mm from both inside edges of plinth and using a straight edge lightly mark a horizontal line either side of the previously marked centre line.
- Page 9 Installation- Floor-Standing – Suite Continued…….. Tip- Before proceeding further extend the centreline approximately 75mm up from the top of Wall Mount Bracket and lightly mark the centre of the top back edge of the surround. This will help when trying to line the bracket up with the slots on the back of the fire in the next installation step.
-
Page 10: Installation- Wall Mounted Suite
Installation – Wall Mounted Suite If the suite is planned to be positioned, as a Wall Mounted Suite the wall mount bracket may be positioned at any desired height on the wall. Note: Consider once installed the distance from the bottom edge of the Suite to the top of the Wall Mount Bracket is 512mm. - Page 11 Installation- Wall Mounted Suite Continued…….. Working from the previous marked line indicating the bottom edge of the Suite and using a straight edge lightly mark a horizontal line approx. 300mm either side of the previously marked centre line at a height of 512mm. See Diagram 16.
- Page 12 Installation- Wall Mounted Suite Continued…….. Tip- Before proceeding further extend the centreline approximately 75mm up from the centre of Wall Mount Bracket and lightly mark the centre of the top back edge of the surround. This will help when trying to line the bracket up with the slots on the back of the fire in the next installation step.
- Page 13 Installation- Wall Mounted Suite Continued…….. Finally, loosen the 4 x Screws holding the bottom 2 x L- Brackets, so that the L- Brackets can be positioned up against the wall, for marking the fixing positions. See Diagram 23. Diagram 23 Mark the fixings positions of the L- Brackets and remove the 2 x L- Brackets from the Suite.
- Page 14 Installation- Wall Mounted Suite Continued…….. Finally screw and secure the 2 x L- Brackets back on the fire and then to the wall using suitable screws. See P17 ‘Important Note’. See Diagrams 25 & 26 Diagram 25 Diagram 26 The installation is now complete. The fuel bed can now be dressed and the logs positioned. See Diagrams 27-31, P15.
-
Page 15: Fuel Bed Layout & Log Positioning
Large Log Diagram 30 - Above shows an example of the 7 x log set up for the 1000 3SL Fire . Diagram 31 - Above shows an example of the 5 x log set up for the 750 3SL Fire . -
Page 16: Replacing The Glass
Replacing the Glass Finally the Glass and 2 X Glass Brackets can be refitted, using the previously removed 2 X Screws. Note- Before proceeding further remove the foam strip and check the channel in the base of the fire is free of any fuel bed material. -
Page 17: Maintenance
CAUTION: Abrasive cleaners should not be used on the glass panel. Liquids should not be sprayed directly onto any surface of the unit. Troubleshooting Should you have any queries regarding this product please contact Customer Services on 0191 4300901 (option 4) or email us at customerservices@bemodern.co.uk Recycling All cardboard packing is recyclable IMPORTANT NOTE: Wall fixings (i.e.
Need help?
Do you have a question about the 1000 3SL FIRE and is the answer not in the manual?
Questions and answers