Table of Contents
Advertisement
Quick Links
QUICK START GUIDE
FEATURES:
• 1/2.7" 5.0 Megapixel CMOS Image Sensor
• Up to 20fps@5MP (2880 × 1620), Up to 30fps@4MP (2560 × 1440), 3MP
(2304 × 1296), 1080P (1920 × 1080), 720P (1280 × 720), D1, 480× 240, CIF
• 2.8mm Fixed Iris Lens
• Matrix IR (up to 100' IR Range)
• True Wide Dynamic Range (120dB)
• True Mechanical Day/Night function by ICR
• XD-DNR (3D & 2D-DNR) Noise Reduction
• Region Intrusion Detection, Object Abandoned / Missing, Scene Change Detection, Line
Crossing, Video Blur, Video Color Cast Detection
• H.265+ / H.265 / H.264+ / H.264 / MJPEG
• MicroSD Card Slot for Local Recording (Up to 256GB)
• 1 Ch. Audio In + Built-in Mic*
• Remote Viewing via CMS, IE (plug-in required)/Google Chrome/Edge/Firefox/Safari,
and iOS & Android Apps
• ONVIF Compliant
• IP67 Weather Resistance
• Optional Wall Mounts (VT-TWMT-3, VT-TWMT-A1 [reqs. VT-TJB08]), Junction Boxes
(VT-TJB01, VT-TJB08), and Pendant Mounts (VT-TPDMT-A1 [reqs. VT-TJB08], VT-TPDM-2
[reqs. VT-TJB01]) See additional mounting options on pg. 9
• 12VDC & PoE (Power over Ethernet) Operation
• 3-Year Warranty
*Please research local, state and federal laws regarding the implementation of audio surveillance.
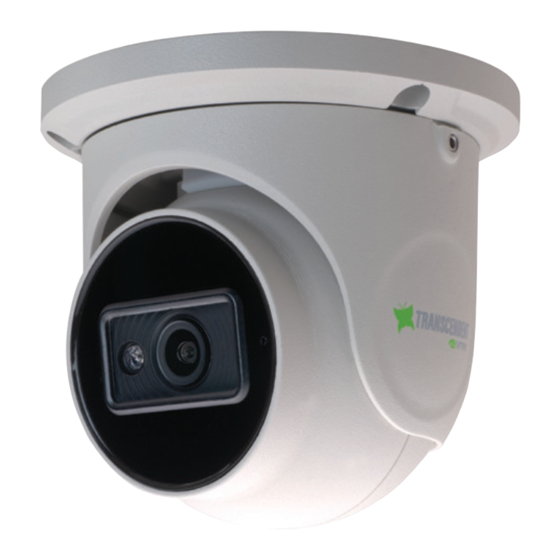
VTC-TNT5RFEA-2
Transcendent Series 5 MegaPixel
Fixed IP WDR Turret Camera
PLEASE NOTE:
Complete User Guide, Software, Tools, and Updates are
available online. Scan the QR Code or visit:
http://www.vitekcctv.com/Downloads
Advertisement
Table of Contents

Related Manuals for Vitek VTC-TNT5RFEA-2


Summary of Contents for Vitek VTC-TNT5RFEA-2
- Page 1 VTC-TNT5RFEA-2 Transcendent Series 5 MegaPixel Fixed IP WDR Turret Camera QUICK START GUIDE FEATURES: • 1/2.7” 5.0 Megapixel CMOS Image Sensor • Up to 20fps@5MP (2880 × 1620), Up to 30fps@4MP (2560 × 1440), 3MP (2304 × 1296), 1080P (1920 × 1080), 720P (1280 × 720), D1, 480× 240, CIF •...
-
Page 2: Components And Accessories
Components and Accessories Camera Drill Template Quick Guide Rubber Plug Screws Waterproof Cap Hex Wrench Overview 1. Network Connector 5. Locking Screw 2. Audio Input 6. Mic 3. Power Connector 7. MicroSD Card Slot 4. Mounting Base 8. Reset Network Cable & Power Connections First connect the Weather Resistant Cap to an Ethernet patch cable, then connect the cameras to the ethernet adaptor. -
Page 3: Installation
Weather Resistant Network Coupler 1. Loosen the nut from the Weather Resistant Network Coupler, 2. Run ethernet cable through coupler, then attach a RJ-45 connector. 3. Tighten the nut and coupler for a weather resistant seal. Installation Before beginning installation, make sure that the wall or ceiling is strong enough to withstand 3 times the weight of the camera. - Page 4 Fig. 2 Rubber Plug 3. Loosen the lock screws, then adjust the camera to obtain the optimium viewing angle. Confirm the correct viewing angle with a monitor. Next, tighten the locking Locking screw to secure the Screw viewing angle adjustments.
-
Page 5: Lan Configuration
LAN Configuration Swi t ch Net wor k Cabl e Net wor k Cabl e MENU IP Camera Comput er Rout er The camera can be accessed on the local network either using the IP-Tool or directly in a web browser. Accessing the Camera Using the IP-Tool 1. - Page 6 4. Double-click the IP address and then the system will pop up the web browser to connect IP-CAM . IE browser will download the Active X control. After downloading, a login window will pop up as shown below: Input the user name and password to log in. Default user name: admin / Default password: 123456.
-
Page 7: Wan Configuration
2. Open the IE Browser and input the default address of IP-CAM and confirm. The IE browser will download Active X control. 3. After downloading Active X control, the login dialog box will pop up. 4. Input the default username and password and then enter to view. WAN Configuration Access the camera by the router or virtual server for example. - Page 8 VTC-TNT5RFEA-2 Detailed Specifications 1/2.7” 5.0 Megapixel CMOS Image Sensor Image Sensor 5 MegaPixel (2880 × 1620) Image Size Resolution Up to 20fps@5MP (2880 × 1620), Up to 30fps@4MP (2560 × 1440), 3MP (2304 × 1296), 1080P (1920 × 1080), 720P (1280 × 720), D1, 480× 240, CIF 0.007 lux @F1.6, AGC ON;...
- Page 9 OPTIONAL ACCESSORIES AND RELATED PRODUCTS FOR VTC-TNT5RFEA-2 VT-TJB08 VT-TJB01 VT-TWMT3 VT-TPDM2 Optional Optional Optional Wall Transcendent Universal Junction Box Junction Box Mount 10” Pendant Mount. Reqs. VT-TJB01 5.10” VT-TWMT-A1 VT-TPLMT VT-TCNMT VT-TPDMT-A1 Transcendent Transcendent Transcendent Transcendent Wall Mount. Reqs. Universal Pole Universal Corner Universal 10”...
- Page 10 OPTIONAL ACCESSORIES AND RELATED PRODUCTS FOR NDAA COMPLIANT TRANSCENDENT IP CAMERAS TRANSCENDENT NVRs A Standalone Solution with Analytic Support and NDAA Compliance! • 8MP (4K) HDMI Output • H.265S / H.265+ / H.265 / H.264 Video Compression • Analytic Support Including Basic Face Detection, License Plate Recognition, and More! •...
- Page 11 Also Consider Vitek NDAA Compliant Wireless Access Points to Reduce Costly Cable Installation! VT-WAP1150 and VT-WAP2150 High Speed 5.8GHz DIP AP / CPE Wireless Bridge w/ 8MB Storage, 64MB RAM, 150MBps transmission, and Point-to-Multi-Point (P2MP) Topology With high speed transmission of 150Mbps and a wireless range of 3000ft.
-
Page 12: Limited Product Warranty
LIMITED PRODUCT WARRANTY VITEK products carry a three (3) year limited warranty. VITEK warrants to the purchaser that products manufactured by VITEK are free of any rightful claim of infringement or the like, and when used in the manner intended, will be free of defects in materials and workmanship for a period of three (3) years, or as otherwise stated above, from the date of purchase by the end user.
Need help?
Do you have a question about the VTC-TNT5RFEA-2 and is the answer not in the manual?
Questions and answers