Table of Contents
Advertisement
Quick Links
+
Smart Garden Irrigation System
USER MANUAL
2-Zone Water Timer
HTV213FRF
Web: www.rainpointonline.com
Email:service@rainpointus.com
WhatsApp: +1 626-780-5952
US Free Hotline(English): +1 833-381-5659
(MON-FRI 9�30 AM-5�30 PM PST)
EU Free Hotline(English Deutsch): +44 800-808-5337
(MON-FRI 9�00 AM-5�00 PM CET )
Advertisement
Table of Contents

Subscribe to Our Youtube Channel
Related Manuals for RainPoint HTV213FRF


Summary of Contents for RainPoint HTV213FRF
- Page 1 Smart Garden Irrigation System USER MANUAL 2-Zone Water Timer HTV213FRF Web: www.rainpointonline.com Email:service@rainpointus.com WhatsApp: +1 626-780-5952 US Free Hotline(English): +1 833-381-5659 (MON-FRI 9�30 AM-5�30 PM PST) EU Free Hotline(English Deutsch): +44 800-808-5337 (MON-FRI 9�00 AM-5�00 PM CET )
-
Page 2: Table Of Contents
CONTENT 1. INTRODUCTION 1.1 Product Overview 1.2 Specification 1.3 Product Features 2. CONNECTION AND INSTALLATION 2.1 Timer Connection 2.2 Timer Installation 3. APP FEATURES AND FUNCTIONS 3.1 Device Home Page 3.2 Basic Setting 3.3 Plan Setting 3.4 Statistics 3.5 Manual Watering 4. -
Page 3: Introduction
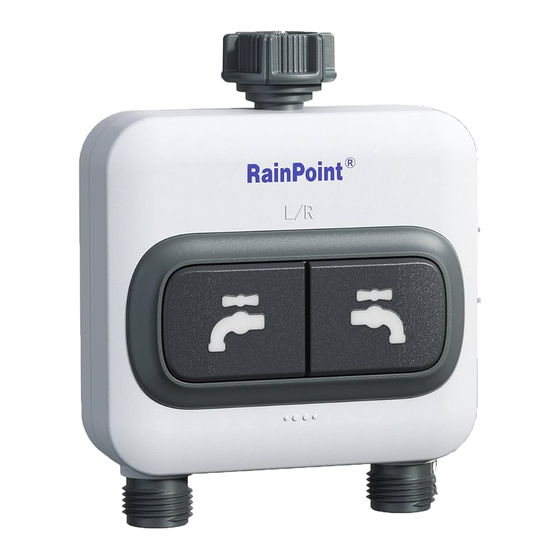
1. INTRODUCTION 1.1 Product Overview Operation Button Battery Cover 1.2 Specification •1” or 3/4” inlet thread and 3/4” outlet thread. •Operating Water Pressure: 0.5~8 bar (7- 116 PSI). •Flow Rate: 1.32~9.25GAL/Min(5 ~35 L/Min). •1 min ~ 12 hrs. •Waterproof Level: IP54. •Maximum 6 plans per zone. -
Page 4: Product Features
1.3 Product Features •App remote controlled. •Build-in flow meter with leaking alert function. •Track water flow rate. •Review water consumption data history on APP. •2 watering methods: Irrigation mode or Misting mode. •Voice controlled via Google Assistant or Amazon Alexa. •Automatically monitor the watering progress according to the soil temperature and humidity data after paired with soil sensor. -
Page 5: Timer Connection
2.1 Timer Connection This device is a sub-device, please connect the hub of Rainpoint Smart+ series before connecting this device. 1. After the hub is successfully connected, select the button on the top right corner of the APP home page to add device, or you can go to the hub’s home page and use “Sub-devices”... - Page 6 2. Find “2-ZONE Water Timer” or the icon to add HTV213FRF 2-Zone Water Timer. 3. Insert 4 AA 1.5V alkaline batteries (not included). Then press and hold the left button of the timer until the light flashes red quickly. Meanwhile, select "Next"...
- Page 7 4. Keep the timer and the hub close to each other so they can connect automatically. 5. Besides that, you can also hold the left button to reset and reconnect if you fail to connect for the first time. 6. After successfully connecting, the last water usage value will display in the middle of the timer’s screen.
-
Page 8: Timer Installation
2.2 Timer Installation Install the timer vertically on the tap. NOTE: 1. Please try to install the timer vertically on the tap, not at an angle or horizontally. 2. Please do not install the timer in a underground valve box to get a better connection with Wi-Fi. -
Page 9: App Features And Functions 3.1 Device Home Page
3. APP FEATURES AND FUNCTIONS 3.1 Device Home Page 1. Setting: Basic settings for the water timer 2. Left side valve & right side valve 3. Next Plan Time & Last Water usage 4. Soil temperature & moisture: Show the data of the soil if you pair the timer with the soil sensor 5. -
Page 10: Basic Setting
3.2 Basic Setting Find the icon on the top right corner of the APP home page to " Settings " page. In the basic settings, you can check and manage the device information, such as name, interface and description. There are also some advanced settings you can Set up for the specific functions: Mist Mode: Set the mist time and interval time for manual misting mode. - Page 11 Pair the Soil Sensor: Pair with a soil sensor to display the data on the home page and activate the " Stop irrigation plan humidity " function. " Stop irrigation plan humidity " : Set a " stop watering " value of the soil moisture to protect the plants from over watering.
- Page 12 Intelligent Irrigation: This is the other feature after connecting with a soil sensor that uses soil moisture to start watering. After enabling this function, you can set a moisture level condition and a watering task which will run automatically once the condition is met. A disable period can also be set to temporarily off this function.
-
Page 13: Plan Setting
3.3 Plan Setting Select Plan and start to create a new auto-watering plan. Set a watering mode first: Press the icon on the top right corner of the "Irrigation Plan" page to set irrigation plan. Irrigation Mode: Normal watering mode with basic start time, duration and frequency. - Page 14 Start Time: Set the time that the plan starts. There are two way to stop watering: Duration or Water Usage Duration: set a watering duration for irrigation plan. Water Usage: set both a water consumption limit value and a limited time. Repeat: Set the watering frequency for your plans.
- Page 15 After finish setting, press the top right button save your plan and you will see a plan overview appears in the list. Use the button on the right to turn on or off the plan. Up to SIX plans that can be created. plans that can be created. There is also a Plan Calendar for checking the overview of all the plans’...
-
Page 16: Statistics
3.4 Statistics Select Statistics to review your daily or monthly water usage that go through this timer. 3.5 Manual Watering 3.5.1 Irrigation Manual Mode Select Irrigation in the home page to manually turn on a temporary irrigation plan with a settable time. - 14 -... - Page 17 3.5.2 Mist Manual Mode Select Mist in the home page to manually turn on a temporary misting plan with a settable time. It is able to change the mist time and interval time by press the time value. Note: When you turn on manual watering, if there is a plan running now or there will be a plan starting during your manual water time, the schedule will be skipped for this time.
-
Page 18: Troubleshooting
4. TROUBLESHOOTING Problem Possible Factors Solution may help Can't turn on •Low battery. •Replace fresh batteries. /off the valve •Impurities in water •Regularly clean the filter inlet. port of impurities to avoid disruptions in use. •Unstable network or delayed response. •Wait a while and try again. - Page 19 Problem Possible Factors Solution may help Hub can’t •Not using 2.4GHz •Confirm 2.4GHz WIFI connection. connect WIFI. •Confirm that the WIFI •Incorrect WIFI password has been entered password. correctly. •Distance between •Stay closer to the hub while sensor and hub is too connecting.
-
Page 20: Notes
•Please clean filters regularly and replace if it is worn in order to prolong working life of timer. 6. WARRANTY RAINPOINT provides a 3-year limited warranty on this product against manufacturing defects in materials and workmanship. - 18 -... -
Page 21: Fcc Statement
7. FCC STATEMENT: (FCC ID:2AWDBHTV213FRF) This device complies with Part 15 of the FCC Rules. Operation is subject to the following two conditions: (1) This device may not cause harmful interference, and (2) this device must accept any interference received, including interference that may cause undesired operation. -
Page 22: Customer Support
RainPoint channel on YouTube quickly. If the app and the user manual don’t have what you’re looking for, and need some help about Rainpoint, please contact us by LOT NO.: XXXXX (on the back of the device) US Free Hotline(English): +1 833-381-5659 (MON-FRI 9�30 AM-5�30 PM PST)
Need help?
Do you have a question about the HTV213FRF and is the answer not in the manual?
Questions and answers