Carel humiSteam x-plus UE008 User Manual
Hide thumbs
Also See for humiSteam x-plus UE008:
- User manual (84 pages) ,
- Installation operation user manual (48 pages) ,
- Addendum manual (10 pages)
Table of Contents
Advertisement
Quick Links
Advertisement
Table of Contents

Subscribe to Our Youtube Channel
Related Manuals for Carel humiSteam x-plus UE008


Summary of Contents for Carel humiSteam x-plus UE008
- Page 2 humiSteam x-plus humidifi ers User manual...
- Page 4 The technical specifi cations shown in the manual may be changed without prior warning. The liability of CAREL S.p.A. in relation to its products is specifi ed in the CAREL S.p.A. general contract conditions, available on the website www.
-
Page 6: Table Of Contents
3.2 CAREL linear distributors for air ducts (DP***DR0) .......13 12. WIRING DIAGRAMS 3.3 CAREL steam blowers (VSDU0A*, models UE001 to UE018 only) 12.1 Diagram of single-phase models UE001 to UE009 (230 V) ..39 12.2 Diagram of three-phase models UE003 to UE018 (230 V) ..40 3.4 Steam hoses ......................14... -
Page 8: Introduction And Assembly
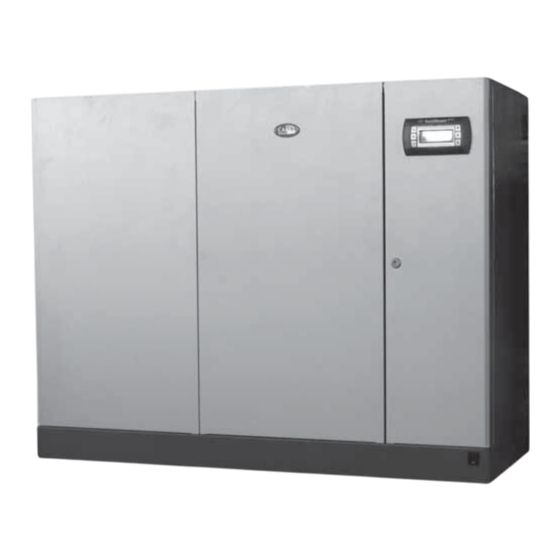
1. INTRODUCTION AND ASSEMBLY 1.1 humiSteam x-plus (UEX*) UE090 UE130 dimensions 1150 (45.3) 1150 (45.3) Range of isothermal immersed electrode humidifi ers with liquid crystal mm (in) 465 (18.3) 465 (18.3) display for the control and distribution of steam. 890 (35.0) 890 (35.0) weights kg packaged 77 (169.8) -
Page 9: Removing The
Models UE001 to UE130 bracket Fig. 1.i turn oval-shaped label with the Carel logo, revealing the head of the earth screw below; remove the screw using a screwdriver; hold the cover by the sides and lift it around 20 mm (0.79”), releasing Fig. -
Page 10: Components And Accessories
CAREL logo until covering 1.8 Components and accessories the fastening holes. Once having opened the packaging and removed the front cover of the humidifi er, make sure the following are included: Models UE025 to UE130... -
Page 11: Water Connections
UE001 to UE0018, use a hose with 3/4’’G fi ttings (see par. bottom tank of the humidifi er (this can run into the drain “Technical specifi cations” page 41, compatible CAREL hose: funnel). code FWH3415000). On models UE025 to UE130 connect the... - Page 12 Fittings provided for the water connections: Modelli UE001…UE018 Modelli UE025…UE130 Key: supply water inlet drain water outlet bottom tank drain water outlet (models UE025 to UE130 only) Fig. 2.b Hydraulic interfaces dimensions Interfaces dimensions drain/fi ll dimensions UE001 a UE018 mm (inc) 72.6 (28.6) 125.4 (49.4)
-
Page 13: Supply Water
2.1 Supply water Only use mains water with: • pressure between 0.1 and 0.8 MPa (14.5 and 116 PSI), temperature between 1 and 40 °C (33.8 and104 °F) and an instant fl ow-rate no lower than the rated fl ow of the fi ll solenoid valve, the connection is G3/4M (see par. -
Page 14: Steam Distribution
DP085* to DP025*. For shorter lengths, used, remove the 22 mm (0.9”) steam inlet section. the support can be supplied as an option (code 18C478A088). 3.2 CAREL linear distributors for air ducts 3.3 CAREL steam blowers (VSDU0A*, models UE001 to UE018 only) -
Page 15: Steam Hoses
To drain the condensate, connect a drain hose with a drain trap and a the condensate hose always follows a downwards path and features a minimum slope of 5° to the bottom of the humidifi er (see Fig. 3.d). CAREL drain trap (fi lled with water before starting operation) to avoid steam condensate drain hoses: code 312353APG being released. -
Page 16: Electrical Connections
4. ELECTRICAL CONNECTIONS 4.2 Power cable connection 4.1 Preparing the electric cableways Before making the connections, ensure that the machine is Models UE001 to UE018 disconnected from the mains power supply. outside unit, bottom view inside unit, top view Check that the power supply voltage of the appliance corresponds to the value indicated on the rating plate inside the electrical panel. - Page 17 2. Enable and control the steam production using: PROPORTIONAL EXTERNAL CONTROLLER • jumper outputs M2.7 and M2.8 or connect to a remote contact CONTROL WITH CAREL MAIN PROBE AND LIMIT PROBE • connect outputs M2.1 and M2.2 to an external controller •...
-
Page 18: Alarm Contact (M6.1 - M6.3)
(terminals M2 pin 1-2-3-4-5-6), the remote ON/OFF digital input (terminal M2 pin 7-8) and cable shields for RS485 communication. If non-CAREL probes are used, check: • voltage signal: 0 to 1 Vdc, 0 to 10 Vdc, 2 to 10 Vdc, terminal M2.1 (GND: 4.4 Alarm contact (M6.1 - M6.3) - Page 19 4.5 Dehumidifi cation contact (M5.1 - M5.2) When the humidifi er is used in the control modes with main probe or main probe plus limit probe, a contact (NO - normally open - voltage free) can be used to activate an external dehumidifi cation device. Fig.
-
Page 20: Remote Terminal, Gsm Modem And Supervisory Network
0907858AXX) (see Fig. 5.a); • up to 200 metres: two CAREL TCONN6J000 boards, 6-wire telephone cables and an AWG20-22 shielded cable with 3 twisted pairs (for the connection of the two boards, Fig. 5.b). Note: to fi ll the empty space left by the display terminal on the humidifi er, use CAREL kit code HCTREW0000. - Page 21 Exceptions managed: 01 illegal function 02 illegal data address Important: for the tLAN and pLAN connections in residential household (IEC EN 55014-1) and residential (IEC EN 61000-6-3) environments, use shielded cable (with shield connected to GND). This warning also applies to the cables leaving the unit. connection terminal block for RS-485 board Fig.
-
Page 22: Command Cascade Of Other Units
5. 4 Command cascade of other units Example: 3 Can I get steam production exceeds that of the master using one or more slave units connected to it. P0 = 100% UE Y- basic UE X-plus Current prod. = 70% - Master: UEX units equipped with analog output for controlling other units Slave 1... -
Page 23: Starting And User Interface
6. STARTING AND USER INTERFACE Before starting the humidifi er, check: (6) DOWN circular navigation inside the menus, the screens, the parameters and the values of the parameters from the “main” screen access an “INFO” screens water connections: Fig. 2.a page 10. In the event of water leaks do not start the humidifi er before having resolved the problem;... -
Page 24: Set" Screen
• isteam production interrupted through the opening of Rem ot e Of f : 6.7 “SET” screen the “Remote ON/OFF” contact; Used to set the main values for the humidifi er. • steam production disabled by keyboard (see “SET” OFF by Keyb. : To access, press ENTER from the “Main”... -
Page 25: Main Menu
6.8 Main menu 1. Conf i g. r est or e. Conf i gur at i on M ai nt enance Save conf i gur at i on Load conf i gur at i on To access press PRG from the main screen Nor m al Val ues Buttons: Rest or e def aul t par am et er s... -
Page 26: User Menu
7. USER MENU From the main screen press: Individual ON time band • PRG to access the main menu, • ENTER to select and access the menu user. User menu screens: 1. Al ar m t hr eshol ds Always ON 2. -
Page 27: Installer Menu
8. INSTALLER MENU From the main screen press: 8.3 Operating options • PRG to access the main menu, • DOWN to select the installer menu, Operating options (1/2) • ENTER, parameter range default • ENTER, % rH % rH Sel ect dat a vi ew on m ai n m ask •... -
Page 28: Supervisor
SMS format; • the SMS messages are subject to the charges and conditions of the SIM card network operator. CAREL declines all liability for the failure to send or receive SMS. “UEX-PLUS” +030220621 - rel. 1.4 - 04.08.2009... -
Page 29: Maintenance Menu
9. MAINTENANCE MENU Important: the operations described in this menu must only be 9.3 Manual procedure carried out by qualifi ed personnel. Important: these operations must only be performed by qualifi ed From the main screen press: personnel, incorrect use may cause serious damage. •... -
Page 30: Table Of Alarms
In these conditions, pressing the alarm button once displays the type of to the type of fault, while the message displayed is reset manually (see alarm (and the code, in line with the CAREL humidifi er standard). the table below). Even if no longer active, the alarm status continues to be displayed until the “reset display”... - Page 31 Main probe pre- high humidity in the check the operation of the probe and Automatic signal only. W ar ni ng: E> alarm room (high temp. the upper limit set by parameter Hi gh hum i di t y act i ve if the temperature probe is used) Main probe low...
-
Page 32: Maintenance And Spare Parts
11. MAINTENANCE AND SPARE PARTS 11.1 Spare parts for models UE001 to UE018 fi ll tank internal tubing kit fi ll solenoid valve kit cylinder manifold with drain pump plastic base plastic humidifi er top TAM (transformer for measuring the current) transformer contactor fuse holder F1-F2... - Page 33 Table of water circuit, electrical and electronic spare parts, UE001 to 018 spare part code position fi g. UE001 UE003 UE005 UE008 UE009 UE010 UE015 UE018 230-400 230 1ph Water circuit Fill tank + conductivity meter UEKVASC100 11.a Fill solenoid valve kit KITVC10006 KITVC10011 11.a...
-
Page 34: Spare Parts For Models Ue025 To Ue065
11.2 Spare parts for models UE025 to UE065 Key: drain circuit fi ll solenoid valve kit internal tubing kit conductivity meter drain pump kit manifold drain pump hose cylinder TAM (transformer for measuring the current) contactor transformer pump control relay fuse carrier electronic controller power terminals... - Page 35 Table of water circuit, electrical and electronic spare parts, UE025 to UE065 description spare part code position fi g. UE025 UE035 UE045 UE065 230 V 400 V 230 V 400 V 400 V 230 V Water circuit Drain pump hose UEKDH00000 Manifold UEKCOLL000...
-
Page 36: Spare Parts For Models Ue090 To Ue130
11.3 Spare parts for models UE090 to UE130 Key: drain circuit fi ll solenoid valve kit internal tubing kit conductivity meter drain pump kit manifold drain pump hose cylinder TAM (transformer for measuring the current) contactor transformer pump control relay fuse carrier electronic controller power terminals... -
Page 37: Cleaning And Maintenance Of The Cylinder
Table of water circuit, electrical and electronic spare parts, UE090 to UE130 description spare part code position fi g. UE090 UE130 Water circuit Drain pump hose UEKDH00000 11.e Manifold UEKCOLL000 11.e Drain pump kit KITPSE0000 11.e Internal tubing kit UEKT100XXL 11.e Double check valve kit FWHDCV0000... -
Page 38: Mechanically Draining The Water In The Cylinder
insert the new cylinder (make sure that the model and the power 11.6 Cylinder connection, three-phase models supply of the new cylinder correspond to the rated data); UE001 to UE130 fasten the cylinder; reconnect the electrical cables to the cylinder; production conductivity (μS/cm) power supply (V) -
Page 39: Cleaning And Maintenance Of The Other Components
11.7 Cleaning and maintenance of the other components Important: • when cleaning plastic components do not use detergents or solvents; • scale can be removed using a solution of 20% acetic acid and then rinsing with water. Maintenance checks on other components: fi ll solenoid valve. -
Page 40: Wiring Diagrams
12. WIRING DIAGRAMS 12.1 Diagram of single-phase models UE001 to UE009 (230 V) key: terminal block contactor F1-F2 primary fuses fuse protection drain pump secondary fuses transformer manual switch fi ll valve drain pump high level electrodes conductimeter external TAM (**) Attention: for TAM confi gurations and connections see par. -
Page 41: Diagram Of Three-Phase Models Ue003 To Ue018 (230 V)
12.2 Diagram of three-phase models UE003 to UE018 (230 V) key: terminal block contactor F1-F2 primary fuses fuse protection drain pump secondary fuses transformer manual switch fi ll valve drain pump high level electrodes conductimeter external TAM (**) Attention: for TAM confi gurations and connections see par. 13.1 “UEX-PLUS”... -
Page 42: Diagram Of Three-Phase Models Ue003 To Ue018 (400 V)
12.3 Diagram of three-phase models UE003 to UE018 (400 V) key: terminal block contactor F1-F2 primary fuses fuse protection drain pump secondary fuses transformer manual switch fi ll valve drain pump high level electrodes conductimeter external TAM (**) Attention: for TAM confi gurations and connections see par. 13.1 “UEX-PLUS”... -
Page 43: Diagram Of Three-Phase Models Ue025 To Ue045 (230 V)
12.4 Diagram of three-phase models UE025 to UE045 (230 V) key: terminal block contactor F1-F2 primary fuses fuse protection drain pump secondary fuses transformer manual switch fi ll valve drain pump high level electrodes conductimeter external TAM (**) Attention: for TAM confi gurations and connections see par. 13.1 “UEX-PLUS”... -
Page 44: Diagram Of Three-Phase Models Ue025 To Ue065 (400 V)
12.5 Diagram of three-phase models UE025 to UE065 (400 V) key: terminal block contactor F1-F2 primary fuses fuse protection drain pump secondary fuses transformer manual switch fi ll valve drain pump high level electrodes conductimeter external TAM (**) Attention: for TAM confi gurations and connections see par. 13.1 “UEX-PLUS”... -
Page 45: Diagram Of Three-Phase Models Ue090 To Ue130
12.6 Diagram of three-phase models UE090 to UE130 key: terminal block contactor F1-F2 primary fuses fuse protection drain pump secondary fuses transformer manual switch FV1-FV2 fi ll valve DP1-DP2 drain pump LS1-LS2 high level electrodes conductimeter TAM1 external TAM TAM2 (**) Attention: for TAM confi gurations and connections see par. -
Page 46: General Features And Models
Important: the confi gurations and connections are already made by CAREL, and no changes are required. The following diagrams represent possible connection modes and may be useful in the event of serious electrical malfunctions on the humidifi er. -
Page 47: Technical Specifi Cations
1/1.5 kg/h (lb/h) (2.2/3.3) (6.6) (11) (17.6) (19.8) (22) (33) (39.7) (55.1) (77.2) (99.2) (143.3) (198.4) (286.6) CAREL steam hoses code ID mm (in) 1312360AXX 22 (0.9”) √ √ 1312365AXX 30 (1.2”) √ √ √ √ √ √ 1312367AXX 40 (1.6”) √... -
Page 48: Models Of Concentrated Jet Steam Distributors
(4) = the humidifi er is fi tted with two outlets and can be connected to up to four distributors (using two “Y” kits) * = use CAREL “Y” kit code UEKY000000 (40 mm/1.6” inlet and 2 x 30 mm/1.2” outlets) ** = use CAREL “Y”... - Page 49 service user installer min. 200 mm H > 250 mm H > 250 mm (7.9”) (9.8”) (9.8”) H > 350 mm H > 400 mm (13.8”) (15.7”) 70 mm 1/3 H 1/3 H 200 mm 2/5 H 2/5 H (7.9”) 1/5 H 200 mm (7.9”)
-
Page 50: Controlling The Board Via Network
OTHERWISE THE OPERATION OF THE HUMIDIFIER MAY BE AFFECTED. “A” read (R)/ analogue variables* (Modbus®: REGISTERS) write (W) CAREL - Modbus® room probe/external regulator: demand room probe/external regulator: minimum (calibration) room probe/external regulator: maximum (calibration) room probe/external regulator: off set (calibration) - Page 51 (Modbus®: COILS) write (W) CAREL - Modbus® system timer – hour: 1 = variable i24 (hour) can be modifi ed; 0 = i24 cannot be modifi ed system timer – minute: 1 = variable i25 (minute) can be modifi ed; 0 = i25 cannot be modifi ed system timer –...
- Page 52 4 = %rh control with external probe + limit probe; 5 = temperature control room probe/ext. regulator: type of signal 0 = 0-1 v; 1 = 0-10 v; 2 = 2-10 v; 3 = 0-20 ma; 4 = 4-20 ma; 5 = ntc carel standard limit probe: type of signal 0 = 0-1 V;...
- Page 53 system timer: day system timer: month system timer: year system timer: week day system timer: week day (can be edited for updating the sistem timer!) 0 = monday; 1 = tuesday; 2 = wednesday; 3 = thursday; 4 = friday; 5 = saturday; 6 = sunday system timer: hour (can be edited for updating the sistem timer!) system timer: minute (can be edited for updating the sistem timer!) system timer: day (can be edited for updating the sistem timer!)
-
Page 54: Technical Appendix
14. TECHNICAL APPENDIX 14.1 Operating principle Proportional control with limit probe (see Figs. 14.1 and 14.3) Immersed electrode humidifi ers manufacture steam by boiling the See “proportional control”, with the addition of a limit probe, generally water contained inside the cylinder. The heat required to boil the water installed in the air duct downstream of the humidifi er. -
Page 55: Operation With Two Cylinders (Only Ue090
Independent control with temperature probe 14.5 Automatic draining See the paragraph on “Independent control with relative humidity probe”. The humidifi er automatically drains and replaces some of the water The unit of measure in this case is °C (°F). contained in the cylinder, to prevent an excessive concentration of salts following the evaporation process. -
Page 56: Automatic Insuffi Cient Supply Water Management
To disable the “cylinder exhaustion” alarm: installer menu > options > cylinder pre-exhaustion alarm To set “cylinder exhaustion warning” (maximum operating hours): installer menu > options > cylinder lifetime warning (setting “0” disables the alarm). CAREL reserves the right to modify or change its products without prior notice. - Page 57 Note...
- Page 58 Note...
- Page 59 Note...
- Page 61 Agenzia / Agency: CAREL INDUSTRIES HQs Via dell’Industria, 11 - 35020 Brugine - Padova (Italy) Tel. (+39) 049.9716611 - Fax (+39) 049.9716600 e-mail: carel@carel.com - www.carel.com...
Need help?
Do you have a question about the humiSteam x-plus UE008 and is the answer not in the manual?
Questions and answers