Advertisement
Overview
Brief Introduction
You can use your camera wirelessly, powered by the battery. Also, you can use it indoors with an AC power outlet connected, or use it outdoors with a solar panel. Once motion is detected by the camera, you can check the messages in the APP through the Wi-Fi linked to the base station.
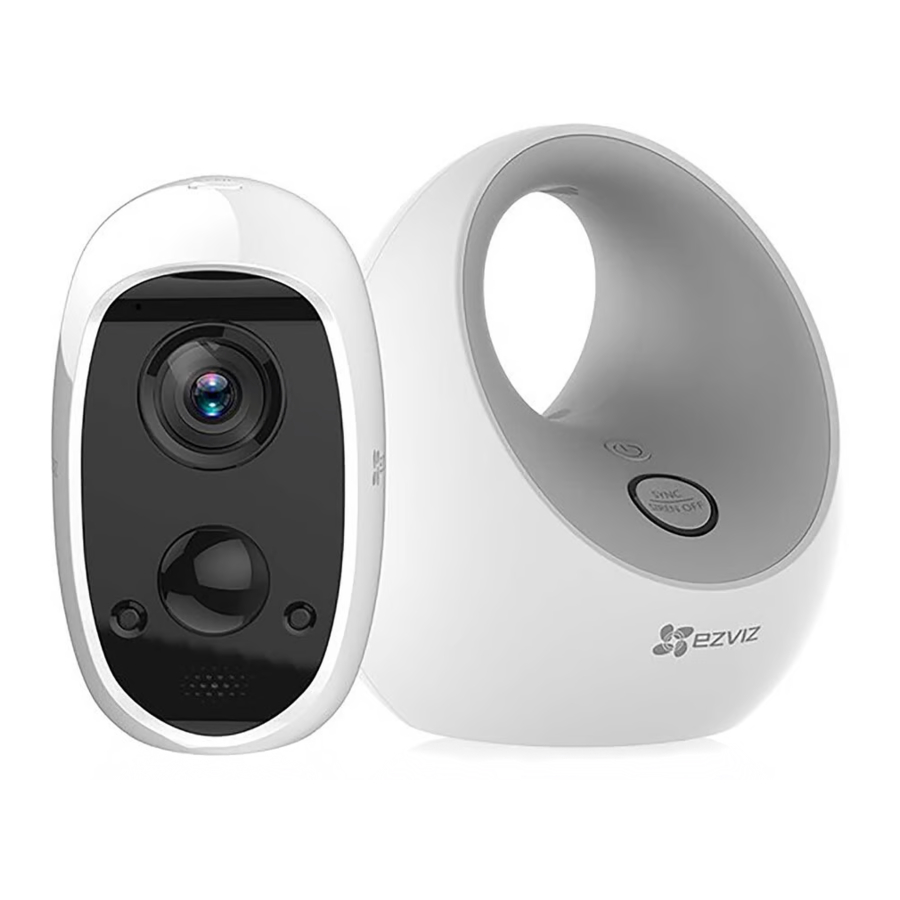
The Appearance of the Device
The appearance of the device is shown below.

Power on Your Device
Your camera comes with accessories that you can use to create a custom security system that meets your individual needs.
Notes:
- For wireless use: Before you use your camera wirelessly, we recommend that you charge the battery, referring to How to Charge the Battery.
- For wired use:
- Indoor: Connect the power adapter to an indoor electrical outlet, referring to Power Adapter.
- Outdoor: If you want to install your camera outdoors, use the solar panel (sold separately), referring to Solar Panel (Sold Separately) .
How to Charge the Battery
Charging Station (Sold Separately)
You can use the charging station (sold separately) to charge the battery.
Steps:
- Insert the battery into one of the battery slots.
![]()
- Connect the power cable to the power adapter.
- Connect the charger with an indoor electrical outlet via power adapter (5V 2A).
![]()
Note:
When the battery is fully charged, the LED indicator of charging station turns green. - After charging the battery, hold on the clasps until you pull out the battery.
![]()


Power Adapter
You can use the power adapter to charge the battery.
- Install the Battery

Steps:- Unlock the battery compartment by pressing and holding the latch, at the same gently pull back the battery cover to open the compartment.
- Pull the battery buckle upwards and insert the battery.
- Insert a micro SD card into the micro SD card slot if needed (See Insert a Micro SD Card).
- Close the battery cover.
Note:
Write down the verification code located on the battery, you are required to input it when you live view or play back the video.
- Charge Your Camera Battery

Steps:- If the camera is outdoor, bring it in to charge the battery.
- Connect the power cable to the power adapter.
- Connect the camera with an indoor electrical outlet via power adapter (5V 2A).


Note:
The camera LED indicator status is shown as below.
- Battery charging: Slow-flashing red.
- Battery fully charged: Off.
Solar Panel (Sold Separately)
You can use the solar panel (sold separately) to charge the battery.
Steps:

- Install the battery (See Install the Battery in Power Adapter).
- Connect the camera to the solar panel.
Notes:
When the battery is fully charged, the camera LED indicator turns solid blue.
- As an alternative charging equipment, the power amount generated by this solar panel may be affected by its actual surrounding environment, mainly the intensity of sunlight and the time length of illumination. If the battery camera is running out of power soon, you are recommended to charge the battery by charging station or power adapter, as the solar panel alone cannot ensure the camera normal working status.
The camera LED indicator status is shown as below.
- Battery charging: Slow-flashing red.
- Battery fully charged: Off.
Connect Your Base Station to the Internet
The base station connects to your home network and allows you to view your camera videos from anywhere.
- Connect the power cable to the power adapter.
- Connect the power adaptor to an indoor electrical outlet (5V 2A).

Note:
The circular LED indicator (SYNC Button) turns solid blue, when the base station is started up. - Connect the base station to an open LAN port on your router using the included Ethernet cable.

Note:
The circular LED indicator (SYNC Button) turns solid green, when the base station is connected to the network.


Get the EZVIZ App
Download the free EZVIZ app to set up your base station and camera. This app provides step-by-step instructions.
Steps:
- Connect your mobile phone to the Internet.
- Search for EZVIZ in the App Store or Google Play (TM).
- Download and install the EZVIZ app.
- Launch the app, register an EZVIZ user account.
 | |
| EZVIZ APP | |
 |  |
Note:
If you have already used the app, make sure that it is the latest version. To find out if an update is available, go to the App store and search for EZVIZ.
Use the EZVIZ App for Installation and Setup
Use the EZVIZ app to install and set up your base station and camera.
The EZVIZ app guides you through setup in this order:
- Create your EZVIZ account. You can use the same account to manage all your EZVIZ devices.
- Connect the EZVIZ base station to the Internet and add it to your account.
- Link each EZVIZ camera with the base station.
Steps:
- Connect your mobile device to the Internet.
- Log in the EZVIZ App.
- At the Home screen, tap "+" on the upper-right corner to go to the scan QR code interface.
![]()
Figure 5-1 Home Screen - Scan the QR code on base station or manually enter the serial number to go to the Add Device Interface.

- Tap Add button.
- Please make sure your base station is powered on.
The circular LED indicator (SYNC Button) turns solid blue, when the base station is started up. - Please make sure your base station is connected to the network, and tap Next button.
![]()
Figure 5-3 Confirm
The circular LED indicator (SYNC Button) turns solid green, when the base station is connected to the network. Please wait patiently for the base station to be added to your EZVIZ account. - Your EZVIZ app turns to Device Setup Interface, when the base station is added to your EZVIZ account successfully.
![]()
Figure 5-4 Device Setup Interface - Tap View Device button to go to your base station setup interface.
- Tap Go to Add button to link camera(s) to your base station.
You can also tap the Finished button to finish the settings.
![]()
Figure 5-5 Device Setup Interface- Before the synchronization, it is suggested to fully charge your camera.
- After the battery is charged, and before the synchronization progress, please disconnect all the charging cables.
- Once your camera is fully charged, bring it close to the base station (within 2 feet to 3 feet (0.6 to 1 m)).

Figure 5-6 The Distance between Base Station and Camera - Tap Next button.
- Press and hold the SYNC button on the camera for about 6 seconds until you hear your camera has been reset successfully.

Figure 5-7 Press and Hold the SYNC Button - Tap Next button.
- Press the SYNC button on the base station. The circular LED indicator flashes blue when the base station starts to synchronize.

Figure 5-8 Press the SYNC Button - Tap Next button.
- The camera LED indicator fast flashes blue, when the camera starts to synchronize.
- The synchronization process lasts about 2 minutes. After 2 minutes, press the SYNC button again if you want to add more cameras.
- Wait for about 150 seconds, and tap
![]() to refresh the page.
to refresh the page.
Camera(s) may take up to 150 seconds to appear in the Add Device list on the EZVIZ APP.- The camera LED indicator fast-flashing red indicates the sync has failed, and you can repeat the steps 13-16 to try again.
- When the camera LED indicator slowly flashes blue, synchronization is complete.
![]()
Figure 5-9 Refresh the Page
- You have added the camera to your base station sucessfully.
- Repeat the steps 13-18 if you want to synchronize more cameras to the base station.
- Up to 6 cameras can be linked to a base station.
![]()
Figure 5-10 Linked Camera


Place or Mount Your Camera
You can place your camera on a flat surface or you can mount it on a wall. Choose a location with a clear, unblocked field of view where camera can receive strong signal emitting from your base station.
Note:
Wi-Fi range will be affected by building materials or objects that will block Wi-Fi signals and by interference from other Wi-Fi networks.
The Wall Mounting
Your camera comes with accessories that you can use to mount your camera.
Option 1: Secure the metal plate with screws

- Place the drill template onto a clean and flat surface, indoors or outdoors.
- (For cement wall/ceiling only) Drill screw holes according to the template, and insert anchors.
- Use screws to fix the metal plate according to the template.
- Place your camera on the mount.
- The magnets in the camera keep it in place.
Option 2: Secure the metal plate with foam sticker

Figure 6-2 Secure the Metal Plate with Foam Sticker
- Pick a clean and flat surface, indoors or outdoors.
- Secure the metal plate with the foam sticker.
- Mount the camera to the metal plate or attach it directly to a magnetic surface.
Find a Good Spot for Your Camera
How to find a good spot for your camera? Keep the following tips in mind:
- Camera and base station should be placed as close to each other as possible for optimal performance, and should not exceed 300 feet (100 m). Avoid placing next to or behind barriers and/or wireless devices, which may significantly decrease the communication range.
- Your camera provides a 126-degree viewing angle. Position your camera(s) to make sure what is most important to you is properly positioned within the cameras' field of view.
- Your cameras motion sensor is far more sensitive to side-to-side movement across their field of view. The best area for motion detection is 5 feet to 25 feet (1.5 to 7.5 m) from the cameras position.
- Remember that the camera uses a built in PIR sensor to detect body heat and provide more relevant motion detection alerts and recordings. To further minimize false alarms, try to avoid high traffic areas like streets with many moving vehicles or other scenes with a high contrast of heat that may also trigger the sensor.
Position Your Camera to Optimize Its Field of View
The field of view is the area in which the camera can detect motion. Your camera provides a 126-degree viewing angle. When positioning your camera, keep the following tips in mind:
Notes:
- Position your cameras to make sure the scene you want to video is within the cameras' field of view.
- Don't block the camera's field of view. Make sure that no walls, tables, or other objects are too close to your camera. If an object is within 2.5 inches (6.4 centimeters) of the sides or front of your camera, that object can reflect infrared (IR) light back into the camera lens, causing glare or hazy video, especially at night.


LED Indicator Guide
Base Station LED Indicator

Figure 7-1 Circular LED Indicator
Descriptions of the Circular LED Indicator
 | Solid Green | The system is working properly. |
 | Solid Blue | The base station is not connected to the Internet. |
 | Flashing Blue | The base station is starting synchronization with the camera. |
 | Off | The base station is turned off. |
Camera LED Indicator

Figure 7-2 Camera LED Indicator
Descriptions of the Camera LED Indicator
 | Solid Red | Camera starting up. |
 | Slow-flashing Red | Camera charging/Network exception. |
 | Fast-flashing Red | Camera exception (e.g. Micro SD card error) / Low battery. |
 | Solid Blue | Video being viewed in the EZVIZ app. |
 | Slow-flashing Blue | Functioning properly. |
 | Fast-flashing Blue | Camera ready for Wi-Fi configuration. / Synchronization in progress. |
Use a Micro SD Card
All recordings are stored to the cloud, but with a camera, you can use a micro SD card as a backup choice to store recordings. Insert a micro SD card (sold separately), and initialize the card in the EZVIZ app before using it.
If you install a micro SD card in the camera, the camera records motion-triggered clips to both the cloud and the micro SD card. If the camera is powered on, but not connected to the Internet, it continues to record to the micro SD card.
Note:
We support micro SD cards, class 10, up to 128 GB capacity, file format FAT32.
Insert a Micro SD Card
Steps:
- Unlock the battery compartment by pressing and holding the latch, at the same time gently pull back the battery cover to open the compartment.
![]()
Figure 8-1 Unlock the Battery Compartment - Insert a micro SD card into the micro SD card slot.
![]()
Figure 8-2 Insert a Micro SD Card


Initialize a Micro SD Card in the EZVIZ App
We support micro SD cards, class 10, up to 128 GB capacity, file format FAT32. You should initialize the card in the EZVIZ app before using it.
Steps:
- At the home screen, tap
![]() to go to the camera Settings interface.
to go to the camera Settings interface.
![]()
- Tap Storage Status -> Memory Card, and then tap Initialize button to initialize the card.
![]()
 to go to the camera Settings interface.

Notes:
- Check the memory card status by tapping Storage Status in the camera Settings interface.
- After the card is initialized, the status turns normal.
View the Micro SD Card Status for a Camera
The EZVIZ app will notify you if the micro SD card is getting full or if the micro SD card is not the correct format. You can also use the app to view the card status.
Steps:
- At the home screen, tap
![]() to go to the camera Settings interface.
to go to the camera Settings interface.
![]()
Figure 8-5 Home Screen - Tap Storage Status, you will see the status of the micro SD card.
![]()
Figure 8-6 Memory Card Status


View Your Camera
Videos recorded by your camera are stored in a library. You can view your recordings and snapshots, and share them with anyone you want.

Figure 9-1 Device information
Descriptions of the Toolbar and Live View Parameters
| Icon | Description |
 | Share device. Tap the button to share your device with anyone you want. |
 | Tap to view or change the camera settings. |
 / / | Start/Stop streaming. |
 / / | Audio on/Mute. |
 / / | 4 split screen display/Single-screen display. |
 / / | Zoom-in/Zoom-out. |
 | Tap to start using talk and listen. Steps:
|
| |
 | Take a snapshot. |
 | Manually start/stop recording. |
 | Tap to select the video resolution from  . . |
 .
. to stop.
Troubleshooting
Q: Why does the battery run out of power within just a week or less?
A: Actually the battery life depends on alarm trigger and network stability. First of all, please check if there are too many alarms triggered, resulting in a large number of video recordings. Then check if the distance between camera and base station is too far, whether there is barrier or radio interference to cause unstable network.
Q: How many cameras can the base station support at most?
A: 6 cameras.
Q: If the camera is offline, will the video recording be continued?
A: If the camera is powered on but disconnect to the Internet, then video recording on micro SD card will continue but cloud recording will stop. If the camera is powered off, both video recordings will stop. However, make sure the camera is offline instead of not being linked to the base station. Video recordings cannot be viewed until the network configuration is finished.
Q: Why the alarm is triggered when nobody in the picture?
A: Please try to set the alarm sensitivity lower. Please notice that vehicle and animals are also the trigger source.

Documents / Resources
References
Download manual
Here you can download full pdf version of manual, it may contain additional safety instructions, warranty information, FCC rules, etc.
Download EZVIZ C3A & W2D - HD 1080p Wire-Free Security Kit Manual
Advertisement


Need help?
Do you have a question about the C3A & W2D and is the answer not in the manual?
Questions and answers