
Related Manuals for Hans Grohe Raindance 04731 0 Series


Summary of Contents for Hans Grohe Raindance 04731 0 Series
- Page 1 EN Installation / User Instructions / Warranty FR Instructions de montage / Mode d'emploi / Garantie ES Instrucciones de montaje / Manejo / Garantía Raindance 04731xx0...
-
Page 2: Installation Considerations
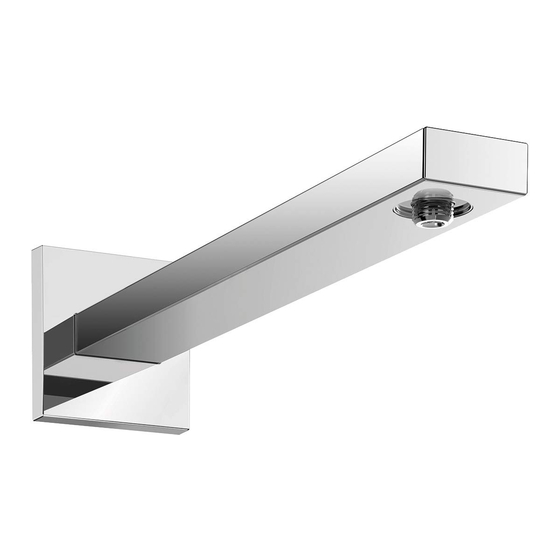
English Français Installation Considerations À prendre en considération pour l’installation • For best results, Hansgrohe recommends that this • Pour de meilleurs résultats, Hansgrohe recommande unit be installed by a licensed, professional plumber. que ce produit soit installé par un plombier professionnel licencié. • Please read over these instructions thoroughly before beginning installation. Make sure that you • Veuillez lire attentivement ces instructions avant de have all tools and supplies needed to complete the procéder à l’installation. Assurez-vous de disposer installation. - Page 3 Raindance 04731xx0 ⅝" (16 mm) ¾" (18 mm) G ½ 15⅜" (390 mm) 16⅞" (428 mm) Roughing-in NPT ½ ⅜" (10 mm) English Français Español Install a NPT ½ female threaded Installez un raccord female fileté Esta instalación requiere un niple pipe fitting recessed ⅜" (10 mm) NPT de ½ po, encastré à ⅜ po hembra de ½ NPT dentro ⅜" behind surface of finished wall. (10 mm) à l’intérieur de la surface (10 mm) de la superficie del pared du plafond fini. acabado.
-
Page 4: Installation / Installation / Instalación
Installation / Installation / Instalación 16 mm 8 mm English Français Español Hold the mounting plate against Maintenez la plaque de montage Sostenga la placa de montaje the wall over the female pipe fitting. contre le mur, sur le raccord de contra la pared sobre el accesorio canalisation femelle. con rosca hembra. Temporarily install the nipple. Installez temporairement le Instale temporalmente el niple. raccord. Level the mounting plate. Mettez de niveau la plaque de Nivele la placa de montaje. montage. Mark the positions of the screw Marque las posiciones de los holes. Marquez les positions des trous de orificios para tornillos. - Page 5 English Français Español Drill the holes using a 6 mm bit. Percez les trous à l’aide d’une Perfore los orificios con una broca mèche de 6 mm. de 6 mm. Do not drill into water lines. Ne percez pas dans les No perfore las tuberías conduites d’eau. de agua. Install the anchors. Installez les chevilles. Instale los pernos de anclaje. Seal the wall around the anchors Scellez le mur autour des chevilles Selle la pared alrededor de los using waterproof sealant. à l’aide d’un agent d'étanchéité. pernos de anclaje con un sellador impermeable.
- Page 6 16 mm 8 mm English Français Español Wrap the threads on the nipple Enroulez les filets sur le raccord à Envuelva las roscas del niple con using plumber's tape. l’aide de ruban de plomberie. cinta de plomero. Install the nipple and mounting Installez le raccord et la plaque Instale el niple y la placa de plate. de montage. montaje.
- Page 7 > 2 min. English Français Español Make sure that the mounting plate Assurez-vous que la plaque de Asegúrese de que la placa de is level. montage est de niveau. montaje quede nivelada. Install the washers and screws. Installez les vis. Instale los tornillos. Flush the supply line for at least Rincez la conduite d’alimentation Purgue las tuberías de suministro two minutes. pendant au moins deux minutes. durante al menos dos minutos.
- Page 8 2.5 mm (1.8 ft-lb/2.5 Nm) English Français Español Push the escutcheon over the Poussez l’écusson sur la plaque de Empuje el escudo sobre la placa mounting plate. montage. de montaje. Lightly lubricate the mounting plate Lubrifiez légèrement les joints Lubrique levemente los retenes de o-rings using plumber's grease. toriques de la plaque de montage la placa de montaje con grasa en utilisant de la graisse de para plomería. Push the arm over the mounting plomberie. piece. Empuje el brazo sobre la pieza de Poussez le bras sur la pièce de montaje. Tighten the screws. montage. Empuje el escudo contra la pared. Push the escutcheon against the Poussez l’écusson contre le mur.
- Page 9 Replacement Parts / Pièces détachées / Repuestos 96179000 93126xx0 98458000 (M6x12) (6x2) xx = colors / couleurs / acabados 00 = Polished Chrome 82 = Brushed Nickel...
- Page 10 Cleaning Recommendation for Hansgrohe Products Modern bathroom faucets, kitchen faucets and shower products are made from different materials to comply with the needs of the market with regard to design and functionality. To avoid damage to the product, it is necessary to take proper care of it. For best results: • Prevent the buildup of mineral scale and /or soap residue by cleaning your Hansgrohe product(s) when needed. • Select a cleaning agent specifically intended for the type of product. • Do not use these types of cleaners as they will cause damage to your Hansgrohe product: ´ Any cleaning agent containing hydrochloric acid, formic acid, lye, or acetic acid. ´ Abrasive cleaning powders, pads, or brushes. ´ Steam cleaners. ´ “No rinse” cleaning agents. • Always follow the instructions provided by the manufacturer of the cleaning agent. • Do not mix cleaning agents, unless directed by the manufacturer. • Do not spray cleaners directly onto the product as drops could enter openings and gaps and cause damage. When using spray cleaners, spray the cleaner onto a soft cloth or sponge. • Always rinse your Hansgrohe product thoroughly with clear water and polish dry with a soft cloth after cleaning. Important • Residue from soaps and shampoos can cause damage. Rinse the product with clean water after each use. • Residue from basin/tub/tile cleaner can cause damage to faucets and fittings. Immediately rinse any overspray from the Hansgrohe product.
- Page 11 Important • Les residus de produits pour le corps comme les savons liquides, shampooings, gels de douche, teintures pour cheveux, parfums, apres-rasage et vernis a ongles peuvent causer des deteriorations. Rincez le produit avec de l’eau propre après chaque utilisation. • Le résidu provenant des nettoyants pour cuvette/baignoire/carrelage peut endommager les robinets et les raccords de tuyauterie. Rincez immédiatement toute surpulvérisation sur le produit Hansgrohe. • De meme, il est interdit de stocker des detergents ou des produits chimiques sous les produits, par ex. dans un meuble sous lavabo, car les vapeurs qui s’en degagent risquent d’abimer les produits. • Les dommages au produit causés par un mauvais entretien ou par l’utilisation de produits de nettoyage inadéquats ne sont pas couverts par la garantie. • Si un composant du produit est endommagé, remplacez-le, car il existe un risque de blessure. Recomendación de limpieza para los productos de Hansgrohe Hoy en día, las griferías de baño y de cocina así como duchas modernas se componen de materiales muy distintos para satisfacer las exigencias del mercado respecto al diseño y la funcionalidad. Para evitar daños y reclamaciones hay que tener...
-
Page 12: Limited Consumer Warranty
Limited Consumer Warranty This warranty is limited to products manufactured by Hansgrohe, Inc. excessive water pressure or corrosion. (“Hansgrohe”) that are purchased by a consumer in the United States C. Labor and other expenses for disconnection, deinstallation, or Canada after March 1, 1996, and installed in either the United or return of the product for warranty service (including but States or in Canada. not limited to proper packaging and shipping costs), or for installation or reinstallation of the product.
Need help?
Do you have a question about the Raindance 04731 0 Series and is the answer not in the manual?
Questions and answers