Table of Contents
Advertisement
2023 Lennox Industries Inc.
©
THIS MANUAL MUST BE LEFT WITH
THE OWNER FOR FUTURE REFERENCE
WARNING
Improper installation, adjustment, alteration,
ser vice or maintenance can cause property
damage, personal injury, or loss of life.
Installation and service must be performed
by a li censed professional HVAC installer
(or equivalent) or a service agency.
Dallas, Texas, USA
INSTALLATION AND USER
INFORMATION GUIDE
M0STAT120N-1 Indoor
Wired Programmable
CONTROLS
508332-01 6/2023
CAUTION
As with any mechanical equipment, contact
with sharp sheet metal edges can result in
personal injury. Use caution while handling
this equipment. Wear gloves and protective
clothing.
IMPORTANT
Frequent changes to operating mode may
cause system malfunctions. Allow at least
one minute between mode changes to allow
the system to stabilize.
Controller
Advertisement
Table of Contents

Related Manuals for Lennox M0STAT120N-1


Summary of Contents for Lennox M0STAT120N-1
- Page 1 INSTALLATION AND USER INFORMATION GUIDE M0STAT120N-1 Indoor 2023 Lennox Industries Inc. © Wired Programmable Dallas, Texas, USA Controller CONTROLS 508332-01 6/2023 CAUTION As with any mechanical equipment, contact with sharp sheet metal edges can result in personal injury. Use caution while handling this equipment.
-
Page 2: Table Of Contents
Table of Contents Filter Reset.......... 13 General ............3 Humidity Setting Function ....13 Requirements..........3 GEAR Function ........13 Shipping and Packing List ......3 Fan Speed Setting ......14 Step-Less Speed Regulation (if supported) ... 14 Product Overview .........4 Room Temperature Settings......14 Product Features ..........4 Timer Function ........ -
Page 3: General
Item General Installation and User Information The M0STAT120N-1 is a wired programmable Guide local controller for mini-split indoor units with Screws for securing back plate to convenient timed schedules for daily operation. drywall (M3.9*25) These instructions are intended as a general... -
Page 4: Product Overview
Product Overview Product Features • Wired programmable local controller for • Active Clean - Washes away dust, mold, mini-split indoor units with convenient timed and grease that may cause odors when it schedules for daily operation adheres to the indoor coil by automatically freezing and then rapidly thawing the coil. -
Page 5: Product Dimensions
the unit switches to any other mode. This Product Dimensions feature is not available for multi-zone systems. 3/4” (20mm) 4-3/4” (120mm) Purify - Unavailable feature on U.S. • models. Rotation - Unavailable feature on U.S. • models. Sleep - Enables the system to automati- •... -
Page 6: Installing Back Plate
Making Connections Prying Back cover position Cable Connection Illustration 1. Connect the controller 4-pin shielded cable assembly to the 4-pin shielded extension cable. 2. Connect the 4-pin shielded extension Figure 2. Back Plate Removal cable to the adapter board, which connects to the display board. - Page 7 two controllers to issue commands to the Indoor Unit indoor unit. HA HB Battery Installation Install the provided Lithium CR3032 battery into battery slot. Wired Controller Figure 6. Cable Connection for MMA Air Handlers Insert Battery with postive side in up Figure 6 shows one controller wired to an position indoor unit.
-
Page 8: Reattach The Top Panel
Buttons and Functions Reattach the Top Panel 1. FAN SPEED Button Figure 9. Reattaching Top Panel 2. MODE Button Buttons and Functions Press the Mode button to scroll through available operation modes (Auto / Cool / Dry / Heat / Fan). 3. - Page 9 • For MWMC/MWHB/MWCB/M33C the minimum is 60ºF (15.5ºC). • For MMDB/A, MCFA/B and M22A the mini- mum is 62°F (16.6°C). NOTE: The temperature cannot be adjusted in FAN mode. 6. TIMER Button Sets unit for daily or weekly on/off operation 7.
-
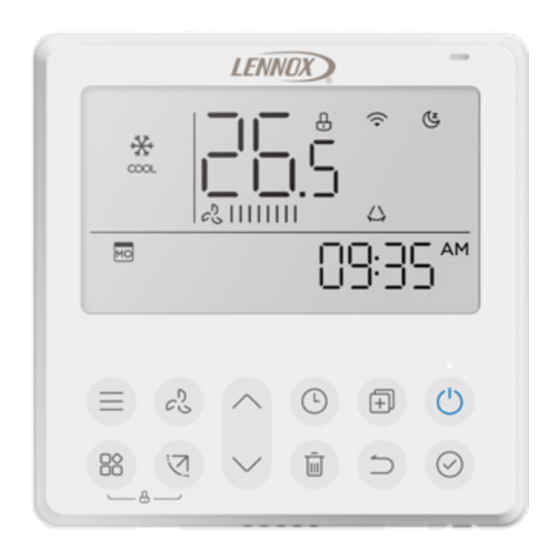
Page 10: Wired Controller Indicators
Wired Controller Indicators F° / C° display Room temperature display *Relative humidity display Wireless control feature display Follow me feature display *Breeze away display Delay off display Turbo feature display *ECO feature display Purify feature display Filter reminder display SLEEP feature display *GEAR feature display *Breezeless display Rotation display... -
Page 11: Operationsset Time And Date
is activated, a lock icon displays on the Operations controller’s screen. Set Time and Date 2. Press both the Function and Swing buttons for three seconds to deactivate the Lock function. 1. Press the Timer button for a minimum of two seconds. The Timer display Louver Swing Function flashes. -
Page 12: Units With Four Up-Down Louvers
2. Select a function. The function icon Units with Four Up-Down Louvers flashes on the controller’s display. NOTE: Each louver can operate independently. 3. Press the Confirm button to set that function. 1. Press the Swing button to activate the Up/Down Adjusting Louver function. -
Page 13: Filter Reset
NOTE: Shutdown, switch mode, turn on in 5% increments. The system self-cleaning and turn on 8-degree automatically exits the humidity heating function automatically control mode after 5 seconds of cancels the Intelligent Eye inactivity. function. The humidity setting displays for Filter Reset 5 seconds and returns to the Set Humidity display. -
Page 14: Fan Speed Setting
Off Timer Use this timer function to stop Press the Mode and Fan buttons at the same air conditioner operation. time for three seconds to activate or deactivate The timer and system operation the keypad tone. starts after the set operating Fan Speed Setting time has passed. -
Page 15: Weekly Timer 1 Or 2
4. Press the Confirm button to complete the settings. Weekly Timer 1 or 2 1. Weekly Timer Setting: Press the Timer button to select the WEEK 1 and press the Confirm button. Additional timer settings can be set by NOTE: Users can press the Back button repeating the actions explained: ON Timer to return to the previous step. -
Page 16: Turning Off Cooling Or Heating While The Timer Is Active
To deactivate the weekly timer, press the Timer button while WEEK 1 displays on the LCD. The indicator will go blank. Turning OFF Cooling or Heating while the Timer is Active Pressing the Power button temporarily • turns off the heating or cooling until the next NOTE: The DAY OFF function can be set scheduled timer event. -
Page 17: Copying Day Setting
Electric Heat Copying Day Setting (MMA Units with Auxillary Heat Only) A day’s setting can be copied to another day of the week. When in the Weekly Timer setting: 1. Press the Confirm button. 2. Press the UP/DOWN button to locate Electric Heat is generally field installed.
Need help?
Do you have a question about the M0STAT120N-1 and is the answer not in the manual?
Questions and answers
Hi - I have an M0STAT120N-1 controller. How do I get it to display the actual room temperature instead of the set temperature ?
The Lennox M0STAT120N-1 controller has a room temperature display feature. To display the actual room temperature instead of the set temperature, look for the room temperature display indicator on the screen. If the display is not showing the room temperature, check the controller settings or manual to switch to the correct display mode.
This answer is automatically generated
Hi - I have an M0STAT120N-1 controller. What is a dry mode? Is it okay to use the auto mode?