Sign In
Upload
Download
Table of Contents
Contents
Add to my manuals
Delete from my manuals
Share
URL of this page:
HTML Link:
Bookmark this page
Add
Manual will be automatically added to "My Manuals"
Print this page
×
Bookmark added
×
Added to my manuals
Manuals
Brands
Fischer Panda Manuals
Portable Generator
Panda 8000x PMS
Manual
Fischer Panda Panda 8000x PMS Manual
Manual marine generator
Hide thumbs
1
2
Table Of Contents
3
4
5
6
7
8
9
10
11
12
13
14
15
16
17
18
19
20
21
22
23
24
25
26
27
28
29
30
31
32
33
34
35
36
37
38
39
40
41
42
43
44
45
46
47
48
49
50
51
52
53
54
55
56
57
58
59
60
61
62
63
64
65
66
67
68
69
70
71
72
73
74
75
76
77
78
79
80
81
82
83
84
85
86
87
88
89
90
91
92
93
94
95
96
97
98
99
100
101
102
103
104
105
106
107
108
109
110
111
112
113
114
115
116
117
118
119
120
121
122
123
124
125
126
127
128
129
130
131
132
133
134
135
136
137
138
139
140
141
142
page
of
142
Go
/
142
Contents
Table of Contents
Troubleshooting
Bookmarks
Table of Contents
Current Revision Status
Table of Contents
General Instructions and Regulations
Safety First
Tools
Manufacturer Declaration in Accordance with the Machinery Directive 2006/42/EC
Customer Registration and Guarantee
Technical Support
Caution, Important Information for Start-Up
Safety Instructions - Safety First
Safe Operation
Observe Safety Instructions
Personal Protective Clothing (PPE)
Cleanliness Ensures Safety
Safe Handling of Fuels and Lubricants
Exhaust Fumes and Fire Protection
Safety Precautions against Burns and Battery Explosions
Protect Your Hands and Body from Rotating Parts
Anti-Freeze and Disposal of Fluids
Implementation of Safety Inspections and Maintenance
Warning and Instruction Signs
Special Instructions and Hazards of Generators
Protective Conductor and Potential Equalisation
Protective Conductor for Panda AC Generators
Switch off All Loads While Working on the Generator
Potential Equalisation for Panda AGT DC Generators
Safety Instructions Concerning Cables
General Safety Instructions for Handling Batteries
In Case of Emergency First Aid / IM Notfall - Erste Hilfe
When an Adult Stops Breathing
Basics
Intended Use of the Machine
Purpose of the Manual and Description of the Definitions of the Trained Persons/Operators/Users
Trained Persons
Operator/Owner
User
Components of the Xgenerator
Range of Operation
Panda Transport Box
Bolted Fischer Panda Transport Box
Fischer Panda Transport Box with Metal Tab Closure
Opening the MPL Sound Insulation Capsule
Opening the GFK Sound Insulation Capsule
Transport and Loading/Unloading
Transporting the Generator
Loading/Unloading of the Generator
Special Service Instructions and Measures for Extended Machine Downtimes and Decommissioning
Instructions for the Starter Battery for Extended Downtimes
Measures for Short Downtimes
Measures for Medium Term Downtimes / Hibernation
Courses for Preservation
Measures for Removing Surface Protection after Medium Term Downtimes
Months)
Measures for Extended Downtimes / Decommissioning
Courses for Preservation
Measures for Removing Surface Protection after Extended Downtimes / Recommissioning (over 6 Months)
The Panda Xgenerator
Type Plate at the Xgenerator
Description of the Generator
Right Side View
Left Side View
Font View
Back View
View from above
Details of Functional Units
Xcontrol Panel
The Cooling System - Scheme
The Fuel System - Scheme
The Operation Surveillance System
The Oil Circuit - Scheme
Remote Control Panel - See Separate Control Panel Manual
Starting the Generator - See Separate Control Panel Manual
Stopping the Generator - See Separate Control Panel Manual
Installation Instructions
Personal Requirements
Hazard Notes for the Installation
Place of Installation
Preliminary Remark
Preparing the Base - Placement
Advice for Optimal Sound Insulation
Generator Connections
Installation of the Cooling System - Raw Water
General Information
Installation of the through Hull Fitting in Yachts - Scheme
Quality of the Raw Water Sucking in Line
Generator Installation above Waterline
Generator Installation below Waterline
Raw Water Installation Scheme
Installation of the Cooling System - Fresh Water
Position of the External Cooling Water Expansion Tank
Ventilation of the Coolant Circuit / Freshwater
Pressure Test for Controlling the Cooling Water Circuit
Installation of the Water Cooled Exhaust System
Installation of the Standard Exhaust System
Installation of the Waterlock
Possible Cause for Water in the Exhaust Hose
Possible Cause: Exhaust Hose
Possible Cause: Cooling Water Hose
Installation Area of the Waterlock
The Volume of the Waterlock
Ideal Position of the Waterlock
Example of the Installation of the Waterlock Off-Center and Possible Effects
Exhaust / Water Separator
Installation Exhaust Water Separator
Fuel System Installation
The Following Items Need to be Installed
Connection of the Fuel Lines at the Tank
Position of the Pre-Filter with Water Separator
Ventilating Air from the Fuel System
Generator DC System Installation
Connection of the Starter Battery Block
Connection of the Xcontrol Panel - See Separate Xcontrol Manual
Connection Box - Generator Xcontrol - CB-G
Xcontrol ECU
FP CAN-Bus for Internal Use
Boostrelay (Optional)
Line Relay (Optional)
Autostart (Optional)
Emergency Stop (Optional)
Fuel Pump
Optional DC-OUT
FP CAN-Bus RJ45
Generator AC System Installation
3-Phase Generator
Electronic Voltage Control Xcontrol
Connection to the AC On-Board Power Supply
Protective Conductor
Electrical Fuse
Required Cable Crosssections
Disconnector - Power Source Selector (Three Way Cam Switch)
Special Recommendations
Instructions on Prevention of Galvanic Corrosion
Instructions and Measures on Prevention of Galvanic Corrosion
Isolation Test
Initial Operation
Generator Operation Instruction
Personal Requirements
Hazard Notes for the Operation
General Operating Instruction
Operation at Low Temperatures
Pre-Heating the Diesel Motor
Tips Regarding Starter Battery
Light Load Operation and Engine Idle
The Soot of the Generator Is Due to the Fact that
To Prevent the Soot of the Generator Following Steps Should be Observed
Generator Load for a Longer Period and Overload
Protection Conductor
Operating Control System on the Fischer Panda Generator
Instructions for Capacitors - Not Present at All Models
Checks before Start, Starting and Stopping the Generator
Maintenance Instructions
Personal Requirements
Hazard Notes for the Maintenance and Failure
Environmental Protection
Maintenance Interval
General Maintenance Instructions
Checks before each Start
Check of Hoses and Rubber Parts in the Sound Insulated Capsule
Oil Change Intervals
Checking Oil-Level
Refilling Oil
After the Oil Level Check and Refilling the Oil
Replacement of Engine Oil and Engine Oil Filter
After the Oil Change
Verifying the Starter Battery and (if Necessary) the Battery Bank
Battery
Check Battery and Cable Connections
Check Electrolyte Level
Check Electrolyte Density
Checking the Water Separator in the Fuel Supply
Replace the Air Filter Mat
Alternative Replacement of the Air Filter Mat with Pull out Holder
Alternative Replacement of the Air Filter at Housing with Snap Fasteners
Ventilation of the Coolant Circuit / Freshwater
V-Belt Replacement for the Internal Cooling Water Pump
The Raw Water Circuit
Clean Raw Water Filter
Causes with Frequent Impeller Waste
Replacement of the Impeller
Generator Faults
Personal Requirements
Hazard Notes for the Troubleshooting
Tools and Measuring Instruments
Troubleshooting Table
Generator Output Voltage too Low
Generator Voltage too High (more than 240 V - 50 Hz)
Generator Voltage Fluctuates
Generator Not Able to Start Electric Motor
Diesel Motor Fails to Start
Starter Is Turning Motor, but Fails to Start
Motor Does Not Achieve Enough Speed During Starting Process
Motor Runs Unsteady
Motor Speed Drops
Motor Runs in off Position
Motor Stops by Itself
Sooty, Black Exhaust
Generator Must be Shut off Immediately if
Overloading the Generator
Monitoring the Generator Voltage
Automatic Voltage Monitoring and Auto-Shut down
Generator-Output Voltage Is too Low
Generator Provides no Voltage
Rotor Magnetism Loss and „Re-Magnetising
Engine Starting Problems
Lifting Solenoid for Motor Stop - Optional
Tables
Technical Data
Fuel
Engine Oil
Engine Oil Classification
Operating Range
Quality of Oil
Coolant Specifications
Coolant Mixture Ratio
Diameter of Conduits
Panda Xcontrol Manual
Current Revision Status
Panda Xcontrol Safety Instructions
Personnel
Safety Instructions
Panda Xcontrol
Components of the Xcontrol
Xcontrol - CP-G
Xcontrol - GC-S
Xcontrol - CB-G
Installation
Installation of the Electronic Control Unit (ECU) Xcontrol - GC-S
Installation of the Connection Box Xcontrol - CB-G
Installation of the Xcontrol - CP-G
Operation
Switching on the Generator
Overview Page with Autostart Activated
The Overview
Symbols Used in Overview
Starting up the Generator
Preparations for Starting up / Checks (Daily) for Marine Version
Preparations for Starting up / Checks (Daily) for Vehicle Version
Starting up the Generator
Stopping the Generator
The Menu
Main Menu
Sub-Menu: "Panel
Setting the Illumination of the CP-G
Setting the Contrast of the CP-G
Setting the Standby Time of the CP-G
Setting the Standby Illumination of the CP-G
Setting the Display Mode of the CP-G Overview Page
Setting the Language of the Text Pages of the CP-G
Setting the Temperature Unit
Setting the Aural Alarm
Setting the Display to Flash in the Event of a Fault
10Setting the Panel Heating
11Setting the Display of the Optional Measurement Data
12Resetting All Values of the Panel Sub-Menu to Default Values
13Return to Main Menu
Sub-Menu: "Generator
Setting the Autostart of the CP-G
Setting the Optional DC Output of the CP-G
Switching the Switching Outputs of the CP-G
Reading out the Event Log of the CP-G
Resetting All Values of the Generator Sub-Menu to the Default Values
Returning the Main Menu
Resetting the Panel Language to the Default (English)
How to Set the Panel Language after a Reset
Faults
Symbols and Messages on the Display
Example of Message - "Sensor Defective
Example of Message - "Sensor/Cable Break
Error Code
Table of Faults
Description of the Symbols
Accessories
Dimensional Drawing
Advertisement
Quick Links
Download this manual
Manual marine generator
Panda 8000x PMS 230/400 V - 50 Hz - 8 kVA
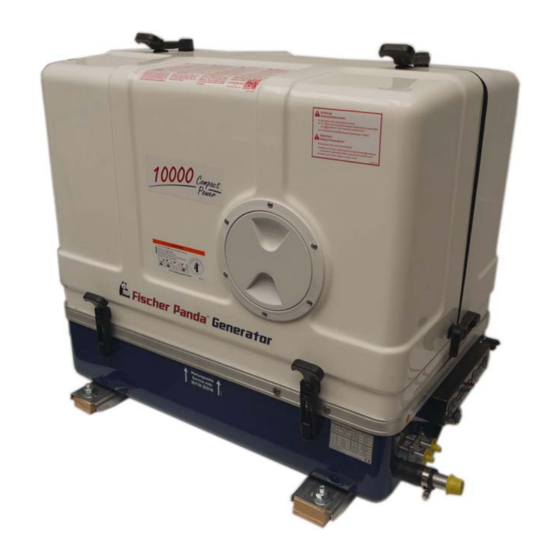
Panda 10000x PMS 230/400 V - 50 Hz - 10,5 kVA
Super silent technology
Panda_8000x-10000x_PMS_eng.R01.5
26.2.18
Table of
Contents
Previous
Page
Next
Page
1
2
3
4
5
Advertisement
Table of Contents
Troubleshooting
Generator Faults
101
Tools and Measuring Instruments
103
Need help?
Do you have a question about the Panda 8000x PMS and is the answer not in the manual?
Ask a question
Questions and answers
Related Manuals for Fischer Panda Panda 8000x PMS
Portable Generator Fischer Panda 8000 NE User Manual
Marine generator (208 pages)
Portable Generator Fischer Panda 8000 NE Operation Manual
Marine generator, super silent technology, 230v - 50 hz / 6,5 kw (44 pages)
Portable Generator Fischer Panda Panda AGT-DC 6000 PVMV-N Manual
(174 pages)
Portable Generator Fischer Panda 8000i PMS Manual
Marine generator (204 pages)
Portable Generator Fischer Panda Panda PMS 6000ND Operation Manual
(96 pages)
Portable Generator Fischer Panda Panda AGT-DC 4000 PMS Operation Manual
Marine generator (32 pages)
Portable Generator Fischer Panda Panda PMS-HD 12-4KU Manual
(148 pages)
Portable Generator Fischer Panda Panda 5000i PMS Manual
Super silent technology 230v/400 v 120 v/240 v 50 hz/60 hz 5kva (166 pages)
Portable Generator Fischer Panda Panda 6000i PMS Manual
(106 pages)
Portable Generator Fischer Panda Panda 4800i PMS Manual
(180 pages)
Portable Generator Fischer Panda 7K PMS Manual
Marine generator (168 pages)
Portable Generator Fischer Panda 4000s PMS SCB Manual
Marine generator 230 v - 50 hz / 3,8 kw super silent technology (118 pages)
Portable Generator Fischer Panda Panda 8000 Manual
Manual vehicle generator (268 pages)
Portable Generator Fischer Panda 12000x PMS Manual
Marine generator (160 pages)
Portable Generator Fischer Panda 5000i PMS Manual
(132 pages)
Portable Generator Fischer Panda Panda AGT 6000 Manuals
Marine version direct and indirect dc diesel gensets (58 pages)
This manual is also suitable for:
Panda 10000x pms
Table of Contents
Print
Rename the bookmark
Delete bookmark?
Delete from my manuals?
Login
Sign In
OR
Sign in with Facebook
Sign in with Google
Upload manual
Upload from disk
Upload from URL


Need help?
Do you have a question about the Panda 8000x PMS and is the answer not in the manual?
Questions and answers