Table of Contents
Advertisement
Advertisement
Table of Contents

Related Manuals for HTC VIVE XR Elite


Summary of Contents for HTC VIVE XR Elite
- Page 1 User Guide...
-
Page 2: Table Of Contents
Hand tracking The VIVE Menu Accessing apps in the Library Viewing your surroundings Cleaning and disinfecting VIVE XR Elite Using the VIVE Case for XR Series Managing screenshots, files, and apps Taking screenshots and screen recordings Connecting the headset to your computer... - Page 3 Contents Casting the headset to your phone Mirroring your phone screen to VIVE XR Elite Phones compatible with VIVE XR Elite Streaming PC VR apps to the headset Settings Connecting to a Wi-Fi network Setting a device passcode Installing system and firmware updates...
- Page 4 About this guide About this guide We use the following symbols to indicate useful and important information: This is a note. It provides detailed information for setup, common questions, and what to do in specific situations. This is a tip. It will give you an alternative way to do a particular step or procedure that you may find helpful.
-
Page 5: Overview
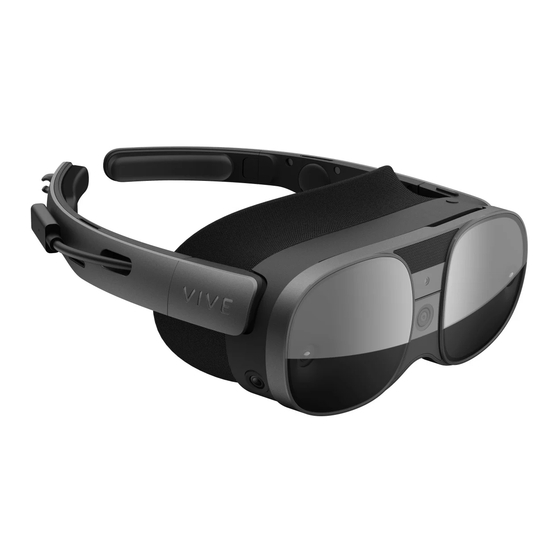
Overview Overview What's inside the box? The VIVE XR Elite package includes the following items: § Headset (with removable face cushion and temples) § Microfiber pouch § VIVE Battery Cradle for XR Series § Lens Protection Card § VIVE Controller for XR Series (×2) §... - Page 6 Overview Inside and bottom views 1. Removable temples 6. IPD slider 2. Cable notch 7. Microphone ® 3. Extended USB Type-C power port 8. Proximity sensor 4. Speakers 9. Diopter dials 5. USB Type-C accessory port The inner-right USB Type-C port (item #5) only supports connections to the dedicated tracker accessory.
-
Page 7: Vive Controller For Xr Series
Overview VIVE Battery Cradle for XR Series 1. Adjustment dial 2. Power LED 3. USB Type-C port 4. Extended USB Type-C cable The USB Type-C port on the battery cradle can be used for PC and external storage device connections. VIVE Controller for XR Series Balanced to fit comfortably in your hands, the controllers are designed for easy input and navigation during long VR sessions. - Page 8 Overview 1. Controller LED 6. Thumb rest 2. Thumbstick 7. Y button 3. VIVE button 8. X button 4. B button 9. Menu button 5. A button Controls To... Do this Turn the controllers on Press the VIVE button on the right controller and the Menu button on the left controller.
- Page 9 Overview Controller LEDs The LED on each controller indicates the current status. Controller status Flashing red Battery level is below 15% Orange Controller is charging Flashing blue Controller is in pairing mode Blue Controller is connecting to the headset Green Controller is connected to the headset Flashing blue and red alternately Controller firmware is being updated...
-
Page 10: Getting Started
Getting started Getting started Attaching the battery cradle and charging the battery The battery cradle has a battery pack that can supply power to the headset. To avoid damaging the headset and battery cradle when attaching or detaching components, assemble the battery cradle on a level surface such as a desk or table. Here's how to attach the battery cradle to the headset: Set the battery cradle down with the USB port facing up. - Page 11 Getting started Attach the battery cradle to the headset using the temple slots. Make sure the release buttons are aligned and the fasteners are fully inserted into the temple slots. Connect the battery cradle's extended USB cable to the headset’s extended USB port. To charge the battery pack, connect a power adapter to the battery cradle's USB Type-C port using a USB cable, and then connect the power adapter to a power outlet.
-
Page 12: Putting On The Headset (With The Battery Cradle Attached)
Getting started The battery pack can be charged without attaching the battery cradle to the headset. Putting on the headset (with the battery cradle attached) Here's how to put on the headset and adjust the fit when the battery cradle is attached. Glasses won't fit inside the headset. -
Page 13: Using The Headset Without The Battery Cradle
Getting started Using the headset without the battery cradle For enhanced portability, you can remove the battery cradle and connect your headset to a power source such as a power bank. Glasses won't fit inside the headset. If you wear glasses, remove them first before putting on your headset. - Page 14 Getting started Pull both sliders toward the middle of the head strap to lengthen it. Remove the temples or battery cradle from your headset, then attach the rubber ends of the head strap to each side of the headset. Reattach the temples or battery cradle to your headset. Put on your headset, position the head strap, and adjust the fit.
-
Page 15: Turning The Headset On And Off
15. Launch VIVE Manager on your phone. On the Welcome screen, select VIVE XR Elite. Select Controllers and Battery cradle if you have these accessories and then tap Next. Follow the onscreen prompts to grant permissions to VIVE Manager. - Page 16 Getting started Tap Start to begin setting up your headset. Sign in with your HTC account, or tap Create an account to create a new account using your email address or phone number. Follow the onscreen instructions to set up the following:...
-
Page 17: Adjusting The Diopter Dials
Getting started If there's a system update available, make sure to install it to get the latest features and enhancements. After installing the system update, tap Restart in VIVE Manager to restart the headset. On the Get in focus screen, tap Confirm. Then put on your headset and continue with setup. - Page 18 Getting started Hold your headset with both hands while adjusting the diopter dials. Turn the dials one at a time until the green lines on the screen are in focus. The green lines will appear only when you're setting up the headset for the first time or after a factory reset.
-
Page 19: Removing And Reattaching The Face Cushion
Getting started Removing and reattaching the face cushion Hold the top of the face cushion, then gently pull it outward to detach it from the headset. § To avoid damaging the face cushion, only hold it from the top when removing it from the headset. -
Page 20: Adjusting The Ipd On The Headset
Getting started Avoid pressing the center of the face cushion against the headset when reattaching it. This may damage the front tab if it's not aligned with the notch on the headset. Adjusting the IPD on the headset Interpupillary distance (IPD) is the distance between the centers of your eyes. Use the IPD slider to adjust the lens spacing so it matches your IPD, which will give you a clear view in VR. -
Page 21: Pairing The Controllers
Getting started Pairing the controllers When using VIVE Manager to set up your headset and controllers, the app will prompt you to turn on the controllers. Your headset can automatically detect and pair with the controllers that came in the box. For details, see Setting up your headset for the first time on page 15. -
Page 22: Setting Up Multiple Play Areas
Setting up multiple play areas With VIVE XR Elite, you're not restricted to only a single play area. The headset allows you to define up to three play areas. Follow the steps in... -
Page 23: Hand Tracking
Getting started Hand tracking The hand tracking feature allows you to use your hands to interact in VR. Hand tracking is enabled by default. § Hand tracking can work in both VR and MR spaces. You can only use hand gestures in apps that support hand tracking. -
Page 24: The Vive Menu
Getting started § To use the controllers, pick them up and position them in front of the headset. § To switch back to hand tracking, place the controllers on a level surface and position your hands in front of the headset. To disable hand tracking, go to Settings, select Inputs, and then turn off Hand tracking. -
Page 25: Accessing Apps In The Library
Getting started Accessing apps in the Library The Library has a filter you can use to find apps more easily. Here's how to filter apps in the Library: In the Library, select the filter button in the upper right. The Library filters apps into the following categories: Category Description My apps... -
Page 26: Viewing Your Surroundings
Cleaning and disinfecting VIVE XR Elite Here are a few tips to help you keep VIVE XR Elite clean and hygienic. Do's § Dampen a cloth with a neutral, non-acidic cleaning solution and use it to wipe the hard surfaces of the headset and controllers clean, especially places you frequently touch with your hands. - Page 27 Getting started § Don’t spray or pour liquid directly on the headset or controllers. § Don’t use any liquids or cleaning solutions on the lenses. § Don’t expose the headset or controllers to direct sunlight. § Don’t use a volatile solvent such as alcohol to clean the temple pads. §...
-
Page 28: Using The Vive Case For Xr Series
Using the VIVE Case for XR Series VIVE XR Elite comes with a microfiber pouch you can use to carry the headset when you're not using the battery cradle. In addition, you can purchase the VIVE Case for XR Series, a hardshell carrying case for the headset. - Page 29 Getting started Put the headset into the microfiber pouch, then close the pouch by tightening the drawstring. Put the pouch containing the headset into the case. If it doesn't fit easily, gently push while rotating it until it's fully inserted. Wrap the drawstring around the top of the pouch.
- Page 30 Getting started Wrap the USB-C to USB-C cable and put it inside the cap so it fits securely behind the notches. Screw the cap securely onto the case.
-
Page 31: Managing Screenshots, Files, And Apps
Managing screenshots, files, and apps Managing screenshots, files, and apps Taking screenshots and screen recordings You can capture screenshots and record videos of what you're viewing on the headset so you can share or view them later. Your headset also allows screen capture and recording in passthrough mode. - Page 32 Managing screenshots, files, and apps § You can also capture screenshots while recording video. § Screen recording pauses automatically when you access certain kinds of dialog boxes, such as password screens. § Screen capturing and recording may not be available in some apps. §...
-
Page 33: Connecting The Headset To Your Computer
Managing screenshots, files, and apps Connecting the headset to your computer You can connect the headset to your computer to transfer files between them. § If the battery cradle is attached to your headset, connect the battery cradle to your computer using a USB cable. -
Page 34: Transferring Screenshots And Screen Recordings To Your Computer
Managing screenshots, files, and apps Transferring screenshots and screen recordings to your computer Here's how to transfer screenshots and screen recordings from your headset to a Windows ® Connect your headset to your PC. For details, see Connecting the headset to your computer on page 33. -
Page 35: Connecting An External Storage Device To The Headset
Managing screenshots, files, and apps Method Steps Browse storage 1. From Home, select Settings. contents 2. Select Storage. 3. Select File browser. You can access the following folders: § Captures: Displays screenshots and screen recordings. § Downloads: Displays images, videos, and APK files you transferred from an external storage device or a computer. -
Page 36: Transferring Files Between The Headset And An External Storage Device
Managing screenshots, files, and apps Transferring files between the headset and an external storage device You can connect an external storage device to your headset and transfer files between them. To find out how to connect a storage device, see Connecting an external storage device to the headset on page 35. -
Page 37: Installing Apk Files On The Headset
Managing screenshots, files, and apps In the Library, select the filter button in the upper right. Select Not installed. Select an app to download and install it. To view and launch installed apps, select , and then select Installed. Installing APK files on the headset You can install VR apps and Android mobile apps on your headset using APK files. -
Page 38: Uninstalling Apps
Managing screenshots, files, and apps From Home, select Settings. Select Advanced. Turn on Allow unknown apps. On the left-hand side of the Settings panel, select Storage. Select File browser. Navigate to the folder that contains the APK file. Select the APK file to install it. After installing an APK file, the app will appear in the Library. -
Page 39: Using Vive Manager
VIVE Manager is a mobile app that lets you set up and manage your headset. VIVE Manager requires Android 9 or later, or iOS 12 or later. To download the app, you can go to VIVE XR Elite Setup page or search for the app on the Google Play Store or App Store. -
Page 40: Pairing Vive Manager With A New Headset
Using VIVE Manager If you've paired headsets before, tap the down arrow to open the Devices dropdown menu and select the headset you want to update. Tap Connect. If you see there's an available system update, tap System update Update. Pairing VIVE Manager with a new headset You can pair VIVE Manager with several headsets and manage them in one place. -
Page 41: Setting Up Parental Controls
When you see the Pair VIVE XR Elite screen and the front headset LED flashes white, press the headset button. You can also check if the pairing code on the Pair VIVE XR Elite screen matches the one displayed in your headset. Then press the headset button. -
Page 42: Granting Permissions For Phone Mirroring
Granting permissions for phone mirroring VIVE Manager needs certain phone permissions in order to mirror your phone to your headset. If you didn't grant VIVE Manager the needed permissions while setting up VIVE XR Elite, you can do it in VIVE Manager. - Page 43 Using VIVE Manager If you've paired headsets before, tap the down arrow to open the Devices dropdown menu and select the headset you want to configure. Launch VIVE Manager on your phone. Tap Connect. Tap Advanced Kiosk mode. Set a passcode, choose apps, and choose the settings appropriate for the Kiosk mode session.
-
Page 44: Sharing And Streaming Content
Sharing and streaming content Sharing and streaming content Casting the headset to an external display ™ You can share what you see in VR with Miracast devices such as TVs wirelessly in real time. Your view in VR will appear on the device you choose, allowing you to share your VR experience with others. -
Page 45: Casting The Headset To Your Phone
Sharing and streaming content Casting the headset to your phone You can use VIVE Manager to cast the headset to your phone. § Screen casting in VIVE Manager requires Android 9 or later, or iOS 12 or later. ® § Before launching VIVE Manager, turn on your phone's Bluetooth and Wi-Fi. -
Page 46: Mirroring Your Phone Screen To Vive Xr Elite
Mirroring your phone screen to VIVE XR Elite You can mirror your phone screen to VIVE XR Elite so you can use your phone without taking off the headset. You can navigate your phone, launch mobile apps, and view photos and videos in §... - Page 47 Sharing and streaming content § If you don't see the toolbar, aim the beam toward the phone screen to make it appear. § When viewing videos, make sure your phone's audio volume is not muted. Moving and resizing the phone screen You can move and resize a mirrored phone screen in VR.
- Page 48 Sharing and streaming content Resizing the phone screen 1. Aim toward any of the edges or corners of the phone screen to make a resize pointer appear. 2. Pinch your thumb and index finger together or press the trigger on the controller to grab the edge or corner.
-
Page 49: Phones Compatible With Vive Xr Elite
Phones compatible with VIVE XR Elite For casting the headset to your phone With the VIVE Manager mobile app, you can cast VIVE XR Elite to any phone running Android 9 or later, or iOS 12 or later. For details, see Casting the headset to your phone on page 45. - Page 50 Sharing and streaming content ™ OPPO Model Phone mirroring DRM content streaming OPPO A73 5G – OPPO Find X3 – OPPO Reno4 Pro 5G – OPPO Reno5 Pro 5G – OPPO Reno5 Z ™ realme Model Phone mirroring DRM content streaming realme 7 5G –...
- Page 51 Sharing and streaming content Model Phone mirroring DRM content streaming Sony Xperia 1 III Sony Xperia 10 II Sony Xperia 10 III Sony Xperia 1 (J9110) vivo Model Phone mirroring DRM content streaming vivo V21 5G – vivo X60 – vivo X50e –...
-
Page 52: Streaming Pc Vr Apps To The Headset
Sharing and streaming content Streaming PC VR apps to the headset You can connect the headset to a PC via a USB or wireless network connection and stream PC VR apps to the headset. For details, visit VIVE Streaming Support. -
Page 53: Connecting To A Wi-Fi Network
Settings Settings Connecting to a Wi-Fi network Your headset can connect to 2.4 GHz and 5 GHz Wi-Fi networks. The headset also supports the Wi-Fi 6E standard. You can connect to 6 GHz wireless networks in regions where the headset is certified to use Wi-Fi 6E. §... -
Page 54: Setting A Device Passcode
Settings Setting a device passcode You can set a device passcode to protect your headset from unauthorized access. Your headset prompts you to enter the passcode when you do one of the following: § Restart the headset. § Turn on the headset when the power is off. §... -
Page 55: Resetting Your Headset (Factory Reset)
Settings Resetting your headset (factory reset) If your headset has a persistent problem that cannot be solved, you can perform a factory reset. A factory reset reverts the headset to its initial state—the state before you turned on the headset for the first time. -
Page 56: Adjusting Audio Settings
Reduces audio leakage, which helps to prevent people nearby from hearing the audio from your headset speakers. Choosing a tracking mode Choose a tracking mode based on where and how you use VIVE XR Elite. From Home, select Settings. Select General. -
Page 57: Pairing Bluetooth Devices
Settings Pairing Bluetooth devices You can pair Bluetooth devices such as headphones, keyboards, and other accessories with your headset. Make sure your Bluetooth device is nearby and in pairing mode. Here's how to pair your Bluetooth device with the headset: From Home, select Settings. -
Page 58: Adding A Vpn Connection
Settings Adding a VPN connection Add virtual private networks (VPNs) so you can connect and access resources remotely inside a local network such as your corporate or home network. Before you can connect your headset to a VPN, you may be asked to do the following: §... -
Page 59: Vive Xr Elite For Business
About VIVE XR Elite for Business Bring the versatile VIVE XR Elite to your business. Take advantage of VIVE Business tools and features to manage your fleet of VIVE XR Elite devices. To learn more about VIVE Business, visit VIVE Business website. -
Page 60: Vive Business
Intune so you can manage your headset remotely. To enroll your VIVE XR Elite in Microsoft Intune, you'll need to first create a device enrollment token in Microsoft Endpoint Manager. After creating a device enrollment token, scan the enrollment token (QR code) using VIVE XR Elite to enroll the headset. See the following for details: §... - Page 61 VIVE XR Elite for Business Select the enrollment profile that matches your requirements. § Corporate-owned, user-associated devices (Preview) § Corporate-owned, userless devices (Preview) On the corresponding enrollment page, click + Create profile.
- Page 62 VIVE XR Elite for Business Specify the details of your profile and click Next.
- Page 63 VIVE XR Elite for Business Review your profile information and click Create. Open your profile page and click Token Show token. The enrollment token's QR code will be displayed. Keep this page open as you'll need to scan the QR code with your headset to enroll it and set it up for Microsoft Intune.
- Page 64 VIVE XR Elite for Business Enrolling the headset and setting it up for Microsoft Intune After creating a device enrollment token, you can now enroll your VIVE XR Elite and set it up for Microsoft Intune. If the headset is currently enrolled or was enrolled to an MDM solution before, perform a factory reset first.
- Page 65 VIVE XR Elite for Business If the headset restarts during setup or setup is interrupted for some other reason, you can resume setup from the Library. First, go to the Library, select the filter button , and then select 2D apps.
-
Page 66: Vmware Airwatch
VIVE XR Elite for Business VMware AirWatch Setting up VMware AirWatch agent and enrolling VIVE XR Elite using a QR code ® You can create and use a QR code to automatically set up Wi-Fi, install the VMware AirWatch agent from a specified URL, and enroll VIVE XR Elite. - Page 67 VIVE XR Elite for Business Parameter Description Server URL Group ID Username Password The following examples show how the data may be entered manually when configuring your QR code. § Wi-Fi with WPA2-EAP authentication: Click here for an editable version of the above sample.
- Page 68 VIVE XR Elite for Business Generate your QR code, and then download it onto your computer. Open the QR code on your computer, and then put on your headset. From Home, select Settings Advanced MDM setup QR code. Use the onscreen QR code scanner to scan the QR code displayed on your computer screen.
-
Page 69: Solutions And Faqs
Solutions and FAQs Solutions and FAQs General How do I prepare the headset before returning it for repair? Before sending in the VIVE XR Elite headset for repair, remove the following accessories from the headset: § Face cushion § Temples §... - Page 70 Solutions and FAQs § To remove the battery cradle, disconnect the extended USB cables on the right side of the headset and battery cradle. Then press the release button on the inner left and right sides of the battery cradle and detach the battery cradle.
- Page 71 § United Arab Emirates § Israel § United Kingdom § Japan § United States § Make sure to update the system software on VIVE XR Elite to the latest version. § Support for additional regions will be added in future software updates.
- Page 72 § Using third-party apps or websites. § Third-party apps or websites may collect personal data. HTC can neither guarantee the accuracy of IPD measured through third-party apps or websites nor ensure the security of your personal data. Estimating your IPD in a mirror You can estimate your IPD with a millimeter ruler and a mirror.
-
Page 73: Hardware
Solutions and FAQs Check the millimeter mark on the other eye. You may need to close the first eye to get a clear reading. 0 10 20 30 40 50 Make a note of your IPD measurement. You may want to recheck several times to make sure your reading is accurate. - Page 74 Solutions and FAQs How do I check the battery level of the headset and controllers? You can check the battery level in the headset or the VIVE Manager app. Here's how: In the headset From Home, aim toward the status icons in the upper-right corner of the dashboard. You'll then see the battery level and connection status of your headset and controllers.
-
Page 75: Apps And Content
VIVE XR Elite on page 49. If your phone is compatible with VIVE XR Elite but a phone mirroring connection cannot be established, try connecting the headset to your phone manually. Here's how: When you see the Phone mirroring connection lost dialog box in the headset, select Connect manually. - Page 76 Tap VIVE XR_[Last 4 digits of Bluetooth address]. Put your headset back on. For details on phone mirroring, see Mirroring your phone screen to VIVE XR Elite on page 46. Why does casting stop when I enter Kiosk mode? Casting stops when the headset's Wi-Fi or Bluetooth connection is disconnected.
-
Page 77: System
What's the VIVE XR Elite beta program and how do I join? The beta program provides early access to upcoming features for VIVE XR Elite. When you join the program you'll get to test new or experimental features and help HTC make VIVE XR Elite better by providing your feedback. - Page 78 Solutions and FAQs Select Advanced. Select Beta features and then select Join. When beta software becomes available, select Update now in the System updates available dialog box that appears. How do I withdraw from the beta program? Put on your headset. From Home, select Settings.
- Page 79 © 2023 HTC Corporation. All Rights Reserved. VIVE, the VIVE logo, HTC, the HTC logo, VIVEPORT, and all other HTC product and service names are trademarks and/or registered trademarks of HTC Corporation and its affiliates in the U.S. and other countries.
Need help?
Do you have a question about the VIVE XR Elite and is the answer not in the manual?
Questions and answers